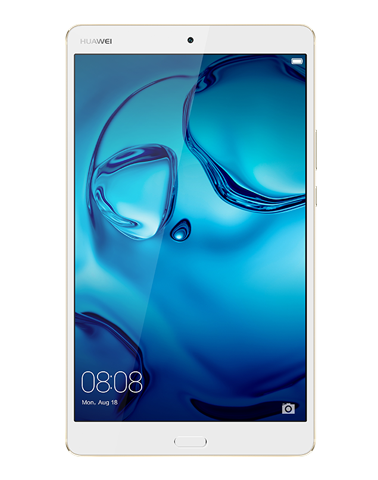
Steps for achieving root on Huawei Mediapad M3.

wolfg wolfg1969

lesstif
/ rsync-exclude.sh
Last active
April 18, 2025 01:17
— forked from apisznasdin/rsync exclude
rsync all exclude recybled bin and thumbnail data
This file contains hidden or bidirectional Unicode text that may be interpreted or compiled differently than what appears below. To review, open the file in an editor that reveals hidden Unicode characters.
Learn more about bidirectional Unicode characters
| #!/bin/bash -x | |
| rsync -ah --progress | |
| --exclude='$RECYCLE.BIN' --exclude='$Recycle.Bin' --exclude='.AppleDB' --exclude='.AppleDesktop' \ | |
| --exclude='.AppleDouble' --exclude='.com.apple.timemachine.supported' --exclude='.dbfseventsd' \ | |
| --exclude='.DocumentRevisions-V100*' --exclude='.DS_Store' --exclude='.fseventsd' --exclude='.PKInstallSandboxManager' \ | |
| --exclude='.Spotlight*' --exclude='.SymAV*' --exclude='.symSchedScanLockxz' --exclude='.TemporaryItems' \ | |
| --exclude='.Trash*' --exclude='.vol' --exclude='.VolumeIcon.icns' --exclude='Desktop DB' --exclude='Desktop DF' \ | |
| --exclude='hiberfil.sys' --exclude='lost+found' --exclude='Network Trash Folder' --exclude='pagefile.sys' \ | |
| --exclude='Recycled' --exclude='RECYCLER' --exclude='System Volume Information' --exclude='Temporary Items' --exclude='Thumbs.db' \ |

This file contains hidden or bidirectional Unicode text that may be interpreted or compiled differently than what appears below. To review, open the file in an editor that reveals hidden Unicode characters.
Learn more about bidirectional Unicode characters
| // [START initialize_firebase_in_sw] | |
| // Import and configure the Firebase SDK | |
| // These scripts are made available when the app is served or deployed on Firebase Hosting | |
| // If you do not serve/host your project using Firebase Hosting see https://firebase.google.com/docs/web/setup | |
| importScripts('https://www.gstatic.com/firebasejs/5.0.0/firebase-app.js'); | |
| importScripts('https://www.gstatic.com/firebasejs/5.0.0/firebase-messaging.js'); | |
| firebase.initializeApp({ | |
| messagingSenderId: '<YOUR_SENDER_ID>' | |
| }); | |
| const messaging = firebase.messaging(); |
This file contains hidden or bidirectional Unicode text that may be interpreted or compiled differently than what appears below. To review, open the file in an editor that reveals hidden Unicode characters.
Learn more about bidirectional Unicode characters
| <template> | |
| <div> | |
| ... | |
| <button @click="registeFCM">Register</button> | |
| ... | |
| </div> | |
| </template> | |
| <script> | |
| import 'firebase/messaging' |
This file contains hidden or bidirectional Unicode text that may be interpreted or compiled differently than what appears below. To review, open the file in an editor that reveals hidden Unicode characters.
Learn more about bidirectional Unicode characters
| const FCMconfig = { | |
| apiKey: 'YOUR_API_KEY', | |
| authDomain: 'YOUR_DOMAIN', | |
| databaseURL: 'https://<YOUR_PROJECT_ID>.firebaseio.com', | |
| projectId: 'YOUR_PROJECT_ID', | |
| storageBucket: '<YOUR_PROJECT_ID>.appspot.com', | |
| messagingSenderId: 'YOUR_SENDER_ID' | |
| } | |
| firebase.initializeApp(FCMconfig) |


thomaspoignant
/ export_dokuwiki
Last active
February 11, 2026 13:35
Dokuwiki, export all pages with one command line. The result is all the wiki pages and files in html
This file contains hidden or bidirectional Unicode text that may be interpreted or compiled differently than what appears below. To review, open the file in an editor that reveals hidden Unicode characters.
Learn more about bidirectional Unicode characters
| wget \ | |
| --recursive \ | |
| --no-clobber \ | |
| --page-requisites \ | |
| --no-check-certificate \ | |
| --html-extension \ | |
| --convert-links \ | |
| --restrict-file-names=windows \ | |
| --no-parent \ | |
| --domains yourdomain.com \ |

tinkerware
/ macos-jdk-install.md
Last active
December 30, 2025 08:25
Maintaining Java Installs on macOS Using Homebrew Cask
Recently, I upgraded my MacBook Pro from a old, trusty Yosemite to Sierra, and reluctantly had to clean out the old JDK versions I had accumulated over a few years. I also wanted to have a Java 9 JDK to play around with the new module system and API’s.
Good news is that, for a while now, you have been able to install and upgrade multiple versions of JDK using only your shell, without having to deal with Oracle’s graphical installers.
To install Java from scratch, install Homebrew Cask cask-update (you need to have Homebrew already installed) first, then install Java using Cask:
brew tap buo/cask-upgrade & brew tap caskroom/versions
brew cask install java8

silveraid
/ CentOS-Docker
Created
October 27, 2017 12:09
Creating minimal CentOS docker image from scratch
This file contains hidden or bidirectional Unicode text that may be interpreted or compiled differently than what appears below. To review, open the file in an editor that reveals hidden Unicode characters.
Learn more about bidirectional Unicode characters
| # Create a folder for our new root structure | |
| $ export centos_root='/centos_image/rootfs' | |
| $ mkdir -p $centos_root | |
| # initialize rpm database | |
| $ rpm --root $centos_root --initdb | |
| # download and install the centos-release package, it contains our repository sources | |
| $ yum reinstall --downloadonly --downloaddir . centos-release | |
| $ rpm --root $centos_root -ivh centos-release*.rpm | |
| $ rpm --root $centos_root --import $centos_root/etc/pki/rpm-gpg/RPM-GPG-KEY-CentOS-7 | |
| # install yum without docs and install only the english language files during the process |

trnila
/ recover-docker-mysql-root.sh
Created
September 9, 2017 16:48
This file contains hidden or bidirectional Unicode text that may be interpreted or compiled differently than what appears below. To review, open the file in an editor that reveals hidden Unicode characters.
Learn more about bidirectional Unicode characters
| #!/bin/sh | |
| container=$1 | |
| pass=$2 | |
| if [ -z "$container" ] || [ -z "$pass" ]; then | |
| echo "usage: $0 container newRootPassword" | |
| exit | |
| fi | |
| mysql_image=$(docker inspect $container --format "{{ .Config.Image }}") |

chrisjm
/ README.md
Last active
December 8, 2023 04:00
— forked from tache/README-SSL-Certificates.md
LetsEncrypt, AWS Certificate Manager, and CloudFront
This is a document for managing LetsEncrypt certificates on AWS using AWS Certificate Manager and configuring on CloudFront using the AWS CLI.
Follow the instructions to set up the certbot and aws commands on your local machine: