
Hyper-V in Windows 10 and Windows 11 allows running Virtual Machine. It is supported only in Pro, Enterprise and Education Edition of Windows 10 and Windows 11 by default. But this guide will show you how to enable it in Home Editions of Windows 10 and Windows 11.
- Search for
Command Promptin Windows Start Menu and open it. - Type
systeminfoand press Enter. Wait for the process to finish - Once the results appear, search for the
Hyper-V Requirementssection which is usually the last one.
- If it says
A hypervisor has been detected. Features required for Hyper-V will not be displayed.that means Hyper-V is already enabled and there is no reason following this guide anymore. - Otherwise, check for
Virtualization Enabled in Firmware:.- If its
Yes, click here. - If its
No, click here.
- If its
- If it says
The process of enabling virtualization can vary a lot depending on the motherboard manufacturer, but it can be summarized in a few steps:
- Completely Shutdown you Computer.
- Turn on the computer and while it is booting up, keep pressing the key to open the BIOS (usually it is
Del,F1,F2,F4,F11, orF12). This key depends on the Motherboard manufacturer. You can easily google it out. - Once you get into the BIOS, it may look very scary or intimidating, but don't worry, you will get it right. Mouse may not work in BIOS so you might have to use the Directional or Arrow keys and the Enter key of the Keyboard to navigate.
- Search for the CPU configuration section, it can be called
CPU configuration,processor,NorthbridgeorChipsetand may be under anadvancedoradvanced modetab or menu. - Now you need to look for the virtualization option and enable it, it can have different names such as
Hyper-V,Vanderpool,SVM,AMD-V,Intel Virtualization TechnologyorVT-X.
- Search for the CPU configuration section, it can be called
- Once its enabled, save and reboot your pc. If this part did not help you, you can specifically go the Website of the Mother Board Manufacturer of your Computer and ask for help there.
- Open File Explorer on windows and Navigate to a folder.
- Right click anywhere in a blank space inside the folder. Select
Newand then ClickText Document. - Open the file in Notepad and copy and paste the following text into it.
pushd "%~dp0" dir /b %SystemRoot%\servicing\Packages\*Hyper-V*.mum >hyper-v.txt for /f %%i in ('findstr /i . hyper-v.txt 2^>nul') do dism /online /norestart /add-package:"%SystemRoot%\servicing\Packages\%%i" del hyper-v.txt Dism /online /enable-feature /featurename:Microsoft-Hyper-V -All /LimitAccess /ALL pause - Click
Filefrom the Menu bar in the top of Notepad, then clickSave as.... In the Save as Window that appears, Change the File name to"Hyper-V.bat"and click save. - Now Double click
Hyper-V.batto run it. This will take some time but will install all features required for Hyper-V. A Restart might be required after it is done. - After Restarting Windows, search for
Turn Windows features on or offin the Start Menu search bar and open it.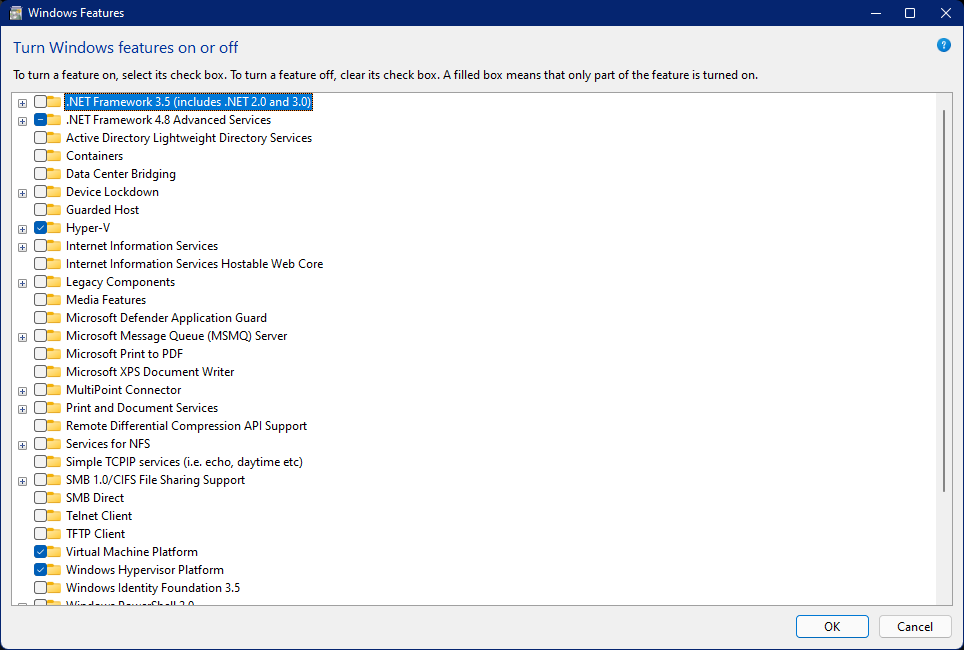
- In the Window, lookout for
Hyper-V,Virtual Machine PlatformandWindows Hypervisor Platform. Then check the check boxes before them and clickOK. This will also take some time and then a Restart is necessary.
Thats it Hyper-V is enabled.


Checking the Hyper-V requirements with systeminfo is a useful first step before enabling virtualization on Windows 10 or 11 Home. Make sure virtualization is enabled in your BIOS/UEFI settings, then follow the guide carefully to complete the setup.
In the same way, having the right setup and guidance can make learning easier for students. Home Tuition Faisalabad can provide personalized support, helping students understand difficult concepts, practice regularly, and focus on areas where they need improvement.