-
-
Save JackHowa/c6aa2b5708e086cbd81080c9f675cadb to your computer and use it in GitHub Desktop.
| // React - Bind 'this' to a Class Method | |
| class MyComponent extends React.Component { | |
| constructor(props) { | |
| super(props); | |
| this.state = { | |
| visibility: false | |
| }; | |
| // change code below this line | |
| this.toggleVisibility = this.toggleVisibility.bind(this) | |
| // change code above this line | |
| } | |
| // change code below this line | |
| toggleVisibility() { | |
| this.setState({ | |
| visibility: !(this.state.visibility) | |
| }) | |
| } | |
| // change code above this line | |
| render() { | |
| if (this.state.visibility) { | |
| return ( | |
| <div> | |
| <button onClick={this.toggleVisibility}>Click Me</button> | |
| <h1>Now you see me!</h1> | |
| </div> | |
| ); | |
| } else { | |
| return ( | |
| <div> | |
| <button onClick={this.toggleVisibility}>Click Me</button> | |
| </div> | |
| ); | |
| } | |
| } | |
| }; |
React - Create a Controlled Input
class ControlledInput extends React.Component {
  constructor(props) {
    super(props);
    this.state = {
      input: ''
    };
    // change code below this line
    this.handleChange = this.handleChange.bind(this);
    // change code above this line
  }
  // change code below this line
  handleChange(event) {
    this.setState({
      input: event.target.value
    })
  }
  // change code above this line
  render() {
    return (
      <div>
        { /* change code below this line */}
        <input value={this.state.input} onChange={this.handleChange} />
        { /* change code above this line */}
        <h4>Controlled Input:</h4>
        <p>{this.state.input}</p>
      </div>
    );
  }
};
https://learn.freecodecamp.org/front-end-libraries/react/create-a-controlled-form
class MyForm extends React.Component {
  constructor(props) {
    super(props);
    this.state = {
      input: '',
      submit: ''
    };
    this.handleChange = this.handleChange.bind(this);
    this.handleSubmit = this.handleSubmit.bind(this);
  }
  handleChange(event) {
    this.setState({
      input: event.target.value
    });
  }
  handleSubmit(event) {
    // change code below this line
    event.preventDefault();
    this.setState({
      // we've already updated the input based on typing
      // just need to update the submit value upon event
      submit: this.state.input
    });
    // change code above this line
  }
  render() {
    return (
      <div>
        <form onSubmit={this.handleSubmit}>
          { /* change code below this line */ }
          <input
            value={this.state.input}
            onChange={this.handleChange}
          />
          { /* change code above this line */ }
          <button type='submit'>Submit!</button>
        </form>
        { /* change code below this line */ }
        <h1>{this.state.submit}</h1>
        { /* change code above this line */ }
      </div>
    );
  }
};
https://learn.freecodecamp.org/front-end-libraries/react/pass-state-as-props-to-child-components
- Unidirectional dataflow
- stateful parent component to child component
class MyApp extends React.Component {
  constructor(props) {
    super(props);
    this.state = {
      name: 'CamperBot'
    }
  }
  render() {
    return (
       <div>
         <Navbar name={this.state.name} />
       </div>
    );
  }
};

class Navbar extends React.Component {
  constructor(props) {
    super(props);
  }
  render() {
    return (
    <div>
      <h1>Hello, my name is: {this.props.name} </h1>
    </div>
    );
  }
};
https://learn.freecodecamp.org/front-end-libraries/react/pass-a-callback-as-props
- pass down parent class methods to children with props
- one child can -- through the parent -- talk to the other, in essence
class MyApp extends React.Component {
  constructor(props) {
    super(props);
    this.state = {
      inputValue: ''
    }
    this.handleChange = this.handleChange.bind(this);
  }
  handleChange(event) {
    this.setState({
      inputValue: event.target.value
    });
  }
  render() {
    return (
       <div>
        { /* change code below this line */ }
        <GetInput handleChange={this.handleChange} />
        <RenderInput input={this.state.inputValue} />
        { /* change code above this line */ }
       </div>
    );
  }
};

class GetInput extends React.Component {
  constructor(props) {
    super(props);
  }
  render() {
    return (
      <div>
        <h3>Get Input:</h3>
        <input
          value={this.props.input}
          onChange={this.props.handleChange}/>
      </div>
    );
  }
};

class RenderInput extends React.Component {
  constructor(props) {
    super(props);
  }
  render() {
    return (
      <div>
        <h3>Input Render:</h3>
        <p>{this.props.input}</p>
      </div>
    );
  }
};

https://learn.freecodecamp.org/front-end-libraries/react/use-the-lifecycle-method-componentwillmount
componentWillMount()comes beforerender()
class MyComponent extends React.Component {
  constructor(props) {
    super(props);
  }
  componentWillMount() {
    // change code below this line
    console.log('component about to render')
    // change code above this line
  }
  render() {
    return <div />
  }
};
https://learn.freecodecamp.org/front-end-libraries/react/use-the-lifecycle-method-componentdidmount
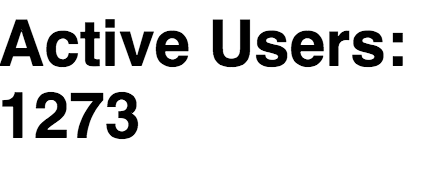
componentDidMount()is the best time/place to make api calls- will re-render the component upon receiving that data
class MyComponent extends React.Component {
  constructor(props) {
    super(props);
    this.state = {
      activeUsers: null
    };
  }
  componentDidMount() {
    setTimeout( () => {
      this.setState({
        activeUsers: 1273
      });
    }, 2500);
  }
  render() {
    return (
      <div>
        <h1>Active Users: { this.state.activeUsers }</h1>
      </div>
    );
  }
};

https://learn.freecodecamp.org/front-end-libraries/react/add-event-listeners
componentDidMount()is the best place to attach event listenersonClick()is an example of one of React's synthetic event handler- Always remember to use
this.methodName()not justmethodName()for class methods
class MyComponent extends React.Component {
  constructor(props) {
    super(props);
    this.state = {
      message: ''
    };
    this.handleEnter = this.handleEnter.bind(this);
    this.handleKeyPress = this.handleKeyPress.bind(this);
  }
  // change code below this line
  componentDidMount() {
    // need to always remember to use 'this' for class methods
    document.addEventListener('keydown', this.handleKeyPress);
  }
  componentWillUnmount() {
    document.removeEventListener('keydown', this.handleKeyPress);
  }
  // change code above this line
  handleEnter() {
    this.setState({
      message: this.state.message + 'You pressed the enter key! '
    });
  }
  handleKeyPress(event) {
    if (event.keyCode === 13) {
      this.handleEnter();
    }
  }
  render() {
    return (
      <div>
        <h1>{this.state.message}</h1>
      </div>
    );
  }
};

via Ray Wenderlich https://www.raywenderlich.com/106369/integrating-parse-react-native-ios
https://codepen.io/eduardoboucas/full/jqWbdb/
for interactive

https://learn.freecodecamp.org/front-end-libraries/react/manage-updates-with-lifecycle-methods
- Can't seem to
console.log(this.props)but that's not unusual as undefined componentWillReceiveProps()is whenever a component is about to receive a propnextPropsis the standard for getting new props herecomponentDidUpdate()happens aftercomponentWillReceiveProps()
class Dialog extends React.Component {
  constructor(props) {
    super(props);
  }
  componentWillUpdate() {
    console.log('Component is about to update...');
  }
  // change code below this line
  componentWillReceiveProps(nextProps) {
    console.log(this.props, nextProps);
  }

  componentDidUpdate() {
    console.log('did update');
  }
  // change code above this line
  render() {
    return <h1>{this.props.message}</h1>
  }
};

class Controller extends React.Component {
  constructor(props) {
    super(props);
    this.state = {
      message: 'First Message'
    };
    this.changeMessage = this.changeMessage.bind(this);
  }
  changeMessage() {
    this.setState({
      message: 'Second Message'
    });
  }
  render() {
    return (
      <div>
        <button onClick={this.changeMessage}>Update</button>
        <Dialog message={this.state.message}/>
      </div>
    );
  }
};
- Check for even via
x % 2 === 0 - Remember to ask nextProps for its value
nextProps.valuenot justnextProps shouldComponentUpdate()checks for performance of whether to re-render, returns bool
class OnlyEvens extends React.Component {
  constructor(props) {
    super(props);
  }
  shouldComponentUpdate(nextProps, nextState) {
    console.log('Should I update?');
     // change code below this line
    return nextProps.value % 2 === 0;
     // change code above this line
  }
  componentWillReceiveProps(nextProps) {
    console.log('Receiving new props...');
  }
  componentDidUpdate() {
    console.log('Component re-rendered.');
  }
  render() {
    return <h1>{this.props.value}</h1>
  }
};

class Controller extends React.Component {
  constructor(props) {
    super(props);
    this.state = {
      value: 0
    };
    this.addValue = this.addValue.bind(this);
  }
  addValue() {
    this.setState({
      value: this.state.value + 1
    });
  }
  render() {
    return (
      <div>
        <button onClick={this.addValue}>Add</button>
        <OnlyEvens value={this.state.value}/>
      </div>
    );
  }
};
https://learn.freecodecamp.org/front-end-libraries/react/introducing-inline-styles
in-line styles
- Don't use kebab-case (lol) for keys like in css (eg, this-is-css-key: "name")
- Use camel case
- Remember to use {{}} around the in-line style value `<div style={{fontSize: "10px"}} >
- Seems like px can be omitted: "Note that you can optionally set the font size to be a number, omitting the units "px", or write it as "72px"."
class Colorful extends React.Component {
  render() {
    return (
      <div style={{color: "red", fontSize: "72px"}}>Big Red</div>
    );
  }
};
https://learn.freecodecamp.org/front-end-libraries/react/add-inline-styles-in-react
- set style object outside of the class
- use constant style object to keep code organized -- not inline styles
- px is assumed unless otherwise said
const styles = {color: "purple", fontSize: 40, border: "2px solid purple"};
// change code above this line
class Colorful extends React.Component {
  render() {
    // change code below this line
    return (
      <div style={styles}>Style Me!</div>
    );
    // change code above this line
  }
};

- get random index from arr
let rand = myArray[Math.floor(Math.random() * myArray.length)]; - can assign a variable from the random
const inputStyle = {
  width: 235,
  margin: 5
}

class MagicEightBall extends React.Component {
  constructor(props) {
    super(props);
    this.state = {
      userInput: '',
      randomIndex: ''
    }
    this.ask = this.ask.bind(this);
    this.handleChange = this.handleChange.bind(this);
  }
  ask() {
    if (this.state.userInput) {
      this.setState({
        randomIndex: Math.floor(Math.random() * 20),
        userInput: ''
      });
    }
  }
  handleChange(event) {
    this.setState({
      userInput: event.target.value
    });
  }
  render() {
    const possibleAnswers = [
      'It is certain',
      'It is decidedly so',
      'Without a doubt',
      'Yes, definitely',
      'You may rely on it',
      'As I see it, yes',
      'Outlook good',
      'Yes',
      'Signs point to yes',
      'Reply hazy try again',
      'Ask again later',
      'Better not tell you now',
      'Cannot predict now',
      'Concentrate and ask again',
      'Don\'t count on it',
      'My reply is no',
      'My sources say no',
      'Most likely',
      'Outlook not so good',
      'Very doubtful'
    ];
    const answer = possibleAnswers[this.state.randomIndex];
    return (
      <div>
        <input
          type="text"
          value={this.state.userInput}
          onChange={this.handleChange}
          style={inputStyle} /><br />
        <button onClick={this.ask}>
          Ask the Magic Eight Ball!
        </button><br />
        <h3>Answer:</h3>
        <p>
          { /* change code below this line */ }
          {answer}
          { /* change code above this line */ }
        </p>
      </div>
    );
  }
};
random arr value via https://stackoverflow.com/questions/4550505/getting-a-random-value-from-a-javascript-array?utm_medium=organic&utm_source=google_rich_qa&utm_campaign=google_rich_qa
fancy way of doing it using short-circuiting hehe
{display &&
           <h1>Displayed!</h1>
}
answer: https://learn.freecodecamp.org/front-end-libraries/react/render-with-an-ifelse-condition
class MyComponent extends React.Component {
  constructor(props) {
    super(props);
    this.state = {
      display: true
    }
    this.toggleDisplay = this.toggleDisplay.bind(this);
  }
  toggleDisplay() {
    this.setState({
      display: !this.state.display
    });
  }
  render() {
    // change code below this line
    let display;
    if (this.state.display) {
      display = <h1>Displayed!</h1>;
    } else {
      display = null;
    }
    return (
       <div>
         <button onClick={this.toggleDisplay}>Toggle Display</button>
         {display}
       </div>
    );
  }
};
slightly better way of doing it:
use short-circuited && operator and use reference within render method
render() {
    // change code below this line
    const display = this.state.display;
    return (
       <div>
         <button onClick={this.toggleDisplay}>Toggle Display</button>
         {display && <h1>Displayed!</h1>}
       </div>
    );
  }
lol that was the next challenge
https://learn.freecodecamp.org/front-end-libraries/react/use--for-a-more-concise-conditional
- logical && operator that makes it more concise
class MyComponent extends React.Component {
  constructor(props) {
    super(props);
    this.state = {
      display: true
    }
    this.toggleDisplay = this.toggleDisplay.bind(this);
  }
  toggleDisplay() {
    this.setState({
      display: !this.state.display
    });
  }
  render() {
    // change code below this line
    return (
       <div>
         <button onClick={this.toggleDisplay}>Toggle Display</button>
         {this.state.display && <h1>Displayed!</h1>}
       </div>
    );
  }
};
remember to initialize state within the this.state = {} and to use : not = for key value pairs
  constructor(props) {
    super(props);
    // change code below this line
    this.state = {
      input: '',
      userAge: ''
    }

    // change code above this line
    this.submit = this.submit.bind(this);
    this.handleChange = this.handleChange.bind(this);
  }
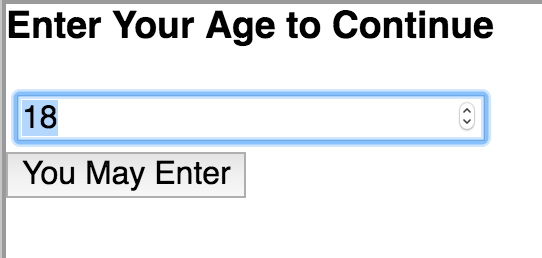
- use Number() static constructor to make explicit the coercion
- check for existence of it in state
- render the button conditionally
- ternary inside a ternary
const inputStyle = {
  width: 235,
  margin: 5
}

class CheckUserAge extends React.Component {
  constructor(props) {
    super(props);
    // change code below this line
    this.state = {
      input: '',
      userAge: ''
    }

    // change code above this line
    this.submit = this.submit.bind(this);
    this.handleChange = this.handleChange.bind(this);
  }
  handleChange(e) {
    this.setState({
      input: e.target.value,
      userAge: ''
    });
  }
  submit() {
    this.setState({
      userAge: this.state.input
    });
  }
  render() {
    const buttonOne = <button onClick={this.submit}>Submit</button>;
    const buttonTwo = <button>You May Enter</button>;
    const buttonThree = <button>You Shall Not Pass</button>;
    return (
      <div>
        <h3>Enter Your Age to Continue</h3>
        <input
          style={inputStyle}
          type="number"
          value={this.state.input}
          onChange={this.handleChange} /><br />
        {
          this.state.userAge ?
            Number(this.state.userAge) >= 18 ?
              buttonTwo :
              buttonThree
            :
            buttonOne
        }
      </div>
    );
  }
};


https://learn.freecodecamp.org/front-end-libraries/react/render-conditionally-from-props
- pass in props to then conditionally render child component
- those props can be determined elsewhere
- useful chance calculate
Math.random() > .5 - remember to make comments like
{ /* change code below this line */ }
class Results extends React.Component {
  constructor(props) {
    super(props);
  }
  render() {
    return (
      <h1>
        {
          this.props.fiftyFifty ?
           "You win!" :
            "You lose!"
        }
      </h1>
    )
  };
};

class GameOfChance extends React.Component {
  constructor(props) {
    super(props);
    this.state = {
      counter: 1
    }
    this.handleClick = this.handleClick.bind(this);
  }
  handleClick() {
    this.setState({
      counter: this.state.counter + 1
    });
  }
  render() {
    let expression = Math.random() > .5;
    return (
      <div>
        <button onClick={this.handleClick}>Play Again</button>
        { /* change code below this line */ }
        <Results fiftyFifty={expression} />
        { /* change code above this line */ }
        <p>{'Turn: ' + this.state.counter}</p>
      </div>
    );
  }
};
- can use basic if/then logic within render()
- can reassign styles within render


class GateKeeper extends React.Component {
  constructor(props) {
    super(props);
    this.state = {
      input: ''
    };
    this.handleChange = this.handleChange.bind(this);
  }
  handleChange(event) {
    this.setState({ input: event.target.value })
  }
  render() {
    let inputStyle = {
      border: '1px solid black'
    };
    // change code below this line
    if (this.state.input.length > 15) {
      inputStyle = {
        border: '3px solid red'
      }
    }
    // change code above this line
    return (
      <div>
        <h3>Don't Type Too Much:</h3>
        <input
          type="text"
          style={inputStyle}
          value={this.state.input}
          onChange={this.handleChange} />
      </div>
    );
  }
};
- render the items in an array with a map
- setup list items with jsx
const textAreaStyles = {
  width: 235,
  margin: 5
};

class MyToDoList extends React.Component {
  constructor(props) {
    super(props);
    // change code below this line
    // state object
    this.state = {
      userInput: '',
      toDoList: []
    }
    // change code above this line
    this.handleSubmit = this.handleSubmit.bind(this);
    this.handleChange = this.handleChange.bind(this);
  }
  handleSubmit() {
    const itemsArray = this.state.userInput.split(',');
    this.setState({
      toDoList: itemsArray
    });
  }
  handleChange(e) {
    this.setState({
      userInput: e.target.value
    });
  }
  render() {
    const toDoList = this.state.toDoList;
    // will need to eventually use the index for unique key
    // the {} evaluates the item
    const items = toDoList.map((item, i) => <li>{item}</li>);
    return (
      <div>
        <textarea
          onChange={this.handleChange}
          value={this.state.userInput}
          style={textAreaStyles}
          placeholder="Separate Items With Commas" /><br />
        <button onClick={this.handleSubmit}>Create List</button>
        <h1>My "To Do" List:</h1>
        <ul>
          {items}
        </ul>
      </div>
    );
  }
};
without unique keys, they're overwritten


- unique keys required hehe
- have to remember to
returnwhen not a one-liner
const frontEndFrameworks = [
  'React',
  'Angular',
  'Ember',
  'Knockout',
  'Backbone',
  'Vue'
];

function Frameworks() {
  const renderFrameworks = frontEndFrameworks.map((framework, index) => {
    return <li key={index}>{framework}</li>
  })
  return (
    <div>
      <h1>Popular Front End JavaScript Frameworks</h1>
      <ul>
        {renderFrameworks}
      </ul>
    </div>
  );
};
- intersestingly, you can get a decodeable error message to open
- when looping through the objects, remember to specify its property -- not just itself
class MyComponent extends React.Component {
  constructor(props) {
    super(props);
    this.state = {
      users: [
        {
          username: 'Jeff',
          online: true
        },
        {
          username: 'Alan',
          online: false
        },
        {
          username: 'Mary',
          online: true
        },
        {
          username: 'Jim',
          online: false
        },
        {
          username: 'Sara',
          online: true
        },
        {
          username: 'Laura',
          online: true
        }
      ]
    }
  }
  render() {
    const users = this.state.users;
    const usersOnline = users.filter(user => user.online);
    const renderOnline = usersOnline.map((user, index) => {
      return <li key={index}>{user.username}</li>;
    })
    return (
       <div>
         <h1>Current Online Users:</h1>
         <ul>
           {renderOnline}
         </ul>
       </div>
    );
  }
};
- Can render on the server side
- Useful perhaps for performance:
Second, this creates a faster initial page load experience because the rendered HTML is smaller than the JavaScript code of the entire app. React will still be able to recognize your app and manage it after the initial load.
- to reference App, need to use
<App />
class App extends React.Component {
  constructor(props) {
    super(props);
  }
  render() {
    return <div/>
  }
};

// change code below this line
ReactDOMServer.renderToString(<App />);
https://learn.freecodecamp.org/front-end-libraries/react/write-a-simple-counter
this has a lot of basis for resetting the state of the tic tac toe board