Git is an Open Source Distributed Version Control System.
-
Control System: This basically means that Git is a content tracker. So Git can be used to store content — it is mostly used to store code due to the other features it provides.
-
Version Control System: The code which is stored in Git keeps changing as more code is added. Also, many developers can add code in parallel. So Version Control System helps in handling this by maintaining a history of what changes have happened. Also, Git provides features like branches and merges, which I will be covering later.
-
Distributed Version Control System: Git has a remote repository which is stored in a server and a local repository which is stored in the computer of each developer. This means that the code is not just stored in a central server, but the full copy of the code is present in all the developers’ computers. Git is a Distributed Version Control System since the code is present in every developer’s computer. I will explain the concept of remote and local repositories later in this article.
GitHub is a web-based hosting service for version control using git.
GitHub is a platform where you can host and (if you want) share your projects with other awesome developers. You can collaborate on code changes on the same project all through a web-based UI.
When you’re first starting to use git, it can be intimidating. Commands and concepts may seem totally foreign if you’ve never used any form of version control in the past. You will pick them up super fast, though.
Repository: Often referred to as a repo. A repository is the collection of files and folders that you’re using git to track. The repository consists of the entire history of your team’s changes to the project. It’s the big ole box you and your team throw your code into.
Commit: Think of this as saving your work. When you commit to a repository, it’s like you’re gathering up the files as they exist at that moment and putting them in a time capsule. The commit will only exist on your local machine until it is pushed to a remote repository.
Push: Pushing is the bread to committing’s butter. Committing throws your files into the timecapsule, and pushing is what launches the capsule into space. Pushing is essentially syncing your commits to the cloud (again, probably Github). You can push multiple commits at once, too. You can work offline, commit lots of work, and then push it all up to Github when you’re back in civilization with that sweet, sweet wifi.
Branch: You can think of your git repo as a tree. The trunk of the tree, the software that goes live, is called the Master Branch. That’s the one that goes live. The branches of that tree are, well, called branches. These are separate instances of the code that offshoots from the main codebase. You might branch off for a single feature or an experimental patch. By branching, you can preserve the integrity of the software and have a way to revert if you do something totally bonkers. It also allows you to work on your task without stumbling into your team’s way (or they into yours).
Merge: When a branch is polished up, free of bugs (as far as you can tell, at least), and ready to become part of the primary codebase, it will get merged into the master branch. Merging is just what it sounds like: integrating two branches together. Any new or updated code will become an official part of the codebase. Anyone who branches off from the point of merging will have this code in their branch as well.
Clone: Cloning a repo is pretty much exactly what it sounds like. It takes the entire online repository and makes an exact copy of it on your local machine. You will need to do this for any number of reasons, not the least of which are starting in the middle of a project with a new team, swapping workstations, or starting over from a corrupted repo.
Fork: Forking is a lot like cloning, only instead of making a duplicate of an existing repo on your local machine, you get an entirely new repo of that code under your own name. This feature is mainly used for taking an existing codebase and going an entirely new direction with it, which happens a lot in open-source software; developers see a base idea that works, but want to go a different way with it. Forking allows that to happen. You can also play in another developer’s repository like it’s your own personal sandbox. And if you do something that you think they may like, you can make a pull request for it to be merged in.
Pull Request: A pull request is when you submit a request for the changes you have made (either on a branch or a fork) to be pulled (or merged) into the Master Branch of the repository. This is the big time. This is where the magic happens. If the pull request is approved, you will have officially contributed to the software, and Github will forever show exactly what you did. However, if the pull request is denied for any reason, the denier will be able to give feedback on why the request was turned down and what you can do to get it accepted.
- Install git and create a GitHub account
The first two things you'll want to do are install git and create a free GitHub account.
Follow the instructions here to install git (if it's not already installed). Note that for this tutorial we will be using git on the command line only. While there are some great git GUIs (graphical user interfaces), I think it's easier to learn git using git-specific commands first and then to try out a git GUI once you're more comfortable with the command.
Once you've done that, create a GitHub account here. (Accounts are free for public repositories, but there's a charge for private repositories.)
- Create a local git repository
When creating a new project on your local machine using git, you'll first create a new repository (or often, 'repo', for short).
To use git we'll be using the terminal. To begin, open up a terminal and move to where you want to place the project on your local machine using the cd (change directory) command. For example, if you have a 'projects' folder on your desktop, you'd do something like:
your:Desktop your$ cd ~/Desktop
your:Desktop your$ mkdir myproject
your:Desktop your$ cd myproject/
To initialize a git repository in the root of the folder, run the git init command:
your:myproject your$ git init
Initialized empty Git repository in /Users/your/Desktop/myproject/.git/
- Add a new file to the repo
Go ahead and add a new file to the project, using any text editor you like or running a touch command.
Once you've added or modified files in a folder containing a git repo, git will notice that changes have been made inside the repo. But, git won't officially keep track of the file (that is, put it in a commit - we'll talk more about commits next) unless you explicitly tell it to.
your:myproject your$ touch test.txt
your:myproject your$ ls
test.txt
After creating the new file, you can use the git status command to see which files git knows exist.
your:myproject your$ git status
On branch master

Initial commit

Untracked files:
  (use "git add <file>..." to include in what will be committed)

	test.txt

nothing added to commit but untracked files present (use "git add" to track)
- Add a file to the staging environment
Add a file to the staging environment using the git add command.
If you rerun the git status command, you'll see that git has added the file to the staging environment (notice the "Changes to be committed" line).
your:myproject your$ git status
On branch master

Initial commit

Changes to be committed:
  (use "git rm --cached <file>..." to unstage)

	new file:   test.txt
- Create a commit
It's time to create your first commit!
Run the command git commit -m "Your message about the commit"
your:myproject your$ git commit -m "This is my first commit!"
[master (root-commit) b345d9a] This is my first commit!
 1 file changed, 1 insertion(+)
 create mode 100644 test.txt
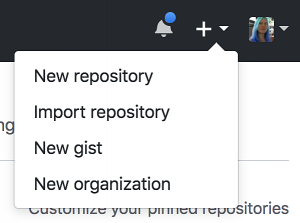
- Create a new repository on GitHub
To create a new repo on GitHub, log in and go to the GitHub home page. You should see a green '+ New repository' button:
After clicking the button, GitHub will ask you to name your repo and provide a brief description.
- Push a commit to GitHub
To push changes onto a new commit on GitHub, you'll want to run git remote add origin <url new repo>, then git push -u origin master