This short guide shows how to connect to instances launched in OpenStack in RDP on Hyper-V, this is useful if you are running Windows inside an OpenStack instance, you will not need to use key pairs
- Make sure your instance running Windows etc. has access to the Internet, because obviously if the instance doesn't have internet you won't be able to connect
If you want to check that your instance has access to the Internet, you can run the ping command inside the instance
ping 8.8.8.8 or ping google.com
If you are sure that your instance has internet access you can continue
Now if we try to connect via Remote Desktop Connection it will not be able to connect by entering the correct IP address of the instance, the error message will say something like: "Could not find computer xxx"
Now to fix this problem, we should add a new security group just for the RDP port
Open a powershell window
First of all list all the projects in your OpenStack environment:
openstack project list
+----------------------------------+---------+
| ID                               | Name    |
+----------------------------------+---------+
| 80b098b87c10422ba6897f4c1f92aa22 | service |
| 8edd5d0ff7ff452ebcd31f8010fd7ee5 | admin   |
| 9616641bde0d4db785f1f82ff213caeb | demo    |
| bc8dd813f9a746fe9cc84fc12a6a9ac3 | stef    |
+----------------------------------+---------+
Now create a new security group with:
openstack security group create --description "Allows to connect RDP on Windows Instances" --project <ProjectName> RDP
Now list all security groups of all projects
openstack security group list
+--------------------------------------+---------+--------------------------------------------+----------------------------------+------+
| ID                                   | Name    | Description                                | Project                          | Tags |
+--------------------------------------+---------+--------------------------------------------+----------------------------------+------+
| 3072f166-b666-4f1a-aa2e-48d00a78b1ba | default | Default security group                     | bc8dd813f9a746fe9cc84fc12a6a9ac3 | []   |
| 3ca40585-3fdf-4d57-b6e6-4fa732bd3100 | default | Default security group                     | 8edd5d0ff7ff452ebcd31f8010fd7ee5 | []   |
| 52e4c530-c60e-4344-91d6-dc93a19a95c1 | RDP     | Allows to connect RDP on Windows Instances | 8edd5d0ff7ff452ebcd31f8010fd7ee5 | []   |
| c9972409-1d43-4775-9329-df2d495bd8f9 | default | Default security group                     | 80b098b87c10422ba6897f4c1f92aa22 | []   |
| f6f63a52-9889-4b98-ba4a-5db7f5274424 | RDP     | Allows to connect RDP on Windows Instances | bc8dd813f9a746fe9cc84fc12a6a9ac3 | []   |
+--------------------------------------+---------+--------------------------------------------+----------------------------------+------+
Now search for Your project ID where we created the security group first
And finally add the RDP rule with:
openstack security group rule create --remote-ip <CIDR> --dst-port 3389:3389 --protocol tcp --ingress --project <ProjectName> <SecurityGroupID>
+-------------------------+--------------------------------------+
| Field                   | Value                                |
+-------------------------+--------------------------------------+
| created_at              | 2023-12-07T20:30:28Z                 |
| description             |                                      |
| direction               | ingress                              |
| ether_type              | IPv4                                 |
| id                      | 9e5d7351-45d8-44ad-8232-ed0d7df9e51d |
| name                    | None                                 |
| port_range_max          | 3389                                 |
| port_range_min          | 3389                                 |
| project_id              | bc8dd813f9a746fe9cc84fc12a6a9ac3     |
| protocol                | tcp                                  |
| remote_address_group_id | None                                 |
| remote_group_id         | None                                 |
| remote_ip_prefix        | 192.168.1.0/24                       |
| revision_number         | 0                                    |
| security_group_id       | f6f63a52-9889-4b98-ba4a-5db7f5274424 |
| tags                    | []                                   |
| tenant_id               | bc8dd813f9a746fe9cc84fc12a6a9ac3     |
| updated_at              | 2023-12-07T20:30:28Z                 |
+-------------------------+--------------------------------------+
Well once this step is completed you can access the OpenStack dashboard and see the newly created rule

Now that you have this new security group, when you want to connect with RDP to any Windows instance, just add this security group to your instance and you will be able to connect via RDP
Well now you can open the Remote Desktop Connection program
Access the Instances tab and copy the IP address assigned to the instance
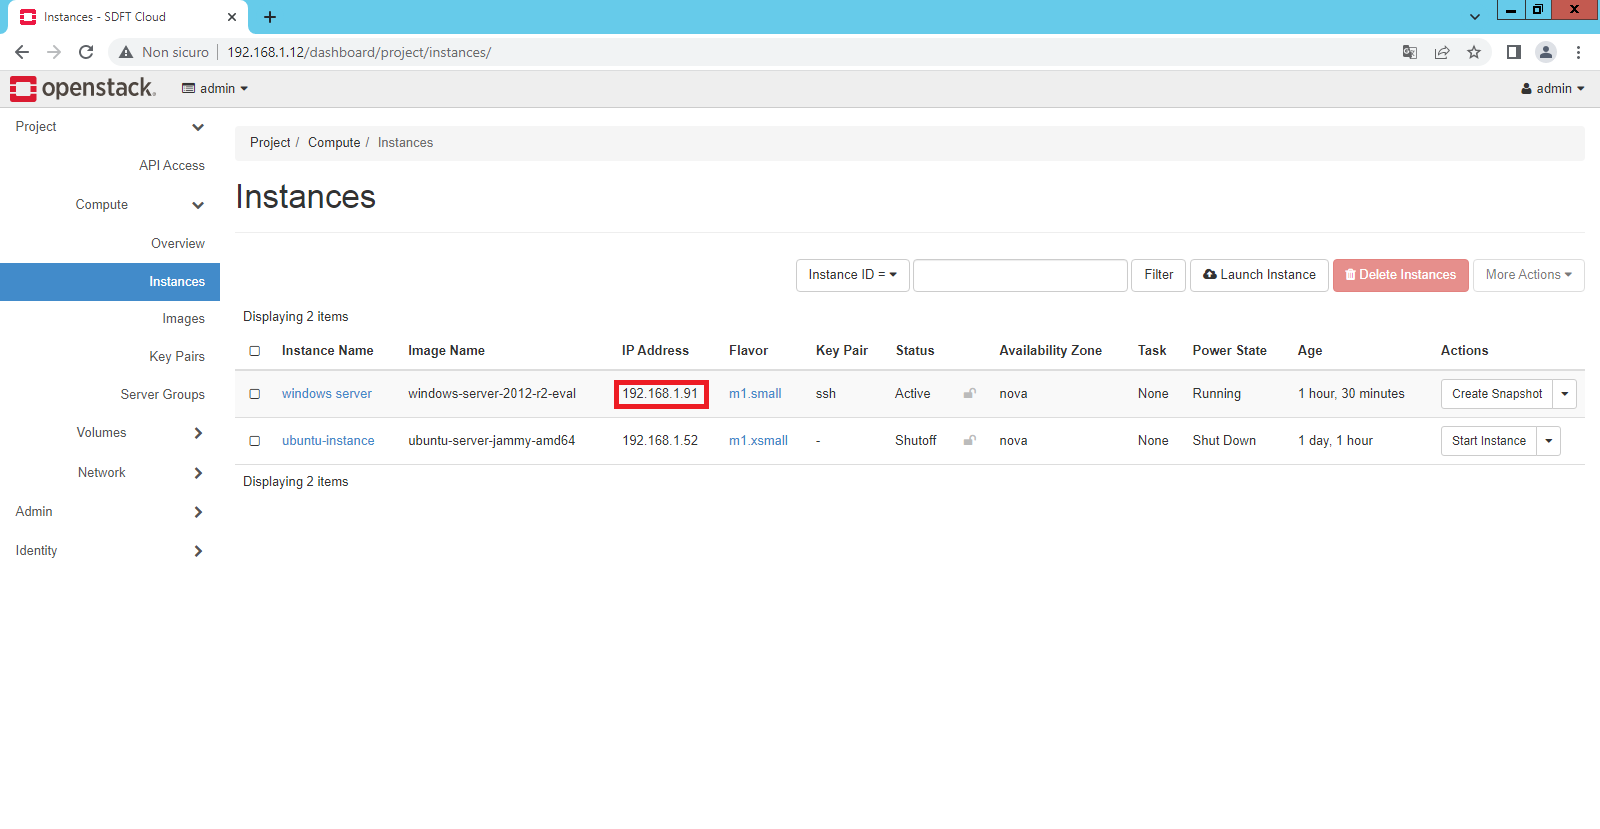
Now enter this IP address into Remote Desktop Connection, then your Windows instance credentials, and you can use your instance running Windows from RDP