Redis Cloud is an add-on implementing the Redis advanced key-value store, which is often referred to as a data structure server since keys can contain strings, hashes, lists, sets and sorted sets.
The Redis Cloud add-on provides a fully-automated redis cloud service for hosting your Redis dataset, with:
- Infinite-scalability: supports all Redis commands at any dataset size.
- Reliability: auto-failover with absolutely no data loss. Enhanced data persistence and backup options.
- Zero-management: no need to deal with data persistence configuration, Redis cluster, failure recovery or scaling of your database.
You can now get started for free immediately, and add memory capacity later as you require it.
You can simply install the add-on from heroku command line:
:::term
$ heroku addons:add rediscloud:plan_name
The plan_name values can be obtained from the list of all Redis Cloud plans available here. For example:
:::term
$ heroku addons:add rediscloud:20MB
$ heroku addons:add rediscloud:1GB
... etc ...
Once Redis Cloud has been added, a REDISCLOUD_URL setting will be available in the app configuration and will contain the canonical URL used to access the newly provisioned Redis Cloud service instance.
This can be confirmed using the heroku config:get command:
:::term
$ heroku config:get REDISCLOUD_URL
http://user:pass@instance.ip/resourceid
After installing Redis Cloud the application should be configured to fully integrate with the add-on.
The redis-rb is a very stable and mature redis client. Install and require the hiredis gem before redis-rb for maximum performances.
Install redis-rb:
:::term
sudo gem install redis
Update the config/environment.rb to include 'redis':
:::ruby
config.gem 'redis'
Setup the Redis connection in 'config/environments/development.rb' :
:::ruby
ENV["REDISCLOUD_URL"] = 'redis://username:password@my.host:6789'
Configure Redis in 'config/initializers/redis.rb' :
:::ruby
uri = URI.parse(ENV["REDISCLOUD_URL"])
redis = Redis.new(:host => uri.host, :port => uri.port, :password => uri.password)
In the configure block include:
:::ruby
configure do
	require 'redis'
	uri = URI.parse(ENV["REDISCLOUD_URL"])
	REDIS = Redis.new(:host => uri.host, :port => uri.port, :password => uri.password)
end
The Redis class exports methods that are named identical to the commands they execute. For instance, the SET and GET commands can be called like this:
:::ruby
redis.set("foo", "bar")
# => "OK"
redis.get("foo")
# => "bar"
Jedis is a blazingly small and sane Redis java client. Jedis was conceived to be easy to use.
You can download the latest build at: http://github.com/xetorthio/jedis/downloads, or use it as a maven dependency:
:::java
<dependency>
	<groupId>redis.clients</groupId>
	<artifactId>jedis</artifactId>
	<version>2.0.0</version>
	<type>jar</type>
	<scope>compile</scope>
</dependency>
Now, configure the connection for Redis:
:::java
try {
		URI redisUri = new URI(System.getenv("REDISCLOUD_URL"));
		JedisPool pool = new JedisPool(new JedisPoolConfig(),
	    		redisUri.getHost(),
	    		redisUri.getPort(),
	    		Protocol.DEFAULT_TIMEOUT,
	    		redisUri.getUserInfo().split(":",2)[1]);
} catch (URISyntaxException e) {
   	    // URI couldn't be parsed.
}
And you are ready to get started:
:::java
Jedis jedis = pool.getResource();
jedis.set("foo", "bar");
String value = jedis.get("foo");
// return the instance to the pool when you're done
pool.returnResource(jedis);
redis-py is a mature and supported Redis client and currently is the way to go for Python.
Install it with:
:::term
sudo pip install redis
And you are ready to get started:
:::python
>>> import redis
>>> url = os.getenv('REDISCLOUD_URL', 'redis://localhost')
>>> r = redis.from_url(url)
>>> r.set('foo', 'bar')
True
>>> r.get('foo')
'bar'
django-redis-cache is a Redis cache backend for Django.
Install django-redis-cache:
:::term
pip install django-redis-cache
Next, configure your settings.py:
:::python
CACHES = {
	'default': {
	'BACKEND': 'redis_cache.RedisCache',
	'LOCATION': os.environ.get('REDISCLOUD_URL', ''),
	'TIMEOUT': 500,
	'BINARY': True,
  }
}
Now you can use your cache:
:::python
from django.core.cache import cache
cache.set("foo", "bar")
print cache.get("foo")
Predis is a flexible and feature-complete PHP (>= 5.3) client library for the Redis key-value store.
Load the Predis library:
:::javascript
<?php
// prepend a base path if Predis is not present in your "include_path".
require 'Predis/Autoloader.php';
Predis\Autoloader::register();
Now you can connect to a Redis instance:
:::javascript
$redis = new Predis\Client($_ENV["REDISCLOUD_URL"]);
And simply start using it:
:::javascript
$redis->set('foo', 'bar');
$value = $redis->get('foo');
node_redis is a complete Redis client for node.js. It supports all Redis commands, including many recently added commands like EVAL from experimental Redis server branches.
You can install it with:
:::term
npm install redis
Now, instantiate a Redis client:
:::javascript
var redis = require('redis');
var url = require('url');
var redisURL = url.parse(process.env.REDISCLOUD_URL);
var client = redis.createClient(redisURL.port, redisURL.hostname, options);
client.auth(redisURL.auth.split(":")[1]);
And you can start using it:
:::javascript
client.set('foo', 'bar');
var value = client.get('foo');
Our analytics dashboard is a great tool for assesing your redis usage. Here is a screenshot of the dashboard:
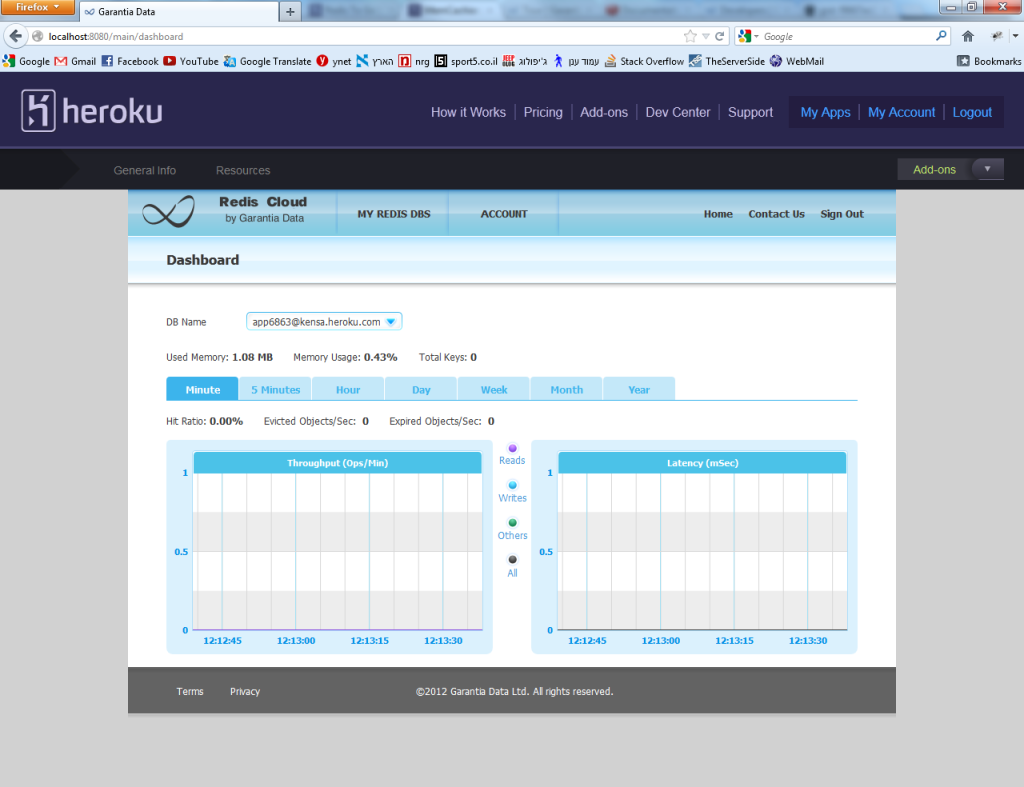
To access your Redis analytics dashboard run:
:::term
heroku addons:open rediscloud
And find your dashboard under the MY REDIS DBS menu.
Alternatively, you can access your Redis dashboard by running:
:::term
heroku addons:open rediscloud
Or open Redis Cloud from your application at heroku.com.
Plan migrations are easy and instant. You can use the 'heroku addons:upgrade' command to migrate to a new plan:
:::term
$ heroku addons:upgrade rediscloud:10GB
A list of all Redis Cloud plans is available here.
Redis Cloud can be removed via the CLI.
:::term
$ heroku addons:remove rediscloud
All Redis Cloud support and runtime issues should be submitted via on of the Heroku Support channels. Any non-support related issues or product feedback is welcome at info@garantiadata.com.