# base.html

{% load static %}<!doctype html>
<html>
  <head>
    <meta charset="utf-8">
    <title>{% block title %}Default Title{% endblock %}</title>
    <link rel="stylesheet" type="text/css" href="{% static 'css/app.css' %}">
    {% block stylesheet %}{% endblock %}
  </head>
  <body>
    <header>
      ...
    </header>
    <main>
      {% block content %}
      {% endblock %}
    </main>
    <footer>
      ...
    </footer>
    <script src="https://code.jquery.com/jquery-3.1.0.min.js"></script>
    <script src="{% static 'js/app.js' %}"></script>
    {% block javascript %}{% endblock %}
  </body>
</html>
The jQuery library and all the JavaScript resources stays in the end of the HTML page for two reasons:
- to guarantee the DOM will be loaded when the script is executed
- to avoid inline scripts (at least scripts that uses jQuery).
All the extra or page specific JavaScript goes inside the {% block javascript %}{% endblock %} block.
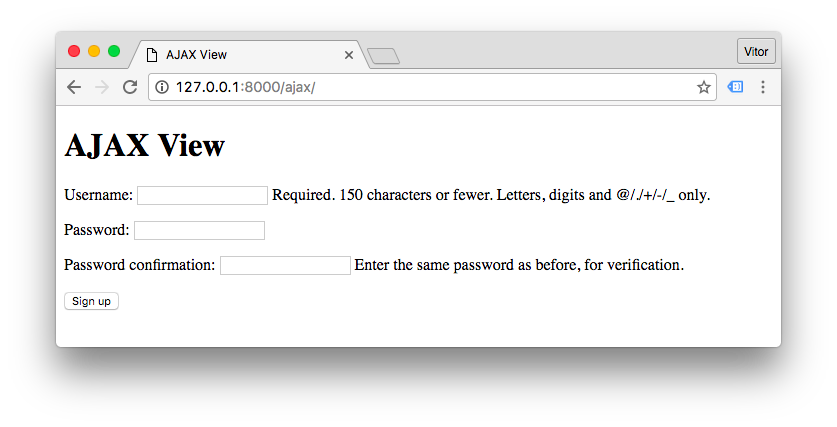
Let’s say you want to validate the username field in a sign up view, as soon as the user finish typing the desired username. You want just to do a simple check, if the username is already taken or not.
from django.contrib.auth.forms import UserCreationForm
from django.views.generic.edit import CreateView

class SignUpView(CreateView):
    template_name = 'core/signup.html'
    form_class = UserCreationForm
from django.conf.urls import url
from core import views

urlpatterns = [
    url(r'^signup/$', views.SignUpView.as_view(), name='signup'),
]
{% extends 'base.html' %}

{% block content %}
  <form method="post">
    {% csrf_token %}
    {{ form.as_p }}
    <button type="submit">Sign up</button>
  </form>
{% endblock %}
The view looks like that:
Let’s implement an asynchronous request to validate if the username is already taken or not.
we gotta have a look on the HTML generated by the {{ form.as_p }}.
We want to inspect the username field, which looks like that:
<input type="text" required="" name="username" maxlength="150" id="id_username" autofocus="">
What we need here is its ID, which is id_username.
Let’s create a listener for the username’s field change event:
{% extends 'base.html' %}

{% block javascript %}
  <script>
    $("#id_username").change(function () {
      console.log( $(this).val() );
    });
  </script>
{% endblock %}

{% block content %}
  <form method="post">
    {% csrf_token %}
    {{ form.as_p }}
    <button type="submit">Sign up</button>
  </form>
{% endblock %}
In this case, as the name suggests, the change event will occur every time the value of the username field changes.
You can check the output of the console.log() function in your web browser console. Generally right clicking in the page and clicking on a menu that says Inspect or something similar.
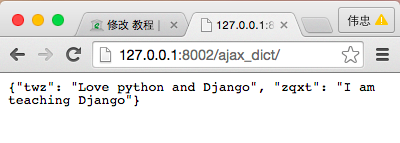
Let’s create a view that checks if a given username is taken, and return a response as JSON.
from django.contrib.auth.models import User
from django.http import JsonResponse

def validate_username(request):
    username = request.GET.get('username', None)
    data = {
        'is_taken': User.objects.filter(username__iexact=username).exists()
    }
    return JsonResponse(data)
Add a route to this view:
from django.conf.urls import url
from core import views

urlpatterns = [
    url(r'^signup/$', views.SignUpView.as_view(), name='signup'),
    url(r'^ajax/validate_username/$', views.validate_username, name='validate_username'),
]
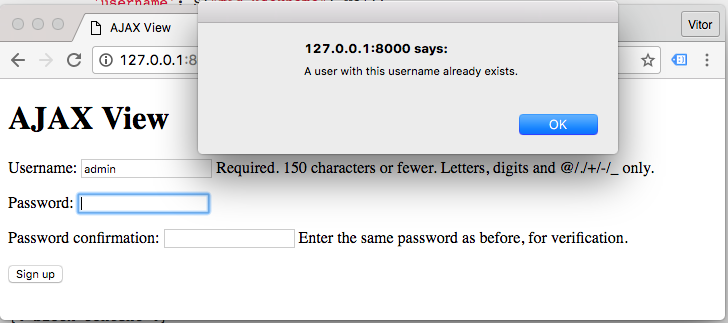
And then the simpliest implementation would be:
{% extends 'base.html' %}

{% block javascript %}
  <script>
    $("#id_username").change(function () {
      var username = $(this).val();

      $.ajax({
        url: '/ajax/validate_username/',
        data: {
          'username': username
        },
        dataType: 'json',
        success: function (data) {
          if (data.is_taken) {
            alert("A user with this username already exists.");
          }
        }
      });

    });
  </script>
{% endblock %}

{% block content %}
  <form method="post">
    {% csrf_token %}
    {{ form.as_p }}
    <button type="submit">Sign up</button>
  </form>
{% endblock %}
The example is working, and that’s great. But there are a few details we can improve:
- Hardcoded URL inside the Ajax function
- User message embeded in the JavaScript
Since we are inside a Django template, we could do something like that:
$.ajax({
  url: '{% url "validate_username" %}',
  ...
});
It is already better, but, I don’t really like this strategy. Two reasons: You won’t be able to extract this JavaScript code to a external file. We have an external script modifying our JavaScript. If you find yourself writing code to write a JavaScript code, give it another thought. There might be a better solution.
Now, what I usually like to do:
from django.contrib.auth.models import User
from django.http import JsonResponse

def validate_username(request):
    username = request.GET.get('username', None)
    data = {
        'is_taken': User.objects.filter(username__iexact=username).exists()
    }
    if data['is_taken']:
        data['error_message'] = 'A user with this username already exists.'
    return JsonResponse(data)
Extract the user message to the Python code, this way is easier to work with translations.
{% extends 'base.html' %}

{% block javascript %}
  <script>
    $("#id_username").change(function () {
      var form = $(this).closest("form");
      $.ajax({
        url: form.attr("data-validate-username-url"),
        data: form.serialize(),
        dataType: 'json',
        success: function (data) {
          if (data.is_taken) {
            alert(data.error_message);
          }
        }
      });

    });
  </script>
{% endblock %}

{% block content %}
  <form method="post" data-validate-username-url="{% url 'validate_username' %}">
    {% csrf_token %}
    {{ form.as_p }}
    <button type="submit">Sign up</button>
  </form>
{% endblock %}
Ideally I would put the data-validate-username-url attribute directly in the username field. But here we would need to expose all the fields in the {{ form.as_p }}. So in this case I can live with the attribute in the form tag.
Generally speaking: try to avoid modifying JavaScript code with Python code, keep the URL references in the HTML and manage user messages in the Python code.
Another tip: if you have direct access to the HTML field, prefer adding a class name like this:
<input type="text" name="username" id="id_username" class="js-validate-username">
And then you hook the change event to the class js-validate-username instead. The js- prefix suggests that there is a JavaScript code that interacts with this element. And then use this prefix for JavaScript only, never use it for styling the component as well via css.