You signed in with another tab or window. Reload to refresh your session.You signed out in another tab or window. Reload to refresh your session.You switched accounts on another tab or window. Reload to refresh your session.Dismiss alert
"How to write a database-driven Web app with Django?"
workflow:
create models
get admin sites up and running asap
your staff(or client) can start populating data
develop the way data is presented to the public
01 - Design your model
object-relational mapper (ORM)
describe your database layout in Python code
data-model syntax (models.py)
rich ways of presenting your models
02 - Install it
$python manage.py migrate
to create the database tables automatically (the migrate command looks at all your available models and creates tables in your database for whichever tables don't already exist)
03 - Enjoy the free API
free, rich Python API to access your data on the fl, no code generation necessary
04 - A dynamic admin interface : it's not just scaffolding - it's the whole house
Once your models are defined, Django can automatically create a professional, production ready administrative interface - a website that lets authenticated users add, change and delete objects.
# mysite/news/admin.py
from django.contrib import admin

from . import models

admin.site.register(models.Article)
your site is edited by a staff, or a client, or maybe just you - and you don't want to have to deal with creating backend interfaces just to manage content
05 - Design your URLs
URLconf - a table of contents for your app - a simple mapping between URL patterns and Python callback functions ("views")
when a user requests a page, Django runs through each path, in order, and stops at the first one that matches the requested URL. Once one of the URL patterns matches, Django calls the given view, which is a Python function. Each view gets passed a request object - which contains request metadata - and the values captured in the pattern.
ex.
if a user requested the URL ("/articles/2005/05/39323/"), Django would call the function news.views.article_detail(request, year=2005, month=5, pk=39323)
06 - Write your views
Each view is responsible for doing one of two things :
Create a project from the template and initialize the database (step 6-1)
Understand data models (step 6-2)
Apply migrations (step 6-3)
Understand the views and page templates created by the project template (step 6-4)
Create a custom administration interface (step 6-5)
Step 6-1: Create the project and initialize the database
Solution Explorer > right-click the "LearningDjango" solution > Add > New Project
select "Polls Django Web Project" template > call the project "DjangoPolls" > select OK
like the other project templates in VS, the "Polls Django Web Project" template includes a requirements.txt file, the VS prompts asks where to install those dependencies > Install into a virtual environment > in the Add Virtual Environment dialog select Create to accept the defaults
Before running the project, initialize the database by following the readme.html
create a Django super user (the administrator) :
right-click the "DjangoPolls" project in Solution Explorer
select the Python > Django Migrate command
right-click the project again, select Python > Django Create Superuser command, and follow the prompts
Set the "DjangoPolls" project to be the default for the VS solution
right-clicking that project in Solution Explorer
select Set as Startup Project
Select Debug > Start Debugging(F5) or use the Web Serve button on the toolbar to run the server
route to /admin page
Question: what does the Django Migrate command do?
Django Migrate command = runs the manage.py migrate command > runs any scripts in the app/migrations folder that haven't been run previously
The migration script itself is created by the manage.py makemigrations command, which scans the app's models.py file, compares it to the current state of the database, and then generates the necessary scripts to migrate the database schema to match the current models.
This feature of Django is very powerful as you update and modify your models over time.
A public site that lets people view polls and vote in them
Part 2
An admin that lets you add, change, and delete polls
Django
Django 2.0
Python
Python 3.4 or later
Create the Polls app in Mysite project
1. Requests and responses
write your 1st view:
# polls/views.py
from django.http import HttpResponse

def index(request):
    return HttpResponse("Hello, world. You're at the polls index.")
To call the view, we need to map it to a URL - and for this we need a URLconf.
# polls/urls.py
from django.urls import path

from . import views

urlpatterns = [
    path('', views.index, name='index'),
]
point the root URLconf at the polls.urls module
# mysite/urls.py
from django.contrib import admin
from django.urls import include, path

urlpatterns = [
    path('polls/', include('polls.urls')),
    path('admin/', admin.site.urls),
]
urls to "polls/", let the "polls.urls" to take care the rest strings
2. Models and the admin site
(1)setup the DB, (2)create your first model, and (3)get a quick introduction to Django's automatically-generated admin site
(1) Database setup
mysite/settings.py
DATABASES 'default':
ENGINE:
'django.db.backends.sqlite3'
'django.db.backends.postgresql'
'django.db.backends.mysql'
'django.db.backends.oracle'
NAME:
the name of your database
should be the full absolute path, including filename, of that file
For DB other than SQLite:
make sure you've created a database by this point. Do that with "CREATE DATABASE database_name;" with your database's interactive prompt.
INSTALLED_APPS:
django.contrib.admin – The admin site.
django.contrib.auth – An authentication system.
django.contrib.contenttypes – A framework for content types.
django.contrib.sessions – A session framework.
django.contrib.messages – A messaging framework.
django.contrib.staticfiles – A framework for managing static files.
$python manage.py migrate
to create tables in the database for these applications before we can use them
SHOW TABLES;
to check
(2) Creating Models
In our simple poll app, 2 models: Question and Choice.
You should see something similar to the following:
Migrations for 'polls':
  polls/migrations/0001_initial.py:
    - Create model Choice
    - Create model Question
    - Add field question to choice
makemigrations tells django that you've made some changes to your models and that you'd like the changes to be stored as a migration
Migrations are how Django stores changes to your models - they're files on disk. You can read the migration for your new model if you like. It's the file polls/migrations/0001_initial.py.
run migrate again to create those model tables in your database:
$python manage.py migrate
(4) Playing with the API
$python manage.py shell
Let's hop into the interactive Python shell and play around with the free API Django gives you.
The final step is to enter your password. You will be asked to enter your password twice, the second time as a confirmation of the first.
Password: **********
Password (again): *********
Superuser created successfully.
(2) Start the development server
runserver > open a Web browser and go to "/admin/" on your local domain
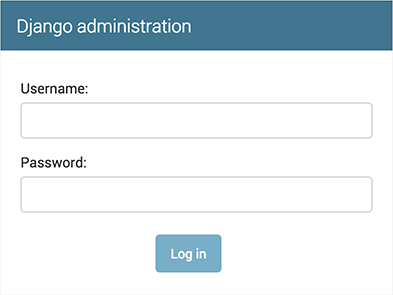
(3) Enter the admin site
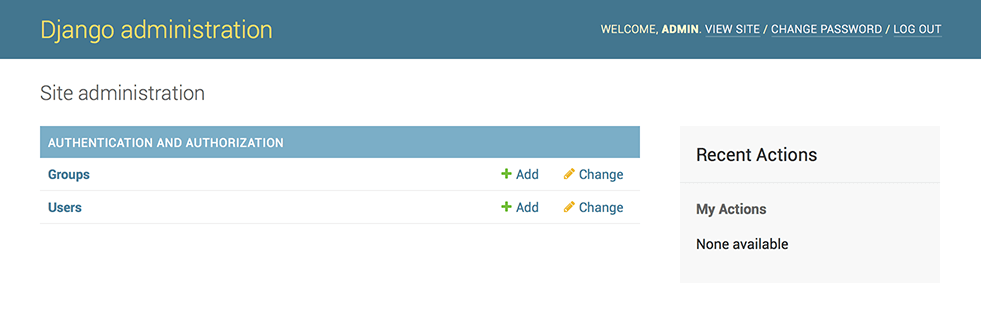
try logging in with the superuser account you created in the previous step.
You should see a few types of editable content: groups and users.
They are provided by django.contrib.auth, the authentication framework shipped by Django.
(4) Make the poll app modifiable in the admin
To tell the admin that Question objects have an admin interface, open the polls/admin.py file and edit it to look like this:
# polls/admin.py
from django.contrib import admin

from .models import Question

admin.site.register(Question)
(5) Explore the free admin functionality
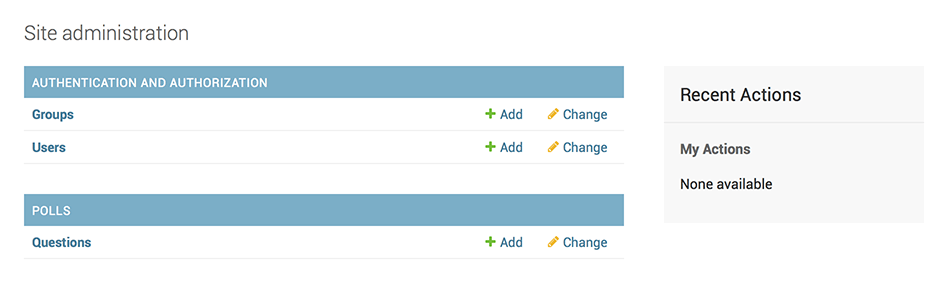
Now that we’ve registered Question, Django knows that it should be displayed on the admin index page:
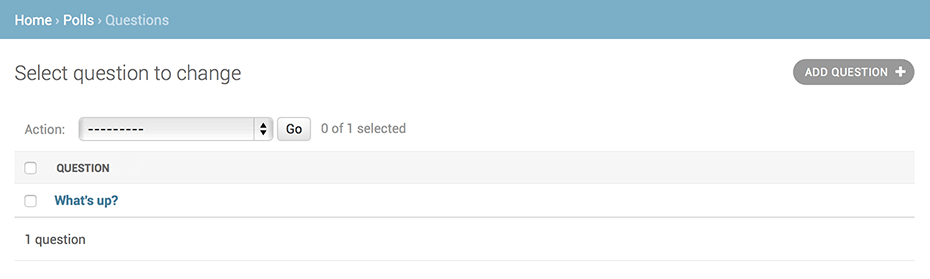
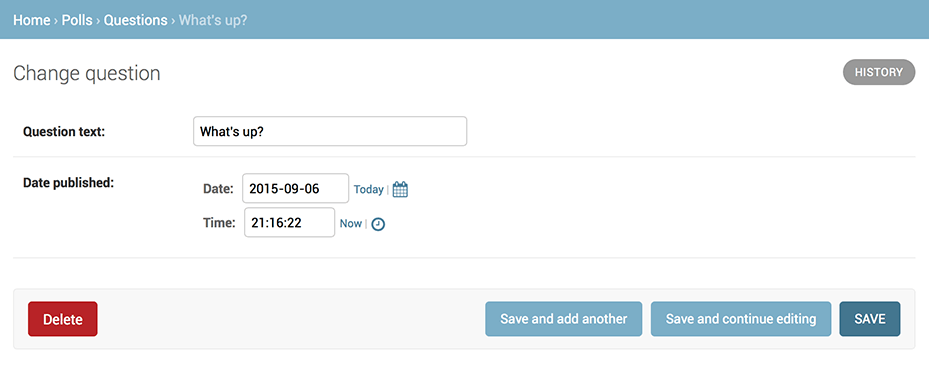
Click “Questions”. Now you’re at the “change list” page for questions. This page displays all the questions in the database and lets you choose one to change it. There’s the “What’s up?” question we created earlier:
Click the “What’s up?” question to edit it:
The form is automatically generated from the Question model.
The different model field types (DateTimeField, CharField) correspond to the appropriate HTML input widget. Each type of field knows how to display itself in the Django admin.
The bottom part of the page gives you a couple of options:
Save – Saves changes and returns to the change-list page for this type of object.
Save and continue editing – Saves changes and reloads the admin page for this object.
Save and add another – Saves changes and loads a new, blank form for this type of object.
Delete – Displays a delete confirmation page.
3. views and templates
In our poll application, we’ll have the following four views:
Question “index” page – displays the latest few questions.
Question “detail” page – displays a question text, with no results but with a form to vote.
Question “results” page – displays results for a particular question.
Vote action – handles voting for a particular choice in a particular question.
web pages & other content are delivered by views - each view is represented by a simple Python function (or method, in the case of class-based views).
Djanpo will choose a view by examining the URL that's requested (the part of the URL after the domain name).
To get from a URL to a view, Django uses what are known as 'URLconfs'. A URLconf maps URL patterns to views.
(1) Write more views
# polls/views.py

def detail(request, question_id):
    return HttpResponse("You're looking at question %s." % question_id)

def results(request, question_id):
    response = "You're looking at the results of question %s."
    return HttpResponse(response % question_id)

def vote(request, question_id):
    return HttpResponse("You're voting on question %s." % question_id)
When somebody requests a page from your website – say, “/polls/34/”, Django will load the mysite.urls Python module because it’s pointed to by the ROOT_URLCONF setting. It finds the variable named urlpatterns and traverses the patterns in order. After finding the match at 'polls/', it strips off the matching text ("polls/") and sends the remaining text – "34/" – to the ‘polls.urls’ URLconf for further processing. There it matches 'int:question_id/', resulting in a call to the detail() view like so:
The question_id=34 part comes from int:question_id.
The :question_id> part of the string defines the name that will be used to identify the matched pattern, and the <int: part is a converter that determines what patterns should match this part of the URL path.
There’s no need to add URL cruft such as .html – unless you want to, in which case you can do something like this:
path('polls/latest.html', views.index),
But don't do this.
(2) Write views that actually do something - render()
Your view can read records from a database, or not.
It can use a template system such as Django’s – or a third-party Python template system – or not.
It can generate a PDF file, output XML, create a ZIP file on the fly, anything you want,using whatever Python libraries you want.
# polls/templates/polls/index.html

{% if latest_question_list %}
    <ul>
    {% for question in latest_question_list %}
        <li><a href="/polls/{{ question.id }}/">{{ question.question_text }}</a></li>
    {% endfor %}
    </ul>
{% else %}
    <p>No polls are available.</p>
{% endif %}
The context is a dictionary mapping template variable names to Python objects.
Load the page by pointing your browser at “/polls/”, and you should see a bulleted-list containing the “What’s up” question from Tutorial 2. The link points to the question’s detail page.
A shortcut: render()
It’s a very common idiom to :
load a template
fill a context
return an HttpResponse object with the result of the rendered template.
Note that once we’ve done this in all these views, we no longer need to import loader and HttpResponse (you’ll want to keep HttpResponse if you still have the stub methods for detail, results, and vote).
The render() function takes the request object as its first argument, a template name as its second argument and a dictionary as its optional third argument. It returns an HttpResponse object of the given template rendered with the given context.
(3) Raising a 404 error - get_object_or_404()
(4) Use the template system
detail() view for our poll application
# polls/templates/polls/detail.html

<h1>{{ question.question_text }}</h1>
<ul>
{% for choice in question.choice_set.all %}
    <li>{{ choice.choice_text }}</li>
{% endfor %}
</ul>
The template system uses dot-lookup syntax to access variable attributes. In the example of {{ question.question_text }}, first Django does a dictionary lookup on the object question. Failing that, it tries an attribute lookup – which works, in this case. If attribute lookup had failed, it would’ve tried a list-index lookup.
Method-calling happens in the {% for %} loop: question.choice_set.all is interpreted as the Python code question.choice_set.all(), which returns an iterable of Choice objects and is suitable for use in the {% for %} tag.
The problem with this hardcoded, tightly-coupled approach is that it becomes challenging to change URLs on projects with a lot of templates. However, since you defined the name argument in the path() functions in the polls.urls module, you can remove a reliance on specific URL paths defined in your url configurations by using the {% url %} template tag:
The way this works is by looking up the URL definition as specified in the polls.urls module. You can see exactly where the URL name of ‘detail’ is defined below:
...
# the 'name' value as called by the {% url %} template tag
path('<int:question_id>/', views.detail, name='detail'),
...
If you want to change the URL of the polls detail view to something else, perhaps to something like polls/specifics/12/ instead of doing it in the template (or templates) you would change it in polls/urls.py:
...
# added the word 'specifics'
path('specifics/<int:question_id>/', views.detail, name='detail'),
...
(6) Namespacing URL names
The tutorial project has just one app, polls. In real Django projects, there might be five, ten, twenty apps or more. How does Django differentiate the URL names between them? For example, the polls app has a detail view, and so might an app on the same project that is for a blog.
How does one make it so that Django knows which app view to create for a url when using the {% url %} template tag?
The answer is to add namespaces to your URLconf. In the polls/urls.py file, go ahead and add an app_name to set the application namespace:
When you’re comfortable with writing views, read part 4 of this tutorial to learn about simple form processing and generic views.
5. Testing
6. Static files
static files:
images
Javascript
CSS
django.contrib.staticfiles:
it collects static files from each of your applications (and any other places you specify) into a single location that can easily be served in production.
Customize your app’s look and feel
create a directory called static in your poll app directory.
Django will look for static files there, similarly to how Django finds templates inside polls/templates
looks for a "static" subdirectory in each of the INSTALLED_APPS
within the static directory you have just created, create another directory called polls
within the static/polls directory, create a file called style.css
your stylesheet should be at polls/static/polls/style.css, you can just refer to this static file in Django simply as polls/style.css, similar to how you reference the path for templates
# polls/static/polls/style.css

li a {
    color: green;
}
If a variable resolves to a callable, the template system will call it with no arguments and use its result instead of the callable.
Tags
Tags provide arbitrary logic in the rendering process.
A tag can:
output content
serve as a control structure
e.g. an “if” statement or a “for” loop
grab content from a database
enable access to other template tags
Tags are surrounded by {% and %} like this:
{% csrf_token %}
Most tags accept arguments:
{% cycle 'odd' 'even' %}
Some tags require beginning and ending tags:
{% if user.is_authenticated %}Hello, {{ user.username }}.{% endif %}
Filters
Filters transform the values of variables and tag arguments.
They look like this:
{{ django|title }}
With a context of {'django': 'the web framework for perfectionists with deadlines'}, this template renders to:
The Web Framework For Perfectionists With Deadlines
Some filters take an argument:
{{ my_date|date:"Y-m-d" }}
Comments
Comments look like this:
{# this won't be rendered #}
A {% comment %} tag provides multi-line comments.
Components
Engine
django.template.Engine encapsulates an instance of the Django template system. The main reason for instantiating an Engine directly is to use the Django template language outside of a Django project.
django.template.backends.django.DjangoTemplates is a thin wrapper adapting django.template.Engine to Django’s template backend API.
Template
django.template.Template represents a compiled template. Templates are obtained with Engine.get_template() or Engine.from_string()
Likewise django.template.backends.django.Template is a thin wrapper adapting django.template.Template to the common template API.
Context
django.template.Context holds some metadata in addition to the context data. It is passed to Template.render() for rendering a template.
django.template.RequestContext is a subclass of Context that stores the current HttpRequest and runs template context processors.
The common API doesn’t have an equivalent concept. Context data is passed in a plain dict and the current HttpRequest is passed separately if needed.
Loaders
Template loaders are responsible for locating templates, loading them, and returning Template objects.
Django provides several built-in template loaders and supports custom template loaders.
Context processors
Context processors are functions that receive the current HttpRequest as an argument and return a dict of data to be added to the rendering context.
Their main use is to add common data shared by all templates to the context without repeating code in every view.
Django provides many built-in context processors. Implementing a custom context processor is as simple as defining a function.