We'll see how to build a python script for multiple operating systems and get a download URL for all the executables. All of this will be done automatically without any manual effort.
A common problem when trying to distribute a python script is that there is no simple and robust solution to do so. Often, a developer can only ship one executable specific to his/her current operating system, even then there is a problem with hosting that script, the developer either has to do that manually on some hosting platform or he/she has to turn to a more complex solution. This doesn’t account for URL change when the same script has been modified and needs to be re-uploaded. So, how do we solve this problem more efficiently?

On the official documentation website, it states:
GitHub Actions is a continuous integration and continuous delivery (CI/CD) platform that allows you to automate your build, test, and deployment pipeline.
In simple terms, with GitHub actions, we can automate stuff, each time the code gets modified the same automation runs. These actions can be triggered for various events like push, merge, pull-request, etc. for our use case we’ll be focusing on push and pull-request.
A GitHub workflow is the automation the Actions platform triggers on certain events. These workflows are represented as a .yml file that contains various components. Refer to this blog to understand those components in depth. We’ll solve this problem by writing our own GitHub workflow.
There are some things we first need to do before writing our custom workflow file:
- Amazon S3 setup (Free)
- GitHub repository secrets
- Shell script to build python scripts
We will use Amazon’s S3 to host our files and get the download URL from there. An advantage of using S3 is that the asset URLs always remain static which means you can upload the same asset multiple times and the URL will always remain the same. Amazon S3 is free to use, at least for our use case we won’t need to spend anything.
You’ll need to add your card details for verification purposes
- The first step is to create an
Amazon S3 account, follow this URL to setup your S3/AWS account - Once you have created your S3 account, you’ll have to create an
IAMuser. Follow this URL to do so. - Now go to the
IAMsection of your console, the link should be something likeyour-region.console.aws.amazon.com/iam/home - Once in the
IAMsection of the console, go to theUser Groupstab. If you haven’t already created a user group then follow this link to do so. - Select the desired group name and go to the
Permissionstab. - Now add the following policies in there:
AmazonS3FullAccess,AdministratorAccess,AmazonS3OutpostsFullAccess - Once that is done, head on to your
S3console. - Click on the
create bucketoption on the left-hand side pane - Once done, click on the newly created bucket and head onto the
Permissionstab - Once in the permission tab, configures the following things:
- Access:
Public - Block all public access:
off - Bucket policy:
{
  "Version": "2012-10-17",
  "Statement": [
      {
          "Sid": "AddPerm",
          "Effect": "Allow",
          "Principal": "*",
          "Action": [
              "s3:PutObject",
              "s3:PutObjectAcl",
              "s3:GetObject"
          ],
          "Resource": "Your Amazon Resource Name (ARN)/*"
      }
  ]
}
You can find your
Amazon Resource Name (ARN)under thePropertiestab
- Once this is done there should be a Publicly accessible label under the bucket name
- Now create a folder named
buildsin the newly created bucket, this folder will contain all the executables.
Now you are all set!
Now that we are all set with S3, we need to add a few secrets to our GitHub repository, these secrets will be used to access and update our S3 bucket. You’ll need to create an ACCESS_ID under your IAM user. Follow this doc to create an access_id. Once you have your access_id copy the following entries from it:
ACCESS_KEY_IDSECRET_ACCESS_KEY
Now go into your GitHub repository setting and navigate to the secrets option. Under the secrets section, create two secrets named:
S3_BUILD_ARTIFACTS_ACCESS_KEY_IDS3_BUILD_ARTIFACTS_SECRET_ACCESS_KEYS3_BUCKET_NAME(Name of the bucket you just created)
Paste the copied values in the respective secrets and click on Add Secret button.
Create a file named build_script.sh in the root of your repository and paste the following content into it:
# build `ui/setup/install.py` using pyinstaller
echo "setting up venv"
python3 -m venv venv
source venv/bin/activate
pip install -r requirements.txt
echo "Building installer..."
pyinstaller --onefile --windowed --noconfirm --clean --workpath=build --distpath=dist --name=$1 $2
Push the file to your GitHub repository.
Now that we have all of the requirements in place we can now proceed to the final step, which is to create our own GitHub workflow file.
First of all, create an .yml under .github/workflows directory (create the repositories if not created already). Name the file something like build-python.yml (not necessary to name it exactly this).
Now paste the following code into the newly created file:
# This workflow will build a python script, generate an executable and upload it to S3.
name: Build python script
on:
push:
branches: [master]
pull_request:
branches: [master]
jobs:
build:
strategy:
matrix:
os: [windows, macos, ubuntu]
runs-on: ${{ matrix.os }}-latest
steps:
- uses: actions/checkout@v2
- name: Set up Python 3.9
uses: actions/setup-python@v2
with:
python-version: 3.8
- name: Install dependencies
run: |
python -m pip install --upgrade pip
pip install -r requirements.txt
pip install pyinstaller
- name: Build script
run: |
bash "${{ github.workspace }}/build_script.sh" "${{matrix.os}}-build" "path/to/your/script"
- name: Upload Artifacts - [macOS, Ubuntu]
if: ${{ matrix.os }} != windows
uses: actions/upload-artifact@v3
with:
name: ${{matrix.os}} Build
path: dist/${{matrix.os}}-build
- name: Upload Artifacts - [windows]
if: ${{ matrix.os }} == windows
uses: actions/upload-artifact@v3
with:
name: ${{matrix.os}} Build
path: dist/${{matrix.os}}-build.exe
publish-to-s3:
runs-on: ubuntu-latest
needs: build
steps:
- uses: actions/checkout@v2
- name: Download Artifacts
uses: actions/download-artifact@v3
with:
path: dist/
- name: Upload to S3
uses: medlypharmacy/s3-artifacts-action@master
with:
aws_access_key_id: ${{ secrets.S3_BUILD_ARTIFACTS_ACCESS_KEY_ID }}
aws_secret_access_key: ${{ secrets.S3_BUILD_ARTIFACTS_SECRET_ACCESS_KEY }}
aws_s3_bucket_name: ${{ secrets.S3_BUCKET_NAME }}
source_path: "dist"
destination_path: "builds"
exclude_repo_from_destination_path: true
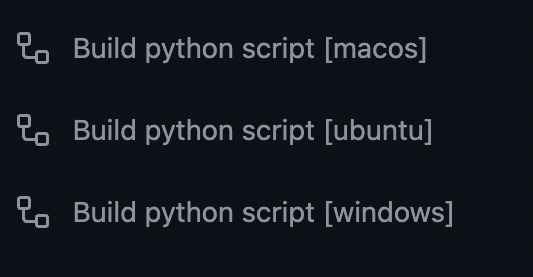
resource_type: "DIRECTORY"Save and push to file to your GitHub repository. A good way to verify if your workflow has been created head onto the Actions tab in your repository and you should be able to see the name of your workflow there, like this:
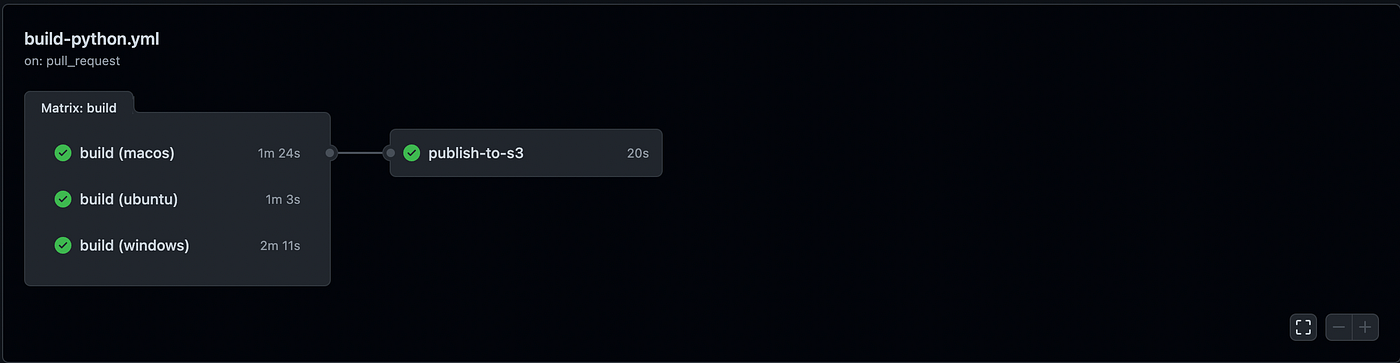
To test if the workflow is working correctly, change the python script locally and push the changes onto your repository. You should see the job start under your workflow, if everything is successful you should see a green check under all jobs, like this:
Now that everything has been pushed to the S3 bucket, head onto your S3 console. Click on the bucket name and navigate to the build folder. You should see three folders name macos-build, windows-build, and ubuntu-build. To get the URL for a specific OS click on their respective folder, you should see the executable file in the root of that folder. Click on that file and copy the S3 URI entry on the right-side pane.
These URLs will always remain static unless you rename the build name.
Now that you have all the URLs, you can use them to ship your executables.
I am using this solution in now of my personal projects called checkpoint, which is a tool that allows you to create multiple named restore points locally with a high level of encryption/security.
Below are some links for your reference: