工欲善其事,必先利其器
久等了,本篇讲一下React项目测试环境搭建。
| 名称 | 作用 |
|---|---|
| jest | 测试框架 |
| testing-library | 测试工具包 |
| msw | mock接口请求 |
当然也会有一些其它可选的工具,如使用mocha代替jest,使用test-cafe、cypress等代替testing-library。这些随个人喜好可以调整。
下面分别介绍下三类工程的测试环境搭建:create-react-app、next.js、umijs。
create-react-app中内置了测试功能,开箱即用。
首先使用create-react-app命令初始化一个工程:
npx create-react-app with-cra
执行这个命令之后,就会得到一个名为with-cra的工程了。
最新版本的create-react-app中已经内置了测试套件,所以现在已经可以执行npm test命令了。
看看它默认生成的测试文件:
import { render, screen } from '@testing-library/react';
import App from './App';

test('renders learn react link', () => {
  render(<App />);
  const linkElement = screen.getByText(/learn react/i);
  expect(linkElement).toBeInTheDocument();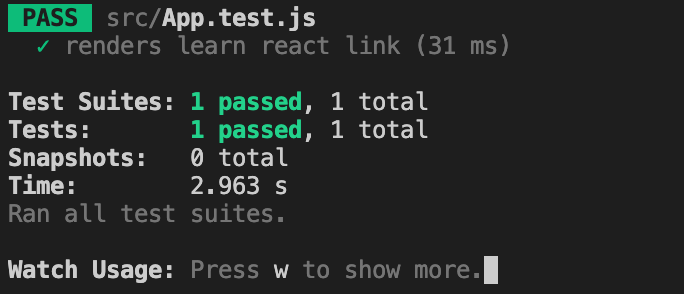
});执行npm test可以看到如下的输出:
Next.js中并没有默认提供test套件,需要新建工程之后手动配置。
执行 npx create-next-app with-nextjs命令,新建一个名为with-nextjs的Next.js工程。
此时执行npm test可以看到Error: no test specified的报错,因为它默认没有配置test套件。
首先,使用npm安装相关依赖:
npm install --save-dev @testing-library/react jest @testing-library/jest-dom identity-obj-proxy然后再加入以下的配置:
package.json文件中,在"scripts"段中新增如下行:
{
  "scripts": {
    "test": "jest"
  }
}添加.babelrc配置文件,内容如下:
{
  "presets": ["next/babel"]
}添加jest.config.json配置文件,内容如下:
{
  "moduleNameMapper": {
    "\\.(css|less|scss|sass)$": "identity-obj-proxy"
  },
  "testEnvironment": "jsdom"
}在pages/index.js同目录下,建立一个新文件index.spec.js,并添加如下的内容:
import { render, screen } from '@testing-library/react';
import '@testing-library/jest-dom'
import Home from './index'

test('renders get started', async () => {
  render(<Home />);
  const greetingElement = screen.getByText('Get started by editing');
  expect(greetingElement).toBeInTheDocument();
})运行npm test,可以看到类似如下的输出,代表测试套件配置完成。
> [email protected] test /Users/yudu/dev/banyudu/react-test-examples/examples/with-nextjs
> jest

 PASS  pages/index.spec.js
  ✓ renders get started (43 ms)

Test Suites: 1 passed, 1 total
Tests:       1 passed, 1 total
Snapshots:   0 total
Time: 1.112 s, estimated 2 sumi.js中也内置了测试功能,但不如CRA的好用,需要额外设置一下。
mkdir with-umi
cd with-umi
npx @umijs/create-umi-app
npm inpm install --save-dev @testing-library/react @testing-library/jest-dom babel-jest @babel/preset-react @babel/preset-env{
"presets": ["@babel/preset-env", ["@babel/preset-react", {
"runtime": "automatic"
}]]
}修改package.json文件,添加jest相关配置:
{
  "jest": {
    "moduleNameMapper": {
      "\\.(css|less|scss|sass)$": "identity-obj-proxy"
    },
    "transform": {
      "\\.[jt]sx?$": "babel-jest"
    },
    "testEnvironment": "jsdom"
  }
}注意这里因为umi-test没有读取jest.config.json,而是读取的package.json中的jestkey,所以不能把jest的配置独立提取成配置文件。
import { render, screen } from '@testing-library/react';
import '@testing-library/jest-dom'
import Home from './index'

test('renders Page index', async () => {
  render(<Home />);
  const greetingElement = screen.getByText('Page index');
  expect(greetingElement).toBeInTheDocument();
})执行测试,得到如下输出:
➜  with-umi git:(main) npm test

> @ test /Users/yudu/dev/banyudu/react-test-examples/examples/with-umi
> umi-test

 PASS  src/pages/index.spec.tsx
  ✓ renders Page index (25 ms)

Test Suites: 1 passed, 1 total
Tests:       1 passed, 1 total
Snapshots:   0 total
Time:        3.83 s
Ran all test suites.
说明测试套件搭建成功。
以上就是针对三种脚手架项目(create-react-app、next.js、umi.js)的测试套件搭建说明。相关的示例代码可以查阅Github项目。
下一期更新一些基础控件的测试套路,敬请期待。