You signed in with another tab or window. Reload to refresh your session.You signed out in another tab or window. Reload to refresh your session.You switched accounts on another tab or window. Reload to refresh your session.Dismiss alert
At this point, we have accomplished all of the features we set out to implement. A user can add a new task, check and uncheck tasks, delete tasks, or edit task names. And they can filter their task list by all, active, or completed tasks.
title
description
robots
extra
Accessibility in React
At this point, we have accomplished all of the features we set out to implement. A user can add a new task, check and uncheck tasks, delete tasks, or edit task names. And they can filter their task list by all, active, or completed tasks.
At this point, we've accomplished all of the features we set out to implement. A user can add a new task, check and uncheck tasks, delete tasks, or edit task names. And they can filter their task list by all, active, or completed tasks.
Or, at least: they can do all of these things with a mouse. Unfortunately, these features are not very accessible to keyboard-only users. Let's explore this now.
Start by clicking on the input at the top of our app, as if you're going to add a new task. You'll see a thick, dashed outline around that input. This outline is your visual indicator that the browser is currently focused on this element. Press the Tab key, and you will see the outline appear around the "Add" button beneath the input. This shows you that the browser's focus has moved.
Press Tab a few more times, and you will see this dashed focus indicator move between each of the filter buttons. Keep going until the focus indicator is around the first "Edit" button. Press Enter.
The <Todo /> component will switch templates, as we designed, and you'll see a form that lets us edit the name of the task.
But where did our focus indicator go?
When we switch between templates in our <Todo /> component, we completely remove the elements that were there before to replace them with something else. That means the element that we were focused on vanishes, and nothing is in focus at all. This could confuse a wide variety of users — particularly users who rely on the keyboard, or users who use a screen reader.
To improve the experience for keyboard and screen-reader users, we should manage the browser's focus ourselves.
When a user toggles a <Todo/> template from viewing to editing, we should focus on the <input> used to rename it; when they toggle back from editing to viewing, we should move focus back to the "Edit" button.
In order to focus on an element in our DOM, we need to tell React which element we want to focus on and how to find it. React's useRef hook creates an object with a single property: current. This property can be a reference to anything we want and look that reference up later. It's particularly useful for referring to DOM elements.
Change the import statement at the top of Todo.js so that it includes useRef:
import React, { useRef, useState } from "react";
Then, create two new constants beneath the hooks in your Todo() function. Each should be a ref - one for the "Edit" button in the view template and one for the edit field in the editing template.
These refs have a default value of null because they will not have value until we attach them to their respective elements. To do that, we'll add an attribute of ref to each element, and set their values to the appropriately named ref objects.
The textbox <input> in your editing template should be updated like this:
To use our refs for their intended purpose, we need to import another React hook: useEffect(). useEffect() is so named because it runs after React renders a given component, and will run any side-effects that we'd like to add to the render process, which we can't run inside the main function body. useEffect() is useful in the current situation because we cannot focus on an element until after the <Todo /> component renders and React knows where our refs are.
Change the import statement of Todo.js again to add useEffect:
import React, { useEffect, useRef, useState } from "react";
useEffect() takes a function as an argument; this function is executed after the component renders. Let's see this in action; put the following useEffect() call just above the return statement in the body of Todo(), and pass into it a function that logs the words "side effect" to your console:
useEffect(() => {
  console.log("side effect");
});
To illustrate the difference between the main render process and code run inside useEffect(), add another log - put this one below the previous addition:
console.log("main render");
Now, open the app in your browser. You should see both messages in your console, with each one repeating three times. Note how "main render" logged first, and "side effect" logged second, even though the "side effect" log appears first in the code.
main render (3)                                     Todo.js:100
side effect (3)                                     Todo.js:98
That's it for our experimentation for now. Delete console.log("main render") now, and lets move on to implementing our focus management.
Now that we know our useEffect() hook works, we can manage focus with it. As a reminder, we want to focus on the editing field when we switch to the editing template.
Update your existing useEffect() hook so that it reads like this:
useEffect(() => {
  if (isEditing) {
    editFieldRef.current.focus();
  }
}, [isEditing]);
These changes make it so that, if isEditing is true, React reads the current value of the editFieldRef and moves browser focus to it. We also pass an array into useEffect() as a second argument. This array is a list of values useEffect() should depend on. With these values included, useEffect() will only run when one of those values changes. We only want to change focus when the value of isEditing changes.
Try it now, and you'll see that when you click an "Edit" button, focus moves to the corresponding edit <input>!
At first glance, getting React to move focus back to our "Edit" button when the edit is saved or cancelled appears deceptively easy. Surely we could add a condition to our useEffect to focus on the edit button if isEditing is false? Let's try it now — update your useEffect() call like so:
This kind of mostly works. Head back to your browser and you'll see that your focus moves between Edit <input> and "Edit" button as you start and end an edit. However, you may have noticed a new problem — the "Edit" button in the final <Todo /> component is focussed immediately on page load, before we even interact with the app!
Our useEffect() hook is behaving exactly as we designed it: it runs as soon as the component renders, sees that isEditing is false, and focuses the "Edit" button. Because there are three instances of <Todo />, we see focus on the last "Edit" button.
We need to refactor our approach so that focus changes only when isEditing changes from one value to another.
In order to meet our refined criteria, we need to know not just the value of isEditing, but also when that value has changed. In order to do that, we need to be able to read the previous value of the isEditing constant. Using pseudocode, our logic should be something like this:
if (wasNotEditingBefore && isEditingNow) {
  focusOnEditField()
}
if (wasEditingBefore && isNotEditingNow) {
  focusOnEditButton()
}
Now we'll define a wasEditing constant beneath the hooks at the top of Todo(). We want this constant to track the previous value of isEditing, so we call usePrevious with isEditing as an argument:
const wasEditing = usePrevious(isEditing);
With this constant, we can update our useEffect() hook to implement the pseudocode we discussed before — update it as follows:
useEffect(() => {
  if (!wasEditing && isEditing) {
    editFieldRef.current.focus();
  }
  if (wasEditing && !isEditing) {
    editButtonRef.current.focus();
  }
}, [wasEditing, isEditing]);
Note that the logic of useEffect() now depends on wasEditing, so we provide it in the array of dependencies.
Again try using the "Edit" and "Cancel" buttons to toggle between the templates of your <Todo /> component; you'll see the browser focus indicator move appropriately, without the problem we discussed at the start of this section.
There's one last keyboard experience gap: when a user deletes a task from the list, the focus vanishes. We're going to follow a pattern similar to our previous changes: we'll make a new ref, and utilize our usePrevious() hook, so that we can focus on the list heading whenever a user deletes a task.
Sometimes, the place we want to send our focus to is obvious: when we toggled our <Todo /> templates, we had an origin point to "go back" to — the "Edit" button. In this case however, since we're completely removing elements from the DOM, we have no place to go back to. The next best thing is an intuitive location somewhere nearby. The list heading is our best choice because it's close to the list item the user will delete, and focusing on it will tell the user how many tasks are left.
Heading elements like our <h2> are not usually focusable. This isn't a problem — we can make any element programmatically focusable by adding the attribute tabindex="-1" to it. This means only focusable with JavaScript. You can't press Tab to focus on an element with a tabindex of -1 the same way you could do with a <button> or <a> element (this can be done using tabindex="0", but that's not really appropriate in this case).
Let's add the tabindex attribute — written as tabIndex in JSX — to the heading above our list of tasks, along with our headingRef:
Note: The tabindex attribute is great for accessibility edge-cases, but you should take great care to not overuse it. Only apply a tabindex to an element when you're absolutely sure that making it focusable will benefit your user in some way. In most cases, you should be utilizing elements that can naturally take focus, such as buttons, anchors, and inputs. Irresponsible usage of tabindex could have a profoundly negative impact on keyboard and screen-reader users!
We want to focus on the element associated with our ref (via the ref attribute) only when our user deletes a task from their list. That's going to require the usePrevious() hook we already used earlier on. Add it to the top of your App.js file, just below the imports:
Now add the following, above the return statement inside the App() function:
const prevTaskLength = usePrevious(tasks.length);
Here we are invoking usePrevious() to track the length of the tasks state, like so:
Note: Since we're now utilizing usePrevious() in two files, a good efficiency refactor would be to move the usePrevious() function into its own file, export it from that file, and import it where you need it. Try doing this as an exercise once you've got to the end.
Now that we've stored how many tasks we previously had, we can set up a useEffect() hook to run when our number of tasks changes, which will focus the heading if the number of tasks we have now is less than with it previously was — i.e. we deleted a task!
Add the following into the body of your App() function, just below your previous additions:
We only try to focus on our list heading if we have fewer tasks now than we did before. The dependencies passed into this hook ensure it will only try to re-run when either of those values (the number of current tasks, or the number of previous tasks) changes.
Now, when you delete a task in your browser, you will see our dashed focus outline appear around the heading above the list.
You've just finished building a React app from the ground up! Congratulations! The skills you've learned here will be a great foundation to build on as you continue working with React.
Most of the time, you can be an effective contributor to a React project even if all you do is think carefully about components and their state and props. Remember to always write the best HTML you can.
useRef() and useEffect() are somewhat advanced features, and you should be proud of yourself for using them! Look out for opportunities to practice them more, because doing so will allow you to create inclusive experiences for users. Remember: our app would have been inaccessible to keyboard users without them!
You can use any AJAX library you like with React. Some popular ones are Axios, jQuery AJAX, and the browser built-in window.fetch.
docs
AJAX and APIs - React
Excerpt
A JavaScript library for building user interfaces
How can I make an AJAX call?
You can use any AJAX library you like with React. Some popular ones are Axios, jQuery AJAX, and the browser built-in window.fetch.
Where in the component lifecycle should I make an AJAX call?
You should populate data with AJAX calls in the componentDidMount lifecycle method. This is so you can use setState to update your component when the data is retrieved.
Example: Using AJAX results to set local state
The component below demonstrates how to make an AJAX call in componentDidMount to populate local component state.
import React, { useState, useEffect } from 'react';

function Example() {
  const [count, setCount] = useState(0);

  // Similar to componentDidMount and componentDidUpdate:
  useEffect(() => {
    // Update the document title using the browser API
    document.title = `You clicked ${count} times`;
  }, [count]);

  return (
    <div>
      <p>You clicked {count} times</p>
      <button onClick={() => setCount(count + 1)}>
        Click me
      </button>
    </div>
  );
}
If you're familiar with React class lifecycle methods, you can think of useEffect Hook as componentDidMount, componentDidUpdate, and componentWillUnmount combined.
By default, React runs the effects after every render — including the first render.
npm install --save react // declarative and flexible JavaScript library for building UInpm install --save react-dom // serves as the entry point of the DOM-related rendering pathsnpm install --save prop-types // runtime type checking for React props and similar objects
// notes: don't forget the command lines
///* ******************************************************************************************* * REACT * https://reactjs.org/docs/react-api.html * ******************************************************************************************* */// Create and return a new React element of the given type.// Code written with JSX will be converted to use React.createElement().// You will not typically invoke React.createElement() directly if you are using JSX.React.createElement(type,[props],[...children])// Clone and return a new React element using element as the starting point.// The resulting element will have the original element's props with the new props merged in shallowly.React.cloneElement(element,[props],[...children])// Verifies the object is a React element. Returns true or false.React.isValidElement(object)React.Children// provides utilities for dealing with the this.props.children opaque data structure.// Invokes a function on every immediate child contained within children with this set to thisArg.React.Children.map(children,function[(thisArg)])// Like React.Children.map() but does not return an array.React.Children.forEach(children,function[(thisArg)])// Returns the total number of components in children,// equal to the number of times that a callback passed to map or forEach would be invoked.React.Children.count(children)// Verifies that children has only one child (a React element) and returns it.// Otherwise this method throws an error.React.Children.only(children)// Returns the children opaque data structure as a flat array with keys assigned to each child.// Useful if you want to manipulate collections of children in your render methods,// especially if you want to reorder or slice this.props.children before passing it down.React.Children.toArray(children)// The React.Fragment component lets you return multiple elements in a render() method without creating an additional DOM element// You can also use it with the shorthand <></>syntax.
React.Fragment/* ******************************************************************************************* * REACT.COMPONENT * React.Component is an abstract base class, so it rarely makes sense to refer to React.Component * directly. Instead, you will typically subclass it, and define at least a render() method. * https://reactjs.org/docs/react-component.html * ******************************************************************************************* */classComponentextendsReact.Component{// Will be called before it is mountedconstructor(props){// Call this method before any other statement// or this.props will be undefined in the constructorsuper(props);// The constructor is also often used to bind event handlers to the class instance.// Binding makes sure the method has access to component attributes like this.props and this.statethis.method=this.method.bind(this);// The constructor is the right place to initialize state.this.state={active: true,// In rare cases, it's okay to initialize state based on props.// This effectively "forks" the props and sets the state with the initial props.// If you "fork" props by using them for state, you might also want to implement componentWillReceiveProps(nextProps)// to keep the state up-to-date with them. But lifting state up is often easier and less bug-prone.color: props.initialColor};}// Enqueues changes to the component state and// tells React that this component and its children need to be re-rendered with the updated state.// setState() does not always immediately update the component. It may batch or defer the update until later.// This makes reading this.state right after calling setState() a potential pitfall.// Instead, use componentDidUpdate or a setState callback.// You may optionally pass an object as the first argument to setState() instead of a function.setState(updater[,callback]){}// Invoked just before mounting occurs (before render())// This is the only lifecycle hook called on server rendering.componentWillMount(){}// Invoked immediately after a component is mounted.// Initialization that requires DOM nodes should go here.// If you need to load data from a remote endpoint, this is a good place to instantiate the network request.// This method is a good place to set up any subscriptions. If you do that, don't forget to unsubscribe in componentWillUnmount().componentDidMount(){}// Invoked before a mounted component receives new props.// If you need to update the state in response to prop changes (for example, to reset it),// you may compare this.props and nextProps and perform state transitions using this.setState() in this method.componentWillReceiveProps(nextProps){}// Let React know if a component's output is not affected by the current change in state or props.// The default behavior is to re-render on every state change, and in the vast majority of cases you should rely on the default behavior.// shouldComponentUpdate() is invoked before rendering when new props or state are being received. Defaults to true.// This method is not called for the initial render or when forceUpdate() is used.// Returning false does not prevent child components from re-rendering when their state changes.shouldComponentUpdate(nextProps,nextState){}// Invoked just before rendering when new props or state are being received.// Use this as an opportunity to perform preparation before an update occurs. This method is not called for the initial render.// Note that you cannot call this.setState() here; nor should you do anything else// (e.g. dispatch a Redux action) that would trigger an update to a React component before componentWillUpdate() returns.// If you need to update state in response to props changes, use componentWillReceiveProps() instead.componentWillUpdate(nextProps,nextState){}// Invoked immediately after updating occurs. This method is not called for the initial render.// Use this as an opportunity to operate on the DOM when the component has been updated.// This is also a good place to do network requests as long as you compare the current props to previous props (e.g. a network request may not be necessary if the props have not changed).componentDidUpdate(prevProps,prevState){}// Invoked immediately before a component is unmounted and destroyed.// Perform any necessary cleanup in this method, such as invalidating timers, canceling network requests,// or cleaning up any subscriptions that were created in componentDidMount().componentWillUnmount(){}// Error boundaries are React components that catch JavaScript errors anywhere in their child component tree,// log those errors, and display a fallback UI instead of the component tree that crashed.// Error boundaries catch errors during rendering, in lifecycle methods, and in constructors of the whole tree below them.componentDidCatch(){}// This method is required.// It should be pure, meaning that it does not modify component state,// it returns the same result each time it's invoked, and// it does not directly interact with the browser (use lifecycle methods for this)// It must return one of the following types: react elements, string and numbers, portals, null or booleans.render(){// Contains the props that were defined by the caller of this component.console.log(this.props);// Contains data specific to this component that may change over time.// The state is user-defined, and it should be a plain JavaScript object.// If you don't use it in render(), it shouldn't be in the state.// For example, you can put timer IDs directly on the instance.// Never mutate this.state directly, as calling setState() afterwards may replace the mutation you made.// Treat this.state as if it were immutable.console.log(this.state);return(<div>{/* Comment goes here */}
Hello, {this.props.name}!
</div>);}}// Can be defined as a property on the component class itself, to set the default props for the class.// This is used for undefined props, but not for null props.Component.defaultProps={color: 'blue'};component=newComponent();// By default, when your component's state or props change, your component will re-render.// If your render() method depends on some other data, you can tell React that the component needs re-rendering by calling forceUpdate().// Normally you should try to avoid all uses of forceUpdate() and only read from this.props and this.state in render().component.forceUpdate(callback)/* ******************************************************************************************* * REACT.DOM * The react-dom package provides DOM-specific methods that can be used at the top level of * your app and as an escape hatch to get outside of the React model if you need to. * Most of your components should not need to use this module. * https://reactjs.org/docs/react-dom.html * ******************************************************************************************* */// Render a React element into the DOM in the supplied container and return a reference// to the component (or returns null for stateless components).ReactDOM.render(element,container[,callback])// Same as render(), but is used to hydrate a container whose HTML contents were rendered// by ReactDOMServer. React will attempt to attach event listeners to the existing markup.ReactDOM.hydrate(element,container[,callback])// Remove a mounted React component from the DOM and clean up its event handlers and state.// If no component was mounted in the container, calling this function does nothing.// Returns true if a component was unmounted and false if there was no component to unmount.ReactDOM.unmountComponentAtNode(container)// If this component has been mounted into the DOM, this returns the corresponding native browser// DOM element. This method is useful for reading values out of the DOM, such as form field values// and performing DOM measurements. In most cases, you can attach a ref to the DOM node and avoid// using findDOMNode at all.ReactDOM.findDOMNode(component)// Creates a portal. Portals provide a way to render children into a DOM node that exists outside// the hierarchy of the DOM component.ReactDOM.createPortal(child,container)/* ******************************************************************************************* * REACTDOMSERVER * The ReactDOMServer object enables you to render components to static markup. * https://reactjs.org/docs/react-dom.html * ******************************************************************************************* */// Render a React element to its initial HTML. React will return an HTML string.// You can use this method to generate HTML on the server and send the markup down on the initial// request for faster page loads and to allow search engines to crawl your pages for SEO purposes.ReactDOMServer.renderToString(element)// Similar to renderToString, except this doesn't create extra DOM attributes that React uses// internally, such as data-reactroot. This is useful if you want to use React as a simple static// page generator, as stripping away the extra attributes can save some bytes.ReactDOMServer.renderToStaticMarkup(element)// Render a React element to its initial HTML. Returns a Readable stream that outputs an HTML string.// The HTML output by this stream is exactly equal to what ReactDOMServer.renderToString would return.// You can use this method to generate HTML on the server and send the markup down on the initial// request for faster page loads and to allow search engines to crawl your pages for SEO purposes.ReactDOMServer.renderToNodeStream(element)// Similar to renderToNodeStream, except this doesn't create extra DOM attributes that React uses// internally, such as data-reactroot. This is useful if you want to use React as a simple static// page generator, as stripping away the extra attributes can save some bytes.ReactDOMServer.renderToStaticNodeStream(element)/* ******************************************************************************************* * TYPECHECKING WITH PROPTYPES * https://reactjs.org/docs/typechecking-with-proptypes.html * ******************************************************************************************* */importPropTypesfrom'prop-types';MyComponent.propTypes={// You can declare that a prop is a specific JS type. By default, these// are all optional.optionalArray: PropTypes.array,optionalBool: PropTypes.bool,optionalFunc: PropTypes.func,optionalNumber: PropTypes.number,optionalObject: PropTypes.object,optionalString: PropTypes.string,optionalSymbol: PropTypes.symbol,// Anything that can be rendered: numbers, strings, elements or an array// (or fragment) containing these types.optionalNode: PropTypes.node,// A React element.optionalElement: PropTypes.element,// You can also declare that a prop is an instance of a class. This uses// JS's instanceof operator.optionalMessage: PropTypes.instanceOf(Message),// You can ensure that your prop is limited to specific values by treating// it as an enum.optionalEnum: PropTypes.oneOf(['News','Photos']),// An object that could be one of many typesoptionalUnion: PropTypes.oneOfType([PropTypes.string,PropTypes.number,PropTypes.instanceOf(Message)]),// An array of a certain typeoptionalArrayOf: PropTypes.arrayOf(PropTypes.number),// An object with property values of a certain typeoptionalObjectOf: PropTypes.objectOf(PropTypes.number),// An object taking on a particular shapeoptionalObjectWithShape: PropTypes.shape({color: PropTypes.string,fontSize: PropTypes.number}),// You can chain any of the above with `isRequired` to make sure a warning// is shown if the prop isn't provided.requiredFunc: PropTypes.func.isRequired,// A value of any data typerequiredAny: PropTypes.any.isRequired,// You can also specify a custom validator. It should return an Error// object if the validation fails. Don't `console.warn` or throw, as this// won't work inside `oneOfType`.customProp: function(props,propName,componentName){if(!/matchme/.test(props[propName])){returnnewError('Invalid prop `'+propName+'` supplied to'+' `'+componentName+'`. Validation failed.');}},// You can also supply a custom validator to `arrayOf` and `objectOf`.// It should return an Error object if the validation fails. The validator// will be called for each key in the array or object. The first two// arguments of the validator are the array or object itself, and the// current item's key.customArrayProp: PropTypes.arrayOf(function(propValue,key,componentName,location,propFullName){if(!/matchme/.test(propValue[key])){returnnewError('Invalid prop `'+propFullName+'` supplied to'+' `'+componentName+'`. Validation failed.');}})};
Advanced Components
Options (ES5)
propTypes object: Type validation in development mode
getDefaultProps function(): object of default props
getInitialState function(): object of the initial state
React is a JavaScript library that aims to simplify development of visual interfaces.
title
description
robots
extra
Comprehensive Guide To ReactJS
Its primary goal is to make it easy to reason about an interface and its state at any point in time, by dividing the UI into a collection of components.
React is a JavaScript library that aims to simplify development of visual interfaces.
Developed at Facebook and released to the world in 2013, it drives some of the most widely used apps, powering Facebook and Instagram among countless other applications.
Its primary goal is to make it easy to reason about an interface and its state at any point in time, by dividing the UI into a collection of components.
Why is React so popular?
React has taken the frontend web development world by storm. Why?
Less complex than the other alternatives
At the time when React was announced, Ember.js and Angular 1.x were the predominant choices as a framework. Both these imposed so many conventions on the code that porting an existing app was not convenient at all.
React made a choice to be very easy to integrate into an existing project, because that's how they had to do it at Facebook in order to introduce it to the existing codebase. Also, those 2 frameworks brought too much to the table, while React only chose to implement the View layer instead of the full MVC stack.
Perfect timing
At the time, Angular 2.x was announced by Google, along with the backwards incompatibility and major changes it was going to bring. Moving from Angular 1 to 2 was like moving to a different framework, so this, along with execution speed improvements that React promised, made it something developers were eager to try.
Backed by Facebook
Being backed by Facebook is, of course, going to benefit a project if it turns out to be successful.
Facebook currently has a strong interest in React, sees the value of it being Open Source, and this is a huge plus for all the developers using it in their own projects.
Is React simple to learn?
Even though I said that React is simpler than alternative frameworks, diving into React is still complicated, but mostly because of the corollary technologies that can be integrated with React, like Redux and GraphQL.
React in itself has a very small API, and you basically need to understand 4 concepts to get started:
Components
JSX
State
Props
All these (and more) are explained in this handbook.
How to install React on your development computer
How do you install React?
React is a library, so saying install might sound a bit weird. Maybe setup is a better word, but you get the concept.
There are various ways to setup React so that it can be used on your app or site.
Load React directly in the web page
The simplest one is to add the React JavaScript file into the page directly. This is best when your React app will interact with the elements present on a single page, and not actually controls the whole navigation aspect.
In this case, you add 2 script tags to the end of the body tag:
Please change the version number to the latest version of React available.
Here we loaded both React and React DOM. Why 2 libraries? Because React is 100% independent from the browser and can be used outside it (for example on Mobile devices with React Native). Hence the need for React DOM, to add the wrappers for the browser.
After those tags you can load your JavaScript files that use React, or even inline JavaScript in a script tag:
<script src="app.js">
</script>

<!-- or -->

<script>
  //my app
</script>
Starting in this way with script tags is good for building prototypes and enables a quick start without having to set up a complex workflow.
How to use create-react-app
create-react-app is a project aimed at getting you up to speed with React in no time, and any React app that needs to outgrow a single page will find that create-react-app meets that need.
You start by using [npx](https://flaviocopes.com/npx/), which is an easy way to download and execute Node.js commands without installing them. npx comes with npm (since version 5.2) and if you don't have npm installed already, do it now from https://nodejs.org (npm is installed with Node).
If you are unsure which version of npm you have, run npm -v to check if you need to update.
Tip: check out my OSX terminal tutorial if you're unfamiliar with using the terminal, applies to Linux as well — I'm sorry but I don't have a tutorial for Windows at the moment, but Google is your friend.
When you run npx create-react-app <app-name>, npx is going to download the most recent create-react-app release, run it, and then remove it from your system. This is great because you will never have an outdated version on your system, and every time you run it, you're getting the latest and greatest code available.
Let's start then:
npx create-react-app todolist
This is when it finished running:
create-react-app created a files structure in the folder you told (todolist in this case), and initialized a Git repository.
It also added a few commands in the package.json file, so you can immediately start the app by going into the folder and run npm start.
In addition to npm start, create-react-app added a few other commands:
npm run build: to build the React application files in the build folder, ready to be deployed to a server
Ejecting is the act of deciding that create-react-app has done enough for you, but you want to do more than what it allows.
Since create-react-app is a set of common denominator conventions and a limited amount of options, it's probable that at some point your needs will demand something unique that outgrows the capabilities of create-react-app.
When you eject, you lose the ability of automatic updates but you gain more flexibility in the Babel and Webpack configuration.
When you eject the action is irreversible. You will get 2 new folders in your application directory, config and scripts. Those contain the configurations - and now you can start editing them.
If you already have a React app installed using an older version of React, first check the version by adding console.log(React.version) in your app, then you can update by running yarn add [email protected], and yarn will prompt you to update (choose the latest version available). Repeat for yarn add [email protected] (change "16.7" with whatever is the newest version of React at the moment)
CodeSandbox
An easy way to have the create-react-app structure, without installing it, is to go to https://codesandbox.io/s and choose "React".
CodeSandbox is a great way to start a React project without having to install it locally.
Codepen "pens" are great for quick projects with one JavaScript file, while "projects" are great for projects with multiple files, like the ones we'll use the most when building React apps.
One thing to note is that in Codepen, due to how it works internally, you don't use the regular ES Modules import syntax, but rather to import for example useState, you use
const { useState } = React
and not
import { useState } from 'react'
SECTION 1: MODERN JAVASCRIPT CORE CONCEPTS YOU NEED TO KNOW TO USE REACT
Find out if you have to learn something before diving into learning React
If you are willing to learn React, you first need to have a few things under your belt. There are some prerequisite technologies you have to be familiar with, in particular related to some of the more recent JavaScript features you'll use over and over in React.
Sometimes people think one particular feature is provided by React, but instead it's just modern JavaScript syntax.
There is no point in being an expert in those topics right away, but the more you dive into React, the more you'll need to master those.
I will mention a list of things to get you up to speed quickly.
Variables
A variable is a literal assigned to an identifier, so you can reference and use it later in the program.
Variables in JavaScript do not have any type attached. Once you assign a specific literal type to a variable, you can later reassign the variable to host any other type, without type errors or any issue.
This is why JavaScript is sometimes referred to as "untyped".
A variable must be declared before you can use it. There are 3 ways to do this, using var, let or const, and those 3 ways differ in how you can interact with the variable later on.
Using var
Until ES2015, var was the only construct available for defining variables.
var a = 0
If you forget to add var you will be assigning a value to an undeclared variable, and the results might vary.
In modern environments, with strict mode enabled, you will get an error. In older environments (or with strict mode disabled) this will simply initialize the variable and assign it to the global object.
If you don't initialize the variable when you declare it, it will have the undefined value until you assign a value to it.
var a //typeof a === 'undefined'
You can redeclare the variable many times, overriding it:
var a = 1
var a = 2
You can also declare multiple variables at once in the same statement:
var a = 1, b = 2jsx
The scope is the portion of code where the variable is visible.
A variable initialized with var outside of any function is assigned to the global object, has a global scope and is visible everywhere. A variable initialized with var inside a function is assigned to that function, it's local and is visible only inside it, just like a function parameter.
Any variable defined in a function with the same name as a global variable takes precedence over the global variable, shadowing it.
It's important to understand that a block (identified by a pair of curly braces) does not define a new scope. A new scope is only created when a function is created, because var does not have block scope, but function scope.
Inside a function, any variable defined in it is visible throughout all the function code, even if the variable is declared at the end of the function it can still be referenced in the beginning, because JavaScript before executing the code actually moves all variables on top (something that is called hoisting). To avoid confusion, always declare variables at the beginning of a function.
Using let
let is a new feature introduced in ES2015 and it's essentially a block scoped version of var. Its scope is limited to the block, statement or expression where it's defined, and all the contained inner blocks.
Modern JavaScript developers might choose to only use let and completely discard the use of var.
If let seems an obscure term, just read let color = 'red' as let the color be red and it all makes much more sense
Defining let outside of any function - contrary to var - does not create a global variable.
Using const
Variables declared with var or let can be changed later on in the program, and reassigned. Once a const is initialized, its value can never be changed again, and it can't be reassigned to a different value.
const a = 'test'
We can't assign a different literal to the a const. We can however mutate a if it's an object that provides methods that mutate its contents.
const does not provide immutability, just makes sure that the reference can't be changed.
const has block scope, same as let.
Modern JavaScript developers might choose to always use const for variables that don't need to be reassigned later in the program.
Why? Because we should always use the simplest construct available to avoid making errors down the road.
Arrow functions
Arrow functions were introduced in ES6 / ECMAScript 2015, and since their introduction they changed forever how JavaScript code looks (and works).
In my opinion this change was so welcoming that you now rarely see the usage of the function keyword in modern codebases.
Visually, it's a simple and welcome change, which allows you to write functions with a shorter syntax, from:
const myFunction = function() {
  //...
}
to
const myFunction = () => {
  //...
}
If the function body contains just a single statement, you can omit the brackets and write all on a single line:
Another example, when returning an object, remember to wrap the curly brackets in parentheses to avoid it being considered the wrapping function body brackets:
this is a concept that can be complicated to grasp, as it varies a lot depending on the context and also varies depending on the mode of JavaScript (strict mode or not).
It's important to clarify this concept because arrow functions behave very differently compared to regular functions.
When defined as a method of an object, in a regular function this refers to the object, so you can do:
The this scope with arrow functions is inherited from the execution context. An arrow function does not bind this at all, so its value will be looked up in the call stack, so in this code car.fullName() will not work, and will return the string "undefined undefined":
Due to this, arrow functions are not suited as object methods.
Arrow functions cannot be used as constructors either, when instantiating an object will raise a TypeError.
This is where regular functions should be used instead, when dynamic context is not needed.
This is also a problem when handling events. DOM Event listeners set this to be the target element, and if you rely on this in an event handler, a regular function is necessary:
const link = document.querySelector('#link')
link.addEventListener('click', () => {
  // this === window
})

const link = document.querySelector('#link')
link.addEventListener('click', function() {
  // this === link
})
Rest and spread
You can expand an array, an object or a string using the spread operator ....
Let's start with an array example. Given
const a = [1, 2, 3]
you can create a new array using
const b = [...a, 4, 5, 6]
You can also create a copy of an array using
const c = [...a]
This works for objects as well. Clone an object with:
const newObj = { ...oldObj }
Using strings, the spread operator creates an array with each char in the string:
Given an object, using the destructuring syntax you can extract just some values and put them into named variables:
const person = {
  firstName: 'Tom',
  lastName: 'Cruise',
  actor: true,
  age: 54 //made up
}

const { firstName: name, age } = person //name: Tom, age: 54
name and age contain the desired values.
The syntax also works on arrays:
const a = [1, 2, 3, 4, 5]
const [first, second] = a
This statement creates 3 new variables by getting the items with index 0, 1, 4 from the array a:
const [first, second, , , fifth] = a
Template literals
Template Literals are a new ES2015 / ES6 feature that allows you to work with strings in a novel way compared to ES5 and below.
The syntax at a first glance is very simple, just use backticks instead of single or double quotes:
const a_string = `something`
They are unique because they provide a lot of features that normal strings built with quotes do not, in particular:
they offer a great syntax to define multiline strings
they provide an easy way to interpolate variables and expressions in strings
they allow you to create DSLs with template tags (DSL means domain specific language, and it's for example used in React by Styled Components, to define CSS for a component)
Let's dive into each of these in detail.
Multiline strings
Pre-ES6, to create a string spanning over two lines you had to use the \ character at the end of a line:
const string =
  'first part \
second part'
This allows to create a string on 2 lines, but it's rendered on just one line:
first part second part
To render the string on multiple lines as well, you explicitly need to add \n at the end of each line, like this:
const string =
  'first line\n \
second line'
or
const string = 'first line\n' + 'second line'
Template literals make multiline strings much simpler.
Once a template literal is opened with the backtick, you just press enter to create a new line, with no special characters, and it's rendered as-is:
const string = `Hey
this
string
is awesome!`
Keep in mind that space is meaningful, so doing this:
const string = `First
                Second`
is going to create a string like this:
First
                Second
an easy way to fix this problem is by having an empty first line, and appending the trim() method right after the closing backtick, which will eliminate any space before the first character:
const string = `
First
Second`.trim()
Interpolation
Template literals provide an easy way to interpolate variables and expressions into strings.
In 2015 the ECMAScript 6 (ES6) standard introduced classes.
JavaScript has a quite uncommon way to implement inheritance: prototypical inheritance. Prototypal inheritance, while in my opinion great, is unlike most other popular programming language's implementation of inheritance, which is class-based.
People coming from Java or Python or other languages had a hard time understanding the intricacies of prototypal inheritance, so the ECMAScript committee decided to sprinkle syntactic sugar on top of prototypical inheritance so that it resembles how class-based inheritance works in other popular implementations.
This is important: JavaScript under the hood is still the same, and you can access an object prototype in the usual way.
A class definition
This is how a class looks.
class Person {
  constructor(name) {
    this.name = name
  }

  hello() {
    return 'Hello, I am ' + this.name + '.'
  }
}
A class has an identifier, which we can use to create new objects using new ClassIdentifier().
When the object is initialized, the constructor method is called, with any parameters passed.
A class also has as many methods as it needs. In this case hello is a method and can be called on all objects derived from this class:
const flavio = new Person('Flavio')
flavio.hello()
Class inheritance
A class can extend another class, and objects initialized using that class inherit all the methods of both classes.
If the inherited class has a method with the same name as one of the classes higher in the hierarchy, the closest method takes precedence:
class Programmer extends Person {
  hello() {
    return super.hello() + ' I am a programmer.'
  }
}

const flavio = new Programmer('Flavio')
flavio.hello()
(the above program prints "Hello, I am Flavio. I am a programmer.")
Classes do not have explicit class variable declarations, but you must initialize any variable in the constructor.
Inside a class, you can reference the parent class calling super().
Static methods
Normally methods are defined on the instance, not on the class.
Static methods are executed on the class instead:
class Person {
  static genericHello() {
    return 'Hello'
  }
}

Person.genericHello() //Hello
Private methods
JavaScript does not have a built-in way to define private or protected methods.
There are workarounds, but I won't describe them here.
Getters and setters
You can add methods prefixed with get or set to create a getter and setter, which are two different pieces of code that are executed based on what you are doing: accessing the variable, or modifying its value.
class Person {
  constructor(name) {
    this.name = name
  }

  set name(value) {
    this.name = value
  }

  get name() {
    return this.name
  }
}
If you only have a getter, the property cannot be set, and any attempt at doing so will be ignored:
class Person {
  constructor(name) {
    this.name = name
  }

  get name() {
    return this.name
  }
}
If you only have a setter, you can change the value but not access it from the outside:
class Person {
  constructor(name) {
    this.name = name
  }

  set name(value) {
    this.name = value
  }
}
Callbacks
Computers are asynchronous by design.
Asynchronous means that things can happen independently of the main program flow.
In the current consumer computers, every program runs for a specific time slot, and then it stops its execution to let another program continue its execution. This thing runs in a cycle so fast that's impossible to notice, and we think our computers run many programs simultaneously, but this is an illusion (except on multiprocessor machines).
Programs internally use interrupts, a signal that's emitted to the processor to gain the attention of the system.
I won't go into the internals of this, but just keep in mind that it's normal for programs to be asynchronous, and halt their execution until they need attention, and the computer can execute other things in the meantime. When a program is waiting for a response from the network, it cannot halt the processor until the request finishes.
Normally, programming languages are synchronous, and some provide a way to manage asynchronicity, in the language or through libraries. C, Java, C#, PHP, Go, Ruby, Swift, Python, they are all synchronous by default. Some of them handle async by using threads, spawning a new process.
JavaScript is synchronous by default and is single threaded. This means that code cannot create new threads and run in parallel.
Lines of code are executed in series, one after another, for example:
const a = 1
const b = 2
const c = a * b
console.log(c)
doSomething()
But JavaScript was born inside the browser, its main job, in the beginning, was to respond to user actions, like onClick, onMouseOver, onChange, onSubmit and so on. How could it do this with a synchronous programming model?
The answer was in its environment. The browser provides a way to do it by providing a set of APIs that can handle this kind of functionality.
More recently, Node.js introduced a non-blocking I/O environment to extend this concept to file access, network calls and so on.
You can't know when a user is going to click a button, so what you do is, you define an event handler for the click event. This event handler accepts a function, which will be called when the event is triggered:
A callback is a simple function that's passed as a value to another function, and will only be executed when the event happens. We can do this because JavaScript has first-class functions, which can be assigned to variables and passed around to other functions (called higher-order functions)
It's common to wrap all your client code in a load event listener on the windowobject, which runs the callback function only when the page is ready:
window.addEventListener('load', () => {
  //window loaded
  //do what you want
})
Callbacks are used everywhere, not just in DOM events.
One common example is by using timers:
setTimeout(() => {
  // runs after 2 seconds
}, 2000)
XHR requests also accept a callback, in this example by assigning a function to a property that will be called when a particular event occurs (in this case, the state of the request changes):
How do you handle errors with callbacks? One very common strategy is to use what Node.js adopted: the first parameter in any callback function is the error object: error-first callbacks
If there is no error, the object is null. If there is an error, it contains some description of the error and other information.
fs.readFile('/file.json', (err, data) => {
  if (err !== null) {
    //handle error
    console.log(err)
    return
  }

  //no errors, process data
  console.log(data)
})
The problem with callbacks
Callbacks are great for simple cases!
However every callback adds a level of nesting, and when you have lots of callbacks, the code starts to be complicated very quickly:
This is just a simple 4-levels code, but I've seen much more levels of nesting and it's not fun.
How do we solve this?
ALTERNATIVES TO CALLBACKS
Starting with ES6, JavaScript introduced several features that help us with asynchronous code that do not involve using callbacks:
Promises (ES6)
Async/Await (ES8)
Promises
Promises are one way to deal with asynchronous code, without writing too many callbacks in your code.
Although they've been around for years, they were standardized and introduced in ES2015, and now they have been superseded in ES2017 by async functions.
Async functions use the promises API as their building block, so understanding them is fundamental even if in newer code you'll likely use async functions instead of promises.
How promises work, in brief
Once a promise has been called, it will start in pending state. This means that the caller function continues the execution, while it waits for the promise to do its own processing, and give the caller function some feedback.
At this point, the caller function waits for it to either return the promise in a resolved state, or in a rejected state, but as you know JavaScript is asynchronous, so the function continues its execution while the promise does it work.
Which JS API use promises?
In addition to your own code and library code, promises are used by standard modern Web APIs like Fetch or Service Workers.
It's unlikely that in modern JavaScript you'll find yourself not using promises, so let's start diving right into them.
Creating a promise
The Promise API exposes a Promise constructor, which you initialize using new Promise():
let done = true

const isItDoneYet = new Promise((resolve, reject) => {
  if (done) {
    const workDone = 'Here is the thing I built'
    resolve(workDone)
  } else {
    const why = 'Still working on something else'
    reject(why)
  }
})
As you can see the promise checks the done global constant, and if that's true, we return a resolved promise, otherwise a rejected promise.
Using resolve and reject we can communicate back a value, in the above case we just return a string, but it could be an object as well.
Consuming a promise
In the last section, we introduced how a promise is created.
Now let's see how the promise can be consumed or used.
Running checkIfItsDone() will execute the isItDoneYet() promise and will wait for it to resolve, using the then callback, and if there is an error, it will handle it in the catch callback.
Chaining promises
A promise can be returned to another promise, creating a chain of promises.
A great example of chaining promises is given by the Fetch API, a layer on top of the XMLHttpRequest API, which we can use to get a resource and queue a chain of promises to execute when the resource is fetched.
The Fetch API is a promise-based mechanism, and calling fetch() is equivalent to defining our own promise using new Promise().
In this example, we call fetch() to get a list of TODO items from the todos.json file found in the domain root, and we create a chain of promises.
Running fetch() returns a response, which has many properties, and within those we reference:
status, a numeric value representing the HTTP status code
statusText, a status message, which is OK if the request succeeded
response also has a json() method, which returns a promise that will resolve with the content of the body processed and transformed into JSON.
So given those premises, this is what happens: the first promise in the chain is a function that we defined, called status(), that checks the response status and if it's not a success response (between 200 and 299), it rejects the promise.
This operation will cause the promise chain to skip all the chained promises listed and will skip directly to the catch() statement at the bottom, logging the Request failed text along with the error message.
If that succeeds instead, it calls the json() function we defined. Since the previous promise, when successful, returned the response object, we get it as an input to the second promise.
In this case, we return the data JSON processed, so the third promise receives the JSON directly:
.then((data) => {
  console.log('Request succeeded with JSON response', data)
})
and we simply log it to the console.
Handling errors
In the above example, in the previous section, we had a catch that was appended to the chain of promises.
When anything in the chain of promises fails and raises an error or rejects the promise, the control goes to the nearest catch() statement down the chain.
new Promise((resolve, reject) => {
  throw new Error('Error')
}).catch(err => {
  console.error(err)
})

// or

new Promise((resolve, reject) => {
  reject('Error')
}).catch(err => {
  console.error(err)
})
Cascading errors
If inside the catch() you raise an error, you can append a second catch() to handle it, and so on.
new Promise((resolve, reject) => {
  throw new Error('Error')
})
  .catch(err => {
    throw new Error('Error')
  })
  .catch(err => {
    console.error(err)
  })
Orchestrating promises with Promise.all()
If you need to synchronize different promises, Promise.all() helps you define a list of promises, and execute something when they are all resolved.
You are not limited to using fetch of course, any promise is good to go.
Orchestrating promises with Promise.race()
Promise.race() runs as soon as one of the promises you pass to it resolves, and it runs the attached callback just once with the result of the first promise resolved.
JavaScript evolved in a very short time from callbacks to promises (ES2015), and since ES2017 asynchronous JavaScript is even simpler with the async/await syntax.
Async functions are a combination of promises and generators, and basically, they are a higher level abstraction over promises. Let me repeat: async/await is built on promises.
Why were async/await introduced?
They reduce the boilerplate around promises, and the "don't break the chain" limitation of chaining promises.
When Promises were introduced in ES2015, they were meant to solve a problem with asynchronous code, and they did, but over the 2 years that separated ES2015 and ES2017, it was clear that promises could not be the final solution.
Promises were introduced to solve the famous callback hell problem, but they introduced complexity on their own, and syntax complexity.
They were good primitives around which a better syntax could be exposed to developers, so when the time was right we got async functions.
They make the code look like it's synchronous, but it's asynchronous and non-blocking behind the scenes.
How it works
An async function returns a promise, like in this example:
const doSomethingAsync = () => {
  return new Promise(resolve => {
    setTimeout(() => resolve('I did something'), 3000)
  })
}
When you want to call this function you prepend await, and the calling code will stop until the promise is resolved or rejected. One caveat: the client function must be defined as async. Here's an example:
The above code will print the following to the browser console:
Before
After
I did something //after 3s
Promise all the things
Prepending the async keyword to any function means that the function will return a promise.
Even if it's not doing so explicitly, it will internally make it return a promise.
This is why this code is valid:
const aFunction = async () => {
  return 'test'
}

aFunction().then(alert) // This will alert 'test'
and it's the same as:
const aFunction = async () => {
  return Promise.resolve('test')
}

aFunction().then(alert) // This will alert 'test'
The code is much simpler to read
As you can see in the example above, our code looks very simple. Compare it to code using plain promises, with chaining and callback functions.
And this is a very simple example, the major benefits will arise when the code is much more complex.
For example here's how you would get a JSON resource, and parse it, using promises:
const getFirstUserData = () => {
  return fetch('/users.json') // get users list
    .then(response => response.json()) // parse JSON
    .then(users => users[0]) // pick first user
    .then(user => fetch(`/users/${user.name}`)) // get user data
    .then(userResponse => userResponse.json()) // parse JSON
}

getFirstUserData()
And here is the same functionality provided using await/async:
const getFirstUserData = async () => {
  const response = await fetch('/users.json') // get users list
  const users = await response.json() // parse JSON
  const user = users[0] // pick first user
  const userResponse = await fetch(`/users/${user.name}`) // get user data
  const userData = await userResponse.json() // parse JSON
  return userData
}

getFirstUserData()
Multiple async functions in series
Async functions can be chained very easily, and the syntax is much more readable than with plain promises:
const promiseToDoSomething = () => {
  return new Promise(resolve => {
    setTimeout(() => resolve('I did something'), 10000)
  })
}

const watchOverSomeoneDoingSomething = async () => {
  const something = await promiseToDoSomething()
  return something + ' and I watched'
}

const watchOverSomeoneWatchingSomeoneDoingSomething = async () => {
  const something = await watchOverSomeoneDoingSomething()
  return something + ' and I watched as well'
}

watchOverSomeoneWatchingSomeoneDoingSomething().then(res => {
  console.log(res)
})
Will print:
I did something and I watched and I watched as well
Easier debugging
Debugging promises is hard because the debugger will not step over asynchronous code.
Async/await makes this very easy because to the compiler it's just like synchronous code.
ES Modules
ES Modules is the ECMAScript standard for working with modules.
While Node.js has been using the CommonJS standard for years, the browser never had a module system, as every major decision such as a module system must be first standardized by ECMAScript and then implemented by the browser.
This standardization process completed with ES6 and browsers started implementing this standard trying to keep everything well aligned, working all in the same way, and now ES Modules are supported in Chrome, Safari, Edge and Firefox (since version 60).
Modules are very cool, because they let you encapsulate all sorts of functionality, and expose this functionality to other JavaScript files, as libraries.
The ES Modules Syntax
The syntax to import a module is:
import package from 'module-name'
while CommonJS uses
const package = require('module-name')
A module is a JavaScript file that exports one or more values (objects, functions or variables), using the export keyword. For example, this module exports a function that returns a string uppercase:
uppercase.js
export default str => str.toUpperCase()
In this example, the module defines a single, default export, so it can be an anonymous function. Otherwise it would need a name to distinguish it from other exports.
Now, any other JavaScript module can import the functionality offered by uppercase.js by importing it.
An HTML page can add a module by using a <script> tag with the special type="module" attribute:
Modules are fetched using CORS. This means that if you reference scripts from other domains, they must have a valid CORS header that allows cross-site loading (like Access-Control-Allow-Origin: *)
ES Modules are one of the biggest features introduced in modern browsers. They are part of ES6 but the road to implement them has been long.
We can now use them! But we must also remember that having more than a few modules is going to have a performance hit on our pages, as it's one more step that the browser must perform at runtime.
Webpack is probably going to still be a huge player even if ES Modules land in the browser, but having such a feature directly built in the language is huge for a unification of how modules work client-side and on Node.js as well.
SECTION 2: REACT CONCEPTS
Single Page Applications
React Applications are also called Single Page Applications. What does this mean?
In the past, when browsers were much less capable than today, and JavaScript performance was poor, every page was coming from a server. Every time you clicked something, a new request was made to the server and the browser subsequently loaded the new page.
Only very innovative products worked differently, and experimented with new approaches.
Today, popularized by modern frontend JavaScript frameworks like React, an app is usually built as a single page application: you only load the application code (HTML, CSS, JavaScript) once, and when you interact with the application, what generally happens is that JavaScript intercepts the browser events and instead of making a new request to the server that then returns a new document, the client requests some JSON or performs an action on the server but the page that the user sees is never completely wiped away, and behaves more like a desktop application.
Single page applications are built in JavaScript (or at least compiled to JavaScript) and work in the browser.
The technology is always the same, but the philosophy and some key components of how the application works are different.
Examples of Single Page Applications
Some notable examples:
Gmail
Google Maps
Facebook
Twitter
Google Drive
Pros and cons of SPAs
An SPA feels much faster to the user, because instead of waiting for the client-server communication to happen, and wait for the browser to re-render the page, you can now have instant feedback. This is the responsibility of the application maker, but you can have transitions and spinners and any kind of UX improvement that is certainly better than the traditional workflow.
In addition to making the experience faster to the user, the server will consume less resources because you can focus on providing an efficient API instead of building the layouts server-side.
This makes it ideal if you also build a mobile app on top of the API, as you can completely reuse your existing server-side code.
Single Page Applications are easy to transform into Progressive Web Apps, which in turn enables you to provide local caching and to support offline experiences for your services (or simply a better error message if your users need to be online).
SPAs are best used when there is no need for SEO (search engine optimization). For example for apps that work behind a login.
Search engines, while improving every day, still have trouble indexing sites built with an SPA approach rather than the traditional server-rendered pages. This is the case for blogs. If you are going to rely on search engines, don't even bother with creating a single page application without having a server rendered part as well.
When coding an SPA, you are going to write a great deal of JavaScript. Since the app can be long-running, you are going to need to pay a lot more attention to possible memory leaks — if in the past your page had a lifespan that was counted in minutes, now an SPA might stay open for hours at a time and if there is any memory issue that's going to increase the browser memory usage by a lot more and it's going to cause an unpleasantly slow experience if you don't take care of it.
SPAs are great when working in teams. Backend developers can just focus on the API, and frontend developers can focus on creating the best user experience, making use of the API built in the backend.
As a con, Single Page Apps rely heavily on JavaScript. This might make using an application running on low power devices a poor experience in terms of speed. Also, some of your visitors might just have JavaScript disabled, and you also need to consider accessibility for anything you build.
Overriding the navigation
Since you get rid of the default browser navigation, URLs must be managed manually.
This part of an application is called the router. Some frameworks already take care of them for you (like Ember), others require libraries that will do this job (like React Router).
What's the problem? In the beginning, this was an afterthought for developers building Single Page Applications. This caused the common "broken back button" issue: when navigating inside the application the URL didn't change (since the browser default navigation was hijacked) and hitting the back button, a common operation that users do to go to the previous screen, might move to a website you visited a long time ago.
This problem can now be solved using the History API offered by browsers, but most of the time you'll use a library that internally uses that API, like React Router.
Declarative
What does it mean when you read that React is declarative? You'll run across articles describing React as a declarative approach to building UIs.
React made its "declarative approach" quite popular and upfront so it permeated the frontend world along with React.
It's really not a new concept, but React took building UIs a lot more declaratively than with HTML templates:
you can build Web interfaces without even touching the DOM directly
you can have an event system without having to interact with the actual DOM Events.
The opposite of declarative is imperative. A common example of an imperative approach is looking up elements in the DOM using jQuery or DOM events. You tell the browser exactly what to do, instead of telling it what you need.
The React declarative approach abstracts that for us. We just tell React we want a component to be rendered in a specific way, and we never have to interact with the DOM to reference it later.
Immutability
One concept you will likely meet when programming in React is immutability (and its opposite, mutability).
It's a controversial topic, but whatever you might think about the concept of immutability, React and most of its ecosystem kind of forces this, so you need to at least have a grasp of why it's so important and the implications of it.
In programming, a variable is immutable when its value cannot change after it's created.
You are already using immutable variables without knowing it when you manipulate a string. Strings are immutable by default, when you change them in reality you create a new string and assign it to the same variable name.
An immutable variable can never be changed. To update its value, you create a new variable.
The same applies to objects and arrays.
Instead of changing an array, to add a new item you create a new array by concatenating the old array, plus the new item.
An object is never updated, but copied before changing it.
This applies to React in many places.
For example, you should never mutate the state property of a component directly, but only through the setState() method.
In Redux, you never mutate the state directly, but only through reducers, which are functions.
The question is, why?
There are various reasons, the most important of which are:
Mutations can be centralized, like in the case of Redux, which improves your debugging capabilities and reduces sources of errors.
Code looks cleaner and simpler to understand. You never expect a function to change some value without you knowing, which gives you predictability. When a function does not mutate objects but just returns a new object, it's called a pure function.
The library can optimize the code because for example JavaScript is faster when swapping an old object reference for an entirely new object, rather than mutating an existing object. This gives you performance.
Purity
In JavaScript, when a function does not mutate objects but just returns a new object, it's called a pure function.
A function, or a method, in order to be called pure should not cause side effects and should return the same output when called multiple times with the same input.
A pure function takes an input and returns an output without changing the input nor anything else.
Its output is only determined by the arguments. You could call this function 1M times, and given the same set of arguments, the output will always be the same.
React applies this concept to components. A React component is a pure component when its output is only dependant on its props.
When a component receives a component as a prop and returns a component, it's called higher order component.
We'll see them in a little while.
The Virtual DOM
Many existing frameworks, before React came on the scene, were directly manipulating the DOM on every change.
First, what is the DOM?
The DOM (Document Object Model) is a Tree representation of the page, starting from the <html> tag, going down into every child, which are called nodes.
It's kept in the browser memory, and directly linked to what you see in a page. The DOM has an API that you can use to traverse it, access every single node, filter them, modify them.
The API is the familiar syntax you have likely seen many times, if you were not using the abstract API provided by jQuery and friends:
React keeps a copy of the DOM representation, for what concerns the React rendering: the Virtual DOM
The Virtual DOM Explained
Every time the DOM changes, the browser has to do two intensive operations: repaint (visual or content changes to an element that do not affect the layout and positioning relative to other elements) and reflow (recalculate the layout of a portion of the page — or the whole page layout).
React uses a Virtual DOM to help the browser use less resources when changes need to be done on a page.
When you call setState() on a Component, specifying a state different than the previous one, React marks that Component as dirty. This is key: React only updates when a Component changes the state explicitly.
What happens next is:
React updates the Virtual DOM relative to the components marked as dirty (with some additional checks, like triggering shouldComponentUpdate())
Runs the diffing algorithm to reconcile the changes
Updates the real DOM
Why is the Virtual DOM helpful: batching
The key thing is that React batches much of the changes and performs a unique update to the real DOM, by changing all the elements that need to be changed at the same time, so the repaint and reflow the browser must perform to render the changes are executed just once.
Unidirectional Data Flow
Working with React you might encounter the term Unidirectional Data Flow. What does it mean? Unidirectional Data Flow is not a concept unique to React, but as a JavaScript developer this might be the first time you hear it.
In general this concept means that data has one, and only one, way to be transferred to other parts of the application.
In React this means that:
state is passed to the view and to child components
actions are triggered by the view
actions can update the state
the state change is passed to the view and to child components
The view is a result of the application state. State can only change when actions happen. When actions happen, the state is updated.
Thanks to one-way bindings, data cannot flow in the opposite way (as would happen with two-way bindings, for example), and this has some key advantages:
it's less error prone, as you have more control over your data
it's easier to debug, as you know what is coming from where
it's more efficient, as the library already knows what the boundaries are of each part of the system
A state is always owned by one Component. Any data that's affected by this state can only affect Components below it: its children.
Changing state on a Component will never affect its parent, or its siblings, or any other Component in the application: just its children.
This is the reason that the state is often moved up in the Component tree, so that it can be shared between components that need to access it.
SECTION 3: IN-DEPTH REACT
JSX
JSX is a technology that was introduced by React.
Although React can work completely fine without using JSX, it's an ideal technology to work with components, so React benefits a lot from JSX.
At first, you might think that using JSX is like mixing HTML and JavaScript (and as you'll see CSS).
But this is not true, because what you are really doing when using JSX syntax is writing a declarative syntax of what a component UI should be.
And you're describing that UI not using strings, but instead using JavaScript, which allows you to do many nice things.
A JSX primer
Here is how you define a h1 tag containing a string:
const element = <h1>Hello, world!</h1>
It looks like a strange mix of JavaScript and HTML, but in reality it's all JavaScript.
What looks like HTML, is actually syntactic sugar for defining components and their positioning inside the markup.
Inside a JSX expression, attributes can be inserted very easily:
const myId = 'test'
const element = <h1 id={myId}>Hello, world!</h1>
You just need to pay attention when an attribute has a dash (-) which is converted to camelCase syntax instead, and these 2 special cases:
class becomes className
for becomes htmlFor
because they are reserved words in JavaScript.
Here's a JSX snippet that wraps two components into a div tag:
<div>
  <BlogPostsList />
  <Sidebar />
</div>
A tag always needs to be closed, because this is more XML than HTML (if you remember the XHTML days, this will be familiar, but since then the HTML5 loose syntax won). In this case a self-closing tag is used.
Notice how I wrapped the 2 components into a div. Why? Because the render() function can only return a single node, so in case you want to return 2 siblings, just add a parent. It can be any tag, not just div.
Transpiling JSX
A browser cannot execute JavaScript files containing JSX code. They must be first transformed to regular JS.
How? By doing a process called transpiling.
We already said that JSX is optional, because to every JSX line, a corresponding plain JavaScript alternative is available, and that's what JSX is transpiled to.
For example the following two constructs are equivalent:
Plain JS
ReactDOM.render(
  React.DOM.div(
    { id: 'test' },
    React.DOM.h1(null, 'A title'),
    React.DOM.p(null, 'A paragraph')
  ),
  document.getElementById('myapp')
)
This very basic example is just the starting point, but you can already see how more complicated the plain JS syntax is compared to using JSX.
At the time of writing the most popular way to perform the transpilation is to use Babel, which is the default option when running create-react-app, so if you use it you don't have to worry, everything happens under the hood for you.
If you don't use create-react-app you need to setup Babel yourself.
JS in JSX
JSX accepts any kind of JavaScript mixed into it.
Whenever you need to add some JS, just put it inside curly braces {}. For example here's how to use a constant value defined elsewhere:
As you can see we nested JavaScript inside JSX defined inside JavaScript nested in JSX. You can go as deep as you need.
HTML in JSX
JSX resembles HTML a lot, but it's actually XML syntax.
In the end you render HTML, so you need to know a few differences between how you would define some things in HTML, and how you define them in JSX.
You need to close all tags
Just like in XHTML, if you have ever used it, you need to close all tags: no more <br> but instead use the self-closing tag: <br /> (the same goes for other tags)
camelCase is the new standard
In HTML you'll find attributes without any case (e.g. onchange). In JSX, they are renamed to their camelCase equivalent:
onchange => onChange
onclick => onClick
onsubmit => onSubmit
class becomes className
Due to the fact that JSX is JavaScript, and class is a reserved word, you can't write
<p class="description">
but you need to use
<p className="description">
The same applies to for which is translated to htmlFor.
CSS in React
JSX provides a cool way to define CSS.
If you have a little experience with HTML inline styles, at first glance you'll find yourself pushed back 10 or 15 years, to a world where inline CSS was completely normal (nowadays it's demonized and usually just a "quick fix" go-to solution).
JSX style is not the same thing: first of all, instead of accepting a string containing CSS properties, the JSX style attribute only accepts an object. This means you define properties in an object:
The CSS values you write in JSX are slightly different from plain CSS:
the keys property names are camelCased
values are just strings
you separate each tuple with a comma
Why is this preferred over plain CSS / SASS / LESS?
CSS is an unsolved problem. Since its inception, dozens of tools around it rose and then fell. The main problem with JS is that there is no scoping and it's easy to write CSS that is not enforced in any way, thus a "quick fix" can impact elements that should not be touched.
JSX allows components (defined in React for example) to completely encapsulate their style.
Is this the go-to solution?
Inline styles in JSX are good until you need to
write media queries
style animations
reference pseudo classes (e.g. :hover)
reference pseudo elements (e.g. ::first-letter)
In short, they cover the basics, but it's not the final solution.
Forms in JSX
JSX adds some changes to how HTML forms work, with the goal of making things easier for the developer.
value and defaultValue
The value attribute always holds the current value of the field.
The defaultValue attribute holds the default value that was set when the field was created.
This helps solve some weird behavior of regular DOM interaction when inspecting input.value and input.getAttribute('value') returning one the current value and one the original default value.
A component is one isolated piece of interface. For example in a typical blog homepage you might find the Sidebar component, and the Blog Posts List component. They are in turn composed of components themselves, so you could have a list of Blog post components, each for every blog post, and each with its own peculiar properties.
React makes it very simple: everything is a component.
Even plain HTML tags are component on their own, and they are added by default.
The next 2 lines are equivalent, they do the same thing. One with JSX, one without, by injecting <h1>Hello World!</h1> into an element with id app.
import React from 'react'
import ReactDOM from 'react-dom'

ReactDOM.render(<h1>Hello World!</h1>, document.getElementById('app'))

ReactDOM.render(
  React.DOM.h1(null, 'Hello World!'),
  document.getElementById('app')
)
See, React.DOM exposed us an h1 component. Which other HTML tags are available? All of them! You can inspect what React.DOM offers by typing it in the Browser Console:
(the list is longer)
The built-in components are nice, but you'll quickly outgrow them. What React excels in is letting us compose a UI by composing custom components.
Up until recently, class components were the only way to define a component that had its own state, and could access the lifecycle methods so you could do things when the component was first rendered, updated or removed.
React Hooks changed this, so our function components are now much more powerful than ever and I believe we'll see fewer and fewer class components in the future, although it will still be perfectly valid way to create components.
There is also a third syntax which uses the ES5 syntax, without the classes:
Instead, you should always use setState() instead, passing it an object:
this.setState({ clicked: true })
The object can contain a subset, or a superset, of the state. Only the properties you pass will be mutated, the ones omitted will be left in their current state.
Why you should always use setState()
The reason is that using this method, React knows that the state has changed. It will then start the series of events that will lead to the Component being re-rendered, along with any DOM update.
Unidirectional Data Flow
A state is always owned by one Component. Any data that's affected by this state can only affect Components below it: its children.
Changing the state on a Component will never affect its parent, or its siblings, or any other Component in the application: just its children.
This is the reason the state is often moved up in the Component tree.
Moving the State Up in the Tree
Because of the Unidirectional Data Flow rule, if two components need to share state, the state needs to be moved up to a common ancestor.
Many times the closest ancestor is the best place to manage the state, but it's not a mandatory rule.
The state is passed down to the components that need that value via props:
Props is how Components get their properties. Starting from the top component, every child component gets its props from the parent. In a function component, props is all it gets passed, and they are available by adding props as the function argument:
In a class component, props are passed by default. There is no need to add anything special, and they are accessible as this.props in a Component instance.
Passing props down to child components is a great way to pass values around in your application. A component either holds data (has state) or receives data through its props.
It gets complicated when:
you need to access the state of a component from a child that's several levels down (all the previous children need to act as a pass-through, even if they do not need to know the state, complicating things)
you need to access the state of a component from a completely unrelated component.
Default values for props
If any value is not required we need to specify a default value for it if it's missing when the Component is initialized.
Some tooling like ESLint have the ability to enforce defining the defaultProps for a Component with some propTypes not explicitly required.
How props are passed
When initializing a component, pass the props in a way similar to HTML attributes:
const desc = 'A description'
//...
<BlogPostExcerpt title="A blog post" description={desc} />
We passed the title as a plain string (something we can only do with strings!), and description as a variable.
Children
A special prop is children. That contains the value of anything that is passed in the body of the component, for example:
<BlogPostExcerpt title="A blog post" description="{desc}">
  Something
</BlogPostExcerpt>
In this case, inside BlogPostExcerpt we could access "Something" by looking up this.props.children.
While Props allow a Component to receive properties from its parent, to be "instructed" to print some data for example, state allows a component to take on life itself, and be independent of the surrounding environment.
Presentational vs container components
In React, components are often divided into 2 big buckets: presentational components and container components.
Each of those have their unique characteristics.
Presentational components are mostly concerned with generating some markup to be outputted.
They don't manage any kind of state, except for state related the the presentation
Container components are mostly concerned with the "backend" operations.
They might handle the state of various sub-components. They might wrap several presentational components. They might interface with Redux.
As a way to simplify the distinction, we can say presentational components are concerned with the look, container components are concerned with making things work.
For example, this is a presentational component. It gets data from its props, and just focuses on showing an element:
In a React component, props are variables passed to it by its parent component. State on the other hand is still variables, but directly initialized and managed by the component.
The state can be initialized by props.
For example, a parent component might include a child component by calling
<ChildComponent />
The parent can pass a prop by using this syntax:
<ChildComponent color=green />
Inside the ChildComponent constructor we could access the prop:
Of course a component can also initialize the state without looking at props.
In this case there's nothing useful going on, but imagine doing something different based on the prop value, probably setting a state value is best.
Props should never be changed in a child component, so if there's something going on that alters some variable, that variable should belong to the component state.
Props are also used to allow child components to access methods defined in the parent component. This is a good way to centralize managing the state in the parent component, and avoid children having the need to have their own state.
Most of your components will just display some kind of information based on the props they received, and stay stateless.
PropTypes
Since JavaScript is a dynamically typed language, we don't really have a way to enforce the type of a variable at compile time, and if we pass invalid types, they will fail at runtime or give weird results if the types are compatible but not what we expect.
Flow and TypeScript help a lot, but React has a way to directly help with props types, and even before running the code, our tools (editors, linters) can detect when we are passing the wrong values:
Notice how I wrap return values in a div. This is because a component can only return one single element, and if you want more than one, you need to wrap it with another container tag.
This, however, causes an unnecessary div in the output. You can avoid this by using React.Fragment:
React provides an easy way to manage events. Prepare to say goodbye to addEventListener.
In the previous article about the State you saw this example:
const CurrencySwitcher = props => {
  return (
    <button onClick={props.handleChangeCurrency}>
      Current currency is {props.currency}. Change it!
    </button>
  )
}
If you've been using JavaScript for a while, this is just like plain old JavaScript event handlers, except that this time you're defining everything in JavaScript, not in your HTML, and you're passing a function, not a string.
The actual event names are a little bit different because in React you use camelCase for everything, so onclick becomes onClick, onsubmit becomes onSubmit.
For reference, this is old school HTML with JavaScript events mixed in:
All handlers receive an event object that adheres, cross-browser, to the W3C UI Events spec.
Bind this in methods
If you use class components, don't forget to bind methods. The methods of ES6 classes by default are not bound. What this means is that this is not defined unless you define methods as arrow functions:
class Converter extends React.Component {
  handleClick = e => {
    /* ... */
  }
  //...
}
when using the the property initializer syntax with Babel (enabled by default in create-react-app), otherwise you need to bind it manually in the constructor:
There are lots of events supported, here's a summary list.
Clipboard
onCopy
onCut
onPaste
Composition
onCompositionEnd
onCompositionStart
onCompositionUpdate
Keyboard
onKeyDown
onKeyPress
onKeyUp
Focus
onFocus
onBlur
Form
onChange
onInput
onSubmit
Mouse
onClick
onContextMenu
onDoubleClick
onDrag
onDragEnd
onDragEnter
onDragExit
onDragLeave
onDragOver
onDragStart
onDrop
onMouseDown
onMouseEnter
onMouseLeave
onMouseMove
onMouseOut
onMouseOver
onMouseUp
Selection
onSelect
Touch
onTouchCancel
onTouchEnd
onTouchMove
onTouchStart
UI
onScroll
Mouse Wheel
onWheel
Media
onAbort
onCanPlay
onCanPlayThrough
onDurationChange
onEmptied
onEncrypted
onEnded
onError
onLoadedData
onLoadedMetadata
onLoadStart
onPause
onPlay
onPlaying
onProgress
onRateChange
onSeeked
onSeeking
onStalled
onSuspend
onTimeUpdate
onVolumeChange
onWaiting
Image
onLoad
onError
Animation
onAnimationStart
onAnimationEnd
onAnimationIteration
Transition
onTransitionEnd
Lifecycle Events
React class components can have hooks for several lifecycle events.
Hooks allow function components to access them too, in a different way.
During the lifetime of a component, there's a series of events that gets called, and to each event you can hook and provide custom functionality.
What hook is best for what functionality is something we're going to see here.
First, there are 3 phases in a React component lifecycle:
Mounting
Updating
Unmounting
Let's see those 3 phases in detail and the methods that get called for each.
Mounting
When mounting you have 4 lifecycle methods before the component is mounted in the DOM: the constructor, getDerivedStateFromProps, render and componentDidMount.
Constructor
The constructor is the first method that is called when mounting a component.
You usually use the constructor to set up the initial state using this.state = ....
getDerivedStateFromProps()
When the state depends on props, getDerivedStateFromProps can be used to update the state based on the props value.
It was added in React 16.3, aiming to replace the componentWillReceiveProps deprecated method.
In this method you haven't access to this as it's a static method.
It's a pure method, so it should not cause side effects and should return the same output when called multiple times with the same input.
Returns an object with the updated elements of the state (or null if the state does not change)
render()
From the render() method you return the JSX that builds the component interface.
It's a pure method, so it should not cause side effects and should return the same output when called multiple times with the same input.
componentDidMount()
This method is the one that you will use to perform API calls, or process operations on the DOM.
Updating
When updating you have 5 lifecycle methods before the component is mounted in the DOM: the getDerivedStateFromProps, shouldComponentUpdate, render, getSnapshotBeforeUpdate and componentDidUpdate.
getDerivedStateFromProps()
See the above description for this method.
shouldComponentUpdate()
This method returns a boolean, true or false. You use this method to tell React if it should go on with the rerendering, and defaults to true. You will return false when rerendering is expensive and you want to have more control on when this happens.
render()
See the above description for this method.
getSnapshotBeforeUpdate()
In this method you have access to the props and state of the previous render, and of the current render.
Its use cases are very niche, and it's probably the one that you will use less.
componentDidUpdate()
This method is called when the component has been updated in the DOM. Use this to run any 3rd party DOM API or call APIs that must be updated when the DOM changes.
It corresponds to the componentDidMount() method from the mounting phase.
Unmounting
In this phase we only have one method, componentWillUnmount.
componentWillUnmount()
The method is called when the component is removed from the DOM. Use this to do any sort of cleanup you need to perform.
Legacy
If you are working on an app that uses componentWillMount, componentWillReceiveProps or componentWillUpdate, those were deprecated in React 16.3 and you should migrate to other lifecycle methods.
Forms in React
Forms are one of the few HTML elements that are interactive by default.
They were designed to allow the user to interact with a page.
Common uses of forms?
Search
Contact forms
Shopping carts checkout
Login and registration
and more!
Using React we can make our forms much more interactive and less static.
There are two main ways of handling forms in React, which differ on a fundamental level: how data is managed.
if the data is handled by the DOM, we call them uncontrolled components
if the data is handled by the components we call them controlled components
As you can imagine, controlled components is what you will use most of the time. The component state is the single source of truth, rather than the DOM. Some form fields are inherently uncontrolled because of their behavior, like the <input type="file"> field.
When an element state changes in a form field managed by a component, we track it using the onChange attribute.
Validation in a form can be handled in the handleChange method: you have access to the old value of the state, and the new one. You can check the new value and if not valid reject the updated value (and communicate it in some way to the user).
HTML Forms are inconsistent. They have a long history, and it shows. React however makes things more consistent for us, and you can get (and update) fields using its value attribute.
<select value="{this.state.age}" onChange="{this.handleChange}">
<option value="teen">Less than 18</option>
<option value="adult">18+</option>
</select>
Previously we mentioned the <input type="file"> field. That works a bit differently.
In this case you need to get a reference to the field by assigning the ref attribute to a property defined in the constructor with React.createRef(), and use that to get the value of it in the submit handler:
This is the uncontrolled components way. The state is stored in the DOM rather than in the component state (notice we used this.curriculum to access the uploaded file, and have not touched the state.
I know what you're thinking — beyond those basics, there must be a library that simplifies all this form handling stuff and automates validation, error handling and more, right? There is a great one, Formik.
Reference a DOM element
React is great at abstracting away the DOM from you when building apps.
But what if you want to access the DOM element that a React component represents?
Maybe you have to add a library that interacts directly with the DOM like a chart library, maybe you need to call some DOM API, or add focus on an element.
Whatever the reason is, a good practice is making sure there's no other way of doing so without accessing the DOM directly.
In the JSX of your component, you can assign the reference of the DOM element to a component property using this attribute:
ref={el => this.someProperty = el}
Put this into context, for example with a button element:
<button ref={el => (this.button = el)} />
button refers to a property of the component, which can then be used by the component's lifecycle methods (or other methods) to interact with the DOM:
In a function component the mechanism is the same, you just avoid using this (since it does not point to the component instance) and use a property instead:
function SomeComponent() {
let button
return <button ref={el => (button = el)} />
}
Server side rendering
Server Side Rendering, also called SSR, is the ability of a JavaScript application to render on the server rather than in the browser.
Why would we ever want to do so?
it allows your site to have a faster first page load time, which is the key to a good user experience
it is essential for SEO: search engines cannot (yet?) efficiently and correctly index applications that exclusively render client-side. Despite the latest improvements to indexing in Google, there are other search engines too, and Google is not perfect at it in any case. Also, Google favors sites with fast load times, and having to load client-side is not good for speed
it's great when people share a page of your site on social media, as they can easily gather the metadata needed to nicely share the link (images, title, description..)
Without Server Side Rendering, all your server ships is an HTML page with no body, just some script tags that are then used by the browser to render the application.
Client-rendered apps are great at any subsequent user interaction after the first page load. Server Side Rendering allows us to get the sweet spot in the middle of client-rendered apps and backend-rendered apps: the page is generated server-side, but all interactions with the page once it's been loaded are handled client-side.
However Server Side Rendering has its drawback too:
it's fair to say that a simple SSR proof of concept is simple, but the complexity of SSR can grow with the complexity of your application
rendering a big application server-side can be quite resource-intensive, and under heavy load it could even provide a slower experience than client-side rendering, since you have a single bottleneck
A very simplistic example of what it takes to Server-Side render a React app
SSR setups can grow very, very complex and most tutorials will bake in Redux, React Router and many other concepts from the start.
To understand how SSR works, let's start from the basics to implement a proof of concept.
Feel free to skip this paragraph if you just want to look into the libraries that provide SSR and not bother with the ground work
To implement basic SSR we're going to use Express.
Warning: the complexity of SSR can grow with the complexity of your application. This is the bare minimum setup to render a basic React app. For more complex needs you might need to do a bit more work or also check out SSR libraries for React.
I assume you started a React app with create-react-app. If you are just trying, install one now using npx create-react-app ssr.
Go to the main app folder with the terminal, then run:
npm install express
You have a set of folders in your app directory. Create a new folder called server, then go into it and create a file named server.js.
Following the create-react-app conventions, the app lives in the src/App.js file. We're going to load that component, and render it to a string using ReactDOMServer.renderToString(), which is provided by react-dom.
You get the contents of the ./build/index.html file, and replace the `
`placeholder, which is the tag where the application hooks by default, with `` `
\${ReactDOMServer.renderToString()}
``.
All the content inside the build folder is going to be served as-is, statically by Express.
import path from 'path'
import fs from 'fs'
import express from 'express'
import React from 'react'
import ReactDOMServer from 'react-dom/server'
import App from '../src/App'
const PORT = 8080
const app = express()
const router = express.Router()
const serverRenderer = (req, res, next) => {
fs.readFile(path.resolve('./build/index.html'), 'utf8', (err, data) => {
if (err) {
console.error(err)
return res.status(500).send('An error occurred')
}
return res.send(
data.replace(
'<div id="root">
</div>',
`<div id="root">${ReactDOMServer.renderToString(<App />)}</div>`
)
)
})
}
router.use('^/$', serverRenderer)
router.use(
express.static(path.resolve(__dirname, '..', 'build'), { maxAge: '30d' })
)
// tell the app to use the above rules
app.use(router)
// app.use(express.static('./build'))
app.listen(PORT, () => {
console.log(`SSR running on port ${PORT}`)
})
Now, in the client application, in your src/index.js, instead of calling ReactDOM.render():
call [ReactDOM.hydrate()](https://reactjs.org/docs/react-dom.html#hydrate), which is the same but has the additional ability to attach event listeners to existing markup once React loads:
All the Node.js code needs to be transpiled by Babel, as server-side Node.js code does not know anything about JSX, nor ES Modules (which we use for the include statements).
[ignore-styles](https://www.npmjs.com/package/ignore-styles) is a Babel utility that will tell it to ignore CSS files imported using the import syntax.
Build the React application, so that the build/ folder is populated:
npm run build
and let's run this:
node server/index.js
I said this is a simplistic approach, and it is:
it does not handle rendering images correctly when using imports, which need Webpack in order to work (and which complicates the process a lot)
it does not handle page header metadata, which is essential for SEO and social sharing purposes (among other things)
So while this is a good example of using ReactDOMServer.renderToString() and ReactDOM.hydrate to get this basic server-side rendering, it's not enough for real world usage.
Server Side Rendering using libraries
SSR is hard to do right, and React has no de-facto way to implement it.
It's still very much debatable if it's worth the trouble, complication and overhead to get the benefits, rather than using a different technology to serve those pages. This discussion on Reddit has lots of opinions in that regard.
When Server Side Rendering is an important matter, my suggestion is to rely on pre-made libraries and tools that have had this goal in mind since the beginning.
In particular, I suggest Next.js and Gatsby, two projects we'll see later on.
The Context API
The Context API is a neat way to pass state across the app without having to use props. It was introduced to allow you to pass state (and enable the state to update) across the app, without having to use props for it.
The React team suggests to stick to props if you have just a few levels of children to pass, because it's still a much less complicated API than the Context API.
In many cases, it enables us to avoid using Redux, simplifying our apps a lot, and also learning how to use React.
How does it work?
You create a context using React.createContext(), which returns a Context object:
Then you create a wrapper component that returns a Provider component, and you add as children all the components from which you want to access the context:
You can create multiple contexts, to make your state distributed across components, yet expose it and make it reachable by any component you want.
When using multiple files, you create the content in one file, and import it in all the places you use it:
//context.js
import React from 'react'
export default React.createContext()
//component1.js
import Context from './context'
//... use Context.Provider
//component2.js
import Context from './context'
//... use Context.Consumer
Higher order components
You might be familiar with Higher Order Functions in JavaScript. Those are functions that accept functions as arguments, and/or return functions.
Two examples of those functions are Array.map() or Array.filter().
In React, we extend this concept to components, and so we have a **Higher Order Component (HOC)**when the component accepts a component as input and returns a component as its output.
In general, higher order components allow you to create code that's composable and reusable, and also more encapsulated.
We can use a HOC to add methods or properties to the state of a component, or a Redux store for example.
You might want to use Higher Order Components when you want to enhance an existing component, operate on the state or props, or its rendered markup.
There is a convention of prepending a Higher Order Component with the with string (it's a convention, so it's not mandatory), so if you have a Button component, its HOC counterpart should be called withButton.
Let's create one.
The simplest example ever of a HOC is one that simply returns the component unaltered:
const withElement = Element => () => <Element />
Let's make this a little bit more useful and add a property to that button, in addition to all the props it already came with, the color:
However, there is a problem here: the state of the parent component cannot be accessed from the children.
To be able to share the state, you need to use a render prop component, and instead of passing components as children of the parent component, you pass a function which you then execute in {this.props.children()}. The function can accept arguments:
Instead of using the children prop, which has a very specific meaning, you can use any prop, and so you can use this pattern multiple times on the same component:
Hooks is a feature that will be introduced in React 16.7, and is going to change how we write React apps in the future.
Before Hooks appeared, some key things in components were only possible using class components: having their own state, and using lifecycle events. Function components, lighter and more flexible, were limited in functionality.
Hooks allow function components to have state and to respond to lifecycle events too, and kind of make class components obsolete. They also allow function components to have a good way to handle events.
Access state
Using the useState() API, you can create a new state variable, and have a way to alter it. useState() accepts the initial value of the state item and returns an array containing the state variable, and the function you call to alter the state. Since it returns an array we use array destructuring to access each individual item, like this: const [count, setCount] = useState(0)
You can add as many useState() calls you want, to create as many state variables as you want. Just make sure you call it in the top level of a component (not in an if or in any other block).
Another very important feature of Hooks is allowing function components to have access to the lifecycle hooks.
Using class components you can register a function on the componentDidMount, componentWillUnmount and componentDidUpdate events, and those will serve many use cases, from variables initialization to API calls to cleanup.
Hooks provide the useEffect() API. The call accepts a function as argument.
The function runs when the component is first rendered, and on every subsequent re-render/update. React first updates the DOM, then calls any function passed to useEffect(). All without blocking the UI rendering even on blocking code, unlike the old componentDidMount and componentDidUpdate, which makes our apps feel faster.
useEffect() can be called multiple times, which is nice to separate unrelated logic (something that plagues the class component lifecycle events).
Since the useEffect() functions are run on every subsequent re-render/update, we can tell React to skip a run, for performance purposes, by adding a second parameter which is an array that contains a list of state variables to watch for. React will only re-run the side effect if one of the items in this array changes.
Enable cross-component communication using custom hooks
The ability to write your own hooks is the feature that is going to significantly alter how you write React apps in the future.
Using custom hooks you have one more way to share state and logic between components, adding a significant improvement to the patterns of render props and higher order components. Which are still great, but now with custom hooks have less relevance in many use cases.
How do you create a custom hook?
A hook is just a function that conventionally starts with use. It can accept an arbitrary number of arguments, and return anything it wants.
When exactly to add hooks instead of regular functions should be determined on a use case basis, and only experience will tell.
Code splitting
Modern JavaScript applications can be quite huge in terms of bundle size. You don't want your users to have to download a 1MB package of JavaScript (your code and the libraries you use) just to load the first page, right? But this is what happens by default when you ship a modern Web App built with Webpack bundling.
That bundle will contain code that might never run because the user only stops on the login page and never sees the rest of your app.
Code splitting is the practice of only loading the JavaScript you need the moment when you need it.
This improves:
the performance of your app
the impact on memory, and so battery usage on mobile devices
the downloaded KiloBytes (or MegaBytes) size
React 16.6.0, released in October 2018, introduced a way of performing code splitting that should take the place of every previously used tool or library: React.lazy and Suspense.
React.lazy and Suspense form the perfect way to lazily load a dependency and only load it when needed.
Let's start with React.lazy. You use it to import any component:
the TodoList component will be dynamically added to the output as soon as it's available. Webpack will create a separate bundle for it, and will take care of loading it when necessary.
Suspense is a component that you can use to wrap any lazily loaded component:
useState() initializes the count variable at 0 and provides us the setCount() method to update its value.
We use both in the incrementCount() method implementation, which calls setCount() updating the value to the existing value of count, plus the increment passed by each Button component.
Fetch and display GitHub users information via API
Very simple example of a form that accepts a GitHub username and once it receives a submit event, it asks the GitHub API for the user information, and prints them.
This code creates a reusable Card component. When you enter a name in the input field managed by the Form component, this name is bound to its state.
When Add card is pressed, the input form is cleared by clearing the userName state of the Form component.
The example uses, in addition to React, the Axios library. It's a nice useful and lightweight library to handle network requests. Add it to the Pen settings in Codepen, or install it locally using npm install axios.
We start by creating the Card component, the one that will display our image and details as gathered from GitHub. It gets its data via props, using
We create a list of those components, which will be passed by a parent component in the cards prop to CardList, which simply iterates on it using map() and outputs a list of cards:
Cool! We must have a way now to ask GitHub for the details of a single username. We'll do so using a Form component, where we manage our own state (username), and we ask GitHub for information about a user using their public APIs, via Axios:
When the form is submitted we call the handleSubmit event, and after the network call we call props.onSubmit passing the parent (App) the data we got from GitHub.
We add it to App, passing a method to add a new card to the list of cards, addNewCard, as its onSubmit prop:
CSS is defined in a slightly different way now. First, notice the double curly brackets: it's because style accepts an object. We pass in a JavaScript object, which is defined in curly braces. We could also do this:
When using create-react-app, those styles are autoprefixed by default thanks to its use of Autoprefixer.
Also, the style now is camelCased instead of using dashes. Every time a CSS property has a dash, remove it and start the next word capitalized.
Styles have the benefit of being local to the component, and they cannot leak to other components in other parts of the app, something that using classes and an external CSS file can't provide.
Using CSS Modules
CSS Modules seem to be a perfect spot in the middle: you use classes, but CSS is scoped to the component, which means that any styling you add cannot be applied to other components without your permission. And yet your styles are defined in a separate CSS file, which is easier to maintain than CSS in JavaScript (and you can use your good old CSS property names).
Start by creating a CSS file that ends with .module.css, for example Button.module.css. A great choice is to give it the same name as the component you are going to style
Add your CSS here, then import it inside the component file you want to style:
That's it! In the resulting markup, React will generate a specific, unique class for each rendered component, and assign the CSS to that class, so that the CSS is not affecting other markup.
SASS in React
When you build a React application using [create-react-app](https://flaviocopes.com/react-create-react-app/), you have many options at your disposal when it comes to styling.
Of course, if not using create-react-app, you have all the choices in the world, but we limit the discussion to the create-react-app-provided options.
You can style using plain classes and CSS files, using the style attribute or CSS Modules, to start with.
SASS/SCSS is a very popular option, a much loved one by many developers.
You can use it without any configuration at all, starting with create-react-app 2.
All you need is a .sass or .scss file, and you just import it in a component:
Styled Components are one of the new ways to use CSS in modern JavaScript. It is the meant to be a successor of CSS Modules, a way to write CSS that's scoped to a single component, and not leak to any other element in the page
A brief history
Once upon a time, the Web was really simple and CSS didn't even exist. We laid out pages using tables and frames. Good times.
Then CSS came to life, and after some time it became clear that frameworks could greatly help especially in building grids and layouts, Bootstrap and Foundation playing a big part in this.
Preprocessors like SASS and others helped a lot to slow down the adoption of frameworks, and to better organize the code, conventions like BEM and SMACSS grew in use, especially within teams.
Conventions are not a solution to everything, and they are complex to remember, so in the last few years with the increasing adoption of JavaScript and build processes in every frontend project, CSS found its way into JavaScript (CSS-in-JS).
New tools explored new ways of doing CSS-in-JS and a few succeeded with increasing popularity:
React Style
jsxstyle
Radium
and more.
Introducing Styled Components
One of the most popular of these tools is Styled Components.
It is the meant to be a successor to CSS Modules, a way to write CSS that's scoped to a single component, and not leak to any other element in the page.
Button is now a React Component in all its greatness.
We created it using a function of the styled object, called button in this case, and passing some CSS properties in a template literal.
Now this component can be rendered in our container using the normal React syntax:
render(<Button />)
Styled Components offer other functions you can use to create other components, not just button, like section, h1, input and many others.
The syntax used, with the backtick, might be weird at first, but it's called Tagged Templates, it's plain JavaScript and it's a way to pass an argument to the function.
Using props to customize components
When you pass some props to a Styled Component, it will pass them down to the DOM node mounted.
For example here's how we pass the placeholder and type props to an input component:
Setting the primary prop changes the color of the button.
Extending an existing Styled Component
If you have one component and you want to create a similar one, just styled slightly differently, you can use extend:
const Button = styled.button`
color: black;
//...
`
const WhiteButton = Button.extend`
color: white;
`
render(
<div>
<Button>A black button, like all buttons</Button>
<WhiteButton>A white button</WhiteButton>
</div>
)
It's Regular CSS
In Styled Components, you can use the CSS you already know and love. It's just plain CSS. It is not pseudo CSS nor inline CSS with its limitations.
You can use media queries, nesting and anything else you might need.
Using Vendor Prefixes
Styled Components automatically add all the vendor prefixes needed, so you don't need to worry about this problem.
SECTION 6: TOOLING
Babel
Babel is an awesome tool, and it's been around for quite some time, but nowadays almost every JavaScript developer relies on it. This will continue, because Babel is now indispensable and has solved a big problem for everyone.
Which problem?
The problem that every Web Developer has surely had: a feature of JavaScript is available in the latest release of a browser, but not in the older versions. Or maybe Chrome or Firefox implement it, but Safari iOS and Edge do not.
For example, ES6 introduced the arrow function:
[1, 2, 3].map((n) => n + 1)
Which is now supported by all modern browsers. IE11 does not support it, nor Opera Mini (How do I know? By checking the ES6 Compatibility Table).
So how should you deal with this problem? Should you move on and leave those customers with older/incompatible browsers behind, or should you write older JavaScript code to make all your users happy?
Enter Babel. Babel is a compiler: it takes code written in one standard, and it transpiles it to code written into another standard.
You can configure Babel to transpile modern ES2017 JavaScript into JavaScript ES5 syntax:
[1, 2, 3].map(function(n) {
return n + 1
})
This must happen at build time, so you must setup a workflow that handles this for you. Webpack is a common solution.
(P.S. if all this ES thing sounds confusing to you, see more about ES versions in the ECMAScript guide)
Installing Babel
Babel is easily installed using npm, locally in a project:
npm install --save-dev @babel/core @babel/cli
Since npm now comes with [npx](https://flaviocopes.com/node/npx/), locally installed CLI packages can run by typing the command in the project folder:
So we can run Babel by just running
npx babel script.js
An example Babel configuration
Babel out of the box does not do anything useful, you need to configure it and add plugins.
to the .babelrc file present in the application root folder. If you don't have that file already, you just create a blank file, and put that content into it.
TIP: If you have never seen a dot file (a file starting with a dot) it might be odd at first because that file might not appear in your file manager, as it's a hidden file.
Now if we have a script.js file with this content:
var a = () => {};
var a = (b) => b;
const double = [1,2,3].map((num) => num * 2);
console.log(double); // [2,4,6]
var bob = {
_name: "Bob",
_friends: ["Sally", "Tom"],
printFriends() {
this._friends.forEach(f =>
console.log(this._name + " knows " + f));
}
};
console.log(bob.printFriends());
running babel script.js will output the following code:
var a = function () {};var a = function (b) {
return b;
};
const double = [1, 2, 3].map(function (num) {
return num * 2;
});
console.log(double); // [2,4,6]
var bob = {
_name: "Bob",
_friends: ["Sally", "Tom"],
printFriends() {
var _this = this;
this._friends.forEach(function (f) {
return console.log(_this._name + " knows " + f);
});
}
};
console.log(bob.printFriends());
As you can see arrow functions have all been converted to JavaScript ES5 functions.
Babel presets
We just saw in the previous article how Babel can be configured to transpile specific JavaScript features.
You can add much more plugins, but you can't add to the configuration features one by one, it's not practical.
This is why Babel offers presets.
The most popular presets are env and react.
Tip: Babel 7 deprecated (and removed) yearly presets like preset-es2017, and stage presets. Use @babel/preset-env instead.
env preset
The env preset is very nice: you tell it which environments you want to support, and it does everything for you, supporting all modern JavaScript features.
E.g. "support the last 2 versions of every browser, but for Safari let's support all versions since Safari 7"
If you want to run modern JavaScript in the browser, Babel on its own is not enough, you also need to bundle the code. Webpack is the perfect tool for this.
Modern JS needs two different stages: a compile stage, and a runtime stage. This is because some ES6+ features need a polyfill or a runtime helper.
To install the Babel polyfill runtime functionality, run
entry: [
'babel-polyfill',
// your app scripts should be here
],
module: {
loaders: [
// Babel loader compiles ES2015 into ES5 for
// complete cross-browser support
{
loader: 'babel-loader',
test: /\.js$/,
// only include files present in the `src` subdirectory
include: [path.resolve(__dirname, "src")],
// exclude node_modules, equivalent to the above line
exclude: /node_modules/,
query: {
// Use the default ES2015 preset
// to include all ES2015 features
presets: ['es2015'],
plugins: ['transform-runtime']
}
}
]
}
By keeping the presets and plugins information inside the webpack.config.js file, we can avoid having a .babelrc file.
Webpack
Webpack is a tool that lets you compile JavaScript modules, also known as module bundler. Given a large number of files, it generates a single file (or a few files) that run your app.
It can perform many operations:
helps you bundle your resources.
watches for changes and re-runs the tasks.
can run Babel transpilation to ES5, allowing you to use the latest JavaScript features without worrying about browser support.
can transpile CoffeeScript to JavaScript
can convert inline images to data URIs.
allows you to use require() for CSS files.
can run a development webserver.
can handle hot module replacement.
can split the output files into multiple files, to avoid having a huge js file to load in the first page hit.
Webpack is not limited to be use on the frontend, it's also useful in backend Node.js development as well.
Predecessors of webpack, and still widely used tools, include:
Grunt
Broccoli
Gulp
There are lots of similarities in what those and Webpack can do, but the main difference is that those are known as task runners, while webpack was born as a module bundler.
It's a more focused tool: you specify an entry point to your app (it could even be an HTML file with script tags) and webpack analyzes the files and bundles all you need to run the app in a single JavaScript output file (or in more files if you use code splitting).
Installing webpack
Webpack can be installed globally or locally for each project.
Webpack can be installed locally as well. It's the recommended setup, because webpack can be updated per-project, and you have less resistance to using the latest features just for a small project rather than updating all the projects you have that use webpack.
Once this is done, add this to your package.json file:
{
//...
"scripts": {
"build": "webpack"
}
}
once this is done, you can run webpack by typing
yarn build
in the project root.
Webpack configuration
By default, webpack (starting from version 4) does not require any config if you respect these conventions:
the entry point of your app is ./src/index.js
the output is put in ./dist/main.js.
Webpack works in production mode
You can customize every little bit of webpack of course, when you need. The webpack configuration is stored in the webpack.config.js file, in the project root folder.
The entry point
By default the entry point is ./src/index.js This simple example uses the ./index.js file as a starting point:
Using webpack allows you to use import or require statements in your JavaScript code to not just include other JavaScript, but any kind of file, for example CSS.
Webpack aims to handle all our dependencies, not just JavaScript, and loaders are one way to do that.
In this example, css-loader interprets the import 'style.css' directive in the CSS. style-loader is then responsible for injecting that CSS in the DOM, using a <style> tag.
The order matters, and it's reversed (the last is executed first).
The HTMLWebpackPlugin plugin has the job of automatically creating an HTML file, adding the output JS bundle path, so the JavaScript is ready to be served.
One useful plugin, CleanWebpackPlugin, can be used to clear the dist/ folder before creating any output, so you don't leave files around when you change the name of the output file:
This mode (introduced in webpack 4) sets the environment on which webpack works. It can be set to development or production (defaults to production, so you only set it when moving to development)
provides more detailed error messages and suggestions
provides a better debugging experience
Production mode is slower to build, since it needs to generate a more optimized bundle. The resulting JavaScript file is smaller in size, as it removes many things that are not needed in production.
I made a sample app that just prints a console.log statement.
Here's the production bundle:
Here's the development bundle:
Running webpack
Webpack can be run from the command line manually if installed globally, but generally you write a script inside the package.json file, which is then run using npm or yarn.
For example this package.json scripts definition we used before:
"scripts": {
"build": "webpack"
}
allows us to run webpack by running
npm run build
or
yarn run build
or simply
yarn build
Watching changes
Webpack can automatically rebuild the bundle when a change in your app happens, and keep listening for the next change.
Just add this script:
"scripts": {
"watch": "webpack --watch"
}
and run
npm run watch
or
yarn run watch
or simply
yarn watch
One nice feature of the watch mode is that the bundle is only changed if the build has no errors. If there are errors, watch will keep listening for changes, and try to rebuild the bundle, but the current, working bundle is not affected by those problematic builds.
Handling images
Webpack allows us to use images in a very convenient way, using the [file-loader](https://webpack.js.org/loaders/file-loader/) loader.
source-map: ideal for production, provides a separate source map that can be minimized, and adds a reference into the bundle, so development tools know that the source map is available. Of course you should configure the server to avoid shipping this, and just use it for debugging purposes
inline-source-map: ideal for development, inlines the source map as a Data URL
SECTION 7: TESTING
Jest
Jest is a library for testing JavaScript code.
It's an open source project maintained by Facebook, and it's especially well suited for React code testing, although not limited to that: it can test any JavaScript code. Its strengths are:
it's fast
it can perform snapshot testing
it's opinionated, and provides everything out of the box without requiring you to make choices
Jest is a tool very similar to Mocha, although they have differences:
Mocha is less opinionated, while Jest has a certain set of conventions
Mocha requires more configuration, while Jest works usually out of the box, thanks to being opinionated
Mocha is older and more established, with more tooling integrations
In my opinion the biggest feature of Jest is it's an out of the box solution that works without having to interact with other testing libraries to perform its job.
Installation
Jest is automatically installed in create-react-app, so if you use that, you don't need to install Jest.
Jest can be installed in any other project using Yarn:
notice how we instruct both to put Jest in the devDependencies part of the package.json file, so that it will only be installed in the development environment and not in production.
Add this line to the scripts part of your package.json file:
{
"scripts": {
"test": "jest"
}
}
so that tests can be run using yarn test or npm run test.
Alternatively, you can install Jest globally:
yarn global add jest
and run all your tests using the jest command line tool.
Create the first Jest test
Projects created with create-react-app have Jest installed and preconfigured out of the box, but adding Jest to any project is as easy as typing
yarn add --dev jest
Add to your package.json this line:
{
"scripts": {
"test": "jest"
}
}
and run your tests by executing yarn test in your shell.
Now, you don't have any tests here, so nothing is going to be executed:
Let's create the first test. Open a math.js file and type a couple functions that we'll later test:
const sum = (a, b) => a + b
const mul = (a, b) => a * b
const sub = (a, b) => a - b
const div = (a, b) => a / b
export default { sum, mul, sub, div }
Now create a math.test.js file, in the same folder, and there we'll use Jest to test the functions defined in math.js:
Running yarn test results in Jest being run on all the test files it finds, and returning us the end result:
Run Jest with VS Code
Visual Studio Code is a great editor for JavaScript development. The Jest extension offers a top notch integration for our tests.
Once you install it, it will automatically detect if you have installed Jest in your devDependencies and run the tests. You can also invoke the tests manually by selecting the Jest: Start Runner command. It will run the tests and stay in watch mode to re-run them whenever you change one of the files that have a test (or a test file):
Matchers
In the previous article I used toBe() as the only matcher:
Asynchronous code in modern JavaScript can have basically 2 forms: callbacks and promises. On top of promises we can use async/await.
Callbacks
You can't have a test in a callback, because Jest won't execute it — the execution of the test file ends before the callback is called. To fix this, pass a parameter to the test function, which you can conveniently call done. Jest will wait until you call done() before ending that test:
In testing, mocking allows you to test functionality that depends on:
Database
Network requests
access to Files
any External system
so that:
your tests run faster, giving a quick turnaround time during development
your tests are independent of network conditions, or the state of the database
your tests do not pollute any data storage because they do not touch the database
any change done in a test does not change the state for subsequent tests, and re-running the test suite should start from a known and reproducible starting point
you don't have to worry about rate limiting on API calls and network requests
Mocking is useful when you want to avoid side effects (e.g. writing to a database) or you want to skip slow portions of code (like network access), and also avoids implications with running your tests multiple times (e.g. imagine a function that sends an email or calls a rate-limited API).
Even more important, if you are writing a Unit Test, you should test the functionality of a function in isolation, not with all its baggage of things it touches.
Using mocks, you can inspect if a module function has been called and which parameters were used, with:
expect().toHaveBeenCalled(): check if a spied function has been called
expect().toHaveBeenCalledTimes(): count how many times a spied function has been called
expect().toHaveBeenCalledWith(): check if the function has been called with a specific set of parameters
expect().toHaveBeenLastCalledWith(): check the parameters of the last time the function has been invoked
Spy packages without affecting the functions code
When you import a package, you can tell Jest to "spy" on the execution of a particular function, using spyOn(), without affecting how that method works.
Jest provides a convenient way to mock an entire package. Create a __mocks__folder in the project root, and in this folder create one JavaScript file for each of your packages.
Say you import mathjs. Create a __mocks__/mathjs.js file in your project root, and add this content:
module.exports = {
log: jest.fn(() => 'test')
}
This will mock the log() function of the package. Add as many functions as you want to mock:
You can also use jest.fn().mockReturnValue('test') to create a simple mock that does nothing except returning a value.
Pre-built mocks
You can find pre-made mocks for popular libraries. For example this package https://github.com/jefflau/jest-fetch-mock allows you to mock fetch() calls, and provide sample return values without interacting with the actual server in your tests.
Snapshot testing
Snapshot testing is a pretty cool feature offered by Jest. It can memorize how your UI components are rendered, and compare it to the current test, raising an error if there's a mismatch.
This is a simple test on the App component of a simple create-react-app application (make sure you install react-test-renderer):
import React from 'react'
import App from './App'
import renderer from 'react-test-renderer'
it('renders correctly', () => {
const tree = renderer.create(<App />).toJSON()
expect(tree).toMatchSnapshot()
})
the first time you run this test, Jest saves the snapshot to the __snapshots__folder. Here's what App.test.js.snap contains:
// Jest Snapshot v1, https://goo.gl/fbAQLP
exports[`renders correctly 1`] = `
<div
className="App"
>
<header
className="App-header"
>
<img
alt="logo"
className="App-logo"
src="logo.svg"
/>
<h1
className="App-title"
>
Welcome to React
</h1>
</header>
<p
className="App-intro"
>
To get started, edit
<code>
src/App.js
</code>
and save to reload.
</p>
</div>
`
As you see it's the code that the App component renders, nothing more.
The next time the test compares the output of <App /> to this. If App changes, you get an error:
When using yarn test in create-react-app you are in watch mode, and from there you can press w and show more options:
Watch Usage
› Press u to update failing snapshots.
› Press p to filter by a filename regex pattern.
› Press t to filter by a test name regex pattern.
› Press q to quit watch mode.
› Press Enter to trigger a test run.
If your change is intended, pressing u will update the failing snapshots, and make the test pass.
You can also update the snapshot by running jest -u (or jest --updateSnapshot) outside of watch mode.
Testing React components
The easiest way to start with testing React components is doing snapshot testing, a testing technique that lets you test components in isolation.
If you are familiar with testing software, it's just like unit testing you do for classes: you test each component functionality.
I assume you created a React app with create-react-app, which already comes with Jest installed, the testing package we'll need.
Let's start with a simple test. CodeSandbox is a great environment to try this out. Start with a React sandbox, and create an App.js component in a components folder, and add an App.test.js file.
import React from 'react'
export default function App() {
return (
<div className="App">
<h1>Hello CodeSandbox</h1>
<h2>Start editing to see some magic happen!</h2>
</div>
)
}
When CodeSandbox detects test files, it automatically runs them for you, and you can click the Tests button in the bottom of the view to show your test results:
A test file can contain multiple tests:
Let's do something a bit more useful now, to actually test a React component. We only have App now, which is not doing anything really useful, so let's first set up the environment with a little application with more functionality: the counter app we built previously. If you skipped it, you can go back and read how we built it, but for easier reference I add it here again.
It's just 2 components: App and Button. Create the App.js file:
We start by importing render and fireEvent from react-testing-library, two helpers. The first lets us render JSX. The second lets us emit events on a component.
Create a Button.test.js and put it in the same folder as Button.js.
import React from 'react'
import { render, fireEvent } from 'react-testing-library'
import Button from './Button'
Buttons are used in the app to accept a click event and then they call a function passed to the onClickFunction prop. We add a count variable and we create a function that increments it:
Now off to the actual tests. We first initialize count to 0, and we render a +1Button component passing a 1 to increment and our incrementCount function to onClickFunction.
Then we get the content of the first child of the component, and we check it outputs +1.
We then proceed to clicking the button, and we check that the count got from 0 to 1:
Let's test the App component now. It shows 4 buttons and the result in the page. We can inspect each button and see if the result increases when we click them, clicking multiple times as well:
The ecosystem around React is huge. Here I introduce you to 4 of the most popular projects based upon React: React Router, Redux, Next.js, Gatsby.
React Router
React Router is the de-facto React routing library, and it's one of the most popular projects built on top of React.
React at its core is a very simple library, and it does not dictate anything about routing.
Routing in a Single Page Application is the way to introduce some features to navigating the app through links, which are expected in normal web applications:
The browser should change the URL when you navigate to a different screen
Deep linking should work: if you point the browser to a URL, the application should reconstruct the same view that was presented when the URL was generated.
The browser back (and forward) button should work like expected.
Routing links together your application navigation with the navigation features offered by the browser: the address bar and the navigation buttons.
React Router offers a way to write your code so that it will show certain components of your app only if the route matches what you define.
Which one to use is mainly dictated by the browsers you need to support. BrowserRouter uses the History API, which is relatively recent, and not supported in IE9 and below. If you don't have to worry about older browsers, it's the recommended choice.
Components
The 3 components you will interact the most when working with React Router are:
BrowserRouter, usually aliased as Router
Link
Route
BrowserRouter wraps all your Route components.
Link components are - as you can imagine - used to generate links to your routes
Route components are responsible for showing - or hiding - the components they contain.
BrowserRouter
Here's a simple example of the BrowserRouter component. You import it from react-router-dom, and you use it to wrap all your app:
import React from 'react'
import ReactDOM from 'react-dom'
import { BrowserRouter as Router } from 'react-router-dom'
ReactDOM.render(
<Router>
<div>
<!-- -->
</div>
</Router>,
document.getElementById('app')
)
A BrowserRouter component can only have one child element, so we wrap all we're going to add in a div element.
Link
The Link component is used to trigger new routes. You import it from react-router-dom, and you can add the Link components to point at different routes, with the to attribute:
import React from 'react'
import ReactDOM from 'react-dom'
import { BrowserRouter as Router, Link } from 'react-router-dom'
ReactDOM.render(
<Router>
<div>
<aside>
<Link to={`/dashboard`}>Dashboard</Link>
<Link to={`/about`}>About</Link>
</aside>
<!-- -->
</div>
</Router>,
document.getElementById('app')
)
Route
Now let's add the Route component in the above snippet to make things actually work as we want:
In your Route component you can lookup the dynamic parameters in match.params.
match is also available in inline rendered routes, and this is especially useful in this case, because we can use the id parameter to lookup the post data in our data source before rendering Post:
Redux is a state manager that's usually used along with React, but it's not tied to that library — it can be used with other technologies as well, but we'll stick to React for the sake of the explanation..
Redux is a way to manage an application state, and move it to an external global store.
There are a few concepts to grasp, but once you do, Redux is a very simple approach to the problem.
Redux is very popular with React applications, but it's in no way unique to React: there are bindings for nearly any popular framework. That said, I'll make some examples using React as it is its primary use case.
When should you use Redux?
Redux is ideal for medium to big apps, and you should only use it when you have trouble managing the state with the default state management of React, or the other library you use.
Simple apps should not need it at all (and there's nothing wrong with simple apps).
Immutable State Tree
In Redux, the whole state of the application is represented by oneJavaScript object, called State or State Tree.
We call it Immutable State Tree because it is read only: it can't be changed directly.
It can only be changed by dispatching an Action.
Actions
An Action is a JavaScript object that describes a change in a minimal way (with just the information needed):
{
type: 'CLICKED_SIDEBAR'
}
// e.g. with more data
{
type: 'SELECTED_USER',
userId: 232
}
The only requirement of an action object is having a type property, whose value is usually a string.
Actions types should be constants
In a simple app an action type can be defined as a string, as I did in the example in the previous lesson.
and to separate actions in their own files, and import them
import { ADD_ITEM, REMOVE_ITEM } from './actions'
Action creators
Actions Creators are functions that create actions.
function addItem(t) {
return {
type: ADD_ITEM,
title: t
}
}
You usually run action creators in combination with triggering the dispatcher:
dispatch(addItem('Milk'))
or by defining an action dispatcher function:
const dispatchAddItem = i => dispatch(addItem(i))
dispatchAddItem('Milk')
Reducers
When an action is fired, something must happen, the state of the application must change.
This is the job of reducers.
A reducer is a pure function that calculates the next State Tree based on the previous State Tree, and the action dispatched.
;(currentState, action) => newState
A pure function takes an input and returns an output without changing the input or anything else. Thus, a reducer returns a completely new state tree object that substitutes the previous one.
What a reducer should not do
A reducer should be a pure function, so it should:
never mutate its arguments
never mutate the state, but instead create a new one with Object.assign({}, ...)
never generate side-effects (no API calls changing anything)
never call non-pure functions, functions that change their output based on factors other than their input (e.g. Date.now() or Math.random())
There is no reinforcement, but you should stick to the rules.
Multiple reducers
Since the state of a complex app could be really wide, there is not a single reducer, but many reducers for any kind of action.
A simulation of a reducer
At its core, Redux can be simplified with this simple model:
You call dispatch() on the Store, passing an Action.
The Store takes care of passing the Action to the Reducer, generating the next State.
The Store updates the State and alerts all the Listeners.
Next.js
Working on a modern JavaScript application powered by React is awesome until you realize that there are a couple problems related to rendering all the content on the client-side.
First, the page takes longer to the become visible to the user, because before the content loads, all the JavaScript must load, and your application needs to run to determine what to show on the page.
Second, if you are building a publicly available website, you have a content SEO issue. Search engines are getting better at running and indexing JavaScript apps, but it's much better if we can send them content instead of letting them figure it out.
The solution to both of those problems is server rendering, also called static pre-rendering.
Next.js is one React framework to do all of this in a very simple way, but it's not limited to this. It's advertised by its creators as a zero-configuration, single-command toolchain for React apps.
It provides a common structure that allows you to easily build a frontend React application, and transparently handle server-side rendering for you.
Here is a non-exhaustive list of the main Next.js features:
Hot Code Reloading: Next.js reloads the page when it detects any change saved to disk.
Automatic Routing: any URL is mapped to the filesystem, to files put in the pages folder, and you don't need any configuration (you have customization options of course).
Single File Components: using styled-jsx, completely integrated as built by the same team, it's trivial to add styles scoped to the component.
Server Rendering: you can (optionally) render React components on the server side, before sending the HTML to the client.
Ecosystem Compatibility: Next.js plays well with the rest of the JavaScript, Node and React ecosystem.
Automatic Code Splitting: pages are rendered with just the libraries and JavaScript that they need, no more.
Prefetching: the Link component, used to link together different pages, supports a prefetch prop which automatically prefetches page resources (including code missing due to code splitting) in the background.
If you visit localhost:3000, this component will automatically be rendered.
Why is this so simple?
Next.js uses a declarative pages structure, which is based on the filesystem structure.
Simply put, pages are inside a pages folder, and the page URL is determined by the page file name. The filesystem is the pages API.
Server-side rendering
Open the page source, View -> Developer -> View Source with Chrome.
As you can see, the HTML generated by the component is sent directly in the page source. It's not rendered client-side, but instead it's rendered on the server.
The Next.js team wanted to create a developer experience for server rendered pages similar to the one you get when creating a basic PHP project, where you simply drop PHP files and you call them, and they show up as pages. Internally of course it's all very different, but the apparent ease of use is clear.
If you point your browser to localhost:3000/contact this page will be rendered. As you can see, also this page is server rendered.
Hot reloading
Note how you did not have to restart the npm process to load the second page. Next.js does this for you under the hood.
Client rendering
Server rendering is very convenient in your first page load, for all the reasons we saw above, but when it comes to navigating inside the website, client-side rendering is key to speeding up the page load and improving the user experience.
Next.js provides a Link component you can use to build links. Try linking the two pages above.
Change index.js to this code:
import Link from 'next/link'
export default () => (
<div>
<p>Hello World!</p>
<Link href="/contact">
<a>Contact me!</a>
</Link>
</div>
)
Now go back to the browser and try this link. As you can see, the Contact page loads immediately, without a page refresh.
This is client-side navigation working correctly, with complete support for the History API, which means your users back button won't break.
If you now cmd-click the link, the same Contact page will open in a new tab, now server rendered.
Dynamic pages
A good use case for Next.js is a blog, as it's something that all developers know how it works, and it's a good fit for a simple example of how to handle dynamic pages.
A dynamic page is a page that has no fixed content, but instead display some data based on some parameters.
Next.js by default provides support for styled-jsx, which is a CSS-in-JS solution provided by the same development team, but you can use whatever library you prefer, like Styled Components.
A Next.js application can be easily exported as a static site, which can be deployed on one of the super fast static site hosts, like Netlify or Firebase Hosting, without the need to set up a Node environment.
The process requires you to declare the URLs that compose the site, but it's a straightforward process.
Deploying
Creating a production-ready copy of the application, without source maps or other development tooling that aren't needed in the final build, is easy.
At the beginning of this tutorial you created a package.json file with this content:
{
"scripts": {
"dev": "next"
}
}
which was the way to start up a development server using npm run dev.
Now just add the following content to package.json instead:
and prepare your app by running npm run build and npm run start.
Now
The company behind Next.js provides an awesome hosting service for Node.js applications, called Now.
Of course they integrate both their products so you can deploy Next.js apps seamlessly, once you have Now installed, by running the now command in the application folder.
Behind the scenes Now sets up a server for you, and you don't need to worry about anything, just wait for your application URL to be ready.
Zones
You can set up multiple Next.js instances to listen to different URLs, yet the application to an outside user will simply look like it's being powered by a single server: https://github.com/zeit/next.js/#multi-zones
Gatsby is a platform for building apps and websites using React.
It is one of the tools that allow you to build on a set of technologies and practices collectively known as JAMstack.
Gatsby is one of the cool kids in the Frontend Development space right now. Why? I think the reasons are:
the explosion of the JAMstack approach to building Web Apps and Web Sites
the rapid adoption of the Progressive Web Apps technology in the industry, which is one of the key features of Gatsby
it's built in React and GraphQL, which are two very popular and rising technologies
it's really powerful
it's fast
the documentation is great
the network effect (people use it, create sites, make tutorials, people know more about it, creating a cycle)
everything is JavaScript (no need to learn a new templating language)
it hides the complexity, in the beginning, but allows us access into every step to customize
All those are great points, and Gatsby is definitely worth a look.
How does it work?
With Gatsby, your applications are built using React components.
The content you'll render in a site is generally written using Markdown, but you can use any kind of data source, like a headless CMS or a web service like Contentful.
Gatsby builds the site, and it's compiled to static HTML which can be deployed on any Web Server you want, like Netlify, AWS S3, GitHub Pages, regular hosting providers, PAAS and more. All you need is a place that serves plain HTTP pages and your assets to the client.
I mentioned Progressive Web Apps in the list. Gatsby automatically generates your site as a PWA, with a service worker that speeds up page loading and resource caching.
You can enhance the functionality of Gatsby via plugins.
Installation
You can install Gatsby by simply running this in your terminal:
npm install -g gatsby-cli
This installs the gatsby CLI utility.
(when a new version is out, update it by calling this command again)
You create a new "Hello World" site by running
gatsby new mysite https://github.com/gatsbyjs/gatsby-starter-hello-world
After the terminal has finished installing the starter, you can run the website by calling
cd mysite
gatsby develop
which will start up a new Web Server and serve the site on port 8000 on localhost.
And here is our Hello World starter in action:
Inspecting the site
If you open the site you created with your favorite code editor (I use VS Code), you'll find there are 3 folders:
.cache, a hidden folder that contains the Gatsby internals, nothing you should change right now
public, which contains the resulting website once you build it
src contains the React components, in this case just the index component
static which will contain the static resources like CSS and images
Now, making a simple change to the default page is easy, just open src/pages/index.js and change "Hello world!" to something else, and save. The browser should instantly hot reload the component (which means the page does not actually refresh, but the content changes - a trick made possible by the underlying technology).
To add a second page, just create another .js file in this folder, with the same content of index.js (tweak the content) and save it.
For example I created a second.js file with this content:
import React from 'react'
export default () => <div>Second page!</div>
gatsby-plugin-catch-links which uses the History API to prevent the browser reloading the page when a link is clicked, loading the new content using AJAX instead
A Gatsby plugin is installed in 2 steps. First you install it using npm, then you add it to the Gatsby configuration in gatsby-config.js.
For example you can install the Catch Links plugin:
npm install gatsby-plugin-catch-links
In gatsby-config.js (create it if you don't have it, in the website root folder), add the plugin to the plugins exported array:
Once you are done tweaking the site and you want to generate the production static site, you will call
gatsby build
At this point you can check that it all works as you expect by starting a local Web Server using
gatsby serve
which will render the site as close as possible to how you will see it in production.
Deployment
Once you build the site using gatsby build, all you need to do is to deploy the result contained in the public folder.
Depending on the solution you choose, you'll need different steps here, but generally you'll push to a Git repository and let the Git post-commit hooks do the job of deploying. Here are some great guides for some popular hosting platforms where you can deploy Gatsby.
All of the code examples below will be included a second time at the bottom of this article as an embedded gist.
title
description
robots
extra
type
React Intro
Introduction to React for Complete Beginners All of the code examples below will be included a second time at the bottom of this article as an embedded gist, so that it is properly syntax highlighted. React uses a syntax extension of JavaScript called JSX that allows you to write HTML directly within JavaScript.
stackbit_page_meta
docs
A Basic Component
The key abstraction that React provides is that of a component. To reiterate, a component is some thing that is being rendered in the browser. It could be a button, a form with a bunch of fields in it, a navigation bar at the top of the page, a single input field, etc. Any of these could be its own component. React doesn't place any restrictions on how large or small a component can be. You could have an entire static site encapsulated in a single React component, but that at that point you may as well not be using React. So the first thing to remember about a component is that a component must render something. If nothing is being rendered from a component, then React will throw an error.
Let's write the most basic of components we can possibly write. Inside of BasicComponent.js, first import React at the top of the file. Our most basic of
components looks like this:
import React from 'react';
export default BasicComponent;
This is a component that simply returns a div tag with the words Hello World! inside. The last line simply exports our component so that it can be imported
by another file.
Notice that this component looks exactly like an anonymous arrow function that we've named BasicComponent. In fact, that is literally what this is. Nothing
more, nothing less. The arrow function then is simply returning the div tag. When a component is written as a function like this one is, it is called a
functional component.
While a component can of course get a lot more complicated than this, fundamentally, all a component does is render some HTML.
A Basic Class Component
The basic component you wrote in the previous exercise is an example of a functional component, which is appropriate since that component is literally
nothing more than a function that returns some HTML. Functional components are great when all you want a component to do is to render some stuff; they
are really good at doing just that.
Components can also be written as classes. For this exercise, we're going to write a class component that does exactly the same thing as the functional component we just wrote. We'll again need to import React at the top of the file, but we'll also need to add a little something. Our import statement will look like this:
import React, { Component } from 'react';
So, in addition to importing React, we're also importing the base Component class that is included in the React library. The export statement at the bottom of the file also stays, completely unchanged. Our class component will thus look like this:
import React, { Component } from 'react';
export default BasicClassComponent;
Notice that our BasicClassComponent inherits from the base Component class that we imported from the React library, by virtue of the 'extends' keyword. That being said, there's nothing in this minimal component that takes advantage of any of those inherited methods. All we have is a method on our component class called render that returns the same div tag.
In this case, if we really were deciding between whether to use a functional component versus a class component to render a simple div tag, then the functional style is more appropriate to use. This is because class components are much better suited for handling component state and triggering events based on the component's lifecycle. Don't worry if you don't know what all these terms meant, we will get to them shortly.
The important takeaways at this point are that there are two types of components, functional and class components, and that functional components are well-suited if you're just looking to render some HTML. Class components, on the other hand, are much better suited for handling components that require more complex functionality, need to exhibit more varied behavior, and/or need to keep track of some state that may change throughout said component's lifecycle.
A Class Component with Some State
When we talked about class components, it was mentioned that class components can handle state. So what does that mean? Component state is any dynamic data that we want the component to keep track of. For example, let's say we have a form component. This form has some input fields that we'd like users to fill out. When a user types characters into an input field, how is that input persisted from the point of view of our form component?
The answer is by using component state! There are a few important concepts regarding component state, such as how to update it, pass it to another component, render it, etc. We'll talk about all of these in a bit, but for now, let's just focus on how to add state to a class component.
Only class components have the ability to persist state, so if at any time you realize that a component needs to keep track of some state, you know that you'll automatically need a class component instead of a functional component.
Our class component with state will look a lot like the basic class component we just wrote, but with some extra stuff:
import React, { Component } from 'react';
export default ClassComponentWithState;
So far, the only new thing going on here is the constructor block. If you recall how classes in JavaScript work, classes need constructors. Additionally, if a class is extending off of another class and wants access to its parent class's methods and properties, then the super function needs to be called inside the class's constructor function. Point being, the constructor function and the call to the super function are not associated with React, they are associated with all JavaScript classes.
Then there is the this.state property inside the constructor function that is set as an empty object. We're adding a property called state to our class and setting it to an empty object. State objects in React are always just plain old objects.
The observant student may be wondering why the basic class component we wrote in the previous exercise had no constructor function within its body. That is because we had no need for them since all our class component was doing was rendering some HTML. The constructor is needed here because that is where we need to initialize our state object. The call to super is needed because we can't reference this inside of our constructor without a call to super first.
Ok, now let's actually use this state object. One very common application of state objects in React components is to render the data being stored inside them within our component's render function. Let's change our current class component to do that.
classClassComponentWithStateextendsComponent{constructor(){super();this.state={someData: 8};}render(){return<div>{`Here's some data to render: ${this.state.someData}`}</div>;}}
export default ClassComponentWithState;
So what's changed here? Well, we added a key-value pair to our state object inside our constructor. Then we changed the contents of the render function. Now, it's actually rendering the data that we have inside the state object. Notice that inside the div tags we're using a template string literal so that we can access the value of this.state.someData straight inside of our rendered content. This is a very handy piece of functionality that React provides for us when writing components.
With React's newest version, we can actually now add state to a component without explicitly defining a constructor on the class. We can refactor our class component to look like this:
classClassComponentWithStateextendsComponent{state={someData: 8};render(){return(<div>{`Here's some data to render: ${this.state.someData}`}</div>);}}
export default ClassComponentWithState;
Our code is slightly cleaner, and doesn't require as many keystrokes as the older version. Fewer keystrokes are always a plus in my book! This new syntax is what is often referred to as 'syntactic sugar': under the hood, the React library translates this back into the old constructor code that we first started with, so that the JavaScript remains valid to the JavaScript interpreter. The clue to this is the fact that when we want to access some data from the state object, we still need to call it with this.state.someData; changing it to just state.someData does not work.
While being able to write our code in this way is nice and convenient, going forward, I'm going to stick with the 'older' style of writing my React components by explicitly defining constructors so that you'll all have a better idea of what's going on under the hood. In other words, it's more "pedagogically sound". If you prefer the newer style (and I would in my own code), feel free to write your React components that way.
classComponentUpdatingStateGreat,sowecanrendersomestatethatourcomponentpersistsforus.However,wesaidanimportantusecaseofcomponentstateistohandledynamicdata.Asinglestaticnumberisn't very dynamic at all. So now let'swalkthroughhowtoupdatecomponentstate.```jsimport React, { Component } from 'react';class ClassComponentUpdatingState extends Component { constructor() { super(); this.state = { aNumber: 8 }; }increment = () => {this.setState({ aNumber: ++this.state.aNumber });};decrement = () => {this.setState({ aNumber: --this.state.aNumber });};render() {return (<div><div>{`Ournumber: ${this.state.aNumber}`}</div><buttononClick={this.increment}>+</button><buttononClick={this.decrement}>-</button></div>);}}
export default ClassComponentUpdatingState;
Notice that we've added two methods to our class: increment and decrement. increment and decrement are methods that we are adding to our class component. Unlike the render method,increment and decrement were not already a part of our class component. This is why increment and decrement are written as arrow functions, so that they are automatically bound to our class component. This needs to happen so that we can call them later on. Again, there's no crazy React black magic going on here, we simply added two methods to our class.
The more interesting thing is what is going on within the bodies of these methods. Each calls this funky setStatefunction. setState in fact is provided to us by React. It is the canonical way to update a component's state. Actually, it's the only way you should ever update a component's state. It may seem more verbose than necessary, but there are good reasons for why you should be doing it this way. I'm not going to get into those reasons now. I'll leave a link to the official documentation on the setState function, although I'm pretty sure at this point it will probably just blow your mind and/or overwhelm you with jargon. So for now, take this as a case of "because I'm telling you so".
So the way to use setState to update a component's state is to pass it an object with each of the state keys you wish to update, along with the updated value. In our increment method we said "I would like to update the aNumber property on my component state by adding one to it and then setting the new value as my new aNumber". The same thing happens in our decrement method, only we're subtracting instead of adding.
Then the other new concept we're running into here is how to actually call these methods we've added to our class. We added two HTML button tags within our render function, then in their respective onClick handlers, we specify the method that should be called whenever this button gets clicked. So whenever we click either of the buttons, our state gets updated appropriately and our component will re-render to show the correct value we're expecting.
classComponentIteratingStateAnothercommonstatepatternyou'llseebeingusedinReactcomponentsisiteratingoveranarrayinourstateobjectandrenderingeacharrayelementinitsowntag.Thisisoftenusedinordertorenderlists.Additionally,wewanttobeabletoeasilyupdatelistsandhaveReactre-renderourupdatedlist.We'llseehowbothofthesearedoneandhowtheyworktogetherwithinasinglecomponentinordertocreatethebehaviorofadynamiclist.
```jsimportReact,{Component}from'react';classClassComponentIteratingStateextendsComponent{constructor(){super();this.state={ingredients: ['flour','eggs','milk','sugar','vanilla extract'],newIngredient: ''};}handleIngredientInput=(event)=>{this.setState({newIngredient: event.target.value});};addIngredient=(event)=>{event.preventDefault();constingredientsList=this.state.ingredients;ingredientsList.push(this.state.newIngredient);this.setState({newIngredient: '',ingredients: ingredientsList});};render(){return(<div>{this.state.ingredients.map(ingredient=><div>{ingredient}</div>)}<formonSubmit={this.addIngredient}><inputtype="text"onChange={this.handleIngredientInput}placeholder="Add a new ingredient"value={this.state.newIngredient}/></form></div>);}}
export default ClassComponentIteratingState;
The first change to note is that our state object now has an 'ingredients' array, and a 'newIngredient' field that has been initialized to an empty string. The ingredients array contains the elements that we'll want to render in our list. We'll see shortly why the newIngredient field is needed.
The addIngredient and handleIngredientInput methods we've added to our class receives a parameter called 'event'. This event object is part of the browser's API. When we interact with some DOM element, such as clicking on an HTML button, the function that is invoked upon that button being clicked actually receives the event object. So when we type some input into an input tag, we're able grab each character that was typed into the input field through the event object paramter.
The handleIngredientInput method is what gets invoked every time the user presses a key to enter text in the input box for adding a new ingredient. Every character the user types gets persisted in the newIngredient field on the state object. We're able to grab the text in the input box using event.target.value, which holds the value of the string text that is currently in the input box. We use that to update our newIngredient string field.
Breaking down the addIngredient method, we see this event.preventDefault() invocation. This is because this method will be used upon submitting a form, and it turns out that submitting a form triggers some default form behavior that we don't want to trigger when we submit the form (namely refreshing the entire page). event.preventDefault() will prevent this default form behavior, meaning our form will only do what we want it to do when it is submitted.
Next, we store a reference to this.state.ingredients in a variable called ingredientsList. So we now have a copy of the array that is stored in our state object. We want to update the copy of the ingredients array first instead of directly updating the actual array itself in state. This is a React best practice.
Now we push whatever value is being stored at our newIngredient field onto the ingredientsList array so that our ingredientsList array is now more up-to-date than our this.state.ingredients array. So all we have to do now is call setState appropriately in order to update the value in our state object. Additionally, we also set the newIngredient field back to an empty string in order to clear out the input field once we submit a new ingredient. Now it's ready to accept more user input!
Looking at our render function, first note the this.state.ingredients.map call. This is looping through each ingredient in our ingredients array and returning each one within its own div tag. This is a very common syntax for rendering everything inside an array.
Then we have an HTML form which contains an input field. The purpose of this form is to allow a user to add new ingredients to the list. Note that we're passing our addIngredient method to the form's onSubmit handler. This means that our addIngredient method gets invoked whenever our form is submitted.
Lastly, the input field has an onChange handler that invokes our handleIngredientInput method whenever there is some sort of change in the input field, namely when a user types into it. Notice that the value field in our input tag reads off of this.state.newIngredient in order to know what value to display. So when a user enters text into the input field, the onChange handler is invoked every time, which updates our this.state.newIngredient field, which the input field
then renders.
Parent and Child Components
Now let's get into talking about how to have components interact with each other. A single isolated component isn't going to do us much good. That being said, it's possible to simply throw all of the HTML for a page into a single React component, though at that point that one component would be so bloated and monolithic that you might as well not have used React at all.
The beauty of React lies in the fact that it allows us to compose modular components together. Let's start off with the component we just saw, but let's change its name to ParentComponent.
importReact,{Component}from'react';importChildComponentfrom'./ChildComponent';classParentComponentextendsComponent{constructor(){super();this.state={ingredients: ['flour','eggs','milk','sugar','vanilla'],newIngredient: ''};}handleIngredientInput=(event)=>{this.setState({newIngredient: event.target.value});};addIngredient=(event)=>{event.preventDefault();constingredientsList=this.state.ingredients;ingredientsList.push(this.state.newIngredient);this.setState({newIngredient: '',ingredients: ingredientsList});};render(){return(<div>{this.state.ingredients.map(ingredient=><ChildComponentthing={ingredient}/>)}<formonSubmit={this.addIngredient}><inputtype="text"onChange={this.handleIngredientInput}placeholder="Add a new ingredient"value={this.state.newIngredient}/></form></div>);}}exportdefaultParentComponent;
The only two other differences in this component are that we're importing a ChildComponent and then using it inside our this.state.ingredients.map call. ChildComponent is another React component. Notice that we're using it just as if it were any other HTML tag. This is how we lay out our component hierarchy: the ChildComponent is rendered within the ParentComponent. We can see this to be the case if we open up the developer console and inspect these elements.
Note also that we're passing each ingredient as a 'thing' to the ChildComponent component. This is how a parent component passes data to a child component. It doesn't need to be called 'thing'; you can call it whatever you want. Conceptually though, every piece of data that a parent component passes down to a child component is called a 'prop' in React lingo.
Let's take a look now at the Child Component. It serves two purposes: 1) to render the props data that it gets from a parent component, and 2) to add the ability for a user to click on it and have it toggle a strikethrough, indicating that the item is 'complete'.
import React, { Component } from 'react';
export default ChildComponent;
The overall structure of the child component is nothing we haven't seen. It's just another class component with its own state object and a method called handleClick.
A component accesses its props via the this.props object. Any prop a parent component passes down to a child component is accessible inside the child component's this.prop object.
So our child component keeps its own state that tracks whether the component has been clicked or not. Then at the top of the render function, it uses a ternary condition to determine whether the div tag that is being rendered should have a strikethrough or not. The handleClick method is then invoked via an onClick handler on the div tag; it does the work of toggling the this.state.clicked boolean.
The overall structure of React applications can be represented as a hierarchical tree structure, just like how the DOM itself is structure. There is an overarching root component at the top of the hierarchy that every other component sits underneath. Specifying that a component should be a child of some parent component is as simple as throwing it in the parent component's render function, just like how we did it in this example.
Babel can translate between different versions of javascript so that your code can run on browsers that are limited to ES5 compatibility... included by default with every new react project.
|15:25:30|bryan@LAPTOP-9LGJ3JGS:[05-installing-nodejs] 05-installing-nodejs_exitstatus:0__________________________________________________________o>npx create-react-app my-appy-appnpm startCreating a new React app in /mnt/c/MY-WEB-DEV/10-React-V3/05-installing-nodejs/my-app.Installing packages. This might take a couple of minutes.Installing react, react-dom, and react-scripts with cra-template...yarn add v1.22.5[1/4] Resolving packages...[2/4] Fetching packages...info [email protected]: The platform "linux" is incompatible with this module.info "[email protected]" is an optional dependency and failed compatibility check. Excluding it from installation.info [email protected]: The platform "linux" is incompatible with this module.info "[email protected]" is an optional dependency and failed compatibility check. Excluding it from installation.[3/4] Linking dependencies...warning "react-scripts > @typescript-eslint/eslint-plugin > [email protected]" has unmet peer dependency "typescript@>=2.8.0 || >= 3.2.0-dev || >= 3.3.0-dev || >= 3.4.0-dev || >= 3.5.0-dev || >= 3.6.0-dev || >= 3.6.0-beta || >= 3.7.0-dev || >= 3.7.0-beta".[----------------------------------------------------------------------------------------------------------------------------------------------------------------------------------------------------------------------------------------------------------------------[4/4] Building fresh packages...success Saved lockfile.success Saved 7 new dependencies.info Direct dependencies├─ [email protected]├─ [email protected]├─ [email protected]└─ [email protected]info All dependencies├─ [email protected]├─ [email protected]├─ [email protected]├─ [email protected]├─ [email protected]├─ [email protected]└─ [email protected]Done in 768.43s.Installing template dependencies using yarnpkg...yarn add v1.22.5[1/4] Resolving packages...[2/4] Fetching packages...info [email protected]: The platform "linux" is incompatible with this module.info "[email protected]" is an optional dependency and failed compatibility check. Excluding it from installation.info [email protected]: The platform "linux" is incompatible with this module.info "[email protected]" is an optional dependency and failed compatibility check. Excluding it from installation.[3/4] Linking dependencies...warning "react-scripts > @typescript-eslint/eslint-plugin > [email protected]" has unmet peer dependency "typescript@>=2.8.0 || >= 3.2.0-dev || >= 3.3.0-dev || >= 3.4.0-dev || >= 3.5.0-dev || >= 3.6.0-dev || >= 3.6.0-beta || >= 3.7.0-dev || >= 3.7.0-beta".warning " > @testing-library/[email protected]" has unmet peer dependency "@testing-library/dom@>=7.21.4".[4/4] Building fresh packages...success Saved lockfile.success Saved 17 new dependencies.info Direct dependencies├─ @testing-library/[email protected]├─ @testing-library/[email protected]├─ @testing-library/[email protected]├─ [email protected]├─ [email protected]└─ [email protected]info All dependencies├─ @testing-library/[email protected]├─ @testing-library/[email protected]├─ @testing-library/[email protected]├─ @testing-library/[email protected]├─ @types/[email protected]├─ @types/[email protected]├─ @types/[email protected]├─ [email protected]├─ [email protected]├─ [email protected]├─ [email protected]├─ [email protected]├─ [email protected]├─ [email protected]├─ [email protected]├─ [email protected]└─ [email protected]Done in 706.12s.Removing template package using yarnpkg...yarn remove v1.22.5[1/2] Removing module cra-template...[2/2] Regenerating lockfile and installing missing dependencies...info [email protected]: The platform "linux" is incompatible with this module.info "[email protected]" is an optional dependency and failed compatibility check. Excluding it from installation.info [email protected]: The platform "linux" is incompatible with this module.info "[email protected]" is an optional dependency and failed compatibility check. Excluding it from installation.warning " > @testing-library/[email protected]" has unmet peer dependency "@testing-library/dom@>=7.21.4".warning "react-scripts > @typescript-eslint/eslint-plugin > [email protected]" has unmet peer dependency "typescript@>=2.8.0 || >= 3.2.0-dev || >= 3.3.0-dev || >= 3.4.0-dev || >= 3.5.0-dev || >= 3.6.0-dev || >= 3.6.0-beta || >= 3.7.0-dev || >= 3.7.0-beta".success Uninstalled packages.Done in 619.62s.Success! Created my-app at /mnt/c/MY-WEB-DEV/10-React-V3/05-installing-nodejs/my-appInside that directory, you can run several commands: yarn start Starts the development server. yarn build Bundles the app into static files for production. yarn test Starts the test runner. yarn eject Removes this tool and copies build dependencies, configuration files and scripts into the app directory. If you do this, you can't go back!We suggest that you begin by typing: cd my-app yarn startCompiled successfully!You can now view my-app in the browser. Local: http://localhost:3000 On Your Network: http://172.25.168.12:3000Note that the development build is not optimized.To create a production build, use yarn build.
ex5 — A Class Component that Iterates through State
ex6 — An Example of Parent and Child Components
With regards to converting an existing HTML, CSS, and JS site into React, first you'll want to think about how to break up your site into components,
as well as think about what the general hierarchical component structure of your site will look like.
From there, it's a simple matter of copying the relevant HTML for that component and throwing it into the render method of your component file.
Any methods that are needed for that component to function properly can added onto your new component.
Once you've refactored your HTML components into React components, you'll want to lay them out in the desired hierarchical structure
with children components being rendered by their parents, as well as ensuring that the parent components are passing down the necessary data as props to their children components.
ex.)
//
<!-- Hello world -->
<divclass="awesome"style="border: 1px solid red"><labelfor="name">Enter your name: </label><inputtype="text"id="name"/></div><p>EnteryourHTMLhere</p>
Is equivalent to:
//xletNewComponent=React.createClass({render: function(){return(<div>{/* Hello world */}<divclassName="awesome"style={{border: '1px solid red'}}><labelhtmlFor="name">Enter your name: </label><inputtype="text"id="name"/></div><p>Enter your HTML here</p></div>);}});
A Basic Component
Acomponent is some thing that is being rendered in the browser. It could be a button, a form with a bunch of fields in it…etc.…
React doesn't place any restrictions on how large or small a component can be.
You could have an entire static site encapsulated in a single React component, but that would defeat the purpose of using React.
So the first thing to remember about a component is that a component mustrendersomething.
If nothing is being rendered from a component, then React will throw an error.
Inside of BasicComponent.js , first import React at the top of the file. Our most basic of components looks like this:
This is a component that simply returns a div tag with the words Hello World! inside.
The last line simply exports our component so that it can be imported by another file.
Notice that this component looks exactly like an anonymous arrow function that we've named BasicComponent .
In fact, that is literally what this is.
The arrow function then is simply returning the div tag. When a component is written as a function like this one is, it is called a functional component.
A Basic Class Component
The above component is an example of a functional component, which is appropriate since that component is literally nothing more than a function that returns some HTML.
Functional components are great when all you want a component to do is to render some stuff.
Components can also be written as classes (although this paradigm is becoming outdated and you should strive to write your components functionally!
For this exercise, we're going to write a class component that does exactly the same thing as the functional component we just wrote.
We'll again need to import React at the top of the file, but we'll also need to add a little something. Our import statement will look like this:
import React, { Component } from 'react';
So, in addition to importing React, we're also importing the base Component class that is included in the React library.
React lets you define components as classes or functions.
Components defined as classes currently provide more features . To define a React component class, you need to extend React.Component:
The only method youmustdefine in a React.Component subclass is called``.
render()
The render() method is the only required method in a class component.
When called, it should examine this.props and this.state and return one of the following types:
React elements. Typically created via JSX. For example, <div /> and <MyComponent /> are React elements that instruct React to render a DOM node, or another user-defined component, respectively.
Arrays and fragments. Let you return multiple elements from render. See the documentation on fragments for more details.
Portals. Let you render children into a different DOM subtree. See the documentation on portals for more details.
String and numbers. These are rendered as text nodes in the DOM.
Booleans or null. Render nothing. (Mostly exists to support return test && <Child /> pattern, where test is boolean.)
The render() function should be pure, meaning that it does not modify component state, it returns the same result each time it's invoked, and it does not directly interact with the browser.
If you need to interact with the browser, perform your work in componentDidMount() or the other lifecycle methods instead. Keeping render() pure makes components easier to think about.
Notice that our BasicClassComponent inherits from the base Component class that we imported from the React library, by virtue of the 'extends' keyword.
That being said, there's nothing in this minimal component that takes advantage of any of those inherited methods.
All we have is a method on our component class called render that returns the same div tag.
If we really were deciding between whether to use a functional component versus a class component to render a simple div tag, then the functional style is more appropriate to use.
This is because class components are much better suited for handling component state and triggering events based on the component's lifecycle.
The important takeaways at this point are that there are two types of components, functional and class components, and that functional components are well-suited if you're just looking to render some HTML.
Class components, on the other hand, are much better suited for handling components that require more complex functionality, need to exhibit more varied behavior, and/or need to keep track of some state that may change throughout said component's lifecycle.
A Class Component with Some State
Component state is any dynamic data that we want the component to keep track of.
For example, let's say we have a form component. This form has some input fields that we'd like users to fill out. When a user types characters into an input field, how is that input persisted from the point of view of our form component?
The answer is by using component state!
There are a few important concepts regarding component state, such as how to update it, pass it to another component, render it, etc.
Only class components have the ability to persist state, so if at any time you realize that a component needs to keep track of some state, you know that you'll automatically need a class component instead of a functional component.
It is possible to handle state with functional components but that requires the use of something called the useState() hook. Hooks were added in React 16.8; prior to this release, there was no mechanism to add state to functional components.
Here's what the above component looks like as a functional component:
Our class component with state will look a lot like the basic class component we just wrote, but with some exceptions:
So far, the only new thing going on here is the constructor block. If you recall how classes in JavaScript work, classes need constructors.
Additionally, if a class is extending off of another class and wants access to its parent class's methods and properties, then the super function needs to be called inside the class's constructor function.
Point being, the constructor function and the call to the super function are not associated with React, they are associated with all JavaScript classes.
Then there is the ``** property inside the constructor function that is set as an empty object**.
We're adding a property called state to our class and setting it to an empty object.
State objects in React are always just plain old objects.
So why is it that the basic class component we wrote in the previous exercise had no constructor function within its body?
That is because we had no need for them since all our class component was doing was rendering some HTML.
The constructor is needed here because that is where we need to initialize our state object.
The call to super is needed because we can't reference this inside of our constructor without a call to super first.
Ok, now let's actually use this state object.
One very common application of state objects in React components is to render the data being stored inside them within our component's render function.
Refactoring our component class to do that:
//xclassClassComponentWithStateextendsComponent{constructor(){super();this.state={someData: 8};}render(){return<div>{`Here's some data to render: ${this.state.someData}`}</div>;}}exportdefaultClassComponentWithState;
We added a key-value pair to our state object inside our constructor.
Then we changed the contents of the render function.
Now, it's actually rendering the data that we have inside the state object.
Notice that inside the div tags we're using a template string literal so that we can access the value of this.state.someData straight inside of our rendered content.
With Reacts newest version, we can actually now add state to a component without explicitly defining a constructor on the class. We can refactor our class component to look like this:
//xclassClassComponentWithStateextendsComponent{state={someData: 8};render(){return<div>{`Here's some data to render: ${this.state.someData}`}</div>;}}exportdefaultClassComponentWithState;
This new syntax is what is often referred to as 'syntactic sugar': under the hood, the React library translates this back into the old constructor code that we first started with, so that the JavaScript remains valid to the JavaScript interpreter.
The clue to this is the fact that when we want to access some data from the state object, we still need to call it with this.state.someData ; changing it to just state.someData does not work.
Class Component Updating State
Great, so we can render some state that our component persists for us.
However, we said an important use case of component state is to handle dynamic data.
A single static number isn't very dynamic at all.
So now let's walk through how to update component state.
Notice that we've added two methods to our class: increment and decrement .
increment and decrement are methods that we are adding to our class component.
Unlike the render method, increment and decrement were not already a part of our class component.
This is why increment and decrement are written as arrow functions, so that they are automatically bound to our class component.
The alternative is using a declaration syntax function with the bind method to bind the context of our methods to the class component.
The more interesting thing is what is going on within the bodies of these methods.
Each calls the setState function.
setState in fact is provided to us by React.
It is the standard way to update a component's state.
It's the only way you should ever update a component's state. It may seem more verbose than necessary, but there are good reasons for why you should be doing it this way.
Unlike the lifecycle methods above (which React calls for you), the methods below are the methods you can call from your components.
There are just two of them: setState() and forceUpdate().
setState()
setState(updater, [callback])
setState() enqueues changes to the component state and tells React that this component and its children need to be re-rendered with the updated state. This is the primary method you use to update the user interface in response to event handlers and server responses.
Think of setState() as a request rather than an immediate command to update the component. For better perceived performance, React may delay it, and then update several components in a single pass. React does not guarantee that the state changes are applied immediately.
setState() does not always immediately update the component. It may batch or defer the update until later. This makes reading this.state right after calling setState() a potential pitfall. Instead, use componentDidUpdate or a setState callback (setState(updater, callback)), either of which are guaranteed to fire after the update has been applied. If you need to set the state based on the previous state, read about the updater argument below.
setState() will always lead to a re-render unless shouldComponentUpdate() returns false. If mutable objects are being used and conditional rendering logic cannot be implemented in shouldComponentUpdate(), calling setState() only when the new state differs from the previous state will avoid unnecessary re-renders.
The first argument is an updater function with the signature:
(state, props) => stateChange
state is a reference to the component state at the time the change is being applied. It should not be directly mutated. Instead, changes should be represented by building a new object based on the input from state and props. For instance, suppose we wanted to increment a value in state by props.step:
Both state and props received by the updater function are guaranteed to be up-to-date. The output of the updater is shallowly merged with state.
The second parameter to setState() is an optional callback function that will be executed once setState is completed and the component is re-rendered. Generally we recommend using componentDidUpdate() for such logic instead.
You may optionally pass an object as the first argument to setState() instead of a function:
setState(stateChange[, callback])
This performs a shallow merge of stateChange into the new state, e.g., to adjust a shopping cart item quantity:
this.setState({quantity: 2})
This form of setState() is also asynchronous, and multiple calls during the same cycle may be batched together. For example, if you attempt to increment an item quantity more than once in the same cycle, that will result in the equivalent of:
Subsequent calls will override values from previous calls in the same cycle, so the quantity will only be incremented once. If the next state depends on the current state, we recommend using the updater function form, instead:
So the way to use setState to update a component's state is to pass it an object with each of the state keys you wish to update, along with the updated value.
In our increment method we said "I would like to update the aNumber property on my component state by adding one to it and then setting the new value as my new aNumber ".
The same thing happens in our decrement method, only we're subtracting instead of adding.
Then the other new concept we're running into here is how to actually call these methods we've added to our class.
We added two HTML button tags within our render function, then in their respective onClick handlers, we specify the method that should be called whenever this button gets clicked. So whenever we click either of the buttons, our state gets updated appropriately and our component will re-render to show the correct value we're expecting.
Class Component Iterating State
Another common state pattern you'll see being used in React components is iterating over an array in our state object and rendering each array element in its own tag.
This is often used in order to render lists.
Additionally, we want to be able to easily update lists and have React re-render our updated list.
We'll see how both of these are done and how they work together within a single component in order to create the behavior of a dynamic list.
//ximportReact,{Component}from'react';classClassComponentIteratingStateextendsComponent{constructor(){super();this.state={ingredients: ['flour','eggs','milk','sugar','vanilla extract'],newIngredient: ''};}handleIngredientInput=(event)=>{this.setState({newIngredient: event.target.value});};addIngredient=(event)=>{event.preventDefault();constingredientsList=this.state.ingredients;ingredientsList.push(this.state.newIngredient);this.setState({newIngredient: '',ingredients: ingredientsList});};render(){return(<div>{this.state.ingredients.map((ingredient)=>(<div>{ingredient}</div>))}<formonSubmit={this.addIngredient}><inputtype="text"onChange={this.handleIngredientInput}placeholder="Add a new ingredient"value={this.state.newIngredient}/></form></div>);}}exportdefaultClassComponentIteratingState;
The first change to note is that our state object now has an 'ingredients' array, and a 'newIngredient' field that has been initialized to an empty string.
The ingredients array contains the elements that we'll want to render in our list.
The addIngredient and handleIngredientInput methods we've added to our class receives a parameter called 'event'.
This event object is part of the browser's API.
When we interact with some DOM element, such as clicking on an HTML button, thefunction that is invoked upon that button being clickedactually receives the event object.
So when we type some input into an input tag, we're able grab each character that was typed into the input field through the event object parameter.
The handleIngredientInput method is what gets invoked every time the user presses a key to enter text in the input box for adding a new ingredient.
Every character the user types gets persisted in the newIngredient field on the state object.
We're able to grab the text in the input box using event.target.value
Which holds the value of the string text that is currently in the input box.
We use that to update our newIngredient string field.
Breaking down the addIngredient method, we see this event.preventDefault() invocation.
This is because this method will be used upon submitting a form, and it turns out that submitting a form triggers some default form behavior that we don't want to trigger when we submit the form (namely refreshing the entire page).
event.preventDefault() will prevent this default form behavior, meaning our form will only do what we want it to do when it is submitted.
Next, we store a reference to this.state.ingredients in a variable called ingredientsList .
So we now have a copy of the array that is stored in our state object.
We want to update the copy of the ingredients array first instead of directly updating the actual array itself in state.
Now we push whatever value is being stored at our newIngredient field onto the ingredientsList array so that our ingredientsList array is now more up-to-date than our this.state.ingredients array.
So all we have to do now is call setState appropriately in order to update the value in our state object.
Additionally, we also set the newIngredient field back to an empty string in order to clear out the input field once we submit a new ingredient.
Now it's ready to accept more user input!
Looking at our render function, first note the this.state.ingredients.map call.
This is looping through each ingredient in our ingredients array and returning each one within its own div tag.
This is a very common pattern for rendering everything inside an array.
Then we have an HTML form which contains an input field.
The purpose of this form is to allow a user to add new ingredients to the list. Note that we're passing our addIngredient method to the form's onSubmit handler.
This means that our addIngredient method gets invoked whenever our form is submitted.
Lastly, the input field has an onChange handler that invokes our handleIngredientInput method whenever there is some sort of change in the input field, namely when a user types into it.
Notice that the value field in our input tag reads off of this.state.newIngredient in order to know what value to display.
So when a user enters text into the input field, the onChange handler is invoked every time, which updates our this.state.newIngredient field, which the input field and then renders.
Parent and Child Components
A single isolated component isn't going to do us much good.
The beauty of React lies in the fact that it allows us to compose modular components together.
Let's start off with the component we just saw, but let's change its name to `` .
//ximportReact,{Component}from'react';importChildComponentfrom'./ChildComponent';classParentComponentextendsComponent{constructor(){super();this.state={ingredients: ['flour','eggs','milk','sugar','vanilla'],newIngredient: ''};}handleIngredientInput=(event)=>{this.setState({newIngredient: event.target.value});};addIngredient=(event)=>{event.preventDefault();constingredientsList=this.state.ingredients;ingredientsList.push(this.state.newIngredient);this.setState({newIngredient: '',ingredients: ingredientsList});};render(){return(<div>{this.state.ingredients.map((ingredient)=>(<ChildComponentthing={ingredient}/>))}<formonSubmit={this.addIngredient}><inputtype="text"onChange={this.handleIngredientInput}placeholder="Add a new ingredient"value={this.state.newIngredient}/></form></div>);}}exportdefaultParentComponent;
The only two other differences in this component are that we're importing a ChildComponent and then using it inside our this.state.ingredients.map call.
ChildComponent is another React component.
Notice that we're using it just as if it were any other HTML tag.
This is how we lay out our component hierarchy: the ChildComponent is rendered within the ParentComponent.
We can see this to be the case if we open up the developer console and inspect these elements.child-left: parent-right
Note also that we're passing each ingredient as a 'thing' to the ChildComponent component.
This is how a parent component passes data to a child component. It doesn't need to be called 'thing'; you can call it whatever you want.
Conceptually though, every piece of data that a parent component passes down to a child component is called a 'prop' in React lingo.
Let's take a look now at the Child Component. It serves two purposes:
to render the props data that it gets from a parent component,
to add the ability for a user to click on it and have it toggle a strikethrough, indicating that the item is 'complete'.
The overall structure of the child component is nothing we haven't seen. It's just another class component with its own state object and a method called handleClick .
A component accesses its props via the this.props object.
Any prop a parent component passes down to a child component is accessible inside the child component's this.prop object.
So our child component keeps its own state that tracks whether the component has been clicked or not.
Then at the top of the render function, it uses a ternary condition to determine whether the div tag that is being rendered should have a strikethrough or not.
The handleClick method is then invoked via an onClick handler on the div tag; it does the work of toggling the this.state.clicked Boolean.
The overall structure of React applications can be represented as a hierarchical tree structure, just like how the DOM itself is structure. There is an overarching root component at the top of the hierarchy that every other component sits underneath. Specifying that a component should be a child of some parent component is as simple as throwing it in the parent component's render function, just like how we did it in this example
Core Concepts:
1. What is react?
React is a declarative, efficient, and flexible JavaScript library for building user interfaces. It uses components to update and render as your data changes.
React manages the creation and continuous updating of DOM nodes in your Web page.
It does not handleAJAXrequests, Local Storage or style your website. IT is just a tool to dynamically render content on a webpage as a result of changes in 'state'. Because it's function is so limited in scope you may hear it referred to as a library… (not a framework … like Angular for example) and you may also hear it described as unopinionated.
2. Why use react?
Works for teams and helps UI workflow patterns
The components can be reusable
Componentized UI is the future of web dev
Declarative programming
In the same way that you use HTML to declare what the user interface should
look like, React provides the same mechanism in its `` method or the higher-level language known as JSX.React… like HTML is Declarative
Declarative programming is a non-imperative style of programming in which programs describe their desired results without explicitly listing commands or steps that must be performed.
Its return value is only determined by its input values
Its return value is always the same for the same input values
A React component is considered pure if it renders the same output for the same state and props. For class components like this, React provides the PureComponent base class. Class components that extend the React.PureComponent class are treated as pure components.
Pure components have some performance improvements and render optimizations since React implements the shouldComponentUpdate() method for them with a shallow comparison for props and state.
Are React functional components pure?
Functional components are very useful in React, especially when you want to isolate state management from the component. That's why they are often called stateless components.
However, functional components cannot leverage the performance improvements and render optimizations that come with React.PureComponent since they are not classes by definition.
If you want React to treat a functional component as a pure component, you'll have to convert the functional component to a class component that extends React.PureComponent.
//xfunctionPercentageStat({ label, score =0, total =Math.max(1,score)}){return(<div><h6>{label}</h6><span>{Math.round((score/total)*100)}%</span></div>);}// CONVERTED TO PURE COMPONENTclassPercentageStatextendsReact.PureComponent{render(){const{ label, score =0, total =Math.max(1,score)}=this.props;return(<div><h6>{label}</h6><span>{Math.round((score/total)*100)}%</span></div>);}}
Reusability
React encourages you to think in terms of reusability as you construct the user
interface from elements and components that you create. When you
make a list or a button, you can then reuse those components to show different data 'state' in the same UI structure as you have built for different data previously.
Component-Based
Build encapsulated components that manage their own state, then compose them to make complex UIs.
Since component logic is written in JavaScript instead of templates, you can easily pass rich data through your app and keep state out of the DOM.
Learn Once, Write Anywhere
We don't make assumptions about the rest of your technology stack, so you can develop new features in React without rewriting existing code.
React can also render on the server using Node and power mobile apps using React Native.
Speed
Due to the use of a virtual DOM, React handles changes to a Web page more
intelligently than just string manipulation. It is constantly monitors the
virtual DOM for changes. It very efficiently reconciles changes in the virtual
DOM with what it has already produced in the real DOM. This is what
makes React one of the speediest front-end libraries available.
3. Who uses react?
Companies such as Facebook app for android and Instagram
Here is a link to a list of other companies who use react.
Who uses react
4. Setting up react
React can be set up in CodePen for quick practice development by adding react.js, react-dom and babel.
It can also be set up by downloading a react starter project from GitHub installing node and following these instructions.
Alternatively it can be set up through NPM like this.
5. Intro to eco system
Composition, being able to wrap up sections of code into there own containers so they can be re used.
How to make a large application? by combining small components to create a larger complex application.
PropTypes allow you to declare the type (string, number, function, etc) of each prop being passed to a component. Then if a prop passed in isn't of the declared type you'll get a warning in the console.
Excerpt from the React website:
React — A JavaScript library for building user interfaces
A JavaScript library for building user interfaces
Declarative
React makes it painless to create interactive UIs. Design simple views for each state in your application, and React will efficiently update and render just the right components when your data changes.
Declarative views make your code more predictable and easier to debug.
A Simple Component
React components implement a render() method that takes input data and returns what to display. This example uses an XML-like syntax called JSX. Input data that is passed into the component can be accessed by render() via this.props.
JSX is optional and not required to use React. Try the Babel REPL to see the raw JavaScript code produced by the JSX compilation step.
In addition to taking input data (accessed via this.props), a component can maintain internal state data (accessed via this.state). When a component's state data changes, the rendered markup will be updated by re-invoking render().
An Application
Using props and state, we can put together a small Todo application. This example uses state to track the current list of items as well as the text that the user has entered. Although event handlers appear to be rendered inline, they will be collected and implemented using event delegation.
A Component Using External Plugins
React allows you to interface with other libraries and frameworks. This example uses remarkable, an external Markdown library, to convert the <textarea>'s value in real time.
So many times I have seen developers use the index of an item as its key when they render a list.
title
description
robots
extra
Lists and Keys
Let me explain, a _key_ is the only thing React uses to identify DOM elements. What happens if you push an item to the list or remove something in the middle? If the _key_ is same as before React assumes that the DOM element represents the same component as before. But that is no longer true.
docs
> ## Excerpt
Lists and Keys - React
Excerpt
A JavaScript library for building user interfaces
First, let's review how you transform lists in JavaScript.
Given the code below, we use the map() function to take an array of numbers and double their values. We assign the new array returned by map() to the variable doubled and log it:
In React, transforming arrays into lists of elements is nearly identical.
Rendering Multiple Components
You can build collections of elements and include them in JSX using curly braces {}.
Below, we loop through the numbers array using the JavaScript map() function. We return a <li> element for each item. Finally, we assign the resulting array of elements to listItems:
When you run this code, you'll be given a warning that a key should be provided for list items. A "key" is a special string attribute you need to include when creating lists of elements. We'll discuss why it's important in the next section.
Let's assign a key to our list items inside numbers.map() and fix the missing key issue.
Keys help React identify which items have changed, are added, or are removed. Keys should be given to the elements inside the array to give the elements a stable identity:
The best way to pick a key is to use a string that uniquely identifies a list item among its siblings. Most often you would use IDs from your data as keys:
We don't recommend using indexes for keys if the order of items may change. This can negatively impact performance and may cause issues with component state. Check out Robin Pokorny's article for an in-depth explanation on the negative impacts of using an index as a key. If you choose not to assign an explicit key to list items then React will default to using indexes as keys.
Keys only make sense in the context of the surrounding array.
For example, if you extract a ListItem component, you should keep the key on the <ListItem /> elements in the array rather than on the <li> element in the ListItem itself.
A good rule of thumb is that elements inside the map() call need keys.
Keys Must Only Be Unique Among Siblings
Keys used within arrays should be unique among their siblings. However, they don't need to be globally unique. We can use the same keys when we produce two different arrays:
Keys serve as a hint to React but they don't get passed to your components. If you need the same value in your component, pass it explicitly as a prop with a different name:
Sometimes this results in clearer code, but this style can also be abused. Like in JavaScript, it is up to you to decide whether it is worth extracting a variable for readability. Keep in mind that if the map() body is too nested, it might be a good time to extract a component.
So many times I have seen developers use the index of an item as its key when they render a list.
It looks elegant and it does get rid of the warning (which was the ‘real' issue, right?). What is the danger here?
It may break your application and display wrong data!
Let me explain, a key is the only thing React uses to identify DOM elements. What happens if you push an item to the list or remove something in the middle? If the key is same as before React assumes that the DOM element represents the same component as before. But that is no longer true.
Stephen describes the problem he run into on egghead.io
Screenshot of the example showing the danger of using the index as key.
It turns out, when nothing is passed React uses the index as key because it is the best guess at the moment. Moreover, it will warn you that it is suboptimal (it says that in a bit confusing words, yes). If you provide it by yourself React just thinks that you know what you are doing which — remember the example — can lead to unpredictable results.
Better
Each such item should have a permanent and unique property. Ideally, it should be assigned when the item is created. Of course, I am speaking about an id. Then we can use it the following way:
Note: First look at the existing properties of the items. It is possible they already have something that can be used as an id.
One way to do so it to just move the numbering one step up in the abstraction. Using a global index makes sure any two items would have different _id_s.
let todoCounter = 1;const createNewTodo = (text) => ({
completed: false,
id: todoCounter++,
text
}
Much better
A production solution should use a more robust approach that would handle a distributed creation of items. For such, I recommend nanoid. It quickly generates short non-sequential url-friendly unique ids. The code could look like the following:
import { nanoid } from 'nanoid';const createNewTodo = (text) => ({
completed: false,
id: nanoid(),
text
}
TL;DR: Generate a unique id for every item and use it as key when rendering the list.
Update: Exception from the rule
Many people asked if they always, always have to generate ids. Others have suggested use cases when using the index as a key seems justifiable.
It is true that sometimes generating new ids is redundant and may be avoided. For example translation of license terms or list of contributors.
To help you decide, I put together three conditions which these examples have in common:
the list and items are static-they are not computed and do not change;
the items in the list have no ids;
the list is never reordered or filtered.
When all of them are met, you may safely use the index as a key.
Update 2: React, Preact, and *react
Although in this article I write about React, the problem is not exclusive to it. In similar libraries, like Preact, the danger is present, too. However, the effects can be different.
See the following StackOverflow question, where the last element disappears. Also please note the explanation in the answers provided by the creator of Preact,
JSX is an XML/HTML-like syntax used by React that extends ECMAScript so that XML/HTML-like text can co-exist with JavaScript/React code. The syntax is intended to be used by preprocessors (i.e., transpilers like Babel) to transform HTML-like text found in JavaScript files into standard JavaScript objects that a JavaScript engine will parse.
Basically, by using JSX you can write concise HTML/XML-like structures (e.g., DOM like tree structures) in the same file as you write JavaScript code, then Babel will transform these expressions into actual JavaScript code. Unlike the past, instead of putting JavaScript into HTML, JSX allows us to put HTML into JavaScript.
By using JSX one can write the following JSX/JavaScript code:
You can think of JSX as a shorthand for calling React.createElement().
The idea of mixing HTML and JavaScript in the same file can be a rather contentious topic. Ignore the debate. Use it if you find it helpful. If not, write the React code required to create React nodes. Your choice. My opinion is that JSX provides a concise and familiar syntax for defining a tree structure with attributes that does not require learning a templating language or leaving JavaScript. Both of which are can be a win when building large applications.
It should be obvious but JSX is easier to read and write over large pyramids of JavaScript function calls or object literals (e.g., contrast the two code samples in this section). Additionally the React team clearly believes JSX is better suited for defining UI's than a traditional templating (e.g., Handlebars) solution:
markup and the code that generates it are intimately tied together. Additionally, display logic is often very complex and using template languages to express it becomes cumbersome. We've found that the best solution for this problem is to generate HTML and component trees directly from the JavaScript code such that you can use all of the expressive power of a real programming language to build UIs.
Consider this variable declaration:
This funny tag syntax is neither a string nor HTML.
It is called JSX, and it is a syntax extension to JavaScript. We recommend using it with React to describe what the UI should look like. JSX may remind you of a template language, but it comes with the full power of JavaScript.
JSX produces React "elements". We will explore rendering them to the DOM in the next section. Below, you can find the basics of JSX necessary to get you started.
Why JSX?
React embraces the fact that rendering logic is inherently coupled with other UI logic: how events are handled, how the state changes over time, and how the data is prepared for display.
Instead of artificially separating technologies by putting markup and logic in separate files, React separates concerns with loosely coupled units called "components" that contain both. We will come back to components in a further section, but if you're not yet comfortable putting markup in JS, this talk might convince you otherwise.
React doesn't require using JSX, but most people find it helpful as a visual aid when working with UI inside the JavaScript code. It also allows React to show more useful error and warning messages.
With that out of the way, let's get started!
Embedding Expressions in JSX
In the example below, we declare a variable called name and then use it inside JSX by wrapping it in curly braces:
You can put any valid JavaScript expression inside the curly braces in JSX. For example, 2 + 2, user.firstName, or formatName(user) are all valid JavaScript expressions.
In the example below, we embed the result of calling a JavaScript function, formatName(user), into an <h1> element.
We split JSX over multiple lines for readability. While it isn't required, when doing this, we also recommend wrapping it in parentheses to avoid the pitfalls of automatic semicolon insertion.
JSX is an Expression Too
After compilation, JSX expressions become regular JavaScript function calls and evaluate to JavaScript objects.
This means that you can use JSX inside of if statements and for loops, assign it to variables, accept it as arguments, and return it from functions:
Specifying Attributes with JSX
You may use quotes to specify string literals as attributes:
You may also use curly braces to embed a JavaScript expression in an attribute:
Don't put quotes around curly braces when embedding a JavaScript expression in an attribute. You should either use quotes (for string values) or curly braces (for expressions), but not both in the same attribute.
Warning:
Since JSX is closer to JavaScript than to HTML, React DOM uses camelCase property naming convention instead of HTML attribute names.
For example, class becomes className in JSX, and tabindex becomes tabIndex.
Specifying Children with JSX
If a tag is empty, you may close it immediately with />, like XML:
JSX tags may contain children:
JSX Prevents Injection Attacks
It is safe to embed user input in JSX:
By default, React DOM escapes any values embedded in JSX before rendering them. Thus it ensures that you can never inject anything that's not explicitly written in your application. Everything is converted to a string before being rendered. This helps prevent XSS (cross-site-scripting) attacks.
JSX Represents Objects
Babel compiles JSX down to React.createElement() calls.
These two examples are identical:
React.createElement() performs a few checks to help you write bug-free code but essentially it creates an object like this:
These objects are called "React elements". You can think of them as descriptions of what you want to see on the screen. React reads these objects and uses them to construct the DOM and keep it up to date.
We will explore rendering React elements to the DOM in the next section.
Tip:
We recommend using the "Babel" language definition for your editor of choice so that both ES6 and JSX code is properly highlighted.
Of course, if you get a DOM node for the component via refs, you can do anything you want with the DOM nodes of other components, but it will likely mess up React.
docs
What we know:
A top-level App component returns <Button /> from its render() method.
Question:
What is the relationship between <Button /> and this in that Button's render()?
Answer:
<Button> is a React "element".
If you log it, you will see a plain object like { type: Button, props: {} }.
The element does not represent anything on the screen at that point.
It is a description of what App wants to be rendered.
At some point, React will look at that description and think: "Hmm, there was no Button here but now there should be. So I'll create a Button instance."
This Button instance created by React is this value in the render() and lifecycle methods. It's only useful for calling setState() or reading the props and state.
If App gets re-rendered and React sees a <Button /> in its output again, it will think: "Hmm, I already have a Button instance exactly at the same spot. Rather than create a new one, I will just update props on the existing one and re-render it."
Let's recap.
<Button /> is an element, a description of what should be rendered. this inside the Button is the actual instance React created based on that description.
App can return a different <Button /> element every time but as long as its key doesn't change, and it is still a <Button /> and not a <Door />, React will keep using the same instance.
Question:
Does rendering `
` guarantee that an `Icon` mounts?
It doesn't. Ultimately it's always up to the component to decide what to do with its children. For example, the Button implementation could completely ignore them and render something else:
//xfunctionButton(props){return<h1>I render whatever I want</h1>;}
Interestingly, it could also render children multiple times:
//xfunctionButton(props){return(<div>
I like to repeat things.
{props.children}{props.children}{props.children}</div>);}
Ultimately, children is not a special prop in any way except for JSX sugar syntax. <Button> <Icon /> </Button> is technically the same as <Button children={<Icon />} />, and it's up to the component how to treat its input props.
Question:
Can the App change anything in the Button output? What and how?
Answer:
There have been a few fun answers in the quiz comments so I will direct you to them. Indeed, since JavaScript doesn't provide any guarantees, technically you can hijack Button before React gets a chance to render it.
However, normally there is no way for a parent component to control the child output except by two mechanisms: passing props and providing context. You probably already know about props, and I won't talk about the context because it's an experimental API and has a few pitfalls. Don't use context in apps unless you know its pitfalls well.
Of course, if you get a DOM node for the component via refs, you can do anything you want with the DOM nodes of other components, but it will likely mess up React.
React.js
Q1. If you want to import just the Component from the React library, what syntax do you use?
import React.Component from 'react'
import [ Component ] from 'react'
import Component from 'react'
[✅] import { Component } from 'react'
Q2. If a function component should always render the same way given the same props, what is a simple performance optimization available for it?
[✅] Wrap it in the React.memo higher-order component.
Implement the useReducer Hook.
Implement the useMemo Hook.
Implement the shouldComponentUpdate lifecycle method.
Q3. How do you fix the syntax error that results from running this code?
10. What is the name of the tool used to take JSX and turn it into createElement calls?
JSX Editor
ReactDOM
Browser Buddy
[✅] Babel
11. Why might you use useReducer over useState in a React component?
when you want to replace Redux
[✅] when you need to manage more complex state in an app
when you want to improve performance
when you want to break your production app
12. Which props from the props object is available to the component with the following syntax?
//<Message{...props}/>
any that have not changed
[✅] all of them
child props
any that have changed
13. Consider the following code from React Router. What do you call :id in the path prop?
//<Routepath="/:id"/>
This is a route modal
[✅] This is a route parameter
This is a route splitter
This is a route link
14. If you created a component called Dish and rendered it to the DOM, what type of element would be rendered?
//functionDish(){return<h1>Mac and Cheese</h1>;}ReactDOM.render(<Dish/>,document.getElementById('root'));
div
section
component
[✅] h1
15. What does this React element look like given the following function? (Alternative: Given the following code, what does this React element look like?)
Q53. React does not render two sibling elements unless they are wrapped in a fragment. Below is one way to render a fragment. What is the shorthand for this?
//<React.Fragment><h1>Our Staff</h1><p>Our staff is available 9-5 to answer your questions</p></React.Fragment>
A
//<...><h1>Our Staff</h1><p>Our staff is available 9-5 to answer your questions</p></...>
B
//<//><h1>Our Staff</h1><p>Our staff is available 9-5 to answer your questions</p>
<///>
[✅] C
//<><h1>Our Staff</h1><p>Our staff is available 9-5 to answer your questions</p></>
D
//<Frag><h1>Our Staff</h1><p>Our staff is available 9-5 to answer your questions</p></Frag>
Q54. If you wanted to display the count state value in the component, what do you need to add to the curly braces in the h1?
In this guide, we will examine the building blocks of React apps: elements and components. Once you master them, you can create complex apps from small reusable pieces.
title
description
robots
extra
type
React
We will examine the building blocks of React apps: elements and components. Once you master them, you can create complex apps from small reusable pieces.
name
value
keyName
relativeUrl
og:description
We will examine the building blocks of React apps: elements and components. Once you master them, you can create complex apps from small reusable pieces.
Click the link above to open an online editor. Feel free to make some changes, and see how they affect the output. Most pages in this guide will have editable examples like this one.
How to Read This Guide
In this guide, we will examine the building blocks of React apps: elements and components. Once you master them, you can create complex apps from small reusable pieces.
TipThis guide is designed for people who prefer learning concepts step by step. If you prefer to learn by doing, check out our practical tutorial. You might find this guide and the tutorial complementary to each other.
This is the first chapter in a step-by-step guide about main React concepts. You can find a list of all its chapters in the navigation sidebar. If you're reading this from a mobile device, you can access the navigation by pressing the button in the bottom right corner of your screen.
Every chapter in this guide builds on the knowledge introduced in earlier chapters. You can learn most of React by reading the "Main Concepts" guide chapters in the order they appear in the sidebar. For example, "Introducing JSX" is the next chapter after this one.
Knowledge Level Assumptions
React is a JavaScript library, and so we'll assume you have a basic understanding of the JavaScript language. If you don't feel very confident, we recommend going through a JavaScript tutorial to check your knowledge level and enable you to follow along this guide without getting lost. It might take you between 30 minutes and an hour, but as a result you won't have to feel like you're learning both React and JavaScript at the same time.
NoteThis guide occasionally uses some newer JavaScript syntax in the examples. If you haven't worked with JavaScript in the last few years, these three points should get you most of the way.
Introducing JSX
Consider this variable declaration:
//constelement=<h1>Hello, world!</h1>;
This funny tag syntax is neither a string nor HTML.
It is called JSX, and it is a syntax extension to JavaScript. We recommend using it with React to describe what the UI should look like. JSX may remind you of a template language, but it comes with the full power of JavaScript.
JSX produces React "elements". We will explore rendering them to the DOM in the next section. Below, you can find the basics of JSX necessary to get you started.
Why JSX?
React embraces the fact that rendering logic is inherently coupled with other UI logic: how events are handled, how the state changes over time, and how the data is prepared for display.
Instead of artificially separating technologies by putting markup and logic in separate files, React separates concerns with loosely coupled units called "components" that contain both. We will come back to components in a further section, but if you're not yet comfortable putting markup in JS, this talk might convince you otherwise.
React doesn't require using JSX, but most people find it helpful as a visual aid when working with UI inside the JavaScript code. It also allows React to show more useful error and warning messages.
With that out of the way, let's get started!
Embedding Expressions in JSX
In the example below, we declare a variable called name and then use it inside JSX by wrapping it in curly braces:
You can put any valid JavaScript expression inside the curly braces in JSX. For example, 2 + 2, user.firstName, or formatName(user) are all valid JavaScript expressions.
In the example below, we embed the result of calling a JavaScript function, formatName(user), into an <h1> element.
We split JSX over multiple lines for readability. While it isn't required, when doing this, we also recommend wrapping it in parentheses to avoid the pitfalls of automatic semicolon insertion.
JSX is an Expression Too
After compilation, JSX expressions become regular JavaScript function calls and evaluate to JavaScript objects.
This means that you can use JSX inside of if statements and for loops, assign it to variables, accept it as arguments, and return it from functions:
You may use quotes to specify string literals as attributes:
//constelement=<divtabIndex="0"></div>;
You may also use curly braces to embed a JavaScript expression in an attribute:
//constelement=<imgsrc={user.avatarUrl}></img>;
Don't put quotes around curly braces when embedding a JavaScript expression in an attribute. You should either use quotes (for string values) or curly braces (for expressions), but not both in the same attribute.
Warning:Since JSX is closer to JavaScript than to HTML, React DOM uses camelCase property naming convention instead of HTML attribute names.For example, class becomes className in JSX, and tabindex becomes tabIndex.
Specifying Children with JSX
If a tag is empty, you may close it immediately with />, like XML:
//constelement=<imgsrc={user.avatarUrl}/>;
JSX tags may contain children:
//constelement=(<div><h1>Hello!</h1><h2>Good to see you here.</h2></div>);
JSX Prevents Injection Attacks
It is safe to embed user input in JSX:
//consttitle=response.potentiallyMaliciousInput;// This is safe:constelement=<h1>{title}</h1>;
By default, React DOM escapes any values embedded in JSX before rendering them. Thus it ensures that you can never inject anything that's not explicitly written in your application. Everything is converted to a string before being rendered. This helps prevent XSS (cross-site-scripting) attacks.
JSX Represents Objects
Babel compiles JSX down to React.createElement() calls.
React.createElement() performs a few checks to help you write bug-free code but essentially it creates an object like this:
//// Note: this structure is simplifiedconstelement={type: 'h1',props: {className: 'greeting',children: 'Hello, world!'}};
These objects are called "React elements". You can think of them as descriptions of what you want to see on the screen. React reads these objects and uses them to construct the DOM and keep it up to date.
We will explore rendering React elements to the DOM in the next section.
Tip:We recommend using the "Babel" language definition for your editor of choice so that both ES6 and JSX code is properly highlighted.
Rendering Elements
Elements are the smallest building blocks of React apps.
An element describes what you want to see on the screen:
const element = <h1>Hello, world</h1>;
Unlike browser DOM elements, React elements are plain objects, and are cheap to create. React DOM takes care of updating the DOM to match the React elements.
Note:One might confuse elements with a more widely known concept of "components". We will introduce components in the next section. Elements are what components are "made of", and we encourage you to read this section before jumping ahead.
Rendering an Element into the DOM
Let's say there is a <div> somewhere in your HTML file:
//<divid="root"></div>
We call this a "root" DOM node because everything inside it will be managed by React DOM.
Applications built with just React usually have a single root DOM node. If you are integrating React into an existing app, you may have as many isolated root DOM nodes as you like.
To render a React element into a root DOM node, pass both to [ReactDOM.render()](<https://reactjs.org/docs/react-dom.html#render>):
React elements are immutable. Once you create an element, you can't change its children or attributes. An element is like a single frame in a movie: it represents the UI at a certain point in time.
With our knowledge so far, the only way to update the UI is to create a new element, and pass it to [ReactDOM.render()](<https://reactjs.org/docs/react-dom.html#render>).
Consider this ticking clock example:
//functiontick(){constelement=(<div>{' '}<h1>Hello, world!</h1><h2>It is {newDate().toLocaleTimeString()}.</h2>{' '}</div>);ReactDOM.render(element,document.getElementById('root'));}setInterval(tick,1000);
It calls [ReactDOM.render()](<https://reactjs.org/docs/react-dom.html#render>) every second from a [setInterval()](<https://developer.mozilla.org/en-US/docs/Web/API/WindowTimers/setInterval>) callback.
Note:In practice, most React apps only call ReactDOM.render() once. In the next sections we will learn how such code gets encapsulated into stateful components.We recommend that you don't skip topics because they build on each other.
React Only Updates What's Necessary
React DOM compares the element and its children to the previous one, and only applies the DOM updates necessary to bring the DOM to the desired state.
You can verify by inspecting the last example with the browser tools:
Even though we create an element describing the whole UI tree on every tick, only the text node whose contents have changed gets updated by React DOM.
In our experience, thinking about how the UI should look at any given moment, rather than how to change it over time, eliminates a whole class of bugs.
Components and Props
Components let you split the UI into independent, reusable pieces, and think about each piece in isolation. This page provides an introduction to the idea of components. You can find a detailed component API reference here.
Conceptually, components are like JavaScript functions. They accept arbitrary inputs (called "props") and return React elements describing what should appear on the screen.
Function and Class Components
The simplest way to define a component is to write a JavaScript function:
This function is a valid React component because it accepts a single "props" (which stands for properties) object argument with data and returns a React element. We call such components "function components" because they are literally JavaScript functions.
You can also use an ES6 class to define a component:
The above two components are equivalent from React's point of view.
Function and Class components both have some additional features that we will discuss in the next sections.
Rendering a Component
Previously, we only encountered React elements that represent DOM tags:
//constelement=<div/>;
However, elements can also represent user-defined components:
//constelement=<Welcomename="Sara"/>;
When React sees an element representing a user-defined component, it passes JSX attributes and children to this component as a single object. We call this object "props".
For example, this code renders "Hello, Sara" on the page:
We call ReactDOM.render() with the <Welcome name="Sara" /> element.
React calls the Welcome component with {name: 'Sara'} as the props.
Our Welcome component returns a <h1>Hello, Sara</h1> element as the result.
React DOM efficiently updates the DOM to match <h1>Hello, Sara</h1>.
Note: Always start component names with a capital letter.React treats components starting with lowercase letters as DOM tags. For example,
represents an HTML div tag, but represents a component and requires Welcome to be in scope.To learn more about the reasoning behind this convention, please read JSX In Depth.
Composing Components
Components can refer to other components in their output. This lets us use the same component abstraction for any level of detail. A button, a form, a dialog, a screen: in React apps, all those are commonly expressed as components.
For example, we can create an App component that renders Welcome many times:
Typically, new React apps have a single App component at the very top. However, if you integrate React into an existing app, you might start bottom-up with a small component like Button and gradually work your way to the top of the view hierarchy.
Extracting Components
Don't be afraid to split components into smaller components.
It accepts author (an object), text (a string), and date (a date) as props, and describes a comment on a social media website.
This component can be tricky to change because of all the nesting, and it is also hard to reuse individual parts of it. Let's extract a few components from it.
The Avatar doesn't need to know that it is being rendered inside a Comment. This is why we have given its prop a more generic name: user rather than author.
We recommend naming props from the component's own point of view rather than the context in which it is being used.
Extracting components might seem like grunt work at first, but having a palette of reusable components pays off in larger apps. A good rule of thumb is that if a part of your UI is used several times (Button, Panel, Avatar), or is complex enough on its own (App, FeedStory, Comment), it is a good candidate to be extracted to a separate component.
Props are Read-Only
Whether you declare a component as a function or a class, it must never modify its own props. Consider this sum function:
//functionsum(a,b){returna+b;}
Such functions are called "pure" because they do not attempt to change their inputs, and always return the same result for the same inputs.
In contrast, this function is impure because it changes its own input:
//functionwithdraw(account,amount){account.total-=amount;}```js//React is pretty flexible but it has a single strict rule:**All React components must act like pure functions with respect to their props.**Of course, application UIs are dynamic and change over time. In the [next section](https://reactjs.org/docs/state-and-lifecycle.html), we will introduce a new concept of "state". State allows React components to change their output over time in response to user actions, network responses, and anything else, without violating this rule.**State and Lifecycle**=======================This page introduces the concept of state and lifecycle in a React component. You can find a [detailed component API reference here](https://reactjs.org/docs/react-component.html).====================================================================================================================================================================================Consider the ticking clock example from [one of the previous sections](https://reactjs.org/docs/rendering-elements.html#updating-the-rendered-element). In [Rendering Elements](https://reactjs.org/docs/rendering-elements.html#rendering-an-element-into-the-dom), we have only learned one way to update the UI. We call `ReactDOM.render()` to change the rendered output:---```js//functiontick(){constelement=(<div><h1>Hello, world!</h1><h2>It is {newDate().toLocaleTimeString()}.</h2></div>);ReactDOM.render(element,document.getElementById('root'));}setInterval(tick,1000);
In this section, we will learn how to make the Clock component truly reusable and encapsulated. It will set up its own timer and update itself every second.
We can start by encapsulating how the clock looks:
//functionClock(props){return(<div>{' '}<h1>Hello, world!</h1><h2>It is {props.date.toLocaleTimeString()}.</h2>{' '}</div>);}functiontick(){ReactDOM.render(<Clockdate={newDate()}/>,document.getElementById('root'));}setInterval(tick,1000);
However, it misses a crucial requirement: the fact that the Clock sets up a timer and updates the UI every second should be an implementation detail of the Clock.
Ideally we want to write this once and have the Clock update itself:
Clock is now defined as a class rather than a function.
The render method will be called each time an update happens, but as long as we render <Clock /> into the same DOM node, only a single instance of the Clock class will be used. This lets us use additional features such as local state and lifecycle methods.
Adding Local State to a Class
We will move the date from props to state in three steps:
Replace this.props.date with this.state.date in the render() method:
//classClockextendsReact.Component{render(){return(<div>{' '}<h1>Hello, world!</h1><h2>It is {this.state.date.toLocaleTimeString()}.</h2>{' '}</div>);}}
Note how we save the timer ID right on this (this.timerID).
While this.props is set up by React itself and this.state has a special meaning, you are free to add additional fields to the class manually if you need to store something that doesn't participate in the data flow (like a timer ID).
We will tear down the timer in the componentWillUnmount() lifecycle method:
Let's quickly recap what's going on and the order in which the methods are called:
When <Clock /> is passed to ReactDOM.render(), React calls the constructor of the Clock component. Since Clock needs to display the current time, it initializes this.state with an object including the current time. We will later update this state.
React then calls the Clock component's render() method. This is how React learns what should be displayed on the screen. React then updates the DOM to match the Clock's render output.
When the Clock output is inserted in the DOM, React calls the componentDidMount() lifecycle method. Inside it, the Clock component asks the browser to set up a timer to call the component's tick() method once a second.
Every second the browser calls the tick() method. Inside it, the Clock component schedules a UI update by calling setState() with an object containing the current time. Thanks to the setState() call, React knows the state has changed, and calls the render() method again to learn what should be on the screen. This time, this.state.date in the render() method will be different, and so the render output will include the updated time. React updates the DOM accordingly.
If the Clock component is ever removed from the DOM, React calls the componentWillUnmount() lifecycle method so the timer is stopped.
Using State Correctly
There are three things you should know about setState().
Do Not Modify State Directly
For example, this will not re-render a component:
//// Wrongthis.state.comment='Hello';
Instead, use setState():
//// Correctthis.setState({comment: 'Hello'});
The only place where you can assign this.state is the constructor.
State Updates May Be Asynchronous
React may batch multiple setState() calls into a single update for performance.
Because this.props and this.state may be updated asynchronously, you should not rely on their values for calculating the next state.
For example, this code may fail to update the counter:
To fix it, use a second form of setState() that accepts a function rather than an object. That function will receive the previous state as the first argument, and the props at the time the update is applied as the second argument:
The merging is shallow, so this.setState({comments}) leaves this.state.posts intact, but completely replaces this.state.comments.
The Data Flows Down
Neither parent nor child components can know if a certain component is stateful or stateless, and they shouldn't care whether it is defined as a function or a class.
This is why state is often called local or encapsulated. It is not accessible to any component other than the one that owns and sets it.
A component may choose to pass its state down as props to its child components:
//<FormattedDatedate={this.state.date}/>
The FormattedDate component would receive the date in its props and wouldn't know whether it came from the Clock's state, from the Clock's props, or was typed by hand:
//functionFormattedDate(props){return<h2>It is {props.date.toLocaleTimeString()}.</h2>;}
This is commonly called a "top-down" or "unidirectional" data flow. Any state is always owned by some specific component, and any data or UI derived from that state can only affect components "below" them in the tree.
If you imagine a component tree as a waterfall of props, each component's state is like an additional water source that joins it at an arbitrary point but also flows down.
To show that all components are truly isolated, we can create an App component that renders three <Clock>s:
Each Clock sets up its own timer and updates independently.
In React apps, whether a component is stateful or stateless is considered an implementation detail of the component that may change over time. You can use stateless components inside stateful components, and vice versa.
Handling Events
Handling events with React elements is very similar to handling events on DOM elements. There are some syntax differences:
React events are named using camelCase, rather than lowercase.
With JSX you pass a function as the event handler, rather than a string.
Another difference is that you cannot return false to prevent default behavior in React. You must call preventDefault explicitly. For example, with plain HTML, to prevent the default form behavior of submitting, you can write:
Here, e is a synthetic event. React defines these synthetic events according to the W3C spec, so you don't need to worry about cross-browser compatibility. React events do not work exactly the same as native events. See the [SyntheticEvent](<https://reactjs.org/docs/events.html>) reference guide to learn more.
When using React, you generally don't need to call addEventListener to add listeners to a DOM element after it is created. Instead, just provide a listener when the element is initially rendered.
When you define a component using an ES6 class, a common pattern is for an event handler to be a method on the class. For example, this Toggle component renders a button that lets the user toggle between "ON" and "OFF" states:
//classToggleextendsReact.Component{constructor(props){super(props);this.state={isToggleOn: true};// This binding is necessary to make `this` work in the callback this.handleClick = this.handleClick.bind(this); }handleClick(){this.setState(prevState=>({isToggleOn: !prevState.isToggleOn}));}render(){return(<buttononClick={this.handleClick}>{this.state.isToggleOn ? 'ON' : 'OFF'}</button>);}}ReactDOM.render(<Toggle/>,document.getElementById('root'));
You have to be careful about the meaning of this in JSX callbacks. In JavaScript, class methods are not bound by default. If you forget to bind this.handleClick and pass it to onClick, this will be undefined when the function is actually called.
This is not React-specific behavior; it is a part of how functions work in JavaScript. Generally, if you refer to a method without () after it, such as onClick={this.handleClick}, you should bind that method.
If calling bind annoys you, there are two ways you can get around this. If you are using the experimental public class fields syntax, you can use class fields to correctly bind callbacks:
//classLoggingButtonextendsReact.Component{// This syntax ensures `this` is bound within handleClick. // Warning: this is *experimental* syntax. handleClick = () => { console.log('this is:', this); }render() {return(<buttononClick={this.handleClick}> Click me
</button>);}}
If you aren't using class fields syntax, you can use an arrow function in the callback:
//classLoggingButtonextendsReact.Component{handleClick(){console.log('this is:',this);}render(){// This syntax ensures `this` is bound within handleClick return ( <button onClick={() => this.handleClick()}> Click me</button>);
}}
The problem with this syntax is that a different callback is created each time the LoggingButton renders. In most cases, this is fine. However, if this callback is passed as a prop to lower components, those components might do an extra re-rendering. We generally recommend binding in the constructor or using the class fields syntax, to avoid this sort of performance problem.
Passing Arguments to Event Handlers
Inside a loop, it is common to want to pass an extra parameter to an event handler. For example, if id is the row ID, either of the following would work:
The above two lines are equivalent, and use arrow functions and [Function.prototype.bind](<https://developer.mozilla.org/en-US/docs/Web/JavaScript/Reference/Global_objects/Function/bind>) respectively.
In both cases, the e argument representing the React event will be passed as a second argument after the ID. With an arrow function, we have to pass it explicitly, but with bind any further arguments are automatically forwarded.
Conditional Rendering
In React, you can create distinct components that encapsulate behavior you need. Then, you can render only some of them, depending on the state of your application.
Conditional rendering in React works the same way conditions work in JavaScript. Use JavaScript operators like [if](<https://developer.mozilla.org/en-US/docs/Web/JavaScript/Reference/Statements/if...else>) or the conditional operator to create elements representing the current state, and let React update the UI to match them.
We'll create a Greeting component that displays either of these components depending on whether a user is logged in:
//functionGreeting(props){constisLoggedIn=props.isLoggedIn;if(isLoggedIn){return<UserGreeting/>;}return<GuestGreeting/>;}ReactDOM.render(// Try changing to isLoggedIn={true}:<GreetingisLoggedIn={false}/>,document.getElementById('root'));
In the example below, we will create a stateful component called LoginControl.
It will render either <LoginButton /> or <LogoutButton /> depending on its current state. It will also render a <Greeting /> from the previous example:
While declaring a variable and using an if statement is a fine way to conditionally render a component, sometimes you might want to use a shorter syntax. There are a few ways to inline conditions in JSX, explained below.
Inline If with Logical && Operator
You may embed expressions in JSX by wrapping them in curly braces. This includes the JavaScript logical && operator. It can be handy for conditionally including an element:
//functionMailbox(props){constunreadMessages=props.unreadMessages;return(<div>{' '}<h1>Hello!</h1>{unreadMessages.length>0&&<h2> You have {unreadMessages.length} unread messages. </h2>}{' '}</div>);}constmessages=['React','Re: React','Re:Re: React'];ReactDOM.render(<MailboxunreadMessages={messages}/>,document.getElementById('root'));
It works because in JavaScript, true && expression always evaluates to expression, and false && expression always evaluates to false.
Therefore, if the condition is true, the element right after && will appear in the output. If it is false, React will ignore and skip it.
Note that returning a falsy expression will still cause the element after && to be skipped but will return the falsy expression. In the example below, <div>0</div> will be returned by the render method.
Another method for conditionally rendering elements inline is to use the JavaScript conditional operator [condition ? true : false](<https://developer.mozilla.org/en/docs/Web/JavaScript/Reference/Operators/Conditional_Operator>).
In the example below, we use it to conditionally render a small block of text.
//render(){constisLoggedIn=this.state.isLoggedIn;return(<div> The user is <b>{isLoggedIn ? 'currently' : 'not'}</b> logged in. </div>);}
It can also be used for larger expressions although it is less obvious what's going on:
Just like in JavaScript, it is up to you to choose an appropriate style based on what you and your team consider more readable. Also remember that whenever conditions become too complex, it might be a good time to extract a component.
Preventing Component from Rendering
In rare cases you might want a component to hide itself even though it was rendered by another component. To do this return null instead of its render output.
In the example below, the <WarningBanner /> is rendered depending on the value of the prop called warn. If the value of the prop is false, then the component does not render:
Returning null from a component's render method does not affect the firing of the component's lifecycle methods. For instance componentDidUpdate will still be called.
Lists and Keys
First, let's review how you transform lists in JavaScript.
Given the code below, we use the [map()](<https://developer.mozilla.org/en-US/docs/Web/JavaScript/Reference/Global_Objects/Array/map>) function to take an array of numbers and double their values. We assign the new array returned by map() to the variable doubled and log it:
In React, transforming arrays into lists of elements is nearly identical.
Rendering Multiple Components
You can build collections of elements and include them in JSX using curly braces {}.
Below, we loop through the numbers array using the JavaScript [map()](<https://developer.mozilla.org/en-US/docs/Web/JavaScript/Reference/Global_Objects/Array/map>) function. We return a <li> element for each item. Finally, we assign the resulting array of elements to listItems:
When you run this code, you'll be given a warning that a key should be provided for list items. A "key" is a special string attribute you need to include when creating lists of elements. We'll discuss why it's important in the next section.
Let's assign a key to our list items inside numbers.map() and fix the missing key issue.
Keys help React identify which items have changed, are added, or are removed. Keys should be given to the elements inside the array to give the elements a stable identity:
The best way to pick a key is to use a string that uniquely identifies a list item among its siblings. Most often you would use IDs from your data as keys:
When you don't have stable IDs for rendered items, you may use the item index as a key as a last resort:
//consttodoItems=todos.map((todo,index)=>// Only do this if items have no stable IDs <li key={index}> {todo.text}</li>);
We don't recommend using indexes for keys if the order of items may change. This can negatively impact performance and may cause issues with component state. Check out Robin Pokorny's article for an in-depth explanation on the negative impacts of using an index as a key. If you choose not to assign an explicit key to list items then React will default to using indexes as keys.
Keys only make sense in the context of the surrounding array.
For example, if you extract a ListItem component, you should keep the key on the <ListItem /> elements in the array rather than on the <li> element in the ListItem itself.
Example: Incorrect Key Usage
//functionListItem(props){constvalue=props.value;return(// Wrong! There is no need to specify the key here: <li key={value.toString()}> {value}</li>);
}functionNumberList(props){constnumbers=props.numbers;constlistItems=numbers.map((number)=>// Wrong! The key should have been specified here: <ListItem value={number} /> );return(<ul>{listItems}</ul>);}constnumbers=[1,2,3,4,5];ReactDOM.render(<NumberListnumbers={numbers}/>,document.getElementById('root'));
Example: Correct Key Usage
//functionListItem(props){// Correct! There is no need to specify the key here: return <li>{props.value}</li>;}functionNumberList(props){constnumbers=props.numbers;constlistItems=numbers.map((number)=>// Correct! Key should be specified inside the array. <ListItem key={number.toString()} value={number} /> );return(<ul>{listItems}</ul>);}constnumbers=[1,2,3,4,5];ReactDOM.render(<NumberListnumbers={numbers}/>,document.getElementById('root'));
A good rule of thumb is that elements inside the map() call need keys.
Keys Must Only Be Unique Among Siblings
Keys used within arrays should be unique among their siblings. However, they don't need to be globally unique. We can use the same keys when we produce two different arrays:
//functionBlog(props){constsidebar=(<ul>{' '}{props.posts.map((post)=>(<likey={post.id}>{post.title}</li>))}</ul>);constcontent=props.posts.map((post)=>(<divkey={post.id}>{' '}<h3>{post.title}</h3><p>{post.content}</p>{' '}</div>));return(<div>{' '}{sidebar}<hr/>{content}{' '}</div>);}constposts=[{id: 1,title: 'Hello World',content: 'Welcome to learning React!'},{id: 2,title: 'Installation',content: 'You can install React from npm.'}];ReactDOM.render(<Blogposts={posts}/>,document.getElementById('root'));
Keys serve as a hint to React but they don't get passed to your components. If you need the same value in your component, pass it explicitly as a prop with a different name:
Sometimes this results in clearer code, but this style can also be abused. Like in JavaScript, it is up to you to decide whether it is worth extracting a variable for readability. Keep in mind that if the map() body is too nested, it might be a good time to extract a component.
Forms
HTML form elements work a bit differently from other DOM elements in React, because form elements naturally keep some internal state. For example, this form in plain HTML accepts a single name:
This form has the default HTML form behavior of browsing to a new page when the user submits the form. If you want this behavior in React, it just works. But in most cases, it's convenient to have a JavaScript function that handles the submission of the form and has access to the data that the user entered into the form. The standard way to achieve this is with a technique called "controlled components".
Controlled Components
In HTML, form elements such as <input>, <textarea>, and <select> typically maintain their own state and update it based on user input. In React, mutable state is typically kept in the state property of components, and only updated with [setState()](<https://reactjs.org/docs/react-component.html#setstate>).
We can combine the two by making the React state be the "single source of truth". Then the React component that renders a form also controls what happens in that form on subsequent user input. An input form element whose value is controlled by React in this way is called a "controlled component".
For example, if we want to make the previous example log the name when it is submitted, we can write the form as a controlled component:
//classNameFormextendsReact.Component{constructor(props){super(props);this.state={value: ''};this.handleChange=this.handleChange.bind(this);this.handleSubmit=this.handleSubmit.bind(this);}handleChange(event){this.setState({value: event.target.value});}handleSubmit(event){alert('A name was submitted: '+this.state.value);event.preventDefault();}render(){return(<formonSubmit={this.handleSubmit}>{' '}<label>{' '}
Name:
<inputtype="text"value={this.state.value}onChange={this.handleChange}/>{' '}</label><inputtype="submit"value="Submit"/>{' '}</form>);}}
Since the value attribute is set on our form element, the displayed value will always be this.state.value, making the React state the source of truth. Since handleChange runs on every keystroke to update the React state, the displayed value will update as the user types.
With a controlled component, the input's value is always driven by the React state. While this means you have to type a bit more code, you can now pass the value to other UI elements too, or reset it from other event handlers.
The textarea Tag
In HTML, a <textarea> element defines its text by its children:
//<textarea>Hello there, this is some text in a text area</textarea>
In React, a <textarea> uses a value attribute instead. This way, a form using a <textarea> can be written very similarly to a form that uses a single-line input:
//classEssayFormextendsReact.Component{constructor(props){super(props);this.state={value: 'Please write an essay about your favorite DOM element.'};this.handleChange=this.handleChange.bind(this);this.handleSubmit=this.handleSubmit.bind(this);}handleChange(event){this.setState({value: event.target.value});}handleSubmit(event){alert('An essay was submitted: '+this.state.value);event.preventDefault();}render(){return(<formonSubmit={this.handleSubmit}>{' '}<label>{' '}
Essay:
<textareavalue={this.state.value}onChange={this.handleChange}/>{' '}</label><inputtype="submit"value="Submit"/>{' '}</form>);}}
Notice that this.state.value is initialized in the constructor, so that the text area starts off with some text in it.
The select Tag
In HTML, <select> creates a drop-down list. For example, this HTML creates a drop-down list of flavors:
`
Grapefruit
Lime
Coconut
Mango
`
Note that the Coconut option is initially selected, because of the selected attribute. React, instead of using this selected attribute, uses a value attribute on the root select tag. This is more convenient in a controlled component because you only need to update it in one place. For example:
//classFlavorFormextendsReact.Component{constructor(props){super(props);this.state={value: 'coconut'};this.handleChange=this.handleChange.bind(this);this.handleSubmit=this.handleSubmit.bind(this);}handleChange(event){this.setState({value: event.target.value});}handleSubmit(event){alert('Your favorite flavor is: '+this.state.value);event.preventDefault();}render(){return(<formonSubmit={this.handleSubmit}>{' '}<label>{' '}
Pick your favorite flavor:
<selectvalue={this.state.value}onChange={this.handleChange}>{' '}<optionvalue="grapefruit">Grapefruit</option><optionvalue="lime">Lime</option><optionvalue="coconut">Coconut</option><optionvalue="mango">
Mango
</option>{' '}</select>{' '}</label><inputtype="submit"value="Submit"/>{' '}</form>);}}
Overall, this makes it so that <input type="text">, <textarea>, and <select> all work very similarly - they all accept a value attribute that you can use to implement a controlled component.
NoteYou can pass an array into the value attribute, allowing you to select multiple options in a select tag:<select multiple={true} value={['B', 'C']}>
The file input Tag
In HTML, an <input type="file"> lets the user choose one or more files from their device storage to be uploaded to a server or manipulated by JavaScript via the File API.
<input type="file" />
Because its value is read-only, it is an uncontrolled component in React. It is discussed together with other uncontrolled components later in the documentation.
Handling Multiple Inputs
When you need to handle multiple controlled input elements, you can add a name attribute to each element and let the handler function choose what to do based on the value of event.target.name.
For example:
//classReservationextendsReact.Component{constructor(props){super(props);this.state={isGoing: true,numberOfGuests: 2};this.handleInputChange=this.handleInputChange.bind(this);}handleInputChange(event){consttarget=event.target;constvalue=target.type==='checkbox' ? target.checked : target.value;constname=target.name;this.setState({[name]: value});}render(){return(<form>{' '}<label>{' '}
Is going:
<inputname="isGoing"type="checkbox"checked={this.state.isGoing}onChange={this.handleInputChange}/>{' '}</label><br/><label>{' '}
Number of guests:
<inputname="numberOfGuests"type="number"value={this.state.numberOfGuests}onChange={this.handleInputChange}/>{' '}</label>{' '}</form>);}}
Specifying the value prop on a controlled component prevents the user from changing the input unless you desire so. If you've specified a value but the input is still editable, you may have accidentally set value to undefined or null.
The following code demonstrates this. (The input is locked at first but becomes editable after a short delay.)
It can sometimes be tedious to use controlled components, because you need to write an event handler for every way your data can change and pipe all of the input state through a React component. This can become particularly annoying when you are converting a preexisting codebase to React, or integrating a React application with a non-React library. In these situations, you might want to check out uncontrolled components, an alternative technique for implementing input forms.
Fully-Fledged Solutions
If you're looking for a complete solution including validation, keeping track of the visited fields, and handling form submission, Formik is one of the popular choices. However, it is built on the same principles of controlled components and managing state --- so don't neglect to learn them.
Lifting State Up
Often, several components need to reflect the same changing data. We recommend lifting the shared state up to their closest common ancestor. Let's see how this works in action.
In this section, we will create a temperature calculator that calculates whether the water would boil at a given temperature.
We will start with a component called BoilingVerdict. It accepts the celsius temperature as a prop, and prints whether it is enough to boil the water:
//functionBoilingVerdict(props){if(props.celsius>=100){return<p>The water would boil.</p>;}return<p>The water would not boil.</p>;}
Next, we will create a component called Calculator. It renders an <input> that lets you enter the temperature, and keeps its value in this.state.temperature.
Additionally, it renders the BoilingVerdict for the current input value.
//classCalculatorextendsReact.Component{constructor(props){super(props);this.handleChange=this.handleChange.bind(this);this.state={temperature: ''};}handleChange(e){this.setState({temperature: e.target.value});}render(){consttemperature=this.state.temperature;return(<fieldset>{' '}<legend>Enter temperature in Celsius:</legend><inputvalue={temperature}onChange={this.handleChange}/><BoilingVerdictcelsius={parseFloat(temperature)}/>{' '}</fieldset>);}}
Our new requirement is that, in addition to a Celsius input, we provide a Fahrenheit input, and they are kept in sync.
We can start by extracting a TemperatureInput component from Calculator. We will add a new scale prop to it that can either be "c" or "f":
//constscaleNames={c: 'Celsius',f: 'Fahrenheit'};classTemperatureInputextendsReact.Component{constructor(props){super(props);this.handleChange=this.handleChange.bind(this);this.state={temperature: ''};}handleChange(e){this.setState({temperature: e.target.value});}render(){consttemperature=this.state.temperature;constscale=this.props.scale;return(<fieldset>{' '}<legend>Enter temperature in {scaleNames[scale]}:</legend><inputvalue={temperature}onChange={this.handleChange}/>{' '}</fieldset>);}}
We can now change the Calculator to render two separate temperature inputs:
We have two inputs now, but when you enter the temperature in one of them, the other doesn't update. This contradicts our requirement: we want to keep them in sync.
We also can't display the BoilingVerdict from Calculator. The Calculator doesn't know the current temperature because it is hidden inside the TemperatureInput.
Writing Conversion Functions
First, we will write two functions to convert from Celsius to Fahrenheit and back:
These two functions convert numbers. We will write another function that takes a string temperature and a converter function as arguments and returns a string. We will use it to calculate the value of one input based on the other input.
It returns an empty string on an invalid temperature, and it keeps the output rounded to the third decimal place:
However, we want these two inputs to be in sync with each other. When we update the Celsius input, the Fahrenheit input should reflect the converted temperature, and vice versa.
In React, sharing state is accomplished by moving it up to the closest common ancestor of the components that need it. This is called "lifting state up". We will remove the local state from the TemperatureInput and move it into the Calculator instead.
If the Calculator owns the shared state, it becomes the "source of truth" for the current temperature in both inputs. It can instruct them both to have values that are consistent with each other. Since the props of both TemperatureInput components are coming from the same parent Calculator component, the two inputs will always be in sync.
Let's see how this works step by step.
First, we will replace this.state.temperature with this.props.temperature in the TemperatureInput component. For now, let's pretend this.props.temperature already exists, although we will need to pass it from the Calculator in the future:
//render(){// Before: const temperature = this.state.temperature;consttemperature=this.props.temperature;// ...
We know that props are read-only. When the temperature was in the local state, the TemperatureInput could just call this.setState() to change it. However, now that the temperature is coming from the parent as a prop, the TemperatureInput has no control over it.
In React, this is usually solved by making a component "controlled". Just like the DOM <input> accepts both a value and an onChange prop, so can the custom TemperatureInput accept both temperature and onTemperatureChange props from its parent Calculator.
Now, when the TemperatureInput wants to update its temperature, it calls this.props.onTemperatureChange:
Note:There is no special meaning to either temperature or onTemperatureChange prop names in custom components. We could have called them anything else, like name them value and onChange which is a common convention.
The onTemperatureChange prop will be provided together with the temperature prop by the parent Calculator component. It will handle the change by modifying its own local state, thus re-rendering both inputs with the new values. We will look at the new Calculator implementation very soon.
Before diving into the changes in the Calculator, let's recap our changes to the TemperatureInput component. We have removed the local state from it, and instead of reading this.state.temperature, we now read this.props.temperature. Instead of calling this.setState() when we want to make a change, we now call this.props.onTemperatureChange(), which will be provided by the Calculator:
//classTemperatureInputextendsReact.Component{constructor(props){super(props);this.handleChange=this.handleChange.bind(this);}handleChange(e){this.props.onTemperatureChange(e.target.value);}render(){consttemperature=this.props.temperature;constscale=this.props.scale;return(<fieldset>{' '}<legend>Enter temperature in {scaleNames[scale]}:</legend><inputvalue={temperature}onChange={this.handleChange}/>{' '}</fieldset>);}}
Now let's turn to the Calculator component.
We will store the current input's temperature and scale in its local state. This is the state we "lifted up" from the inputs, and it will serve as the "source of truth" for both of them. It is the minimal representation of all the data we need to know in order to render both inputs.
For example, if we enter 37 into the Celsius input, the state of the Calculator component will be:
//{temperature: '37',scale: 'c'}
If we later edit the Fahrenheit field to be 212, the state of the Calculator will be:
//{temperature: '212',scale: 'f'}
We could have stored the value of both inputs but it turns out to be unnecessary. It is enough to store the value of the most recently changed input, and the scale that it represents. We can then infer the value of the other input based on the current temperature and scale alone.
The inputs stay in sync because their values are computed from the same state:
Now, no matter which input you edit, this.state.temperature and this.state.scale in the Calculator get updated. One of the inputs gets the value as is, so any user input is preserved, and the other input value is always recalculated based on it.
Let's recap what happens when you edit an input:
React calls the function specified as onChange on the DOM <input>. In our case, this is the handleChange method in the TemperatureInput component.
The handleChange method in the TemperatureInput component calls this.props.onTemperatureChange() with the new desired value. Its props, including onTemperatureChange, were provided by its parent component, the Calculator.
When it previously rendered, the Calculator had specified that onTemperatureChange of the Celsius TemperatureInput is the Calculator's handleCelsiusChange method, and onTemperatureChange of the Fahrenheit TemperatureInput is the Calculator's handleFahrenheitChange method. So either of these two Calculator methods gets called depending on which input we edited.
Inside these methods, the Calculator component asks React to re-render itself by calling this.setState() with the new input value and the current scale of the input we just edited.
React calls the Calculator component's render method to learn what the UI should look like. The values of both inputs are recomputed based on the current temperature and the active scale. The temperature conversion is performed here.
React calls the render methods of the individual TemperatureInput components with their new props specified by the Calculator. It learns what their UI should look like.
React calls the render method of the BoilingVerdict component, passing the temperature in Celsius as its props.
React DOM updates the DOM with the boiling verdict and to match the desired input values. The input we just edited receives its current value, and the other input is updated to the temperature after conversion.
Every update goes through the same steps so the inputs stay in sync.
Lessons Learned
There should be a single "source of truth" for any data that changes in a React application. Usually, the state is first added to the component that needs it for rendering. Then, if other components also need it, you can lift it up to their closest common ancestor. Instead of trying to sync the state between different components, you should rely on the top-down data flow.
Lifting state involves writing more "boilerplate" code than two-way binding approaches, but as a benefit, it takes less work to find and isolate bugs. Since any state "lives" in some component and that component alone can change it, the surface area for bugs is greatly reduced. Additionally, you can implement any custom logic to reject or transform user input.
If something can be derived from either props or state, it probably shouldn't be in the state. For example, instead of storing both celsiusValue and fahrenheitValue, we store just the last edited temperature and its scale. The value of the other input can always be calculated from them in the render() method. This lets us clear or apply rounding to the other field without losing any precision in the user input.
When you see something wrong in the UI, you can use React Developer Tools to inspect the props and move up the tree until you find the component responsible for updating the state. This lets you trace the bugs to their source:
Composition vs Inheritance
React has a powerful composition model, and we recommend using composition instead of inheritance to reuse code between components.
In this section, we will consider a few problems where developers new to React often reach for inheritance, and show how we can solve them with composition.
Containment
Some components don't know their children ahead of time. This is especially common for components like Sidebar or Dialog that represent generic "boxes".
We recommend that such components use the special children prop to pass children elements directly into their output:
Anything inside the <FancyBorder> JSX tag gets passed into the FancyBorder component as a children prop. Since FancyBorder renders {props.children} inside a <div>, the passed elements appear in the final output.
While this is less common, sometimes you might need multiple "holes" in a component. In such cases you may come up with your own convention instead of using children:
React elements like <Contacts /> and <Chat /> are just objects, so you can pass them as props like any other data. This approach may remind you of "slots" in other libraries but there are no limitations on what you can pass as props in React.
Specialization
Sometimes we think about components as being "special cases" of other components. For example, we might say that a WelcomeDialog is a special case of Dialog.
In React, this is also achieved by composition, where a more "specific" component renders a more "generic" one and configures it with props:
//functionDialog(props){return(<FancyBordercolor="blue">{' '}<h1className="Dialog-title">{props.title}</h1><pclassName="Dialog-message">{props.message}</p>{' '}</FancyBorder>);}functionWelcomeDialog(){return<Dialogtitle="Welcome"message="Thank you for visiting our spacecraft!"/>;}
Composition works equally well for components defined as classes:
//functionDialog(props){return(<FancyBordercolor="blue">{' '}<h1className="Dialog-title">{props.title}</h1><pclassName="Dialog-message">{props.message}</p>{props.children}{' '}</FancyBorder>);}classSignUpDialogextendsReact.Component{constructor(props){super(props);this.handleChange=this.handleChange.bind(this);this.handleSignUp=this.handleSignUp.bind(this);this.state={login: ''};}render(){return(<Dialogtitle="Mars Exploration Program"message="How should we refer to you?">{' '}<inputvalue={this.state.login}onChange={this.handleChange}/><buttononClick={this.handleSignUp}> Sign Me Up! </button>{' '}</Dialog>);}handleChange(e){this.setState({login: e.target.value});}handleSignUp(){alert(`Welcome aboard, ${this.state.login}!`);}}
At Facebook, we use React in thousands of components, and we haven't found any use cases where we would recommend creating component inheritance hierarchies.
Props and composition give you all the flexibility you need to customize a component's look and behavior in an explicit and safe way. Remember that components may accept arbitrary props, including primitive values, React elements, or functions.
If you want to reuse non-UI functionality between components, we suggest extracting it into a separate JavaScript module. The components may import it and use that function, object, or a class, without extending it.
Thinking in React
React is, in our opinion, the premier way to build big, fast Web apps with JavaScript. It has scaled very well for us at Facebook and Instagram.
One of the many great parts of React is how it makes you think about apps as you build them. In this document, we'll walk you through the thought process of building a searchable product data table using React.
Start With A Mock
Imagine that we already have a JSON API and a mock from our designer. The mock looks like this:
Our JSON API returns some data that looks like this:
The first thing you'll want to do is to draw boxes around every component (and subcomponent) in the mock and give them all names. If you're working with a designer, they may have already done this, so go talk to them! Their Photoshop layer names may end up being the names of your React components!
But how do you know what should be its own component? Use the same techniques for deciding if you should create a new function or object. One such technique is the single responsibility principle, that is, a component should ideally only do one thing. If it ends up growing, it should be decomposed into smaller subcomponents.
Since you're often displaying a JSON data model to a user, you'll find that if your model was built correctly, your UI (and therefore your component structure) will map nicely. That's because UI and data models tend to adhere to the same information architecture. Separate your UI into components, where each component matches one piece of your data model.
You'll see here that we have five components in our app. We've italicized the data each component represents.
FilterableProductTable (orange): contains the entirety of the example
SearchBar (blue): receives all user input
ProductTable (green): displays and filters the data collection based on user input
ProductCategoryRow (turquoise): displays a heading for each category
ProductRow (red): displays a row for each product
If you look at ProductTable, you'll see that the table header (containing the "Name" and "Price" labels) isn't its own component. This is a matter of preference, and there's an argument to be made either way. For this example, we left it as part of ProductTable because it is part of rendering the data collection which is ProductTable's responsibility. However, if this header grows to be complex (e.g., if we were to add affordances for sorting), it would certainly make sense to make this its own ProductTableHeader component.
Now that we've identified the components in our mock, let's arrange them into a hierarchy. Components that appear within another component in the mock should appear as a child in the hierarchy:
Now that you have your component hierarchy, it's time to implement your app. The easiest way is to build a version that takes your data model and renders the UI but has no interactivity. It's best to decouple these processes because building a static version requires a lot of typing and no thinking, and adding interactivity requires a lot of thinking and not a lot of typing. We'll see why.
To build a static version of your app that renders your data model, you'll want to build components that reuse other components and pass data using props. props are a way of passing data from parent to child. If you're familiar with the concept of state, don't use state at all to build this static version. State is reserved only for interactivity, that is, data that changes over time. Since this is a static version of the app, you don't need it.
You can build top-down or bottom-up. That is, you can either start with building the components higher up in the hierarchy (i.e. starting with FilterableProductTable) or with the ones lower in it (ProductRow). In simpler examples, it's usually easier to go top-down, and on larger projects, it's easier to go bottom-up and write tests as you build.
At the end of this step, you'll have a library of reusable components that render your data model. The components will only have render() methods since this is a static version of your app. The component at the top of the hierarchy (FilterableProductTable) will take your data model as a prop. If you make a change to your underlying data model and call ReactDOM.render() again, the UI will be updated. You can see how your UI is updated and where to make changes. React's one-way data flow (also called one-way binding) keeps everything modular and fast.
Refer to the React docs if you need help executing this step.
Step 3: Identify The Minimal (but complete) Representation Of UI State
To make your UI interactive, you need to be able to trigger changes to your underlying data model. React achieves this with state.
To build your app correctly, you first need to think of the minimal set of mutable state that your app needs. The key here is DRY: Don't Repeat Yourself. Figure out the absolute minimal representation of the state your application needs and compute everything else you need on-demand. For example, if you're building a TODO list, keep an array of the TODO items around; don't keep a separate state variable for the count. Instead, when you want to render the TODO count, take the length of the TODO items array.
Think of all the pieces of data in our example application. We have:
The original list of products
The search text the user has entered
The value of the checkbox
The filtered list of products
Let's go through each one and figure out which one is state. Ask three questions about each piece of data:
Is it passed in from a parent via props? If so, it probably isn't state.
Does it remain unchanged over time? If so, it probably isn't state.
Can you compute it based on any other state or props in your component? If so, it isn't state.
The original list of products is passed in as props, so that's not state. The search text and the checkbox seem to be state since they change over time and can't be computed from anything. And finally, the filtered list of products isn't state because it can be computed by combining the original list of products with the search text and value of the checkbox.
OK, so we've identified what the minimal set of app state is. Next, we need to identify which component mutates, or owns, this state.
Remember: React is all about one-way data flow down the component hierarchy. It may not be immediately clear which component should own what state. This is often the most challenging part for newcomers to understand, so follow these steps to figure it out:
For each piece of state in your application:
Identify every component that renders something based on that state.
Find a common owner component (a single component above all the components that need the state in the hierarchy).
Either the common owner or another component higher up in the hierarchy should own the state.
If you can't find a component where it makes sense to own the state, create a new component solely for holding the state and add it somewhere in the hierarchy above the common owner component.
Let's run through this strategy for our application:
ProductTable needs to filter the product list based on state and SearchBar needs to display the search text and checked state.
The common owner component is FilterableProductTable.
It conceptually makes sense for the filter text and checked value to live in FilterableProductTable
Cool, so we've decided that our state lives in FilterableProductTable. First, add an instance property this.state = {filterText: '', inStockOnly: false} to FilterableProductTable's constructor to reflect the initial state of your application. Then, pass filterText and inStockOnly to ProductTable and SearchBar as a prop. Finally, use these props to filter the rows in ProductTable and set the values of the form fields in SearchBar.
You can start seeing how your application will behave: set filterText to "ball" and refresh your app. You'll see that the data table is updated correctly.
So far, we've built an app that renders correctly as a function of props and state flowing down the hierarchy. Now it's time to support data flowing the other way: the form components deep in the hierarchy need to update the state in FilterableProductTable.
React makes this data flow explicit to help you understand how your program works, but it does require a little more typing than traditional two-way data binding.
If you try to type or check the box in the current version of the example, you'll see that React ignores your input. This is intentional, as we've set the value prop of the input to always be equal to the state passed in from FilterableProductTable.
Let's think about what we want to happen. We want to make sure that whenever the user changes the form, we update the state to reflect the user input. Since components should only update their own state, FilterableProductTable will pass callbacks to SearchBar that will fire whenever the state should be updated. We can use the onChange event on the inputs to be notified of it. The callbacks passed by FilterableProductTable will call setState(), and the app will be updated.
And That's It
Hopefully, this gives you an idea of how to think about building components and applications with React. While it may be a little more typing than you're used to, remember that code is read far more than it's written, and it's less difficult to read this modular, explicit code. As you start to build large libraries of components, you'll appreciate this explicitness and modularity, and with code reuse, your lines of code will start to shrink. :)
The reference to root comes from a div in the body of you
State of a component is simply
Class Components require render() method to return JSX.
Functional Components directly return JSX.
Class is className in React.
When parsing for an integer just chain Number.parseInt("123")
Use ternary operator if you want to make a conditional inside a fragment.
Purpose of React.Fragment is to allow you to create groups of children without adding an extra dom element.
Front-End History
React makes it easier for you to make front-end elements. A front-end timeline
Some noteworthy front e
2005: Scrip
2005: Dojo
2006: YUI
2010: Knockout
2011:
2012: Elm
2013: React (Considered
React manages the creation and updating of DOM nodes in your Web page.
All it does is dynamically render stuff into your DOM.
What it doesn't do:
Ajax
Services
Local Storage
Provide a CSS framework
React is unopinionated
Just contains a few rules for developers to follow, and it just works.
JSX : Javascript Extension is a language invented to help write React Applications (looks like a mixture of JS and HTML)
Here is an overview of the difference between rendering out vanilla JS to create elements, and JSX:
This may seem like a lot of code but when you end up building many components, it becomes nice to put each of those functions/classes into their own files to organize your code. Using tools with React
React DevTools : New tool in your browser to see ow React is working in the browser
create-react-app : Extensible command-line tool to help generate standard React applications.
Webpack : In between tool for dealing with the extra build step involved.
HMR : (Hot Module Replacement) When you make changes to your source code the changes are delivered in real-time.
React Developers created something called Flux Architecture to moderate how their web page consumes and modifies data received from back-end API's.
Choosing React
Basically, React is super important to learn and master.
React Concepts and Features
There are many benefits to using React over just Vanilla JavaScript.
Modularity
To avoid the me
Easy to start
No specials tools are needed to use Basic React.
You can start working directly with createElement method in React.
Declarative Programming
React is declarative in nature, utilizing either it's built-in createElement method or the higher-level language known as JSX.
Reusability
Create elements that can be re-used over and over. One-flow of data
React apps are built as a combination of parent and child components.
Parents can have one or more child components, all children have parents.
Data is never passed from child to the parent.
Virtual DOM : React provides a Virtual DOM that acts as an agent between the real DOM and the developer to help debug, maintain, and provide general use.
Due to this usage, React handles web pages much more intelligently; making it one of the speediest Front End Libraries available.
ES6 Refresher
Exporting one item per file
Use export default statement in ES6 to export an item. ES6
CommonJS (Equivalent)
Exporting multiple items per file
Use just thw export keyword (without default) to export multiple items per file. ES6 (Better to export them individually like this, rather than bunching them all into an object)
CommonJS (Equivalent)
Importing with ES6 vs CommonJS
Import statements in ES6 modules must always be at the top of the file, because all imports must occur before the rest of the file's code runs. ES6
CommonJS
Unnamed default imports
You can name unnamed items exported with export default any name when you import them.
Just remember if you use export instead of export default then your import is already named and cannot be renamed.
Aliasing imports
Use as asterisk to import an entire module's contents.
Keep in mind you must use an as keyword to refer to it later.
You can also name identically named functions or items from different files.
Browser support for ES6 Modules
ES6 Modules can only be used when a JS file is specified as a module. <script type="module" src="./wallet.js"></script>
You can get browser support for ES6 modules by adding module into your script tag.
Notes
JSX In Depth
Remember that JSX is just syntactic sugar for the built in React.createElement(component, props, ...children)
React Library must always be in
Use Dot Notation for JSX Type
User-Defined Components Must Be Capitalized <Foo /> vs <div>
Cannot use a general expression as the React element type. (Incorrect)
(Corrected)
Props in JSX
Several ways to specify props in JSX.
Javascript Expressions as Props
String Literals
Props Default to "True"
Spread Attributes
Children in JSX
props.children : The content between opening and closing tag. JavaScript Expressions as Children
Functions as Children
props.children works like any other prop, meaning it can pass any sort of data.
Booleans, Null, and Undefined Are Ignored
false, null, undefined, and true are all valid children.
They will not render.
You can use these to conditionally render items.
In this example, the component will only render if showHeader evals to True.
Note that certain falsy values such as zero will still be rendered by React, you can work around this by ensuring situations like the above eval. into a boolean.
In the times you want booleans to be rendered out, simply convert it into a string first.
Reconciliation
The Diffing Algorithm
Diffing : When the state of a component changes React creates a new virtual DOM tree.
Elements of Different Types
Every time the root elements have different types, React tears down the old tree and builds the new tree from scratch.
DOM Elements Of the Same Type
When comparing two DOM elements of the same type, React keeps the same underlying DOM node and only updates the changes attributes.
Component Elements Of The Same Type
When components update, instances will remain the same, so th
React will only update the props, to match the new element.
Recursing On Children
React will iterate both lists of children and generate a mutation whenever there's a
This is why we use keys.
Makes it easier for React to match children in the original tree with children in the subsequent tree.
Tradeoffs
Important to remember that reconciliation algorithm is an implementation detail.
Re-rendering only to apply the differences following the rules stated in the previous sections.
Typechecking With PropTypes
As your application grows, you can use React's typechecking to catch bugs.
propTypes is a special property to run typechecking.
exports range of built in validators to ensure your received data is valid.
propTypes is only checked in development mode.
Requiring Single Child
Use PropTypes.element to specify only a single child can be passed to a component as children.
Default Prop Values
Use defaultProps to assign default values for props.
Notes
React Router Introduction
React Router is the answer for rendering different components for different pages.
A front-end library that allows you to control whi
Client-side Routing Getting started with ro
Install React Router with:
npm install — save react-rou
Import Browser Router from package.
import { BrowserRouter } from "react-ro
BrowserRouter is the primary component of the r
Wrap it around components.
Creates a React Context that passes routing information down to all its descendant components.
You can also use HashRouter, where it would generate a hash before the endpoint. Creating frontend routes
React Router helps your app render specific components based on the URL.
The most common component is <Route>
Wrapped around another component, causing the comp. to only render if the a certain URL is matched.
Props : path, component, exact, and [render]
Browser Router can only have a single child component.
The Browser Router wraps all routes within a parent div element.
component
Indica
path
Indicate
exact
Tells route to not pattern match and only render a certain route exclusively to it's associated component.
render
Optional prop that takes in a function to be called.
Causes extra work for React.
Preferred for inline rendering of simple functional components.
Difference between component and render is that component returns new JSX that be re-mounted, but render returns the JSX that will be mounted only once.
// This inline rendering will work, but is unnecessarily slow. <Route path="/hello" component={() => <h1>Hello!</h1>} /> // This is the preferred way for inline rendering. <Route path="/hello" render={() => <h1>Hello!</h1>} />
Also useful if you need to pass in specific props to a component.
// `users` to be passed as a prop: const users = { 1: { name: "Andrew" }, 2: { name: "Raymond" }, }; <Route path="/users" render={() => <Users users={users} />} />;
Route path params
Your component's props can hold information about URL's parameters.
Will match segments starting at : to the next /, ?, #.
{...props} spreads out the router's props.
props.match.params is used to acce
Useful keys on the mat
isExact : boolean that tells you whether or not the URL exactly matches the path.
url : the currentURL
path : Route path it matched against (w/o wildcards)
params : Matches for the individual wildcard segments.
Navigation
React Router Navigation
Link, NavLink, Redirect, history props of React Router are used to help your user navigate routes. Adding links for navigation
Issues on-click navigation event to a route defined in app.
Usage renders an anchor tag with a correctly set href attribute.
Link takes two properties: to and onClick.
to : route location that
onClick : clickHandler.
NavLink works just l
Adds extra styling, when the path it links to matches the current path.
As it's name suggests, it is used to Nav Bars.
Takes three props:
activeClassName : allows you to set a CSS class name for styling. (default set to 'active')
activeStyle : style object that is applied inline when it's to prop. matches the current URL.
exact prop is a boolean that defaults to false; you can set it to true to apply requirement of an exact URL match.
exact can also be used as a flag instead of a reg. property value.
benefit of adding this is so that you don't trigger other matches. Switching between routes
<Switch> : Component allows you to only render one route even if several match the current URL.
You may nest as many routes as you wish but only the first match of the current URL will be rendered.
Very useful if we want a default component to render if none of our routes match.
DefaultComponent will only render if none of the other URLs match up.
<Redirect> : Helps redirect users.
Only takes a single prop: to.
History
History allows you to update the URL programmatically.
Contains two useful methods:
push : Adds a new URL to the end of the history stack.
replace : Replaces the current URL on the history stack, so the back button won't take you to it.
Nested Routes
Why nested routes?
Create routes that tunnel into main components vs getting rendered on the main page as it's own thing. What are nested routes?
Alt. version using props.match
As you can see above, our end URL isn't even defined until we apply those flexible values in.
React Builds
Build : Process of converting code into something that can actually execute or run on the target platform.
In regards to React, the minimum a build should do is convert JSX to something that browsers can understand.
Linting : Process of using a tool to analyze your code to catch common errors
Transpilation : Process of converting source code, like JS, from one version to another.
Minification : Process of removing all unnecessary characters in your code.
Bundling : Process of combining multiple code files into a single file.
Tree Shaking : Process of removing unused or dead code from your application before it's bundled. Configuration or code?
Configuration allows developers to create build tasks by declaring either JSON, XML, or YAML without explicitly writing every step in the process.
Coding or Scripting simply requires code. Babel and webpack (yes, that's intentionally a lowercase 'w')
Babel : Code Transpiler that allows you to use all of the latest features and syntax wihtout worrying about what browsers support what.
webpack : Allows developers to use JS modules w/o requiring users to use a browser that natively supports ES modules.
Create React App uses webpack and Babel under the hood to build applications. The Create React App build process
What happens when you run npm start:
.env variables are loaded.
list of browsers to support are checked.
config'd HTTP port checked for availability.
application compiler is configured and created.
webpack-dev-starter is started
webpack-dev-starter compiles app.
index.html is loaded into browser
file watcher is started to watch for changes. Ejecting
There is a script in Create React App called eject that allows you to 'eject' your application and expose all the hidden stuff. Preparing to deploy a React application for production
Defining Env Variables
Configuring the supported browsers
If you specify older browsers it will affect how your code get's transpiled. Creating a production build
Run npm run build to create a production build.
Bundles React in production mode and optimizes the build for the best performance.
Notes
Introduction to React
Simply a nice library that turns data into DOM.
Tree Diffing : Fast comparison and patching of data by comparing the current virtual DOM and new virtual DOM - updating only the pieces that change.
It's just a tree with some fancy diffing
Create Element
From JavaScript To DOM
The React.createElement function has the following form:
Type : Type of element to create, i.e. a string for an HTML element or a reference to a function or class that is a React component.
Props : Object that contains data to render the element.
Children : Children of the elemet, as many as you want. Creating elements
Our rendering goal:
There are five tags to create:
One ul
Two li
Two a
There are certain attributes
Each li has a class (or className in React)
Both a ele's have href attributes
Also keep in mind the parent child relationships happening between the tags.
ul is the parent of both li
Each li has an a element as a child
Each a has a text content child
Converting to virtual DOM
After you set up your React.createElement, you use React.render to take the value returned from cE and a DOM node to insert into the conversion of the real DOM.
JS Code => Virtual DOM => Real Dom Updates
If you call React.render a second or multiple times i
Components are pieces of reusable front-end pieces.
Components should be Single Responsibility Principle compliant.
Create Element
React.createElement Demo
Can import non-local dependencies with import 'package-link'
Remember when importing modules from other files you have to denote the file type in the import statement. HTML Original
React Version
Because class is a reserved keyword in JS, in React we can use className to assign a class to an element.
Remember the data tha
props : Properties;
To handle certain values that are initially undefined, we can use defaultProps.
You can change in the devTools Network tab the internet speed to check for values that may be undefined to hangle with defaultProps.
If we fetch multiple pieces of data, we can render many
You need to assign a unique key to each of the clues.
We need to keep track of them individually so that React can easily refer to a specific one if there is an issue. clue => { key:clue.id, ...clue }
Note: JSX is preferred over React.createElement;
Notes from Hello Programmer Exercise
When you import modules from websites they must have CORs activated.
These import statements, import global variables.
When we want to move our code into production we need to change the imports into the production minified versions.
While we will never actually be creating full apps with just React.createElement => it is the enginer that is running under the hood!
Introduction to JSX
JSX : Javascript Extension, a new language created by React developers to have an easier way of interacting with the React API. How to use JSX
We will use babel to convert version of modern JS into an older version of JS. React Create Element
JSX Version
Keep in mind that self closing tags in React must have a forward slash to close it.
Properties and Data
Comments in JSX have the following syntax:
Property Names:
checked : Attribute of input components su
className : Used to specify a CSS class.
dangerouslySetInnerHTML : React's equivalent of innerHTML because it is risky to
htmlFor : Because for is protected keyword, React elements use this instead.
onChange : Event fired whenever a form field is changed.
style : Accepts a JS object with camelCase properties rather than a CSS string.
value : Supported by Input, Select, and TextArea components; use it to set the value of the component.
Note: React uses camel-case!!! The JSX semicolon gotcha
create Element equivalent
We wrap what want to return in parenthesis so JS doesn't auto add semi-colons after every line and run the code incorrectly.
Just remember if you decided to use the return keyword in a function to 'return some JSX', then make sure you wrap the JSX in parenthesis.
npx create-react-app my-app
Single line used to initiate a React application.
React has a great toolchain where you can see changes live as you
React errors will be rendered directly onto the browser window.
A downside is that it installs a lot of bloat files.
Examples of React create Element and JSX equivalent
More Complex JSX Example
Notes
Using Custom CRA Templates
Using a Custom Template npx create-react-app my-app --template @appacademy/simple
Keep in mind that using create-react-app automatically initializes a git repository for you!
App Academy custom template for creating a react app.
You can write React components using ES2015 Classes: Function Component
ES2015 Version
We can access props within a class component by using this.props
Keep in mind Class Components are used just like function components.
Setting and accessing props
If we define a constructor method in our Class Component, we have to define the super method with props passed through it.
Side Note: Before React used ES2015 Classes, it used React.createclass function, if you ever need to use this antiquated method make sure you install a module cal
One of the major reasons why you would choose to use a Class Component over a
Second of the major reasons is to be able to use a
Props are data that are provided by the consumer o
Not meant to be changed by a component.
State is data that is internal to the component.
Intended to be updated or mutated. When to use state
Only Use State when it is absolutely necessary
If the data never changes, or if it's needed through an entire application use props instead.
State is more often used when creating components that retrieve data from APIs or render forms.
The general rule of thumb: If a component doesn't need to use state or lifecyle methods, it should be prioritized as a function component.
Functional:Stateless || Class:Stateful Initializing state
Use a class constructor method to initialize this.state object. // Application Entry Point
// Class Component: RandomQuote
Updating State
Let's say we want to update our state with a new quote.
We can set up event listeners in React similarly to how we did them before.
<button type="button" onClick={this.changeQuote}
onClick is the event listener.
{this.changeQuote} is the event handler method.
Our Class Component File should now look like this with the new additions:
Don't modify state directly
It is important to never modify your state directly!
ALWAYS use this.setState method to update state.
This is because when you only use this.state to re-assign, no re-rendering will occur => leaving our component out of sync. Properly updating state from the previ
In our current example, the way we have changeQuote set up leaves us with occasionally producing the same index twice in a row.
One solution is to design a loop but keep in mind that state updates are handled asynchronously in React (your current value is not guaranteed to be the latest)
A safe method is to pass an anonymous method to this.setState (instead of an object literal) Previous
Passing w/ Anon Method
Providing default values for props
In our current example, we pass in a static array of predefined quotes in our constructor.
The way it is set up right now leaves our list of quotes unchanged after initialization.
We can make quotes more dynamic by replacing our static array with a props argument passed into super.
constructor(props) { super(props); }
We can now move our quotes array to our application entry point and pass it in as a prop. // Application Entry Point
One thing to note about this workaround is that the caller of the component must set the quotes prop or the component will throw an error => so use defaultProps!
A good safety net in case the consumer/caller doesn't provide a value for the quotes array.
We can even remove it from our index.js now and an error will not be thrown.
Handling Events
To add an event listener to an element, just define a method to handle the event and associate that method with the element event you are listening for. Example
Note that when refering the handler method in onClick we're not invoking showAlert simply just passing a reference. Preventing default behavior
HTML Elements in the browser often have a lot of default behavior.
I.E. Clicking on an <a> element navigates so a resource denoted by <href> property.
Here is an example of where using e.preventDefault() could come in handy.
The button contained within the form will end up refreshing the page before this.submitForm method can be completed.
We can stick an e.preventDefault() into the actual method to get around this problem.
e : Parameter that references a Synthetic Event object type. Using this in event handlers
When we console log this we see the AlertButton object.
If we were to write the showAlert method with a regular class method like:
We would get undefined => remember that fat arrow binds to the current context! Reviewing class methods and the this keyword
Let's refresh on binding.
The first time we use our displayMethod call, it is called directly on the instance of the boyfriend class, which is why Momato Riruru was printed out.
The second time it was called, the ref of the method is
Remember we can use the bind method to rebind context!
We can refactor to get the second call working like this:
const displayAgain = Ming.displayName.bind(Ming); displayAgain(); // => Now Momato Riruru will be printed out.
To continue using function declarations vs fat arrow we can assign context in a constructor within a class component.
Experimental Syntax : Syntax that has been proposed to add to ECMAScript but hasn't officially been added to the language specification yet.
It's good to pick one approach and use it consistently, either:
Class Properties & Arrow Functions
Bind Method & This Keyword The SyntheticEvent object
Synthetic Event Objects: Cross Browser wrappeds around the browser's native event.
Includes the use of stopPropagation() and preventDefault();
Attributes of the Synthetic Event Object:Attributesboolean bubblesboolean cancelableDOMEventTarget currentTargetboolean defaultPreventednumber eventPhaseboolean isTrustedDOMEvent nativeEventvoid preventDefault()boolean isDefaultPrevented()void stopPropagation()boolean isPropagationStopped()void persist()DOMEventTarget targetnumber timeStampstring type
nativeEvent : property defined in a synthetic event object that gives you access to the underlying native browser event (rarely used!)
Forms in React
Exercise being done in a separate file Random Notes
onChange : detects when a value of an input element changes.
Assigning onChange to our input fields makes our component's state update in real time during user input.
Dont forget to add prev
submittedOn: new Date(), Can be added to a form, most likely will persist into a DB.
Controlled Components
We use the onChange event handlers on form fields to keep our component's state as the "one source of truth"
Adding an onChange event handler to every single input can massively bloat your code.
Try assiging it to it's own method to apply everywhere.
textarea is handled differently in react: it takes in a value property to handle what the inner text will be.
We can use validation libraries like validate to make our validation functions more complex.
Note About Client-side vs server-side validation
Server-side validation is not optional.
Tech-savvy users can manipulate client-side validations.
Sometimes the 'best approach' is to skip implementing validations on the client-side and rely completely on the server-side validation.
Component Lifecycle
Component Lifecycle is simply a way of describing the key moments in the lifetime of a component.
Loading (Mounting)
Updating
Unloading (Unmounting) The lifecycle of a React component
Each Class Component has several lifecycle methods that you can add to run code at specific times.
componentDidMount : Method called after your component has been added to th
componentDidUpdate : Method called after your component has been updated.
componentWillUnmount : Method called just before your component is removed from the component tree.
Mounting
constructor method is called
render method is called
React updates the DOM
componentDidMount is called
Updating
When component receives new props
render method is called
React updates the DOM
componentDidUpdate is called
When setState is called
render method is called
React updates the DOM
componentDidUpdate is called
Unmounting
The moment before a class component is removed from the component tree:
componentDidMount will be c
Occasionally you will encoun
UNSAFE_componentW
UNSAFE_componentWillReceiveProps
UNSAFE_componentWillUpdate
Just know they will be removed soon from React's API, peace. Using the class component lifecycle methods Exercise done in sep. directory
Assorted Notes:
Common Use for componentDidMount lifecycle method is for fetching data from an API.
—
Notes
React Context
You can use React Context to pass data through a component tree without having to manually thread props.
Convenient way to share & update global data. Creating a Context
We use React.createContext to create context.
Keep in mind if you invoke this method with aruguments, those arguments will be set as default co
In order to pass context over to child components we need to wrap them in a provider component.
The provider component takes in a value property that points to the information that needs to be passed to the children.
Setting up a Consumer
Keep in mind that Context.Consumer expects a function as a child.
The function has a value prop passed in from Context.Provider
Notes
Redux Explained
JS Framework for managing the frontend state of a web application.
Gives u
Redux
Client Side Data Mana
Controls "Frontend State"
NOT Your Database
NOT Component State
Just used for managing Data
Visual of how an app without React manages it's data.
A lot of prop threading happening.
Data stored in a sep. loca
Store
Holds the Frontend State
Provides an
Action
POJOs
Outline Changes to Frontend State
Reducers
Functions
Make Changes to Frontend State Where did Redux come from?
There are three central philosophies of Redux:
A Single Source of Truth : state is stored in a POJO
State is Read Only : State is immutable, modified by dispatching actions.
Changes are Made with Pure Functions : Reducers that receive the actions and return updated state are pure functions of the old state and action. When is it appropriate to use Redux?
When doing a project with simpler global state requirements, it may be better to choose React's Context API over Redux.
Redux o
State
_Redux
State is all the information stored by that program at a particular point i
Redux's m
Store
Redux stores state in a single store.
Redux store is a single JS object wit
Methods include: getState, dispatch(action), and s
Actions
_Redux store is updated by dispatching
Action is ju
Contain info to update the store.
We dispatch actions in res
Pure Functions
Redux Reducers are Pure Functions
Functions are pure when their behavior depends only on it's arguments as has no side effects.
Simply takes in an argument and outputs a value.
Reducer
Redux handles actions using reducers
A function that is called each time an action is dispatched.
Takes in an action and current state
Required to be pure functions so their behavior is predictable.
Middleware
Customize response to dispatch actions by using Middleware
Middleware is an optional component of Redus that allows custom responses to dispatched actions.
Most common use is to dispatch async requests to a server.
Time Traveling Dev Tools
Redux can time travel wow
Time travel refers to Redux's ability to revert to a previous state because reducers are all pure functions.
Thunks
Convenient format for taking async actions in Redux
General concept in CS referring to a function who's primary purpose is to call another function.
Most commonly used to make async API requests.
Flux and Redux
What is Flux?
Front-end application architecutre.
A pattern in which to structure an application.
Unidirectional Data Flow — offers more predictability.
Actions : Begins the data flow of data, simple object that contains a type; type indicates the type of change to be performed.
Dispatcher : Mechanism for distributing actions to the store.
Store : The entire state of the application, responsible for updating the state of your app.
View : Unit of code that's responsible for rendering the user interface. Used to re-render the application when actions and changes occur.
Redux
Library that facilitates the implementation of Flux.
Redux Three Principles
Single Source of Truth
State is Read-Only
Only Pure Functions Change State
Store
Simply an object that holds the application state wrapped in an API.
Three methods:
getState() : Returns the store's current state.
dispatch(action) : Passes an action into the store's reducer to tell it what info to update.
subscribe(callback) : Registers a callback to be triggered whenever the store updates. Updating the Store
Subscribing to the store
Whenever a store process a dispatch(), it triggers all its subscribers.
Subscribers : callbacks that can be added to the store via subscribe().
Reviewing a simple example
Reducers
Reducer function receives the current state and action, updates the state appropriately based on the action.type and returns the following state.
You can bundles different action types and ensuing logic by using a switch/case statement.
Reviewing how Array#slice works
Approach that can be used to remove an element without mutating the original array. Avoiding state mutations
Your reducer must always return a new object if the state changes. GOOD
BAD
Actions
Actions are the only way to trigger changes to the store's state. Using action creators
fruit is the payload key and orange is the state data
Action Creators : Functions created from extrapolating the creation of an action object.
Use parenthesis for implicit return value.
We can now add whatever fruit we'd like.
Preventing typos in action type string literals
Using constant variables helps reduce simple typos in a reducer's case clauses.
Debugging Arrow Functions
It is important to learn how to use debugger statements with arrow functions to effectively debug Redux cycle. Understanding the limitations of implicit return values
You must use explicit return statement arrow function to use a debugger.
React Router Introduction
Now that you know how to render components in a React app, how do you handle rendering different components for different website pages? React Router is the answer!
Think of how you have created server-side routes in Express. Take the following URL and server-side route. Notice how the /users/:userId path corresponds with the http://localhost:3000/users/2 URL to render a specific HTML page.
In the default React setup, you lose the ability to create routes in the same manner as in Express. This is what React Router aims to solve!
React Router is a frontend routing library that allows you to control which components to display using the browser location. A user can also copy and paste a URL and email it to a friend or link to it from their own website.
When you finish this article, you should be able to use the following from the react-router-dom library:
<BrowserRouter> to provide your application access to the react-router-dom library; and
<Route> to connect specific URL paths to specific components you want rendered; and
<Switch> to wrap several Route elements, rendering only one even if several match the current URL; and
React Router's match prop to access route path parameters.
Getting started with routing
Since you are writing single page apps, you don't want to refresh the page each time you change the browser location. Instead, you want to update the browser location and your app's response using JavaScript. This is known as client-side routing. You are using React, so you will use React Router to do this.
Create a simple react project template:
Then install React Router:
Now import BrowserRouter from react-router-dom in your entry file:
BrowserRouter
BrowserRouter is the primary component of the router that wraps your route hierarchy. It creates a React context that passes routing information down to all its descendent components. For example, if you want to give <App> and all its children components access to React Router, you would wrap <App> like so:
Alternatively, you could import and use HashRouter from react-router-dom. Links for applications that use <HashRouter> would look like https://www.website.com/#/profile (with an # between the domain and path).
You'll focus on using the <BrowserRouter>.
Creating frontend routes
React Router helps your React application render specific components based on the URL. The React Router component you'll use most often is <Route>.
The <Route> component is used to wrap another component, causing that component to only be rendered if a certain URL is matched. The behavior of the <Route> component is controlled by the following props: path, component, exact, and render (optional).
Create a simple Users component that returns <h1>This is the users index!</h1>. Now let's refactor your index.js file so that you can create your routes within the component:
Note that BrowserRouter can only have a single child component, so the snippet above wraps all routes within parent a <div> element. Now let's create some routes!
component
Begin with the component prop. This prop takes a reference to the component to be rendered. Let's render your App component:
Now you'll need to connect a path to the component!
path
The wrapped component will only be rendered when the path is matched. The path matches the URL when it matches some initial portion of the URL. For example, a path of / would match both of the following URLs: / and /users. (Because /users begins with a / it matches the path /)
Take a moment to navigate to http://localhost:3000/users to see how both the App component and Users component are rendering.
exact
If this exact flag is set, the path will only match when it exactly matches the URL. Then browsing to the /users path would no longer match / and only the Users component will be rendered (instead of both the App component and Users component).
render
This is an optional prop that takes in a function to be called. The function will be called when the path matches. The function's return value is rendered. You could also define a functional component inside the component prop, but this results in extra, unnecessary work for React. The render prop is preferred for inline rendering of simple functional components.
The difference between using component and render is that component returns new JSX to be re-mounted every time the route renders, while render simply returns to JSX what will be mounted once and re-rendered. For any given route, you should only use either the component prop, or the render prop. If both are supplied, only the component prop will be used.
It can be helpful to use render instead of component in your <Route> when you need to pass props into the rendered component. For example, imagine that you needed to pass the users object as a prop to your Users component. Then you could pass in props from Root to Users by returning the Users component like so:
As a reminder, BrowserRouter can only have a single child component. That's why you have wrapped all your routes within parent a <div> element.
With this Root component, you will always render the <h1>Hi, I'm Root!</h1>, regardless of the path. Because of the first <Route>, you will only render the App component if the path exactly matches /. Because of the second <Route>, you will only render the Users component if the path matches /users.
Route path params
A component's props can also hold information about a URL's parameters. The router will match route segments starting at : up to the next /, ?, or #. Those matched values are then passed to components via their props. Such segments are wildcard values that make up your route parameters.
For example, take the route below:
The router would break down the full /users/:userId/photos path to two parts: /users, :userId.
The Profile component's props would have access to the :userId part of the http://localhost:3000/users/:userId/photos URL through the props with router parameter information. You would access the the match prop's parameters (props.match.params). If you are using the render prop of the Route component, make sure to spread the props back into the component if you want it to know about the "match" parameters.
The params object would then have a property of userId which would hold the value of the :userId wildcard value. Let's render the userId parameter in a user profile component. Take a moment to create a Profile.js file with the following code:
Notice how it uses the match prop to access the :userId parameter from the URL. You can use this wildcard to make and AJAX call to fetch the user information from the database and render the return data in the Profile component. Recall that your Profile component was rendered at the path /users/:userId. Thus you can use your userId parameters from match.params to fetch a specific user:
Match
Now that you've seen your React Router's match prop in action, let's go over more about route props! React Router passes information to the components as route props, accessible to all components with access to the React Router. The three props it makes available are location, match and history. You've learned about props.match.params, but now let's review the other properties of the match prop!
This is an object that contains important information about how the current URL matches the route path. Here are some of the more useful keys on the match object:
isExact: a boolean that tells you whether or not the URL exactly matches the path
url: the current URL
path: the route path it matched against (without wildcards filled in)
params: the matches for the individual wildcard segments, nested under their names
When you use React Router, the browser location and history are a part of the state of your app. You can store information about which component should be displayed, which user profile you are currently viewing, or any other piece of state, in the browser location. You can then access that information from anywhere your Router props are passed to in your app.
Now that you've learned about parameters and route props, let's revisit your Root component to add an exact flag to your /users route so that it does not render with your /users/:userId route. Your component should look something like this:
What you learned
In this article, you learned how to:
Use components from the React Router library; and
Create routes to render specific component
Manage the order of rendered routes; and
Use the exact flag to ensure that a specific path renders a specific component; and
Use the React Router match prop to access Router params.
React Router Navigation
Now that you know how to create front-end routes with React Router, you'll need to implement a way for your users to navigate the routes! This is what using React Router's Link, NavLink, Redirect, and history prop can help you do.
In this article, you'll be working off of the demo project you built in the React Router Intro reading. When you finish this article, you should be able to use the following components from the react-router-dom library:
<Link> or <NavLink> to create links with absolute paths to routes in your application (like "/users/1"); and,
<Redirect> to redirect a user to another path (i.e. a login page when the user is not logged in); and
React Router's history prop to update a browser's URL programmatically.
Adding links for navigation
React Router's <Link> is one way to simplify navigation around your app. It issues an on-click navigation event to a route defined in your app's router. Using <Link> renders an anchor tag with a correctly set href attribute.
Link
To use it, update your imports from the react-router-dom package to include Link:
Note that <Link> can take two props: to and onClick.
The to prop is a route location description that points to an absolute path, (i.e. /users). Add the following Link components in your index.js file above your routes:
The onClick prop is just like any other JSX click handler. You can write a function that takes in an event and handles it. Add the following Link before your routes and the following click handler function within your Root component:
Now, test your routes and links! If you inspect the page, you'll see that your links are now rendered as <a> elements. Notice that clicking the App with click handler link logs a message in your console while directing your browser to render the App component.
NavLink
The <NavLink> works just like a <Link>, but with a little extra functionality. It has the ability to add extra styling when the path it links to matches the current path. This makes it an ideal choice for a navigation bar, hence the name. This styling can be controlled by three extra props: activeClassName, activeStyle, and exact. To begin using NavLink, update your imports from the react-router-dom package:
The activeClassName prop of the NavLink component allows you to set a CSS class name for styling the NavLink when its route is active. By default, the activeClassName is already set to active. This means that you simply need to add an .active class to your CSS file to add active styling to your link. A NavLink will be active if its to prop path matches the current URL.
Let's change your "Users", "Hello", and "Andrew's Profile" links to be different colors and have a larger font size when active.
For example, this is what the rendered HTML <a> tag would look like when when the browser is navigated to the / path or the /users path:
Import NavLink into your index.js file and take a moment to update all your Link elements to NavLink elements. Set an activeClassName prop to an active class. Add the following .active class to your index.css file:
Test your styled links! Notice how the App and App with click handler links are always bolded. This is because all of your links include the / path, meaning that the link to / will be active when browsing to /users and /users/1 because of how users and users/1 are both prefaced by a /.
The activeStyle prop is a style object that will be applied inline to the NavLink when its to prop matches the current URL. Add the following activeStyle to your App link and comment out the .active class in your CSS file.
The following html is rendered when at the / path:
Notice how your App with click handler is not bolded anymore. This is because the default active class being applied does not have any CSS stylings set to the class. Uncomment your .active class in your CSS file to bring back bolding to this NavLink.
The exact prop is a boolean that defaults to false. If set to true, then the activeStyle and activeClassName props will only be applied when the current URL exactly matches the to prop. Update your App and App with click handler links with an exact prop set. Just like in your routes, you can use the exact flag instead of exact={true}.
Now your App and App with click handler links will only be bolded when you have navigated precisely to the / path.
Switching between routes
You came across styling issues when the /users and /users/1 paths matched the / path. Routing can have this issue as well. This is why you need to control the switching between routes.
React Router's <Switch> component allows you to only render one <Route> even if several match the current URL. You can nest as many Routes as you wish between the opening and closing Switch tags, but only the first one that matches the current URL will be rendered.
This is particularly useful if you want a default component that will only render if none of our other routes match. View the example below. Without the Switch, DefaultComponent would always render. Since there isn't set a path in the DefaultComponent route, it will simply use the default path of /. Now the DefaultComponent will only render when neither of the preceding routes match.
Import Switch from react-router-dom and add <Switch> tags around your routes to take care of ordering and switching between your routes! Begin by adding the following route to the bottom of your routes to render that a 404: Page not found message:
This is what your Root component should look like at this point:
Now you have control over the precedence of rendered components! Try navigating to http://localhost:3000/asdf or any other route you have not defined. The <h1>404: Page not found</h1> JSX of the last <Route> will be rendered whenever the browser attempts to visit an undefined route.
Redirecting users
But what if you want to redirect users to a login page when they aren't logged in? The <Redirect> component from React Router helps you redirect users!
The component takes only one prop: to. When it renders, it replaces the current URL with the value of its to prop. Typically you conditionally render <Redirect> to redirect the user away from some page you don't want them to visit. The example below checks whether there is a defined currentUser prop. If so, the <Route> will render the Home component. Otherwise, it will redirect the user to the /login path.
Note: you will learn how to use a more flexible auth pattern — don't directly imitate this example.
History
You know how to redirect users with a <Redirect> component, but what if you need to redirect users programmatically? You've learned about the React Router's match prop, but now let's go over another one of the route props: history!
This prop lets you update the URL programmatically. For example, suppose you want to push a new URL when the user clicks a button. It has two useful methods:
push - This adds a new URL to the end of the history stack. That means that clicking the back button will take the browser to the previous URL. Note that pushing the same URL multiple times in a row will have no effect; the URL will still only show up on the stack once. In development mode, pushing the same URL twice in a row will generate a console warning. This warning is disabled in production mode.
replace - This replaces the current URL on the history stack, so the back button won't take you to it. For example:
What you learned
In this article, you learned how to:
Create navigation links for your route paths; and
Redirect users through using the <Redirect> component; and
Update a browser's URL programmatically by using React Router's history prop.
React Router Nested Routes
Now you know how to create front-end routes and add navigation with React Router. When initializing Express projects, you declare static routes. Static routes are routes that are declared when an application is initialized. When using React Router in your application's initialization, you can declare dynamic routes. React Router introduces dynamic routing, where your routes are created as your application is rendering. This allows you to create nested routes within components!
In this article, let's dive into nested routes! When you finish the article, you should:
Describe what nested routes are; and
Be able to use React Router to create and navigate nested routes; and
Know how to use the React Router match prop to generate links and routes.
Why nested routes?
Let's begin with why you might need nested routes. As you remember, you are using React to create a single-page application. This means that you'll be organizing your application into different components and sub-components.
For example, imagine creating a simple front-end application with three main pages: a home welcome page (path of /), a users index page (path of /users), and user profile pages (path of /users/:userId). Now imagine if every user had links to separate posts and photos pages.
You can create those routes and links within the user profile component, instead of creating the routes and links where the main routes are defined.
What are nested routes?
Now let's dive into a user profile component to understand what are nested routes! Imagine you have a route in your application's entry file to each user's profile like so:
This means that upon navigating to http://localhost:3000/users/1, you would render the following Profile component and the userId parameter within props.match.params would have the value of "1".
Since this route is not created until the Profile component is rendered, you are dynamically creating your nested /users/:userId/posts and /users/:userId/photos routes. Remember that your match prop also has other helpful properties. You can use match.url instead of /users/${id} in your profile links. You can also use match.path instead of /users/:userId in your profile routes. Remember that you can destructure url, path, and params from your match prop!
In tomorrow's project, you'll build a rainbow of routes as well as define nested routes. In the future, you may choose to implement nested routes to keep your application's routes organized within related components.
What you learned
In this article, you learned:
What nested routes are; and
About creating and navigating nested routes with React Router; and
How to use the React Router props to generate nested links and routes.
React Builds
A "build" is the process of converting code into something that can actually execute or run on the target platform. A "front-end build" is a process of preparing a front-end or client-side application for the browser.
With React applications, that means (at a minimum) converting JSX to something that browsers can actually understand. When using Create React App, the build process is automatically configured to do that and a lot more.
When you finish this article, you should be able to:
Describe what front-end builds are and why they're needed;
Describe at a high level what happens in a Create React App when you run npm start; and
Prepare to deploy a React application into a production environment.
Understanding front-end builds
The need for front-end builds predates React. Over the years, developers have found it helpful to extend the lowest common denominator version of JavaScript and CSS that they could use.
Sometimes developers extend JavaScript and CSS with something like TypeScript or Sass. Using these non-standard languages and syntaxes require you to use a build process to convert your code into standard JavaScript and CSS that can actually run in the browser.
Browser-based applications also require a fair amount of optimization to deliver the best, or at least acceptable, experience to end users. Front-end build processes could be configured to lint code, run unit tests, optimize images, minify and bundle code, and more — all automatically at the press of a button (i.e. running a command at the terminal).
JavaScript versions and the growth of front-end builds
Developers are generally an impatient lot. When new features are added to JavaScript, we don't like to wait for browsers to widely support those features before we start to use them in our code. And we really don't like when we have to support older, legacy versions of browsers.
In recent years, JavaScript has been updated on a yearly basis and browser vendors do a decent job of updating their browsers to support the new features as they're added to the language. Years ago though, there was an infamous delay between versions 5 and 6 of JavaScript. It took years before ES6 (or ES2015 as it eventually was renamed to) to officially be completed and even longer before browsers supported all of its features.
In the period of time before ES2015 was broadly supported by browsers, developers used front-end builds to convert or transpile ES2015 features and syntax to an older version of the language that was more broadly supported by browsers (typically ES5). The transpilation from ES2015/ES6 down to ES5 was one of the major drivers for developers to add front-end builds to their client-side projects.
Reviewing common terminology
When learning about front-end or React builds, you'll encounter a lot of terminology that you may or may not be familiar with. Here's some of the terminology that you'll likely encounter:
Linting is process of using a tool to analyze your code to catch common programming errors, bugs, stylistic inconsistencies, and suspicious coding patterns. ESLint is a popular JavaScript linting tool.
Transpilation is the process of converting source code, like JavaScript, from one version to another version. Usually this means converting newer versions of JavaScript, ES2019 or ES2021, to a version that's more widely supported by browsers, like ES2015, or even ES5 or ES3 (if you need to support the browser that your parents or grandparents use).
Minification is the process of removing all unnecessary characters in your code (e.g. white space characters, new line characters, comments) to produce an overall smaller file. Minification tools will often also rename identifers in your code (i.e. parameter and variable names) in the quest for smaller and smaller file sizes. Source maps can also be generated to allow debugging tools to cross reference between minified code and the original source code.
Bundling is the process of combining multiple code files into a single file. Creating a bundle (or a handful of bundles) reduces the number of requests that a client needs to make to the server.
Tree shaking is the process of removing unused (or dead) code from your application before it's bundled. Tree shaking external dependencies can sometimes have a dramatic positive impact on overall bundled file sizes.
Configuration or code?
Front-end build tools have come and gone over the years; sometimes very quickly, which helped bring about the phenomenon known as JavaScript fatigue.
Configuration based tools allow you to create your build tasks by declaring (usually using JSON, XML, or YAML) what you want to be done, without explicitly writing every step in the process. In contrast, coding or scripting based tools allow you to, well, write code to create your build tasks. Configuration based tools can sometimes feel simpler to use while giving up some control (at least initially) while coding based tools can feel more familiar and predictable (since you're describing tasks procedurally). Every generalization is false though (including this one), so there are plenty of exceptions.
Grunt is a JSON configuration based task runner that can be used to orchestrate the various tasks that make up your front-end build. Grunt was very quickly supplanted by Gulp, which allowed developers to write JavaScript to define front-end build tasks. After Gulp, the front-end tooling landscape became a bit more muddled. Some developers preferred the simplicity of using npm scripts to define build tasks while others preferred the power of configuration based bundlers like webpack.
Babel and webpack (yes, that's intentionally a lowercase 'w')
As front-end or client-side applications grew in complexity, developers found themselves wanting to leverage more advanced JavaScript features and newer syntax like classes, arrow functions, destructuring, async/await, etc. Using a code transpiler, like Babel, allows you to use all of the latest and greatest features and syntax without worrying about what browsers support what.
Module loaders and bundlers, like webpack, also allowed developers to use JavaScript modules without requiring users to use a browser that natively supports ES modules. Also, module bundling (along with minification and tree-shaking) helps to reduce the bandwidth that's required to deliver the assets for your application to the client.
[Create React App][cra] uses webpack (along with Babel) under the covers to build your React applications. Even if you're not using Create React App, webpack and Babel are still very popular choices for building React applications.
Pulling back the covers (a bit) on the Create React App build process
Running an application created by Create React App using npm start can feel magical. Some stuff happens in the terminal and your application opens into your default browser. Even better, when you make changes to your application, your changes will (usually) automatically appear in the browser!
The Create React App build process
At a high level, here's what happens when you run npm start:
Environment variables are loaded (more about this in a bit);
The list of browsers to support are checked (more about this too in
The configured HTTP port is checked to ensure that it's available;
The application compiler is configured and created;
The index.html file is loaded into the browser; and
A file watcher is started to watch your files, waiting for changes.
Ejecting
Create React App provides a script that you can run to "eject" your application from the Create React App tooling. When you eject your application, all of the hidden stuff is exposed so that you can review and customize it.
The need to customize Create React App rarely happens. Also, don't eject an actual project as it's a one-way trip! Once a Create React App project has been ejected, there's no going back (though you could always undo the ejection process by reverting to an earlier commit if you're using source control).
To eject your application from Create React App, run the command npm run eject. You'll be prompted if you want to continue; type "y" to continue with the ejection process. Once the ejection process has completed, you can review the files that were previously hidden from you.
In the package.json file, you'll see the following npm scripts:
You can open the ./scripts/start.js file to see the code that's executed when you run npm start.
If you're curious about the webpack configuration, you can open and review the ./config/webpack.config.js.
Preparing to deploy a React application for production
Before you deploy your application to production, you'll want to make sure that you've replaced static values in your code with environment variables and considered what browsers you need to support.
Defining environment variables
Create React App supports defining environment variables in an .env file. To define an environment variable, add an .env file to your project and define one or more variables that start with the prefix REACT_APP_:
Environment variables can be used in code like this:
You can also reference environment variables in your index.html like this:
Important: Environment variables are embedded into your HTML, CSS, and JavaScript bundles during the build process. Because of this, it's very important to not store any secrets, like API keys, in your environment variables as anyone can view your bundled code in the browser by inspecting your files.
Configuring the supported browsers
In your project's package.json file, you can see the list of targeted browsers:
Adjusting these targets affect how your code will be transpiled. Specifying older browser versions will result in your code being transpiled to older versions of JavaScript in order to be compatible with the specified browser versions. The production list specifies the browsers to target when creating a production build and the development list specifics the browsers to target when running the application using npm start.
The browserl.ist website can be used to see the browsers supported by your configured browserslist.
Creating a production build
To create a production build, run the command npm run build. The production build process bundles React in production mode and optimizes the build for the best performance. When the command completes, you'll find your production ready files in the build folder.
Now your application is ready to be deployed!
For more information about how to deploy a Create React App project into production, see this page in the official documentation.
What you learned
In this article, you learned how to:
Describe what front-end builds are and why they're needed;
Describe at a high level what happens in a Create React App when you run npm start; and
Prepare to deploy a React application into a production environment.
React Router Documentation
Now that you've had an introduction to React Router, feel free to explore the official documentation to learn more! As you become a full-fledged software engineer, remember that documentation is your friend. You can take a brief overview for now, as the documentation might include a lot of information at first. The more you learn about React, the more you should revisit the official documentation and learn!
Today you're going to get our first experience using React Router. The goal is to create a basic app that displays the colors of the rainbow. This rainbow, however, has something special about it — some of the colors are nested within others.
Phase 0: Setup
Begin by creating a new React project:
Now you'll remove all the contents of your src and all the contents from your public directory to build the application architecture from scratch! After you have deleted all your files within the directories, create a new index.html file in your public folder. Use the html:5 emmet shortcut to generate an HTML template. Title your page "Rainbow Routes" and create a div with an id of root in your DOM's <body> element. Create an index.css file in your src directory with the following code. Now let's create your entry file!
Create an index.js entry file in the src directory. At the top of the file, make sure to import React from the react package and ReactDOM from the react-dom package. Make sure to also import your the index.css file you just created! This will take care of styling your rainbow routes.
Now you can use the ReactDOM.render() method to render a <Root /> component instead of the DOM element with an id of root. Lastly, wrap your render function with a DOMContentLoaded event listener, like so:
Let's create your Root component right in your entry file! Your Root component will take care of applying your BrowserRouter to the application. Applying the BrowserRouter to your Root component allows all the child components rendering within <BrowserRouter> tags to use and access the Route, Link, and NavLink components within the react-router-dom package.
Install the react-router-dom package:
Now import BrowserRouter from the react-router-dom package, like so:
You're going to be rendering a lot of components, so let's keep your src directory organized by creating a components directory within. Within your new ./src/components directory, create a Rainbow.js file for your Rainbow component with the following code:
Your Rainbow component will act as the home page or default path (/) of your application. Import the Rainbow component into your entry file and have your Root component render <Rainbow /> wrapped within <BrowserRouter> tags, like so:
Within your Rainbow component, you'll be rendering <NavLink> and <Route> components to add different navigation paths to different components. Let's create all the components you will render!
Create files for the following components in your ./src/components directory:
Red
Blue
Green
Indigo
Orange
Violet
Yellow
Your Red and Blue components will look something like this:
Your Green, Indigo, Orange, Violet, and Yellow components will look something like this:
Now start your server and verify you can see the "Rainbow Router!" header from your Rainbow component. Currently there is no functionality. Let's fix that!
Phase 1: Routes
As a reminder, wrapping the Rainbow component in <BrowserRouter> tags makes the router available to all descendent React Router components. Now open the Rainbow.js file. You're going to render some of your color components from here. Ultimately you want your routes to look like this.
URLComponents/Rainbow/redRainbow -> Red/red/orangeRainbow -> Red -> Orange/red/yellowRainbow -> Red -> Yellow/greenRainbow -> Green/blueRainbow -> Blue/blue/indigoRainbow -> Blue -> Indigo/violetRainbow -> Violet
This means that the Red, Green, Blue, and Violet components need to render in the Rainbow component, but only when you are at the corresponding URL. You'll do this with Route components. Begin by importing the Red, Green, Blue, and Violet components into your Rainbow.js file. Then add the necessary Route components inside the div with id="rainbow" in the Rainbow component. For example to render the Red component with the /red path, you would use the following Route component:
Test that your code works! Manually type in each URL you just created, and you should see the color component pop up. Remember, these are React Routes, so the paths you created will come after the /. For example, your default rainbow route will look like http://localhost:3000/ while your red route will look like http://localhost:3000/red.
You want to nest the Orange and Yellow components inside the Red component, and the Indigo component inside the Blue component. Remember to import your components to use them in a Route tag. You'll have to go add the corresponding Route tags to the Red.js and Blue.js files. Make sure to use the correct nested paths, such as "/red/orange" for the orange Route.
Phase 2: Links
Manually navigating to our newly created routes is tiresome, so let's add functionality to take care of this process for us. React Router provides the Link and NavLink components for this purpose.
Add Links to the paths /red, /green, /blue, and /violet in the Rainbow component. For example, your red link should look like
When you are at blue you want to be able to get to /blue/indigo, and then back to /blue. Add the corresponding Links to the Blue component like this:
Similarly, add Links to /red, /red/orange and /red/yellow to the Red component. Test all your links. Navigation is so much easier now!
Phase 3: NavLinks
It would be nice if our links gave us some indication of which route you were at. Fortunately, React Router has a special component for that very purpose: NavLink. NavLinks get an extra CSS class when their to prop matches the current URL. By default this class is called active.
Go ahead and switch all your Links to NavLinks. If you open the app you won't see any change yet. That's because you haven't added any special styling to the active class. Go ahead and open the index.css file. Create an .active class and add the line font-weight: 700. Now your active links will be bold. Isn't that nice!
The only problem is that now the Blue only link is active even when the path is /blue/indigo. That doesn't make a lot of sense. Let's add the exact flag to that link so it will only be active when its to exactly matches the current path. Now it should look like:
Do the same for the Red only link. Everything should be working now.
Phase 4 — Changing NavLink's Active Class
You've already set up NavLink to bold the link text using the .active class in src/index.css. But what if you wanted this class to be something else? For instance, what if you want your main color links (Red, Green, Blue, Violet) to be styled differently when active than your sub-route links (Red Only, Add Orange, Add Yellow, etc.).
You can set the class that React Router sets to an active NavLink by adding the activeClassName prop.
For instance, when we are at a route matching the below NavLink's to prop, the component will have a class of .parent-active applied:
This allows much more flexibility to style an active NavLink!
Using the example above, add an activeClassName prop to each of your NavLinks in src/components/Rainbow.js. Now, add some CSS styling for that class in your src/index.css to distinguish your main and your sub-route links.
Compare your work to the solution and make sure the behavior is the same. Time to celebrate! ✨ 🌈 ✨
You can also learn more about using the React Router at reacttraining.com!
Exploring React Builds Project
In this project, you'll use Create React App to create a simple React application. You'll experiment with some of the features that Create React App provides and deploy a production build of your application to a standalone Express application.
Phase 0: Setup
Begin by using the create-react-app package to create a React application:
Remember that using the create-react-app command initializes your project as a Git repository. If you use the ls -a to view the hidden files in your project, you'll see the .git file.
Update the App component:
Wrap the <h1> element with a <div> element; and
Change the <h1> element content to something like "Exploring React Builds".
Phase 1: Using CSS modules
You've already seen an example of using the import keyword to import a stylesheet into a module so that it'll be included in your application build. That's the technique being used to include the global index.css stylesheet:
You can also leverage CSS modules in your Create React App projects. CSS Modules scope stylesheet class names so that they are unique to a specific React component. This allows you to create class names without having to worry if they might collide with class names used in another component.
Add a new css-modules folder to the src folder. Within that folder, add the following files:
HeadingA.js
HeadingA.modu
HeadingB.js
HeadingB.module.css
Then update the contents of each file to the following:
Notice how the .heading CSS class name is being used within each component to set the color of the <h1> element. For the HeadingA component, the color is green, and for the HeadingB component, the color is red. Using the file naming convention [name].module.css let's Create React App know that we want these stylesheets to be processed as CSS Modules. Using CSS Modules allows the .heading class name to be reused across components without any issue.
To see this feature in action, update your App component to render both of your new components:
Then run your application (npm start) to see "Heading A" and "Heading B" displayed respectively in green and red. If you use the browser's developer tools to inspect "Heading A", you'll see that the .heading class name has been modified so that it's unique to the HeadingA component:
CSS Modules is an example of how a front-end build process can be used to modify code to enable a feature that's not natively supported by browsers.
Phase 2: Using an image in a component
Create React App configures webpack with support for loading images (as well as CSS, fonts, and other file types). What this means, for you as the developer, is that you can add an image file to your project, import it directly into a module, and render it in a React component.
Download any image of off the Web or click here to download the below image.
Then within the src folder add a new folder named image. Within that folder add a new component file named Image.js. Also add your downloaded image file to the image folder (so it's a sibling to the Image.js file).
Update the contents of the Image.js file to this:
You can import an image into a component using the import keyword. This tells webpack to include the image in the build. Notice that when you import an image into a module, you'll get a path to the image's location within the build. You can use this path to set the src attribute on an <img> element.
Be sure to update the image import statement to the correct file name if you're using your own image!
Now update the App component to import and render the Image component:
If you run your application (npm start) you'll see your image displayed on the page! You can also open your browser's developer tools and view the "Sources" for the current page. If you can expand the localhost:3000 > static > media node on the left, you can see the image file that webpack copied to your build.
Images in stylesheets
You can also reference images in your CSS files too. Add a CSS file named Image.css to the ./src/image folder and update its contents to this:
Then update the Image component to this:
Now you'll see the image displayed twice on the page!
Phase 3: Updating the supported browsers (and its affect on code transpilation)
Earlier you learned about the browerslist setting in the package.json file and now adjusting these targets affect how your code will be transpiled:
The production list specifies the browsers to target when creating a production build and the development list specifics the browsers to target when running the application using npm start. Currently, you're targeting relatively recent versions of the major browsers when creating a development build. Targeting older browser versions results in your code being transpiled to an older version of JavaScript.
To experiment with this configuration option, let's add a class component to the project. Add a new folder named class-component to the src folder. Within that folder, add a file named ClassComponent.js containing the following code:
Don't forget to update your App component to render the new component:
Now run your application using npm start. Open your browser's developer tools and view the "Sources" for the current page. Expand the localhost:3000 > static > js node on the left and select the main.chunk.js file. Press CMD+F on macOS or CTRL+F on Windows to search the file for "Class Component". Here's what the transpiled code looks like for the ClassComponent class:
Have you wondered yet why you need to use the developer tools to view the bundles generated by Create React App? Remember that when you run npm start, Create React App builds your application using webpack-dev-server. To keep things as performant as possible, the bundles generated by webpack-dev-server are stored in memory instead of writing them to the file system.
The JSX in the component's render method has been converted to JavaScript but the ClassComponent ES2015 class is left alone. This makes sense though as JSX isn't natively supported by any browser while ES2015 classes have been natively supported by browsers for awhile now.
But what if you need to target a version of a browser that doesn't support ES2015 classes? You can use the "Can I use…" website to see when browsers started supporting ES2105 (or ES6) classes. Starting with version 49, Chrome natively supported classes. But imagine that you need to support Chrome going back to version 30, a version of Chrome that doesn't support classes.
Change the browserslist.development property in the package.json file to this:
The query chrome >= 30 specifies that you want to target Chrome version 30 or newer.
The browserl.ist website can be used to see the browsers supported by your configured browserslist.
Stop your application if it's currently running. Delete the ./node_modules/.cache folder and run npm start again. Then view the main.chunk.js bundle again in the developer tools:
Now your ES2015 class component is being converted to a constructor function! Here's the transpiled code for reference:
Luckily it's very rare that you'll need to read the code in your generated bundles. webpack, by default, is configured to generate sourcemaps. Sourcemaps are a mapping of the code in a generated file, like a bundle file, to the original source code. This gives you access to your original source code in the browser's developer tools:
You can even set a breakpoint in your source within the developer tools to stop execution on a specific line of code!
Phase 4: Adding environment variables
Earlier you learned that Create React App supports defining environment variables in an .env file. This gives you a convenient way to avoid hard coding values that vary across environments.
Let's experiment with this feature so that you can see how the Create React App build process embeds environment variables into your HTML, CSS, and JavaScript bundles.
Add an .env file to the root of your Create React App project. Define an environment variable named REACT_APP_TITLE:
Remember that environment variables need to be prefixed with REACTAPP for Create React App to process them. After defining your environment variable, you can refer to it within JSX using an expression and process.env:
Environment variables can also be referred to in regular JavaScript code:
You can also reference environment variables in your ./public/index.html file like this:
Run your application again using npm start. Open your browser's developer tools and view the "Sources" for the current page. Expand the localhost:3000 node on the left and select (index). Notice that the text %REACT_APP_TITLE% within the <title> element has been converted to the text literal Exploring React Builds:
If you expand the localhost:3000 > static > js node on the left and select the main.chunk.js file, you can see how the App component's JSX has been converted to JavaScript:
Here's a closer look at the relevant React.createElement method call:
Again, notice how the environment variable has been replaced with a text literal. This has important security implications for you to consider. Because environment variables are embedded into your HTML, CSS, and JavaScript bundles during the build process, it's very important to not store any secrets, like API keys, in your environment variables. Remember, anyone can view your bundled code in the browser by inspecting your files!
Phase 5: Deploying a production build
In the last phase of this project, let's add routing to the React application, create a production build, and deploy the build to an Express application!
Adding routing
To add React Router to the application, start by installing the react-router-dom npm package:
Then update the App component to this code:
Be sure to run and test your application to ensure that the defined routes work as expected:
/ - Should display the HeadingA and HeadingB components;
/image - Should display the Image component; and
/class-component - Should display the ClassComponent component.
Creating a production build
To create a production build, run the command npm run build from the root of your project. The output in the terminal should look something like this:
Ignore the comments about using serve to deploy your application (i.e. npm install -g serve and serve -s build). In the next step, you'll create a simple Express application to server your React application.
Serving a React application using Express
Create a new folder for your Express application outside of the Create React App project folder.
For example, from the root of your project, use cd .. to go up a level and then create a new folder named express-server by running the command mkdir express-server. This makes the express-server folder a sibling to your Create React App project folder.
Browse into the express-server folder and initialize it to use npm (i.e. npm init -y). Then install Express by running the command npm install express@^4.0.0.
App a file named app.js with the following contents:
This simple Express application will:
Attempt to match incoming requests to static files located in the public folder; and
If a matching static file isn't found, then the ./public/index.html file will be served for all other requests.
Now add a folder named public to the root of your Express project. Copy the files from the build folder in your Create React App project to the public folder in the Express application project. Then run your application using the command node app.js.
Open a browser and browse to the URL http://localhost:9000/. You should see your React application served from your Express application! Be sure to click the navigation links to verify that all of your configured routes work as expected.
Also, because you configured Express to serve the ./public/index.html file for any request that doesn't match a static file, you can "deep link" to any of your React application's routes:
The reference to root comes from a div in the body of your public HTML file.
State of a component is simply a regular JS Object.
Class Components require render() method to return JSX.
Functional Components directly return JSX.
Class is className in React.
When parsing for an integer just chain Number.parseInt("123")
Use ternary operator if you want to make a conditional inside a fragment.
{ x === y ? <div>Naisu</div> : <div>Not Naisu</div>; }
Purpose of React.Fragment is to allow you to create groups of children without adding an extra dom element.
Front-End History
React makes it easier for you to make front-end elements. A front-end timeline
Some noteworthy front end libraries that have been used in the past few years:
2005: Script.aculo.us
2005: Dojo
2006: YUI
2010: Knockout
2011: AngularJS
2012: Elm
2013: React (Considered the standard front-end library)
React manages the creation and updating of DOM nodes in your Web page.
All it does is dynamically render stuff into your DOM.
What it doesn't do:
Ajax
Services
Local Storage
Provide a CSS framework
React is unopinionated
Just contains a few rules for developers to follow, and it just works.
JSX : Javascript Extension is a language invented to help write React Applications (looks like a mixture of JS and HTML)
Here is an overview of the difference between rendering out vanilla JS to create elements, and JSX:
fetch("https://example.com/api/people")
.then((response) => response.json())
.then((people) => {
const html = "<ul>";
for (let person of data.people) {
html += `<li>${person.lastName}, ${person.firstName}</li>`;
}
html += "</ul>";
document.querySelector("#people-list").innerHTML = html;
});
function PeopleList(props) {
return (
<ul>
$
{props.people.map((person) => (
<li>
{person.lastName}, {person.firstName}
</li>
))}
</ul>
);
}
const peopleListElement = document.querySelector("#people-list");
fetch("https://example.com/api/people")
.then((response) => response.json())
.then((people) => {
const props = { people };
ReactDOM.render(<PeopleList props={props} />, peopleListElement);
});
This may seem like a lot of code but when you end up building many components, it becomes nice to put each of those functions/classes into their own files to organize your code. Using tools with React
React DevTools : New tool in your browser to see ow React is working in the browser
create-react-app : Extensible command-line tool to help generate standard React applications.
Webpack : In between tool for dealing with the extra build step involved.
- HMR : (Hot Module Replacement) When you make changes to your source code the changes are delivered in real-time.
- React Developers created something called `Flux Architecture` to moderate how their web page consumes and modifies data received from back-end API's.
- Choosing React
- Basically, React is super important to learn and master.
React Concepts and Features
There are many benefits to using React over just Vanilla JavaScript.
Modularity
To avoid the mess of many event listeners and template strings, React gives you the benefit of a lot of modularity.
Easy to start
No specials tools are needed to use Basic React.
You can start working directly with createElement method in React.
Declarative Programming
React is declarative in nature, utilizing either it's built-in createElement method or the higher-level language known as JSX.
Reusability
Create elements that can be re-used over and over. One-flow of data
React apps are built as a combination of parent and child components.
Parents can have one or more child components, all children have parents.
Data is never passed from child to the parent.
Virtual DOM : React provides a Virtual DOM that acts as an agent between the real DOM and the developer to help debug, maintain, and provide general use.
Due to this usage, React handles web pages much more intelligently; making it one of the speediest Front End Libraries available.
ES6 Refresher
Exporting one item per file
Use export default statement in ES6 to export an item. ES6
export default class Wallet {
// ...
}
// sayHello will not be exported
function sayHello() {
console.log("Hello!");
}
CommonJS (Equivalent)
class Wallet {
// ...
}
// sayHello will not be exported
function sayHello() {
console.log("Hello!");
}
module.exports = Wallet;
Exporting multiple items per file
Use just thw export keyword (without default) to export multiple items per file. ES6 (Better to export them individually like this, rather than bunching them all into an object)
- Import statements in ES6 modules must always be at the top of the file, because all imports must occur before the rest of the file's code runs. ES6
import { Wallet } from "./wallet";
import * as fs from "fs";
const wallet = new Wallet();
CommonJS
let { Wallet } = require("./wallet");
const wallet = new Wallet();
let fs = require("fs");
Unnamed default imports
You can name unnamed items exported with export default any name when you import them.
// exporting
export default class Wallet {
// ...
}
// importing
import Money from "wallet.js";
const wallet = new Money();
Just remember if you use export instead of export default then your import is already named and cannot be renamed.
// exporting
export class Wallet {
// ...
}
// importing
import { Wallet } from "wallet.js";
const wallet = new Wallet();
Aliasing imports
Use as asterisk to import an entire module's contents.
Keep in mind you must use an as keyword to refer to it later.
// export
export function sayHello() {
console.log("Hello!");
}
export const sayHi = () => {
console.log("Hi!");
};
//import
import * as Greetings from "greetings.js";
Greetings.sayHello(); // Hello!
Greetings.sayHi(); // Hi!
You can also name identically named functions or items from different files.
import { Wallet as W1 } from "./wallet1";
import { Wallet as W2 } from "./wallet2";
const w1 = new W1();
const w2 = new W2();
Browser support for ES6 Modules
ES6 Modules can only be used when a JS file is specified as a module. <script type="module" src="./wallet.js"> </script>
You can get browser support for ES6 modules by adding module into your script tag.
Notes
JSX In Depth
Remember that JSX is just syntactic sugar for the built in React.createElement(component, props, ...children)
React Library must always be in scope from your JSX code.
Use Dot Notation for JSX Type
User-Defined Components Must Be Capitalized <Foo /> vs <div>
Cannot use a general expression as the React element type. (Incorrect)
function Story(props) {
// Wrong! JSX type can't be an expression.
return <components[props.storyType] story={props.story} />;
};
(Corrected)
function Story(props) {
// Correct! JSX type can be a capitalized variable.
const SpecificStory = components[props.storyType];
return <SpecificStory story={props.story} />;
}
props.children : The content between opening and closing tag. JavaScript Expressions as Children
function Item(props) {
return <li>{props.message}</li>;
}
function TodoList() {
const todos = ["finish doc", "submit pr", "nag dan to review"];
return (
<ul>
{todos.map((message) => (
<Item key={message} message={message} />
))}
</ul>
);
}
Functions as Children
props.children works like any other prop, meaning it can pass any sort of data.
// Calls the children callback numTimes to produce a repeated component
function Repeat(props) {
let items = [];
for (let i = 0; i < props.numTimes; i++) {
items.push(props.children(i));
}
return <div>{items}</div>;
}
function ListOfTenThings() {
return (
<Repeat numTimes={10}>
{(index) => <div key={index}>This is item {index} in the list</div>}
</Repeat>
);
}
Booleans, Null, and Undefined Are Ignored
false, null, undefined, and true are all valid children.
Note that certain falsy values such as zero will still be rendered by React, you can work around this by ensuring situations like the above eval. into a boolean.
In the times you want booleans to be rendered out, simply convert it into a string first.
<div>My JavaScript variable is {String(myVariable)}.</div>
Reconciliation
The Diffing Algorithm
Diffing : When the state of a component changes React creates a new virtual DOM tree.
Elements of Different Types
Every time the root elements have different types, React tears down the old tree and builds the new tree from scratch.
DOM Elements Of the Same Type
When comparing two DOM elements of the same type, React keeps the same underlying DOM node and only updates the changes attributes.
Use PropTypes.element to specify only a single child can be passed to a component as children.
import PropTypes from "prop-types";
class MyComponent extends React.Component {
render() {
// This must be exactly one element or it will warn.
const children = this.props.children;
return <div>{children}</div>;
}
}
MyComponent.propTypes = {
children: PropTypes.element.isRequired,
};
Default Prop Values
Use defaultProps to assign default values for props.
Tells route to not pattern match and only render a certain route exclusively to it's associated component.
render
Optional prop that takes in a function to be called.
Causes extra work for React.
Preferred for inline rendering of simple functional components.
Difference between component and render is that component returns new JSX that be re-mounted, but render returns the JSX that will be mounted only once.
// This inline rendering will work, but is unnecessarily slow. <Route path="/hello" component={() => <h1>Hello!</h1>} /> // This is the preferred way for inline rendering. <Route path="/hello" render={() => <h1>Hello!</h1>} />
Also useful if you need to pass in specific props to a component.
// `users` to be passed as a prop: const users = { 1: { name: "Andrew" }, 2: { name: "Raymond" }, }; <Route path="/users" render={() => <Users users={users} />} />;
Route path params
Your component's props can hold information about URL's parameters.
Will match segments starting at : to the next /, ?, #.
History allows you to update the URL programmatically.
Contains two useful methods:
push : Adds a new URL to the end of the history stack.
replace : Replaces the current URL on the history stack, so the back button won't take you to it.
// Pushing a new URL (and adding to the end of history stack):
const handleClick = () => this.props.history.push("/some/url");
// Replacing the current URL (won't be tracked in history stack):
const redirect = () => this.props.history.replace("/some/other/url");
---
### Nested Routes
Why nested routes?
- <span id="6403">Create routes that tunnel into main components vs getting rendered on the main page as it's own thing. What are nested routes?</span>
<!-- -->
const Profile = (props) => {
// Custom call to database to fetch a user by a user ID.
const user = fetchUser(props.match.params.userId);
const { name, id } = user;
return (
<div>
<h1>Welcome to the profile of {name}!</h1>
<Link to={`/users/${id}/posts`}>{name}'s Posts</Link>
<Link to={`/users/${id}/photos`}>{name}'s Photos</Link>
<Route path="/users/:userId/posts" component={UserPosts} />
<Route path="/users/:userId/photos" component={UserPhotos} />
</div>
);
};
Alt. version using `props.match`
// Destructure `match` prop
const Profile = ({ match: { url, path, params }) => {
// Custom call to database to fetch a user by a user ID.
const user = fetchUser(params.userId);
const { name, id } = user;
return (
<div>
<h1>Welcome to the profile of {name}!</h1>
<Link to={`${url}/posts`}>{name}'s Posts</Link>
<Link to={`${url}/photos`}>{name}'s Photos</Link>
<Route path={`${path}/posts`} component={UserPosts} />
<Route path={`${path}/photos`} component={UserPhotos} />
</div>}
);
};
- <span id="03fb">As you can see above, our end URL isn't even defined until we apply those flexible values in.</span>
---
### React Builds
- <span id="0fae">`Build` : Process of converting code into something that can actually execute or run on the target platform.</span>
- <span id="6fdb">In regards to React, the minimum a build should do is convert JSX to something that browsers can understand. Reviewing common terminology</span>
- <span id="779d">`Linting` : Process of using a tool to analyze your code to catch common errors, bugs, inconsistencies etc...</span>
- <span id="f1e5">`Transpilation` : Process of converting source code, like JS, from one version to another.</span>
- <span id="9f9f">`Minification` : Process of removing all unnecessary characters in your code.</span>
- <span id="57df">`Bundling` : Process of combining multiple code files into a single file.</span>
- <span id="d052">`Tree Shaking` : Process of removing unused or dead code from your application before it's bundled. Configuration or code?</span>
- <span id="ce13">`Configuration` allows developers to create build tasks by declaring either JSON, XML, or YAML without explicitly writing every step in the process.</span>
- <span id="16a6">`Coding` or `Scripting` simply requires code. Babel and webpack (yes, that's intentionally a lowercase 'w')</span>
- <span id="4363">`Babel` : Code Transpiler that allows you to use all of the latest features and syntax wihtout worrying about what browsers support what.</span>
- <span id="804b">`webpack` : Allows developers to use JS modules w/o requiring users to use a browser that natively supports ES modules.</span>
- <span id="77f2">Create React App uses webpack and Babel under the hood to build applications. The Create React App build process</span>
- <span id="222f">What happens when you run `npm start`:</span>
1. <span id="d245">.env variables are loaded.</span>
2. <span id="6209">list of browsers to support are checked.</span>
3. <span id="1c34">config'd HTTP port checked for availability.</span>
4. <span id="950b">application compiler is configured and created.</span>
5. <span id="8e30">`webpack-dev-starter` is started</span>
6. <span id="48cc">`webpack-dev-starter` compiles app.</span>
7. <span id="68ad">`index.html` is loaded into browser</span>
8. <span id="e670">file watcher is started to watch for changes. Ejecting</span>
- <span id="428b">There is a script in Create React App called `eject` that allows you to 'eject' your application and expose all the hidden stuff. Preparing to deploy a React application for production</span>
- <span id="eb79">Defining Env Variables</span>
<!-- -->
REACT_APP_FOO: some value
REACT_APP_BAR: another value
console.log(process.env.REACT_APP_FOO);
Can be referenced in your index.html like so: <title>%REACT_APP_BAR%</title>
Configuring the supported browsers
{
"browserslist": {
"production": [
">0.2%",
"not dead",
"not op_mini all"
],
"development": [
"last 1 chrome version",
"last 1 firefox version",
"last 1 safari version"
]
}
}
- <span id="8a03">If you specify older browsers it will affect how your code get's transpiled. Creating a production build</span>
- <span id="fee3">Run `npm run build` to create a production build.</span>
- <span id="bdaf">Bundles React in production mode and optimizes the build for the best performance.</span>
---
### Notes
### Introduction to React
- <span id="7224">Simply a nice library that turns data into DOM.</span>
- <span id="a9de">`Tree Diffing` : Fast comparison and patching of data by comparing the current virtual DOM and new virtual DOM - updating only the pieces that change.</span>
- <span id="1bbc">`It's just a tree with some fancy diffing`</span>
---
### Create Element
From JavaScript To DOM
- <span id="cae8">The `React.createElement` function has the following form:</span>
<!-- -->
React.createElement(type, [props], [...children]);
- <span id="1688">`Type` : Type of element to create, i.e. a string for an HTML element or a reference to a function or class that is a React component.</span>
- <span id="3249">`Props` : Object that contains data to render the element.</span>
- <span id="56ab">`Children` : Children of the elemet, as many as you want. Creating elements</span>
- <span id="ee64">Our rendering goal:</span>
<!-- -->
<ul>
<li class="selected">
<a href="/pets">Pets</a>
</li>
<li>
<a href="/owners">Owners</a>
</li>
</ul>
- <span id="eb8b">There are five tags to create:</span>
- <span id="ea28">One `ul`</span>
- <span id="a4ba">Two `li`</span>
- <span id="de01">Two `a`</span>
- <span id="90b5">There are certain attributes we want to appear in the DOM for these tags as well:</span>
- <span id="dab5">Each `li` has a `class` (or `className` in React)</span>
- <span id="e88e">Both `a` ele's have `href` attributes</span>
- <span id="fd8c">Also keep in mind the parent child relationships happening between the tags.</span>
- <span id="9893">`ul` is the parent of both `li`</span>
- <span id="eafa">Each `li` has an `a` element as a child</span>
- <span id="84cc">Each `a` has a `text content` child</span>
<figure>
<img src="https://cdn-images-1.medium.com/max/800/0*8ls0PmtREELbf5Wm" class="graf-image" />
</figure>React.createElement(
"ul",
null,
React.createElement(
"li",
{ className: "selected" },
React.createElement("a", { href: "/pets" }, "Pets")
),
React.createElement(
"li",
null,
React.createElement("a", { href: "/owners" }, "Owners")
)
);
Converting to virtual DOM
- <span id="e7d4">After you set up your `React.createElement`, you use `React.render` to take the value returned from cE and a DOM node to insert into the conversion of the real DOM.</span>
<!-- -->
// Put the element tree in a variable
const navList = React.createElement(
"ul",
null,
React.createElement(
"li",
{ className: "selected" },
React.createElement("a", { href: "/pets" }, "Pets")
),
React.createElement(
"li",
null,
React.createElement("a", { href: "/owners" }, "Owners")
)
);
// Get a DOM node for React to render to
const mainElement = document.querySelector("main");
// Give React the element tree and the target
ReactDOM.render(navList, mainElement);
- <span id="2cbc">JS Code => Virtual DOM => Real Dom Updates</span>
- <span id="25d5">If you call React.render a second or multiple times it just checks the existing Virtual DOM and it knows which smaller areas to change. Thinking in Components</span>
- <span id="fe61">Components are pieces of reusable front-end pieces.</span>
- <span id="bffa">Components should be Single Responsibility Principle compliant.</span>
---
### Create Element
`React.createElement Demo`
- <span id="a288">Can import non-local dependencies with `import 'package-link'`</span>
<!-- -->
const App = () => React.createElement("h1", null, "Hello, Programmers!");
const target = document.querySelector("main");
const app = React.createElement(App, null);
// Give React the element tree and the target
ReactDOM.render(app, target);
- <span id="0693">Remember when importing modules from other files you have to denote the file type in the import statement. HTML Original</span>
<!-- -->
<section class="clue">
<h1 class="clue__title">Clue$ 268530</h1>
<div class="clue__question">
2009: I dreamed a Dream
</div>
<div class="clue__category">
<<unparsed>>
</div>
<div class="clue__amount">
$800
</div>
</section>
React Version
const Clue = () =>
React.createElement(
"section",
{ className: "clue" },
React.createElement("h1", { className: "clue__title" }, "Title"),
React.createElement("div", { className: "clue__question" }, "?"),
React.createElement("div", { className: "clue__category" }, "Category"),
React.createElement("div", { className: "clue__amount" }, "$800")
);
- <span id="f587">Because `class` is a reserved keyword in JS, in React we can use `className` to assign a class to an element.</span>
- <span id="4d51">Remember the data that goes into createElement: element type, data to pass into the element, and then children.</span>
- <span id="8199">`props` : Properties;</span>
- <span id="6b53">To handle certain values that are initially undefined, we can use `defaultProps`.</span>
<!-- -->
Clue.defaultProps = {
category: {},
};
- <span id="4abe">You can change in the devTools Network tab the internet speed to check for values that may be undefined to hangle with defaultProps.</span>
- <span id="79e3">If we fetch multiple pieces of data, we can render many things by using `map`.</span>
- <span id="06f2">You need to assign a unique key to each of the clues.</span>
- <span id="c12e">We need to keep track of them individually so that React can easily refer to a specific one if there is an issue. `clue => { key:clue.id, ...clue }`</span>
<!-- -->
const App = (props) =>
React.createElement(
"h1",
null,
props.clues.map((clue) =>
React.createElement(Clue, { key: clue.id, ...clue })
)
);
export default App;
- <span id="1dd5">Note: JSX is preferred over React.createElement;</span>
---
### Notes from Hello Programmer Exercise
- <span id="1fb8">When you import modules from websites they must have CORs activated.</span>
- <span id="1ef6">These import statements, import `global variables`.</span>
- <span id="6613">When we want to move our code into production we need to change the imports into the production minified versions.</span>
<!-- -->
import "https://unpkg.com/react@16/umd/react.production.min.js";
import "https://unpkg.com/[email protected]/umd/react-dom.production.min.js";
- <span id="0046">While we will never actually be creating full apps with just React.createElement => it is the enginer that is running under the hood!</span>
<!-- -->
import "https://unpkg.com/react@16/umd/react.development.js";
import "https://unpkg.com/react-dom@16/umd/react-dom.development.js";
const Links = () =>
React.createElement(
"ul",
{ id: "nav-links" },
React.createElement(
"li",
{ className: "is-selected" },
React.createElement("a", { href: "http://appacademy.io" }, "App Academy")
),
React.createElement(
"li",
null,
React.createElement("a", { href: "https://aaonline.io" }, "a/A Open")
)
);
// Set up React Element: Type, Imported Data, Child (Child is Text in this Scenario)
// HelloWorld is a function based component
const HelloWorld = () => React.createElement("h1", null, "Hello, Programmers");
const AllTogether = () =>
React.createElement(
"div",
null,
React.createElement(HelloWorld, null),
React.createElement(Links, null)
);
// Target the Element to append new Ele
const target = document.querySelector("main");
// Assign your 'App' to your created Elements
// We are creating an element from the HelloWorld function.
const app = React.createElement(AllTogether, null);
// Render from the Virtual Dom to the Actual Dom
ReactDOM.render(app, target);
Introduction to JSX
JSX : Javascript Extension, a new language created by React developers to have an easier way of interacting with the React API. How to use JSX
We will use babel to convert version of modern JS into an older version of JS. React Create Element
Keep in mind that self closing tags in React must have a forward slash to close it.
- Properties and Data
<img src="https://via.placeholder.com/150" />;
// becomes..
React.createElement("img", { src: "https://via.placeholder.com/150" });
// if we want to pass in data vs just a string literal
<a href={props.searchUrl}>{props.searchText}</a>;
// so it becomes..
React.createElement("a", { href: props.searchUrl }, props.searchText);
// if you want the text search uppercase..
<a href={props.searchUrl}>{props.searchText.toUpperCase()}</a>;
Comments in JSX have the following syntax:
<div>
<h2>This is JSX</h2>
{/* This is a comment in JSX */}
</div>
Property Names:
checked : Attribute of input components such as checkbox or radio, use it to set whether the component is checked or not.
className : Used to specify a CSS class.
dangerouslySetInnerHTML : React's equivalent of innerHTML because it is risky to cross-site scripting attacks.
htmlFor : Because for is protected keyword, React elements use this instead.
onChange : Event fired whenever a form field is changed.
style : Accepts a JS object with camelCase properties rather than a CSS string.
value : Supported by Input, Select, and TextArea components; use it to set the value of the component.
Note: React uses camel-case!!! The JSX semicolon gotcha
function App() {
return (
<div>
<h1>Hello!</h1>
<div>Welcome to JSX.</div>
</div>
);
}
create Element equivalent
is equivalent to
function App() {
return (
React.createElement(
'div',
null,
React.createElement('h1', null, 'Hello!'),
React.createElement('div', null, 'Welcome to JSX.'),
)
);
}
We wrap what want to return in parenthesis so JS doesn't auto add semi-colons after every line and run the code incorrectly.
Just remember if you decided to use the return keyword in a function to 'return some JSX', then make sure you wrap the JSX in parenthesis.
npx create-react-app my-app
Single line used to initiate a React application.
React has a great toolchain where you can see changes live as you're editing your application.
React errors will be rendered directly onto the browser window.
A downside is that it installs a lot of bloat files.
Examples of React create Element and JSX equivalent
// ./src/App.js
import React from "react";
function App() {
return <h1>Hello world!</h1>;
}
export default App;
``;
// ./src/index.js
import React from "react";
import ReactDOM from "react-dom";
import "./index.css";
import App from "./App";
ReactDOM.render(
<React.StrictMode>
<App />
</React.StrictMode>,
document.getElementById("root")
);
---
### React Class Components
Class Components
- <span id="b5e6">You can write React components using ES2015 Classes: Function Component</span>
<!-- -->
// ./src/Message.js
import React from "react";
const Message = (props) => {
return <div>{props.text}</div>;
};
export default Message;
ES2015 Version
// ./src/Message.js
import React from "react";
class Message extends React.Component {
render() {
return <div>{this.props.text}</div>;
}
}
export default Message;
- <span id="ae33">We can access props within a `class component` by using `this.props`</span>
- <span id="0b60">Keep in mind Class Components are used just like function components.</span>
<!-- -->
// ./src/index.js
import React from "react";
import ReactDOM from "react-dom";
import Message from "./Message";
ReactDOM.render(
<React.StrictMode>
<Message text="Hello world!" />
</React.StrictMode>,
document.getElementById("root")
);
Setting and accessing props
class Message extends React.Component {
constructor(props) {
super(props);
// TODO Initialize state, etc.
}
render() {
return <div>{this.props.text}</div>;
}
}
- <span id="cd5a">If we define a constructor method in our Class Component, we have to define the `super` method with `props` passed through it.</span>
- <span id="8bf7">Side Note: Before React used ES2015 Classes, it used `React.createclass` function, if you ever need to use this antiquated method make sure you install a module called `create-react-class` Stateful components</span>
- <span id="4b12">One of the major reasons why you would choose to use a Class Component over a Function Component is to add and manage local or internal state to your component.</span>
- <span id="8e82">Second of the major reasons is to be able to use a Class Component's lifecycle methods. What is state?</span>
- <span id="7fab">Props are data that are provided by the consumer or caller of the component.</span>
- <span id="98f4">Not meant to be changed by a component.</span>
- <span id="c6a9">State is data that is `internal` to the component.</span>
- <span id="3e89">Intended to be updated or mutated. When to use state</span>
- <span id="c03f">_Only Use State when it is absolutely necessary_</span>
- <span id="204b">If the data never changes, or if it's needed through an entire application use props instead.</span>
- <span id="0b53">State is more often used when creating components that retrieve data from APIs or render forms.</span>
- <span id="1b6b">The general rule of thumb: If a component doesn't need to use state or lifecyle methods, it should be prioritized as a `function component`.</span>
- <span id="d708">Functional:Stateless || Class:Stateful Initializing state</span>
- <span id="e5d5">Use a class constructor method to initialize `this.state` object. // Application Entry Point</span>
<!-- -->
// ./src/index.js
import React from 'react'
import ReactDOM from 'react-dom';
import RandomQuote from './RandomQuote';
ReactDOM.render(
<React.StrictMode>
<RandomQuote />
</React.StrictMode>
document.getElementById('root');
)
// Class Component: RandomQuote
import React from "react";
class RandomQuote extends React.Component {
constructor() {
super();
const quotes = [
"May the Force be with you.",
"There's no place like home.",
"I'm the king of the world!",
"My mama always said life was like a box of chocolates.",
"I'll be back.",
];
this.state = {
quotes,
currentQuoteIndex: this.getRandomInt(quotes.length);
}
}
getRandomInt(max) {
return Math.floor(Math.random() * Math.floor(max));
}
render() {
return (
<div>
<h2>Random Quote</h2>
<p>{this.state.quotes[this.state.currentQuoteIndex]}</p>
</div>
)
}
}
export default RandomQuote;
Updating State
- <span id="3fdc">Let's say we want to update our state with a new quote.</span>
- <span id="eddc">We can set up event listeners in React similarly to how we did them before.</span>
- <span id="106c"><button type="button" onClick={this.changeQuote}> Change Quote </button></span>
- <span id="a77a">`onClick` is the event listener.</span>
- <span id="f406">`{this.changeQuote}` is the event handler method.</span>
- <span id="7dca">Our Class Component File should now look like this with the new additions:</span>
<!-- -->
import React from "react";
class RandomQuote extends React.Component {
constructor() {
super();
const quotes = [
"May the Force be with you.",
"There's no place like home.",
"I'm the king of the world!",
"My mama always said life was like a box of chocolates.",
"I'll be back.",
];
this.state = {
quotes,
currentQuoteIndex: this.getRandomInt(quotes.length);
}
}
changeQuote = () => {
const newIndex = this.getRandomInt(this.state.quotes.length);
// Setting the 'new state' of currentQuoteIndex state property
// to newly generated random index #.
this.setState({
currentQuoteIndex: newIndex;
})
}
getRandomInt(max) {
return Math.floor(Math.random() * Math.floor(max));
}
render() {
return (
<div>
<h2>Random Quote</h2>
<p>{this.state.quotes[this.state.currentQuoteIndex]}</p>
<button type="button" onClick={this.changeQuote}>
Change Quote
</button>
</div>
)
}
}
export default RandomQuote;
Don't modify state directly
- <span id="ca27">It is important to `never` modify your state directly!</span>
- <span id="780d">ALWAYS use `this.setState` method to update state.</span>
- <span id="1581">This is because when you only use this.state to re-assign, no re-rendering will occur => leaving our component out of sync. Properly updating state from the previous state</span>
- <span id="dc5a">In our current example, the way we have `changeQuote` set up leaves us with occasionally producing the same index twice in a row.</span>
- <span id="0bff">One solution is to design a loop but keep in mind that state updates are handled asynchronously in React (your current value is not guaranteed to be the latest)</span>
- <span id="39f9">A safe method is to pass an anonymous method to `this.setState` (instead of an object literal) Previous</span>
<!-- -->
changeQuote = () => {
const newIndex = this.getRandomInt(this.state.quotes.length);
this.setState({
currentQuoteIndex: newIndex;
})
}
Passing w/ Anon Method
changeQuote = () => {
this.setState((state, props) => {
const { quotes, currentQuoteIndex } = state;
let newIndex = -1;
do {
newIndex = this.getRandomInt(quote.length);
} while (newIndex === currentQuoteIndex);
return {
currentQuoteIndex: newIndex,
};
});
};
Providing default values for props
- <span id="7e8c">In our current example, we pass in a static array of predefined quotes in our constructor.</span>
- <span id="3e8f">The way it is set up right now leaves our list of quotes unchanged after initialization.</span>
- <span id="add0">We can make quotes more dynamic by replacing our static array with a `props` argument passed into `super`.</span>
- <span id="53d6">constructor(props) { super(props); }</span>
- <span id="918a">We can now move our quotes array to our application entry point and pass it in as a prop. // Application Entry Point</span>
<!-- -->
// ./src/index.js
import React from 'react'
import ReactDOM from 'react-dom';
import RandomQuote from './RandomQuote';
// Re-assign our array here and pass it in as a prop in Render.
const quotes = [
"May the Force be with you.",
"There's no place like home.",
"I'm the king of the world!",
"My mama always said life was like a box of chocolates.",
"I'll be back.",
"This way I can define more quotes",
];
ReactDOM.render(
<React.StrictMode>
<RandomQuote quotes={quotes}/>
</React.StrictMode>
document.getElementById('root');
)
- <span id="a0bb">One thing to note about this workaround is that the caller of the component _must_ set the quotes prop or the component will throw an error => so use `defaultProps`!</span>
<!-- -->
// At the bottom of RandomQuote.js...
RandomQuote.defaultProps = {
quotes: [
"May the Force be with you.",
"There's no place like home.",
"I'm the king of the world!",
"My mama always said life was like a box of chocolates.",
"I'll be back.",
"This way I can define more quotes",
],
};
- <span id="c575">A good safety net in case the consumer/caller doesn't provide a value for the quotes array.</span>
- <span id="3be6">We can even remove it from our index.js now and an error will not be thrown.</span>
---
### Handling Events
- <span id="a82e">To add an event listener to an element, just define a method to handle the event and associate that method with the element event you are listening for. Example</span>
<!-- -->
import React from "react";
class AlertButton extends React.Component {
showAlert = () => {
window.alert("Button Clicked!");
};
render() {
return (
<button type="button" onClick={this.showAlert}>
Submit
</button>
);
}
}
- <span id="a852">Note that when refering the handler method in onClick we're not invoking showAlert simply just passing a reference. Preventing default behavior</span>
- <span id="5cb0">HTML Elements in the browser often have a lot of default behavior.</span>
- <span id="df4d">I.E. Clicking on an `<a>` element navigates so a resource denoted by `<href>` property.</span>
- <span id="952c">Here is an example of where using `e.preventDefault()` could come in handy.</span>
<!-- -->
import React from "react";
class NoDefaultSubmitForm extends React.Component {
submitForm = (e) => {
e.preventDefault();
window.alert("Handling form submission...");
};
render() {
return (
<form onSubmit={this.submitForm}>
<button>Submit</button>
</form>;
)}
}
- <span id="b149">The button contained within the form will end up refreshing the page before `this.submitForm` method can be completed.</span>
- <span id="a034">We can stick an `e.preventDefault()` into the actual method to get around this problem.</span>
- <span id="004a">`e` : Parameter that references a `Synthetic Event` object type. Using `this` in event handlers</span>
<!-- -->
// ./src/AlertButton.js
import React from "react";
class AlertButton extends React.Component {
showAlert = () => {
window.alert("Button clicked!");
console.log(this);
};
render() {
return (
<button type="button" onClick={this.showAlert}>
Click Me
</button>
);
}
}
export default AlertButton;
- <span id="3c8f">When we console log `this` we see the AlertButton object.</span>
- <span id="42a0">If we were to write the showAlert method with a regular class method like:</span>
<!-- -->
showAlert() {
console.log(this);
}
- <span id="c081">We would get `undefined` => remember that fat arrow binds to the current context! Reviewing class methods and the `this` keyword</span>
- <span id="e98e">Let's refresh on binding.</span>
<!-- -->
class Boyfriend {
constructor() {
this.name = "Momato Riruru";
}
displayName() {
console.log(this.name);
}
}
const Ming = new Boyfriend();
Ming.displayName(); // => Momato Riruru
const displayAgain = Ming.displayName;
displayAgain(); // => Result in a Type Error: Cannot read property 'name' of undefined.
- <span id="fb85">The first time we use our `displayMethod` call, it is called directly on the instance of the boyfriend class, which is why `Momato Riruru` was printed out.</span>
- <span id="3a9b">The second time it was called, the ref of the method is stored as a variable and method is called on that variable instead of the instance; resulting in a type error (it has lost it's context)</span>
- <span id="0a2c">Remember we can use the `bind` method to rebind context!</span>
- <span id="d6d9">We can refactor to get the second call working like this:</span>
- <span id="7ead">const displayAgain = Ming.displayName.bind(Ming); displayAgain(); // => Now Momato Riruru will be printed out.</span>
- <span id="a8b0">To continue using function declarations vs fat arrow we can assign context in a constructor within a class component.</span>
<!-- -->
import React from "react";
class AlertButton extends React.Component {
constructor() {
super();
this.showAlert = this.showAlert.bind(this); // binding context
}
showAlert() {
console.log(this);
}
render() {
return (
<button type="button" onClick={this.showAlert}>
Submit
</button>
);
}
}
export default AlertButton;
- <span id="a4e6">`Experimental Syntax` : Syntax that has been proposed to add to ECMAScript but hasn't officially been added to the language specification yet.</span>
- <span id="801d">It's good to pick one approach and use it consistently, either:</span>
1. <span id="2e3e">Class Properties & Arrow Functions</span>
2. <span id="cc27">Bind Method & This Keyword The `SyntheticEvent` object</span>
- <span id="f177">Synthetic Event Objects: Cross Browser wrappeds around the browser's native event.</span>
- <span id="418f">Includes the use of stopPropagation() and preventDefault();</span>
- <span id="b94f">Attributes of the Synthetic Event Object:Attributesboolean bubblesboolean cancelableDOMEventTarget currentTargetboolean defaultPreventednumber eventPhaseboolean isTrustedDOMEvent nativeEventvoid preventDefault()boolean isDefaultPrevented()void stopPropagation()boolean isPropagationStopped()void persist()DOMEventTarget targetnumber timeStampstring type</span>
- <span id="7484">`nativeEvent` : property defined in a synthetic event object that gives you access to the underlying native browser event (rarely used!)</span>
---
### Forms in React
_Exercise being done in a separate file_ Random Notes
- <span id="45ec">`onChange` : detects when a value of an input element changes.</span>
- <span id="9ca4">Assigning `onChange` to our input fields makes our component's state update in real time during user input.</span>
- <span id="eb83">Dont forget to add `preventDefault` onto form submissions to deal with the default behavior of the browser refreshing the page!</span>
- <span id="c413">`submittedOn: new Date(),` Can be added to a form, most likely will persist into a DB.</span>
- <span id="b97f">Controlled Components</span>
- <span id="ac48">We use the `onChange` event handlers on form fields to keep our component's state as the `"one source of truth"`</span>
- <span id="4685">Adding an `onChange` event handler to every single input can massively bloat your code.</span>
- <span id="448c">Try assiging it to it's own method to apply everywhere.</span>
- <span id="f229">`textarea` is handled differently in react: it takes in a value property to handle what the inner text will be.</span>
<!-- -->
// ./src/ContactUs.js
import React from "react";
class ContactUs extends React.Component {
constructor() {
super();
this.state = {
name: "",
email: "",
phone: "",
phoneType: "",
comments: "",
validationErrors: [],
};
}
onChange = (e) => {
const { name, value } = e.target;
this.setState({ [name]: value });
};
// Vanilla JS Function for validating inputs
validate(name, email) {
const validationErrors = [];
if (!name) {
validationErrors.push("Please provide a Name");
}
if (!email) {
validationErrors.push("Please provide an Email");
}
return validationErrors;
}
onSubmit = (e) => {
// Prevent the default form behavior
// so the page doesn't reload.
e.preventDefault();
// Retrieve the contact us information from state.
const { name, email, phone, phoneType, comments } = this.state;
// Get Validation Errors - proceeding destructuring values from this.state.
const validationErrors = this.validate(name, email);
// If we have errors...
if (validationErrors.length > 0) {
this.setState({ validationErrors });
} else {
// Proceed normally
// Create a new object for the contact us information.
const contactUsInformation = {
name,
email,
phone,
phoneType,
comments,
submittedOn: new Date(),
};
console.log(contactUsInformation);
// Reset the form state.
this.setState({
name: "",
email: "",
phone: "",
phoneType: "",
comments: "",
validationErrors: [],
});
}
};
render() {
const { name, email, phone, phoneType, comments, validationErrors } =
this.state;
return (
<div>
<h2>Contact Us</h2>
{validationErrors.length > 0 && (
<div>
The following errors were found:
<ul>
{validationErrors.map((error) => (
<li key={error}>{error}</li>
))}
</ul>
</div>
)}
<form onSubmit={this.onSubmit}>
<div>
<label htmlFor="name">Name:</label>
<input
id="name"
name="name"
type="text"
onChange={this.onChange}
value={name}
/>
</div>
<div>
<label htmlFor="email">Email:</label>
<input
id="email"
name="email"
type="text"
onChange={this.onChange}
value={email}
/>
</div>
<div>
<label htmlFor="phone">Phone:</label>
<input
id="phone"
name="phone"
type="text"
onChange={this.onChange}
value={phone}
/>
<select name="phoneType" onChange={this.onChange} value={phoneType}>
<option value="">Select a phone type...</option>
{this.props.phoneTypes.map((phoneType) => (
<option key={phoneType}>{phoneType}</option>
))}
</select>
</div>
<div>
<label htmlFor="comments">Comments:</label>
<textarea
id="comments"
name="comments"
onChange={this.onChange}
value={comments}
/>
</div>
<div>
<button>Submit</button>
</div>
</form>
</div>
);
}
}
ContactUs.defaultProps = {
phoneTypes: ["Home", "Work", "Mobile"],
};
export default ContactUs;
- <span id="a2da">We can use validation libraries like `validate` to make our validation functions more complex.</span>
<!-- -->
import isEmail from "validator/es/lib/isEmail";
validate(name, email) {
const validationErrors = [];
if (!name) {
validationErrors.push("Please provide a Name");
}
if (!email) {
validationErrors.push("Please provide an Email");
} else if (!isEmail(email)) {
validationErrors.push("Please provide a valid Email");
}
return validationErrors;
}
Note About Client-side vs server-side validation
- <span id="5808">Server-side validation is not optional.</span>
- <span id="3bb8">Tech-savvy users can manipulate client-side validations.</span>
- <span id="311f">Sometimes the 'best approach' is to skip implementing validations on the client-side and rely completely on the server-side validation.</span>
---
### Component Lifecycle
<figure>
<img src="https://cdn-images-1.medium.com/max/800/0*c24XQBvqBBg0Eztz" class="graf-image" />
</figure>- <span id="e1d9">Component Lifecycle is simply a way of describing the key moments in the lifetime of a component.</span>
1. <span id="8e64">Loading (Mounting)</span>
2. <span id="7e94">Updating</span>
3. <span id="2cd3">Unloading (Unmounting) The lifecycle of a React component</span>
- <span id="7740">Each `Class Component` has several `lifecycle methods` that you can add to run code at specific times.</span>
- <span id="e7d0">`componentDidMount` : Method called after your component has been added to the component tree.</span>
- <span id="6d92">`componentDidUpdate` : Method called after your component has been updated.</span>
- <span id="9ee2">`componentWillUnmount` : Method called just before your component is removed from the component tree.</span>
- <span id="7bd8">`Mounting`</span>
1. <span id="6f9e">`constructor` method is called</span>
2. <span id="e9c7">`render` method is called</span>
3. <span id="eef3">React updates the `DOM`</span>
4. <span id="19bb">`componentDidMount` is called</span>
- <span id="85f1">`Updating`</span>
- <span id="94f5">When component receives new `props`</span>
1. <span id="e635">`render` method is called</span>
2. <span id="70f9">React updates the `DOM`</span>
3. <span id="9507">`componentDidUpdate` is called</span>
- <span id="b00a">When `setState` is called</span>
1. <span id="6864">`render` method is called</span>
2. <span id="e13b">React updates the `DOM`</span>
3. <span id="c459">`componentDidUpdate` is called</span>
- <span id="bfdd">`Unmounting`</span>
- <span id="10c1">The moment before a class component is removed from the component tree:</span>
- <span id="c214">`componentDidMount` will be called. Avoiding the legacy lifecycle methods</span>
- <span id="d438">Occasionally you will encounter some deprecated lifecycle methods:</span>
- <span id="1f6b">UNSAFE_componentWillMount</span>
- <span id="48ac">UNSAFE_componentWillReceiveProps</span>
- <span id="df27">UNSAFE_componentWillUpdate</span>
- <span id="af07">Just know they will be removed soon from React's API, peace. Using the class component lifecycle methods _Exercise done in sep. directory_</span>
- <span id="344c">Assorted Notes:</span>
- <span id="d6b1">Common Use for `componentDidMount` lifecycle method is for fetching data from an API.</span>
---
—
### Notes
### React Context
- <span id="e968">You can use `React Context` to pass data through a component tree without having to manually thread props.</span>
- <span id="89d9">Convenient way to share & update `global data`. Creating a Context</span>
<!-- -->
// PupContext.js
import { createContext } from "react";
const PupContext = createContext();
export default PupContext;
- <span id="a8bf">We use `React.createContext` to create context.</span>
- <span id="98b9">Keep in mind if you invoke this method with aruguments, those arguments will be set as default context. Adding a Provider to the App component</span>
- <span id="a919">In order to pass context over to child components we need to wrap them in a provider component.</span>
- <span id="9afc">The provider component takes in a value property that points to the information that needs to be passed to the children.</span>
<!-- -->
<MyContext.Provider value={/* some value */}>
<ChildComponent />
</MyContext.Provider>
Setting up a Consumer
<MyContext.Consumer>
{(value) => <Component value={value} />}
</MyContext.Consumer>
- <span id="2693">Keep in mind that `Context.Consumer` expects a function as a child.</span>
- <span id="19fc">The function has a value prop passed in from `Context.Provider`</span>
---
### Notes
### Redux Explained
- <span id="eab4">JS Framework for managing the frontend state of a web application.</span>
- <span id="3c8b">Gives us ability to store information in an organized manner in a web app and quickly retrieve that information from anywhere in the app.</span>
- <span id="695d">`Redux`</span>
- <span id="00d5">Client Side Data Management</span>
- <span id="dd41">Controls "Frontend State"</span>
- <span id="d828">NOT Your Database</span>
- <span id="855a">NOT Component State</span>
- <span id="4c1a">Just used for managing Data</span>
<figure>
<img src="https://cdn-images-1.medium.com/max/800/0*N7KFfhOZZ7UrY8s4" class="graf-image" />
</figure>- <span id="04c0">Visual of how an app without React manages it's data.</span>
- <span id="bae2">A lot of prop threading happening.</span>
- <span id="989f">Data stored in a sep. location — `global data`. The Anatomy of Redux</span>
- <span id="cd66">`Store`</span>
- <span id="9453">Holds the Frontend State</span>
- <span id="cea4">Provides an API for the Frontend State</span>
- <span id="c653">`Action`</span>
- <span id="7fb4">POJOs</span>
- <span id="69a1">Outline Changes to Frontend State</span>
- <span id="1a0a">`Reducers`</span>
- <span id="a372">Functions</span>
- <span id="8bb8">Make Changes to Frontend State Where did Redux come from?</span>
- <span id="6d0b">There are three central philosophies of Redux:</span>
1. <span id="12ac">`A Single Source of Truth` : state is stored in a POJO</span>
2. <span id="d178">`State is Read Only` : State is immutable, modified by dispatching actions.</span>
3. <span id="51c5">`Changes are Made with Pure Functions` : Reducers that receive the actions and return updated state are pure functions of the old state and action. When is it appropriate to use Redux?</span>
- <span id="117f">When doing a project with simpler global state requirements, it may be better to choose React's Context API over Redux.</span>
- <span id="5d3d">Redux offers more flexibility and support for middleware along with richer developer tools. Vocabulary</span>
- <span id="1ceb">`State`</span>
- <span id="49e7">_Redux is a State Manager_</span>
- <span id="5018">State is all the information stored by that program at a particular point in time.</span>
- <span id="8fdb">Redux's main job is to store the state and make it directly available to your entire app.</span>
- <span id="8bbd">`Store`</span>
- <span id="f027">_Redux stores state in a single store_.</span>
- <span id="c97e">Redux store is a single JS object with a couple of methods (not a class!)</span>
- <span id="199d">Methods include: `getState`, `dispatch(action)`, and `subscribe(listener)`</span>
- <span id="8bcf">`Actions`</span>
- <span id="2049">_Redux store is updated by dispatching actions_</span>
- <span id="cbac">Action is just a POJO that includes a mandatory `type` property.</span>
- <span id="f2d5">Contain info to update the store.</span>
- <span id="1bd9">We dispatch actions in response to User actions or AJAX requests.</span>
- <span id="1b78">`Pure Functions`</span>
- <span id="c436">_Redux Reducers are Pure Functions_</span>
- <span id="e204">Functions are pure when their behavior depends only on it's arguments as has no side effects.</span>
- <span id="450b">Simply takes in an argument and outputs a value.</span>
- <span id="e146">`Reducer`</span>
- <span id="9721">_Redux handles actions using reducers_</span>
- <span id="c312">A function that is called each time an action is dispatched.</span>
- <span id="84d8">Takes in an `action` and `current state`</span>
- <span id="90a3">Required to be pure functions so their behavior is predictable.</span>
- <span id="5c36">`Middleware`</span>
- <span id="6b22">_Customize response to dispatch actions by using Middleware_</span>
- <span id="9287">Middleware is an optional component of Redus that allows custom responses to dispatched actions.</span>
- <span id="f953">Most common use is to dispatch async requests to a server.</span>
- <span id="773e">`Time Traveling Dev Tools`</span>
- <span id="d703">_Redux can time travel wow_</span>
- <span id="7187">Time travel refers to Redux's ability to revert to a previous state because reducers are all pure functions.</span>
- <span id="ada3">`Thunks`</span>
- <span id="ee0f">_Convenient format for taking async actions in Redux_</span>
- <span id="586e">General concept in CS referring to a function who's primary purpose is to call another function.</span>
- <span id="6f45">Most commonly used to make async API requests.</span>
---
### Flux and Redux
What is Flux?
- <span id="06d1">Front-end application architecutre.</span>
- <span id="8311">A pattern in which to structure an application.</span>
- <span id="05e6">Unidirectional Data Flow — offers more predictability.</span>
- <span id="751c">`Actions` : Begins the data flow of data, simple object that contains a type; type indicates the type of change to be performed.</span>
- <span id="e8e7">`Dispatcher` : Mechanism for distributing actions to the store.</span>
- <span id="af4f">`Store` : The entire state of the application, responsible for updating the state of your app.</span>
- <span id="d7ff">`View` : Unit of code that's responsible for rendering the user interface. Used to re-render the application when actions and changes occur.</span>
<figure>
<img src="https://cdn-images-1.medium.com/max/800/0*ywV6dO4a4QcGJxK5" class="graf-image" />
</figure>- <span id="af94">Redux</span>
<figure>
<img src="https://cdn-images-1.medium.com/max/800/0*Nd73GjTY1PVQtjtQ" class="graf-image" />
</figure>- <span id="dc16">Library that facilitates the implementation of Flux.</span>
- <span id="623a">Redux Three Principles</span>
- <span id="2ac6">`Single Source of Truth`</span>
- <span id="a2b9">`State is Read-Only`</span>
- <span id="897b">`Only Pure Functions Change State`</span>
---
### Store
- <span id="cd1e">Simply an object that holds the application state wrapped in an API.</span>
- <span id="f57c">`Three methods`:</span>
- <span id="354c">`getState()` : Returns the store's current state.</span>
- <span id="537c">`dispatch(action)` : Passes an action into the store's reducer to tell it what info to update.</span>
- <span id="4539">`subscribe(callback)` : Registers a callback to be triggered whenever the store updates. Updating the Store</span>
<!-- -->
store.dispatch(action);
// Add Orange Action
const addOrange = {
type: "ADD_FRUIT",
fruit: "orange",
};
// Reducer for Orange Action
const fruitReducer = (state = [], action) => {
switch (action.type) {
case "ADD_FRUIT":
return [...state, action.fruit];
default:
return state;
}
};
// Run the Dispatch
console.log(store.getState()); // []
store.dispatch(addOrange);
console.log(store.getState()); // [ 'orange' ]
Subscribing to the store
- <span id="1a02">Whenever a store process a dispatch(), it triggers all its subscribers.</span>
- <span id="e667">`Subscribers` : callbacks that can be added to the store via subscribe().</span>
<!-- -->
const display = () => {
console.log(store.getState());
};
const unsubscribeDisplay = store.subscribe(display);
store.dispatch(addOrange); // [ 'orange', 'orange' ]
// display will no longer be invoked after store.dispatch()
unsubscribeDisplay();
store.dispatch(addOrange); // no output
Reviewing a simple example
// app.js
const { createStore } = require("redux");
// Define the store's reducer.
const fruitReducer = (state = [], action) => {
switch (action.type) {
case "ADD_FRUIT":
return [...state, action.fruit];
default:
return state;
}
};
// Create the store.
const store = createStore(fruitReducer);
// Define an 'ADD_FRUIT' action for adding an orange to the store.
const addOrange = {
type: "ADD_FRUIT",
fruit: "orange",
};
// Log to the console the store's state before and after
// dispatching the 'ADD_FRUIT' action.
console.log(store.getState()); // []
store.dispatch(addOrange);
console.log(store.getState()); // [ 'orange' ]
// Define and register a callback to listen for store updates
// and console log the store's state.
const display = () => {
console.log(store.getState());
};
const unsubscribeDisplay = store.subscribe(display);
// Dispatch the 'ADD_FRUIT' action. This time the `display` callback
// will be called by the store when its state is updated.
store.dispatch(addOrange); // [ 'orange', 'orange' ]
// Unsubscribe the `display` callback to stop listening for store updates.
unsubscribeDisplay();
// Dispatch the 'ADD_FRUIT' action one more time
// to confirm that the `display` method won't be called
// when the store state is updated.
store.dispatch(addOrange); // no output
### Reducers
- <span id="98f3">Reducer function receives the current `state` and `action`, updates the state appropriately based on the `action.type` and returns the following state.</span>
- <span id="4cee">You can bundles different action types and ensuing logic by using a switch/case statement.</span>
<!-- -->
const fruitReducer = (state = [], action) => {
switch (action.type) {
case "ADD_FRUIT":
return [...state, action.fruit];
case "ADD_FRUITS":
return [...state, ...action.fruits];
case "SELL_FRUIT":
const index = state.indexOf(action.fruit);
if (index !== -1) {
// remove first instance of action.fruit
return [...state.slice(0, index), ...state.slice(index + 1)];
}
return state; // if action.fruit is not in state, return previous state
case "SELL_OUT":
return [];
default:
return state;
}
};
Reviewing how Array\#slice works
const fruits = ["apple", "apple", "orange", "banana", "watermelon"];
// The index of the 'orange' element is 2.
const index = fruits.indexOf("orange");
// `...fruits.slice(0, index)` returns the array ['apple', 'apple']
// `...fruits.slice(index + 1)` returns the array ['banana', 'watermelon']
// The spread syntax combines the two array slices into the array
// ['apple', 'apple', 'banana', 'watermelon']
const newFruits = [...fruits.slice(0, index), ...fruits.slice(index + 1)];
- <span id="f322">Approach that can be used to remove an element without mutating the original array. Avoiding state mutations</span>
- <span id="f862">Your reducer must always return a new object if the state changes. GOOD</span>
<!-- -->
const goodReducer = (state = { count: 0 }, action) => {
switch (action.type) {
case "INCREMENT_COUNTER":
const nextState = Object.assign({}, state);
nextState.count++;
return nextState;
default:
return state;
}
};
BAD
const badReducer = (state = { count: 0 }, action) => {
switch (action.type) {
case "INCREMENT_COUNTER":
state.count++;
return state;
default:
return state;
}
};
---
### Actions
- <span id="64b4">Actions are the only way to trigger changes to the store's state. Using action creators</span>
<!-- -->
const addOrange = {
type: "ADD_FRUIT",
fruit: "orange",
};
store.dispatch(addOrange);
console.log(store.getState()); // [ 'orange' ]
- <span id="c39d">fruit is the `payload key` and orange is the `state data`</span>
- <span id="43e2">`Action Creators` : Functions created from extrapolating the creation of an action object.</span>
<!-- -->
const addFruit = (fruit) => ({
type: "ADD_FRUIT",
fruit,
});
- <span id="11fd">Use parenthesis for implicit return value.</span>
- <span id="eea8">We can now add whatever fruit we'd like.</span>
<!-- -->
store.dispatch(addFruit("apple"));
store.dispatch(addFruit("strawberry"));
store.dispatch(addFruit("lychee"));
console.log(store.getState()); // [ 'orange', 'apple', 'strawberry', 'lychee' ]
Preventing typos in action type string literals
const ADD_FRUIT = "ADD_FRUIT";
const ADD_FRUITS = "ADD_FRUITS";
const SELL_FRUIT = "SELL_FRUIT";
const SELL_OUT = "SELL_OUT";
const addFruit = (fruit) => ({
type: ADD_FRUIT,
fruit,
});
const addFruits = (fruits) => ({
type: ADD_FRUITS,
fruits,
});
const sellFruit = (fruit) => ({
type: SELL_FRUIT,
fruit,
});
const sellOut = () => ({
type: SELL_OUT,
});
- <span id="ae86">Using constant variables helps reduce simple typos in a reducer's case clauses.</span>
---
### Debugging Arrow Functions
- <span id="43c6">It is important to learn how to use debugger statements with arrow functions to effectively debug Redux cycle. Understanding the limitations of implicit return values</span>
<!-- -->
const addFruit = (fruit) => {
return {
type: "ADD_FRUIT",
fruit,
};
};
const addFruit = (fruit) => {
debugger;
return {
type: "ADD_FRUIT",
fruit,
};
};
- <span id="2806">You must use explicit return statement arrow function to use a debugger.</span>
---
### React Router Introduction
Now that you know how to render components in a React app, how do you handle rendering different components for different website pages? React Router is the answer!
Think of how you have created server-side routes in Express. Take the following URL and server-side route. Notice how the `/users/:userId` path corresponds with the `http://localhost:3000/users/2` URL to render a specific HTML page.
// http://localhost:3000/users/2
app.get('/users/:userId', (req, res) => {
res.render('userProfile.pug');
});
In the default React setup, you lose the ability to create routes in the same manner as in Express. This is what React Router aims to solve!
<a href="https://github.com/ReactTraining/react-router" class="markup--anchor markup--p-anchor">React Router</a> is a frontend routing library that allows you to control which components to display using the browser location. A user can also copy and paste a URL and email it to a friend or link to it from their own website.
When you finish this article, you should be able to use the following from the `react-router-dom` library:
- <span id="e5d3">`<BrowserRouter>` to provide your application access to the `react-router-dom` library; and</span>
- <span id="e1cd">`<Route>` to connect specific URL paths to specific components you want rendered; and</span>
- <span id="bf15">`<Switch>` to wrap several `Route` elements, rendering only one even if several match the current URL; and</span>
- <span id="0318">React Router's `match` prop to access route path parameters.</span>
### Getting started with routing
Since you are writing single page apps, you don't want to refresh the page each time you change the browser location. Instead, you want to update the browser location and your app's response using JavaScript. This is known as client-side routing. You are using React, so you will use React Router to do this.
Create a simple react project template:
npx create-react-app my-app --template @appacademy/simple
Then install React Router:
npm install --save react-router-dom@^5.1.2
Now import `BrowserRouter` from `react-router-dom` in your entry file:
import { BrowserRouter } from 'react-router-dom`;
### BrowserRouter
`BrowserRouter` is the primary component of the router that wraps your route hierarchy. It creates a React context that passes routing information down to all its descendent components. For example, if you want to give `<App>` and all its children components access to React Router, you would wrap `<App>` like so:
// ./src/index.js
import React from 'react';
import ReactDOM from 'react-dom';
import { BrowserRouter } from 'react-router-dom';
import App from './App';
const Root = () => {
return (
<BrowserRouter>
<App />
</BrowserRouter>
);
};
ReactDOM.render(
<React.StrictMode>
<Root />
</React.StrictMode>,
document.getElementById('root'),
);
Now you can route the rendering of certain components to certain URLs (i.e `https://www.website.com/profile`<a href="https://www.website.com/profile%29." class="markup--anchor markup--p-anchor">).</a>
### HashRouter
Alternatively, you could import and use `HashRouter` from `react-router-dom`. Links for applications that use `<HashRouter>` would look like `https://www.website.com/#/profile` (with an `#` between the domain and path).
You'll focus on using the `<BrowserRouter>`.
### Creating frontend routes
React Router helps your React application render specific components based on the URL. The React Router component you'll use most often is `<Route>`.
The `<Route>` component is used to wrap another component, causing that component to only be rendered if a certain URL is matched. The behavior of the `<Route>` component is controlled by the following props: `path`, `component`, `exact`, and `render` (optional).
Create a simple `Users` component that returns `<h1>This is the users index!</h1>`. Now let's refactor your `index.js` file so that you can create your routes within the component:
// ./src/index.js
import React from 'react';
import ReactDOM from 'react-dom';
import { BrowserRouter, Route } from 'react-router-dom';
import App from './App';
import Users from './Users';
const Root = () => {
return (
<BrowserRouter>
<div>
{/* TODO: Routes */}
</div>
</BrowserRouter>
);
};
ReactDOM.render(
<React.StrictMode>
<Root />
</React.StrictMode>,
document.getElementById('root'),
);
Note that `BrowserRouter` can only have a single child component, so the snippet above wraps all routes within parent a `<div>` element. Now let's create some routes!
### component
Begin with the `component` prop. This prop takes a reference to the component to be rendered. Let's render your `App` component:
const Root = () => {
return (
<BrowserRouter>
<div>
<Route component={App} />
</div>
</BrowserRouter>
);
};
Now you'll need to connect a path to the component!
### path
The wrapped component will only be rendered when the path is matched. The path matches the URL when it matches some initial portion of the URL. For example, a path of `/` would match both of the following URLs: `/` and `/users`. (Because `/users` begins with a `/` it matches the path `/`)
<Route path='/' component={App} />
<Route path='/users' component={Users} />
Take a moment to navigate to `http://localhost:3000/users` to see how both the `App` component and `Users` component are rendering.
### exact
If this `exact` flag is set, the path will only match when it exactly matches the URL. Then browsing to the `/users` path would no longer match `/` and only the `Users` component will be rendered (instead of both the `App` component and `Users` component).
<Route exact path='/' component={App} />
<Route path='/users' component={Users} />
### render
This is an optional prop that takes in a function to be called. The function will be called when the path matches. The function's return value is rendered. You could also define a functional component inside the `component` prop, but this results in extra, unnecessary work for React. The `render` prop is preferred for inline rendering of simple functional components.
The difference between using `component` and `render` is that `component` returns new JSX to be re-mounted every time the route renders, while `render` simply returns to JSX what will be mounted once and re-rendered. For any given route, you should only use either the `component` prop, or the `render` prop. If both are supplied, only the `component` prop will be used.
// This inline rendering will work, but is unnecessarily slow.
<Route path="/hello" component={() => <h1>Hello!</h1>} />
// This is the preferred way for inline rendering.
<Route path="/hello" render={() => <h1>Hello!</h1>} />
It can be helpful to use `render` instead of `component` in your `<Route>` when you need to pass props into the rendered component. For example, imagine that you needed to pass the `users` object as a prop to your `Users` component. Then you could pass in props from `Root` to `Users` by returning the `Users` component like so:
// `users` to be passed as a prop:
const users = {
1: { name: 'Andrew' },
2: { name: 'Raymond' }
};
<Route path="/users" render={() => <Users users={users} />} />
As a reminder, `BrowserRouter` can only have a single child component. That's why you have wrapped all your routes within parent a `<div>` element.
const Root = () => {
const users = {
1: { name: 'Andrew' },
2: { name: 'Raymond' }
};
return (
<BrowserRouter>
<div>
<h1>Hi, I'm Root!</h1>
<Route exact path="/" component={App} />
<Route path="/hello" render={() => <h1>Hello!</h1>} />
<Route path="/users" render={() => <Users users={users} />} />
</div>
</BrowserRouter>
);
};
With this `Root` component, you will always render the `<h1>Hi, I'm Root!</h1>`, regardless of the path. Because of the first `<Route>`, you will only render the `App` component if the path exactly matches `/`. Because of the second `<Route>`, you will only render the `Users` component if the path matches `/users`.
### Route path params
A component's props can also hold information about a URL's parameters. The router will match route segments starting at `:` up to the next `/`, `?`, or `#`. Those matched values are then passed to components via their props. Such segments are _wildcard_ values that make up your route parameters.
For example, take the route below:
<Route path="/users/:userId"
render={(props) => <Profile users={users} {...props} />} />
The router would break down the full `/users/:userId/photos` path to two parts: `/users`, `:userId`.
The `Profile` component's props would have access to the `:userId` part of the `http://localhost:3000/users/:userId/photos` URL through the `props` with router parameter information. You would access the the `match` prop's parameters (`props.match.params`). If you are using the `render` prop of the `Route` component, make sure to spread the props back into the component if you want it to know about the "match" parameters.
// Route's `render` prop allows you to pass the `users`
// prop and spread the router `props`.
render={(props) => <Profile users={users} {...props} />}
The `params` object would then have a property of `userId` which would hold the value of the `:userId` _wildcard_ value. Let's render the `userId` parameter in a user profile component. Take a moment to create a `Profile.js` file with the following code:
// ./src/Profile.js
import React from "react";
const Profile = (props) => (
<div>
The user's id is {props.match.params.userId}.
</div>
);
export default Profile;
Notice how it uses the `match` prop to access the `:userId` parameter from the URL. You can use this wildcard to make and AJAX call to fetch the user information from the database and render the return data in the `Profile` component. Recall that your `Profile` component was rendered at the path `/users/:userId`. Thus you can use your `userId` parameters from `match.params` to fetch a specific user:
// ./src/Profile.js
import React from "react";
const Profile = ({ users, match: { params } }) => {
// In a real-world scenario, you'd make a call to an API to fetch the user,
// instead of passing down and keying into a `users` prop.
const user = users[params.userId];
return (
<div>
The user's id is {params.userId} and the user's name is {user.name}.
</div>
);
};
export default Profile;
### Match
Now that you've seen your React Router's `match` prop in action, let's go over more about <a href="https://reacttraining.com/react-router/web/api/Route/route-props" class="markup--anchor markup--p-anchor">route props</a>! React Router passes information to the components as route props, accessible to all components with access to the React Router. The three props it makes available are `location`, `match` and `history`. You've learned about `props.match.params`, but now let's review the other properties of the `match` prop!
This is an object that contains important information about how the current URL matches the route path. Here are some of the more useful keys on the `match` object:
- <span id="1d2c">`isExact`: a boolean that tells you whether or not the URL exactly matches the path</span>
- <span id="b558">`url`: the current URL</span>
- <span id="ab28">`path`: the route path it matched against (without wildcards filled in)</span>
- <span id="be5b">`params`: the matches for the individual wildcard segments, nested under their names</span>
When you use React Router, the browser `location` and `history` are a part of the state of your app. You can store information about which component should be displayed, which user profile you are currently viewing, or any other piece of state, in the browser location. You can then access that information from anywhere your Router props are passed to in your app.
Now that you've learned about parameters and route props, let's revisit your `Root` component to add an `exact` flag to your `/users` route so that it does not render with your `/users/:userId` route. Your component should look something like this:
const Root = () => {
const users = {
1: { name: 'Andrew' },
2: { name: 'Raymond' }
};
return (
<BrowserRouter>
<h1>Hi, I'm Root!</h1>
<div>
<Route exact path="/" component={App} />
<Route path="/hello" render={() => <h1>Hello!</h1>} />
{/* Render the `Users` page if no ID is included. */}
<Route exact path="/users" render={() => <Users users={users} />} />
{/* Otherwise, render the profile page for that userId. */}
<Route path="/users/:userId" component={(props) => <Profile users={users} {...props} />} />
</div>
</BrowserRouter>
);
};
### What you learned
In this article, you learned how to:
- <span id="92fc">Use components from the React Router library; and</span>
- <span id="19b5">Create routes to render specific components; and</span>
- <span id="fc9d">Manage the order of rendered routes; and</span>
- <span id="3281">Use the `exact` flag to ensure that a specific path renders a specific component; and</span>
- <span id="3949">Use the React Router `match` prop to access Router params.</span>
---
### React Router Navigation
Now that you know how to create front-end routes with React Router, you'll need to implement a way for your users to navigate the routes! This is what using React Router's `Link`, `NavLink`, `Redirect`, and `history` prop can help you do.
In this article, you'll be working off of the demo project you built in the React Router Intro reading. When you finish this article, you should be able to use the following components from the `react-router-dom` library:
- <span id="76bc">`<Link>` or `<NavLink>` to create links with absolute paths to routes in your application (like "/users/1"); and,</span>
- <span id="cdc2">`<Redirect>` to redirect a user to another path (i.e. a login page when the user is not logged in); and</span>
- <span id="d8a7">React Router's `history` prop to update a browser's URL programmatically.</span>
### Adding links for navigation
React Router's `<Link>` is one way to simplify navigation around your app. It issues an on-click navigation event to a route defined in your app's router. Using `<Link>` renders an anchor tag with a correctly set `href` attribute.
### Link
To use it, update your imports from the `react-router-dom` package to include `Link`:
import { BrowserRouter, Route, Link } from 'react-router-dom';
Note that `<Link>` can take two props: `to` and `onClick`.
The `to` prop is a route location description that points to an absolute path, (i.e. `/users`). Add the following `Link` components in your `index.js` file above your routes:
<Link to="/">App</Link>
<Link to="/users">Users</Link>
<Link to="/users/1">Andrew's Profile</Link>
The `onClick` prop is just like any other JSX click handler. You can write a function that takes in an `event` and handles it. Add the following `Link` before your routes and the following click handler function within your `Root` component:
// Link with onClick prop
<Link to="/" onClick={handleClick}>App with click handler</Link>
// Click handler function
const handleClick = () => {
console.log('Thanks for clicking!')
};
Now, test your routes and links! If you inspect the page, you'll see that your links are now rendered as `<a>` elements. Notice that clicking the `App with click handler` link logs a message in your console while directing your browser to render the `App` component.
### NavLink
The `<NavLink>` works just like a `<Link>`, but with a little extra functionality. It has the ability to add extra styling when the path it links to matches the current path. This makes it an ideal choice for a navigation bar, hence the name. This styling can be controlled by three extra props: `activeClassName`, `activeStyle`, and `exact`. To begin using `NavLink`, update your imports from the `react-router-dom` package:
import { BrowserRouter, Route, NavLink } from 'react-router-dom';
The `activeClassName` prop of the `NavLink` component allows you to set a CSS class name for styling the `NavLink` when its route is active. By default, the `activeClassName` is already set to `active`. This means that you simply need to add an `.active` class to your CSS file to add active styling to your link. A `NavLink` will be active if its `to` prop path matches the current URL.
Let's change your "Users", "Hello", and "Andrew's Profile" links to be different colors and have a larger font size when active.
<NavLink to="/">App</NavLink>
<NavLink activeClassName="red" to="/users">Users</NavLink>
<NavLink activeClassName="blue" to="/hello">Hello</NavLink>
<NavLink activeClassName="green" to="/users/1">Andrew's Profile</NavLink>
<NavLink to="/" onClick={handleClick}>App with click handler</NavLink>
For example, this is what the rendered HTML `<a>` tag would look like when when the browser is navigated to the `/` path or the `/users` path:
<!-- Navigated to the / path (the activeClassName
prop is set to active by default) -->
<a href="/" class="active">App</a>
<!-- NOT navigated to the `/` path -->
<a href="/">App</a>
<!-- Navigated to the /users path (the activeClassName
prop is manually set to red) -->
<a href="/users" class="red">Users</a>
<!-- NOT navigated to the `/users` path -->
<a href="/users">Users</a>
Import `NavLink` into your `index.js` file and take a moment to update all your `Link` elements to `NavLink` elements. Set an `activeClassName` prop to an `active` class. Add the following `.active` class to your `index.css` file:
.active {
font-weight: bold;
}
.red {
color: red;
font-size: 30px;
}
.blue {
color: blue;
font-size: 30px;
}
.green {
color: green;
font-size: 30px;
}
Test your styled links! Notice how the `App` and `App with click handler` links are always bolded. This is because all of your links include the `/` path, meaning that the link to `/` will be active when browsing to `/users` and `/users/1` because of how `users` and `users/1` are both prefaced by a `/`.
The `activeStyle` prop is a style object that will be applied inline to the `NavLink` when its `to` prop matches the current URL. Add the following `activeStyle` to your `App` link and comment out the `.active` class in your CSS file.
<NavLink to="/" activeStyle={{ fontWeight: "bold" }}>App</NavLink>
The following html is rendered when at the `/` path:
<a href="/" style="font-weight:bold;" class="active">App</a>
Notice how your `App with click handler` is not bolded anymore. This is because the default `active` class being applied does not have any CSS stylings set to the class. Uncomment your `.active` class in your CSS file to bring back bolding to this NavLink.
The `exact` prop is a boolean that defaults to `false`. If set to `true`, then the `activeStyle` and `activeClassName` props will only be applied when the current URL exactly matches the `to` prop. Update your `App` and `App with click handler` links with an `exact` prop set. Just like in your routes, you can use the `exact` flag instead of `exact={true}`.
<NavLink to="/" exact={true} activeStyle={{ fontWeight: "bold" }}>App</NavLink>
<NavLink to="/" exact onClick={handleClick}>App with click handler</NavLink>
Now your `App` and `App with click handler` links will only be bolded when you have navigated precisely to the `/` path.
### Switching between routes
You came across styling issues when the `/users` and `/users/1` paths matched the `/` path. Routing can have this issue as well. This is why you need to control the switching between routes.
React Router's `<Switch>` component allows you to only render one `<Route>` even if several match the current URL. You can nest as many `Route`s as you wish between the opening and closing `Switch` tags, but only the first one that matches the current URL will be rendered.
This is particularly useful if you want a default component that will only render if none of our other routes match. View the example below. Without the Switch, `DefaultComponent` would always render. Since there isn't set a path in the `DefaultComponent` route, it will simply use the default path of `/`. Now the `DefaultComponent` will only render when neither of the preceding routes match.
<Switch>
<Route path="some/url" component={SomeComponent} />
<Route path="some/other/url" component={OtherComponent} />
<Route component={DefaultComponent} />
</Switch>
Import `Switch` from `react-router-dom` and add `<Switch>` tags around your routes to take care of ordering and switching between your routes! Begin by adding the following route to the bottom of your routes to render that a `404: Page not found` message:
<Route render={() => <h1>404: Page not found</h1>} />
This is what your `Root` component should look like at this point:
const Root = () => {
const users = [
{ name: 'andrew' },
{ name: 'raymond' }
];
const handleClick = () => {
console.log('Thanks for clicking!')
};
return (
<BrowserRouter>
<h1>Hi, I'm Root!</h1>
<div>
<NavLink to="/" exact={true} activeStyle={{ fontWeight: "bold" }}>App</NavLink>
<NavLink activeClassName="red" to="/users">Users</NavLink>
<NavLink activeClassName="blue" to="/hello">Hello</NavLink>
<NavLink activeClassName="green" to="/users/1">Andrew's Profile</NavLink>
<NavLink to="/" exact onClick={handleClick}>App with click handler</NavLink>
<Switch>
<Route path="/users/:userId" component={(props) => <Profile users={users} {...props} />} />
<Route exact path="/users" render={() => <Users users={users} />} />
<Route path="/hello" render={() => <h1>Hello!</h1>} />
<Route exact path="/" component={App} />
<Route render={() => <h1>404: Page not found</h1>} />
</Switch>
</div>
</BrowserRouter>
);
};
Now you have control over the precedence of rendered components! Try navigating to `http://localhost:3000/asdf` or any other route you have not defined. The `<h1>404: Page not found</h1>` JSX of the last `<Route>` will be rendered whenever the browser attempts to visit an undefined route.
### Redirecting users
But what if you want to redirect users to a login page when they aren't logged in? The `<Redirect>` component from React Router helps you redirect users!
The component takes only one prop: `to`. When it renders, it replaces the current URL with the value of its `to` prop. Typically you conditionally render `<Redirect>` to redirect the user away from some page you don't want them to visit. The example below checks whether there is a defined `currentUser` prop. If so, the `<Route>` will render the `Home` component. Otherwise, it will redirect the user to the `/login` path.
<Route
exact path="/"
render={() => (this.props.currentUser ? <Home /> : <Redirect to="/login" />)}
/>
Note: you will learn how to use a more flexible auth pattern — don't directly imitate this example.
### History
You know how to redirect users with a `<Redirect>` component, but what if you need to redirect users programmatically? You've learned about the React Router's `match` prop, but now let's go over another one of the <a href="https://reacttraining.com/react-router/web/api/Route/route-props" class="markup--anchor markup--p-anchor">route props</a>: `history`!
// Pushing a new URL (and adding to the end of history stack):
const handleClick = () => this.props.history.push('/some/url');
// Replacing the current URL (won't be tracked in history stack):
const redirect = () => this.props.history.replace('/some/other/url');
This prop lets you update the URL programmatically. For example, suppose you want to push a new URL when the user clicks a button. It has two useful methods:
- <span id="31f3">`push` - This adds a new URL to the end of the history stack. That means that clicking the back button will take the browser to the previous URL. Note that pushing the same URL multiple times in a row will have no effect; the URL will still only show up on the stack once. In development mode, pushing the same URL twice in a row will generate a console warning. This warning is disabled in production mode.</span>
- <span id="90c1">`replace` - This replaces the current URL on the history stack, so the back button won't take you to it. For example:</span>
### What you learned
In this article, you learned how to:
- <span id="169b">Create navigation links for your route paths; and</span>
- <span id="d108">Redirect users through using the `<Redirect>` component; and</span>
- <span id="d090">Update a browser's URL programmatically by using React Router's `history` prop.</span>
---
### React Router Nested Routes
Now you know how to create front-end routes and add navigation with React Router. When initializing Express projects, you declare static routes. Static routes are routes that are declared when an application is initialized. When using React Router in your application's initialization, you can declare dynamic routes. React Router introduces dynamic routing, where your routes are created as your application is rendering. This allows you to create nested routes within components!
In this article, let's dive into <a href="https://reacttraining.com/react-router/core/guides/philosophy/nested-routes" class="markup--anchor markup--p-anchor">nested routes</a>! When you finish the article, you should:
- <span id="38ee">Describe what nested routes are; and</span>
- <span id="0559">Be able to use React Router to create and navigate nested routes; and</span>
- <span id="ce4a">Know how to use the React Router `match` prop to generate links and routes.</span>
### Why nested routes?
Let's begin with why you might need nested routes. As you remember, you are using React to create a single-page application. This means that you'll be organizing your application into different components and sub-components.
For example, imagine creating a simple front-end application with three main pages: a home welcome page (path of `/`), a users index page (path of `/users`), and user profile pages (path of `/users/:userId`). Now imagine if every user had links to separate `posts` and `photos` pages.
You can create those routes and links within the user profile component, instead of creating the routes and links where the main routes are defined.
### What are nested routes?
Now let's dive into a user profile component to understand what are nested routes! Imagine you have a route in your application's entry file to each user's profile like so:
<Route path="/users/:userId" component={Profile} />
This means that upon navigating to `http://localhost:3000/users/1`, you would render the following `Profile` component and the `userId` parameter within `props.match.params` would have the value of `"1"`.
const Profile = (props) => {
// Custom call to database to fetch a user by a user ID.
const user = fetchUser(props.match.params.userId);
const { name, id } = user;
return (
<div>
<h1>Welcome to the profile of {name}!</h1>
{/* Links to a specific user's posts and photos */}
<Link to={`/users/${id}/posts`}>{name}'s Posts</Link>
<Link to={`/users/${id}/photos`}>{name}'s Photos</Link>
{/* Routes to a specific user's posts and photos */}
<Route path='/users/:userId/posts' component={UserPosts} />
<Route path='/users/:userId/photos' component={UserPhotos} />
</div>
);
};
Since this route is not created until the `Profile` component is rendered, you are dynamically creating your nested `/users/:userId/posts` and `/users/:userId/photos` routes. Remember that your `match` prop also has other helpful properties. You can use `match.url` instead of `/users/${id}` in your profile links. You can also use `match.path` instead of `/users/:userId` in your profile routes. Remember that you can destructure `url`, `path`, and `params` from your `match` prop!
// Destructure `match` prop
const Profile = ({ match: { url, path, params }) => {
// Custom call to database to fetch a user by a user ID.
const user = fetchUser(params.userId);
const { name, id } = user;
return (
<div>
<h1>Welcome to the profile of {name}!</h1>
{/* Replaced `/users/${id}` URL with `props.match.url` */}
<Link to={`${url}/posts`}>{name}'s Posts</Link>
<Link to={`${url}/photos`}>{name}'s Photos</Link>
{/* Replaced `/users/:userId` path with `props.match.path` */}
<Route path={`${path}/posts`} component={UserPosts} />
<Route path={`${path}/photos`} component={UserPhotos} />
</div>}
);
};
In tomorrow's project, you'll build a rainbow of routes as well as define nested routes. In the future, you may choose to implement nested routes to keep your application's routes organized within related components.
### What you learned
In this article, you learned:
- <span id="2378">What nested routes are; and</span>
- <span id="e072">About creating and navigating nested routes with React Router; and</span>
- <span id="c8b8">How to use the React Router props to generate nested links and routes.</span>
---
### React Builds
A "build" is the process of converting code into something that can actually execute or run on the target platform. A "front-end build" is a process of preparing a front-end or client-side application for the browser.
With React applications, that means (at a minimum) converting JSX to something that browsers can actually understand. When using Create React App, the build process is automatically configured to do that and a lot more.
When you finish this article, you should be able to:
- <span id="2448">Describe what front-end builds are and why they're needed;</span>
- <span id="efab">Describe at a high level what happens in a Create React App when you run `npm start`; and</span>
- <span id="502f">Prepare to deploy a React application into a production environment.</span>
### Understanding front-end builds
The need for front-end builds predates React. Over the years, developers have found it helpful to extend the lowest common denominator version of JavaScript and CSS that they could use.
Sometimes developers extend JavaScript and CSS with something like <a href="https://www.typescriptlang.org/" class="markup--anchor markup--p-anchor">TypeScript</a> or <a href="https://sass-lang.com/" class="markup--anchor markup--p-anchor">Sass</a>. Using these non-standard languages and syntaxes require you to use a build process to convert your code into standard JavaScript and CSS that can actually run in the browser.
Browser-based applications also require a fair amount of optimization to deliver the best, or at least acceptable, experience to end users. Front-end build processes could be configured to lint code, run unit tests, optimize images, minify and bundle code, and more — all automatically at the press of a button (i.e. running a command at the terminal).
### JavaScript versions and the growth of front-end builds
Developers are generally an impatient lot. When new features are added to JavaScript, we don't like to wait for browsers to widely support those features before we start to use them in our code. And we _really_ don't like when we have to support older, legacy versions of browsers.
In recent years, JavaScript has been updated on a yearly basis and browser vendors do a decent job of updating their browsers to support the new features as they're added to the language. Years ago though, there was an infamous delay between versions 5 and 6 of JavaScript. It took _years_ before ES6 (or ES2015 as it eventually was renamed to) to officially be completed and even longer before browsers supported all of its features.
In the period of time before ES2015 was broadly supported by browsers, developers used front-end builds to convert or _transpile_ ES2015 features and syntax to an older version of the language that was more broadly supported by browsers (typically ES5). The transpilation from ES2015/ES6 down to ES5 was one of the major drivers for developers to add front-end builds to their client-side projects.
### Reviewing common terminology
When learning about front-end or React builds, you'll encounter a lot of terminology that you may or may not be familiar with. Here's some of the terminology that you'll likely encounter:
Linting is process of using a tool to analyze your code to catch common programming errors, bugs, stylistic inconsistencies, and suspicious coding patterns. <a href="https://eslint.org/" class="markup--anchor markup--p-anchor">ESLint</a> is a popular JavaScript linting tool.
Transpilation is the process of converting source code, like JavaScript, from one version to another version. Usually this means converting newer versions of JavaScript, <a href="https://www.ecma-international.org/ecma-262/10.0/index.html" class="markup--anchor markup--p-anchor">ES2019</a> or <a href="https://tc39.es/ecma262/" class="markup--anchor markup--p-anchor">ES2021</a>, to a version that's more widely supported by browsers, like <a href="http://www.ecma-international.org/ecma-262/6.0/" class="markup--anchor markup--p-anchor">ES2015</a>, or even <a href="https://www.ecma-international.org/ecma-262/5.1/" class="markup--anchor markup--p-anchor">ES5</a> or <a href="https://www.ecma-international.org/publications/files/ECMA-ST-ARCH/ECMA-262,%203rd%20edition,%20December%201999.pdf" class="markup--anchor markup--p-anchor">ES3</a> (if you need to support the browser that your parents or grandparents use).
Minification is the process of removing all unnecessary characters in your code (e.g. white space characters, new line characters, comments) to produce an overall smaller file. Minification tools will often also rename identifers in your code (i.e. parameter and variable names) in the quest for smaller and smaller file sizes. Source maps can also be generated to allow debugging tools to cross reference between minified code and the original source code.
Bundling is the process of combining multiple code files into a single file. Creating a bundle (or a handful of bundles) reduces the number of requests that a client needs to make to the server.
Tree shaking is the process of removing unused (or dead) code from your application before it's bundled. Tree shaking external dependencies can sometimes have a dramatic positive impact on overall bundled file sizes.
### Configuration or code?
Front-end build tools have come and gone over the years; sometimes very quickly, which helped bring about the phenomenon known as <a href="https://sdtimes.com/softwaredev/is-the-javascript-fatigue-real/" class="markup--anchor markup--p-anchor">JavaScript fatigue</a>.
Configuration based tools allow you to create your build tasks by declaring (usually using JSON, XML, or YAML) what you want to be done, without explicitly writing every step in the process. In contrast, coding or scripting based tools allow you to, well, write code to create your build tasks. Configuration based tools _can_ sometimes feel simpler to use while giving up some control (at least initially) while coding based tools _can_ feel more familiar and predictable (since you're describing tasks procedurally). Every generalization is false though (including this one), so there are plenty of exceptions.
<a href="https://gruntjs.com/" class="markup--anchor markup--p-anchor">Grunt</a> is a JSON configuration based task runner that can be used to orchestrate the various tasks that make up your front-end build. Grunt was very quickly supplanted by <a href="https://gulpjs.com/" class="markup--anchor markup--p-anchor">Gulp</a>, which allowed developers to write JavaScript to define front-end build tasks. After Gulp, the front-end tooling landscape became a bit more muddled. Some developers preferred the simplicity of using <a href="https://docs.npmjs.com/misc/scripts" class="markup--anchor markup--p-anchor">npm scripts</a> to define build tasks while others preferred the power of configuration based bundlers like <a href="https://webpack.js.org/" class="markup--anchor markup--p-anchor">webpack</a>.
### Babel and webpack (yes, that's intentionally a lowercase 'w')
As front-end or client-side applications grew in complexity, developers found themselves wanting to leverage more advanced JavaScript features and newer syntax like classes, arrow functions, destructuring, async/await, etc. Using a code transpiler, like <a href="https://babeljs.io/" class="markup--anchor markup--p-anchor">Babel</a>, allows you to use all of the latest and greatest features and syntax without worrying about what browsers support what.
Module loaders and bundlers, like <a href="https://webpack.js.org/" class="markup--anchor markup--p-anchor">webpack</a>, also allowed developers to use JavaScript modules without requiring users to use a browser that natively supports ES modules. Also, module bundling (along with minification and tree-shaking) helps to reduce the bandwidth that's required to deliver the assets for your application to the client.
\[Create React App\]\[cra\] uses webpack (along with Babel) under the covers to build your React applications. Even if you're not using Create React App, webpack and Babel are still very popular choices for building React applications.
### Pulling back the covers (a bit) on the Create React App build process
Running an application created by Create React App using `npm start` can feel magical. Some stuff happens in the terminal and your application opens into your default browser. Even better, when you make changes to your application, your changes will (usually) automatically appear in the browser!
### The Create React App build process
At a high level, here's what happens when you run `npm start`:
- <span id="2808">Environment variables are loaded (more about this in a bit);</span>
- <span id="f272">The list of browsers to support are checked (more about this too in a bit);</span>
- <span id="71b2">The configured HTTP port is checked to ensure that it's available;</span>
- <span id="f826">The application compiler is configured and created;</span>
- <span id="c605">`webpack-dev-server` is started;</span>
- <span id="a696">`webpack-dev-server` compiles your application;</span>
- <span id="c66e">The `index.html` file is loaded into the browser; and</span>
- <span id="6add">A file watcher is started to watch your files, waiting for changes.</span>
### Ejecting
Create React App provides a script that you can run to "eject" your application from the Create React App tooling. When you eject your application, all of the hidden stuff is exposed so that you can review and customize it.
> _The need to customize Create React App rarely happens. Also, don't eject an actual project as it's a one-way trip! Once a Create React App project has been ejected, there's no going back (though you could always undo the ejection process by reverting to an earlier commit if you're using source control)._
To eject your application from Create React App, run the command `npm run eject`. You'll be prompted if you want to continue; type "y" to continue with the ejection process. Once the ejection process has completed, you can review the files that were previously hidden from you.
In the `package.json` file, you'll see the following npm scripts:
{
"scripts": {
"start": "node scripts/start.js",
"build": "node scripts/build.js",
"test": "node scripts/test.js"
}
}
You can open the `./scripts/start.js` file to see the code that's executed when you run `npm start`.
If you're curious about the webpack configuration, you can open and review the `./config/webpack.config.js`.
### Preparing to deploy a React application for production
Before you deploy your application to production, you'll want to make sure that you've replaced static values in your code with environment variables and considered what browsers you need to support.
### Defining environment variables
Create React App supports defining environment variables in an `.env` file. To define an environment variable, add an `.env` file to your project and define one or more variables that start with the prefix `REACT_APP_`:
REACT_APP_FOO: some value
REACT_APP_BAR: another value
Environment variables can be used in code like this:
console.log(process.env.REACT_APP_FOO);
You can also reference environment variables in your `index.html` like this:
<title>%REACT_APP_BAR%</title>
> _Important: Environment variables are embedded into your HTML, CSS, and JavaScript bundles during the build process. Because of this, it's_ very important _to not store any secrets, like API keys, in your environment variables as anyone can view your bundled code in the browser by inspecting your files._
### Configuring the supported browsers
In your project's `package.json` file, you can see the list of targeted browsers:
{
"browserslist": {
"production": [
">0.2%",
"not dead",
"not op_mini all"
],
"development": [
"last 1 chrome version",
"last 1 firefox version",
"last 1 safari version"
]
}
}
Adjusting these targets affect how your code will be transpiled. Specifying older browser versions will result in your code being transpiled to older versions of JavaScript in order to be compatible with the specified browser versions. The `production` list specifies the browsers to target when creating a production build and the `development` list specifics the browsers to target when running the application using `npm start`.
The <a href="https://browserl.ist/" class="markup--anchor markup--p-anchor">browserl.ist</a> website can be used to see the browsers supported by your configured `browserslist`.
### Creating a production build
To create a production build, run the command `npm run build`. The production build process bundles React in production mode and optimizes the build for the best performance. When the command completes, you'll find your production ready files in the `build` folder.
Now your application is ready to be deployed!
> _For more information about how to deploy a Create React App project into production, see_ <a href="https://facebook.github.io/create-react-app/docs/deployment" class="markup--anchor markup--blockquote-anchor">
<em>this page</em>
</a> _in the official documentation._
### What you learned
In this article, you learned how to:
- <span id="1ff3">Describe what front-end builds are and why they're needed;</span>
- <span id="1fc3">Describe at a high level what happens in a Create React App when you run `npm start`; and</span>
- <span id="6adc">Prepare to deploy a React application into a production environment.</span>
---
### React Router Documentation
Now that you've had an introduction to React Router, feel free to explore the official documentation to learn more! As you become a full-fledged software engineer, remember that documentation is your friend. You can take a brief overview for now, as the documentation might include a lot of information at first. The more you learn about React, the more you should revisit the official documentation and learn!
### Setting up React Router
- <span id="bfa4">
<a href="https://reacttraining.com/react-router/web/guides/quick-start" class="markup--anchor markup--li-anchor">React Router Quick Start</a>
</span>
- <span id="b0cb">
<a href="https://reacttraining.com/react-router/web/api/HashRouter" class="markup--anchor markup--li-anchor">HashRouter</a>
</span>
- <span id="f48b">
<a href="https://reacttraining.com/react-router/web/api/BrowserRouter" class="markup--anchor markup--li-anchor">BrowserRouter</a>
</span>
### Routes and Links
- <span id="72bd">
<a href="https://reacttraining.com/react-router/web/api/Route" class="markup--anchor markup--li-anchor">Route</a>
</span>
- <span id="e256">
<a href="https://reacttraining.com/react-router/web/api/Link" class="markup--anchor markup--li-anchor">Link</a>
</span>
- <span id="1d9d">
<a href="https://reacttraining.com/react-router/web/api/NavLink" class="markup--anchor markup--li-anchor">NavLink</a>
</span>
### Switch and Redirect
- <span id="5240">
<a href="https://reacttraining.com/react-router/web/api/Switch" class="markup--anchor markup--li-anchor">Switch</a>
</span>
- <span id="b405">
<a href="https://reacttraining.com/react-router/web/api/Redirect" class="markup--anchor markup--li-anchor">Redirect</a>
</span>
### React Router Params (ownProps)
- <span id="e0d6">
<a href="https://reacttraining.com/react-router/web/api/history" class="markup--anchor markup--li-anchor">props.history</a>
</span>
- <span id="5f4a">
<a href="https://reacttraining.com/react-router/web/api/location" class="markup--anchor markup--li-anchor">props.location</a>
</span>
- <span id="bd15">
<a href="https://reacttraining.com/react-router/web/api/match" class="markup--anchor markup--li-anchor">props.match</a>
</span>
---
### Rainbow Routes Project
Today you're going to get our first experience using React Router. The goal is to create a basic app that displays the colors of the rainbow. This rainbow, however, has something special about it — some of the colors are nested within others.
### Phase 0: Setup
Begin by creating a new React project:
npx create-react-app rainbow-routes --template @appacademy/simple
Now you'll remove all the contents of your `src` and all the contents from your `public` directory to build the application architecture from scratch! After you have deleted all your files within the directories, create a new `index.html` file in your `public` folder. Use the `html:5` emmet shortcut to generate an HTML template. Title your page "Rainbow Routes" and create a `div` with an `id` of `root` in your DOM's `<body>` element. Create an `index.css` file in your `src` directory with the following code. Now let's create your entry file!
h4 {
color: darkblue;
cursor: pointer;
}
h4:hover {
text-decoration: underline;
}
#rainbow {
position: absolute;
top: 0;
left: 300px;
}
h3 {
position: absolute;
top: 1px;
}
.red {
background-color: red;
width: 100px;
height: 100px;
}
.orange {
background-color: orange;
width: 100px;
height: 50px;
}
.yellow {
background-color: yellow;
width: 100px;
height: 50px;
}
.green {
background-color: green;
width: 100px;
height: 100px;
}
.blue {
background-color: blue;
width: 100px;
height: 100px;
}
.indigo {
background-color: mediumslateblue;
width: 100px;
height: 50px;
}
.violet {
background-color: darkviolet;
width: 100px;
height: 100px;
}
a {
display: block;
margin-bottom: 10px;
}
Create an `index.js` entry file in the `src` directory. At the top of the file, make sure to import `React` from the `react` package and `ReactDOM` from the `react-dom` package. Make sure to also import your the `index.css` file you just created! This will take care of styling your _rainbow routes_.
Now you can use the `ReactDOM.render()` method to render a `<Root />` component instead of the DOM element with an `id` of `root`. Lastly, wrap your render function with a `DOMContentLoaded` event listener, like so:
document.addEventListener('DOMContentLoaded', () => {
ReactDOM.render(
<Root />,
document.getElementById('root'),
);
});
Let's create your `Root` component right in your entry file! Your `Root` component will take care of applying your `BrowserRouter` to the application. Applying the `BrowserRouter` to your `Root` component allows all the child components rendering within `<BrowserRouter>` tags to use and access the `Route`, `Link`, and `NavLink` components within the `react-router-dom` package.
const Root = () => (
// TODO: Apply BrowserRouter
// TODO: Render rainbow
);
Install the `react-router-dom` package:
npm install react-router-dom@^5.0.0
Now import `BrowserRouter` from the `react-router-dom` package, like so:
import { BrowserRouter } from 'react-router-dom';
You're going to be rendering a lot of components, so let's keep your `src` directory organized by creating a `components` directory within. Within your new `./src/components` directory, create a `Rainbow.js` file for your `Rainbow` component with the following code:
// ./src/components/Rainbow.js
import React from 'react';
import { Route, Link, NavLink } from 'react-router-dom';
const Rainbow = () => (
<div>
<h1>Rainbow Router!</h1>
{/* Your links should go here */}
<div id="rainbow">
{/* Your routes should go here */}
</div>
</div>
);
export default Rainbow;
Your `Rainbow` component will act as the home page or default path (`/`) of your application. Import the `Rainbow` component into your entry file and have your `Root` component render `<Rainbow />` wrapped within `<BrowserRouter>` tags, like so:
const Root = () => (
<BrowserRouter>
<Rainbow />
</BrowserRouter>
);
Within your `Rainbow` component, you'll be rendering `<NavLink>` and `<Route>` components to add different navigation paths to different components. Let's create all the components you will render!
Create files for the following components in your `./src/components` directory:
- <span id="1c8e">`Red`</span>
- <span id="a8dd">`Blue`</span>
- <span id="6ca3">`Green`</span>
- <span id="8e44">`Indigo`</span>
- <span id="f8f2">`Orange`</span>
- <span id="0f47">`Violet`</span>
- <span id="8a89">`Yellow`</span>
Your `Red` and `Blue` components will look something like this:
import React from 'react';
import { Route, Link, NavLink } from 'react-router-dom';
const Color = () => (
<div>
<h2 className="color">Color</h2>
{/* Links here */}
{/* Routes here */}
</div>
);
export default Color;
Your `Green`, `Indigo`, `Orange`, `Violet`, and `Yellow` components will look something like this:
import React from 'react';
const Color = () => (
<div>
<h3 className="color">Color</h3>
</div>
);
export default Color;
Now start your server and verify you can see the "Rainbow Router!" header from your `Rainbow` component. Currently there is no functionality. Let's fix that!
### Phase 1: Routes
As a reminder, wrapping the `Rainbow` component in `<BrowserRouter>` tags makes the router available to all descendent React Router components. Now open the `Rainbow.js` file. You're going to render some of your color components from here. Ultimately you want your routes to look like this.
URLComponents`/Rainbow/redRainbow -> Red/red/orangeRainbow -> Red -> Orange/red/yellowRainbow -> Red -> Yellow/greenRainbow -> Green/blueRainbow -> Blue/blue/indigoRainbow -> Blue -> Indigo/violetRainbow -> Violet`
This means that the `Red`, `Green`, `Blue`, and `Violet` components need to render in the `Rainbow` component, but only when you are at the corresponding URL. You'll do this with `Route` components. Begin by importing the `Red`, `Green`, `Blue`, and `Violet` components into your `Rainbow.js` file. Then add the necessary `Route` components inside the `div` with `id="rainbow"` in the `Rainbow` component. For example to render the `Red` component with the `/red` path, you would use the following `Route` component:
<Route path="/red" component={Red} />
Test that your code works! Manually type in each URL you just created, and you should see the color component pop up. Remember, these are React Routes, so the paths you created will come after the `/`. For example, your default rainbow route will look like `http://localhost:3000/` while your red route will look like `http://localhost:3000/red`<a href="http://localhost:3000/red." class="markup--anchor markup--p-anchor">.</a>
You want to nest the `Orange` and `Yellow` components inside the `Red` component, and the `Indigo` component inside the `Blue` component. Remember to import your components to use them in a `Route` tag. You'll have to go add the corresponding `Route` tags to the `Red.js` and `Blue.js` files. Make sure to use the correct nested paths, such as `"/red/orange"` for the orange `Route`.
### Phase 2: Links
Manually navigating to our newly created routes is tiresome, so let's add functionality to take care of this process for us. React Router provides the `Link` and `NavLink` components for this purpose.
Add `Link`s to the paths `/red`, `/green`, `/blue`, and `/violet` in the `Rainbow` component. For example, your red link should look like
<Link to="/red">Red</NavLink>
When you are at `blue` you want to be able to get to `/blue/indigo`, and then back to `/blue`. Add the corresponding `Link`s to the `Blue` component like this:
<Link to='/blue' >Blue only</Link>
<Link to='/blue/indigo' >Add indigo</Link>
Similarly, add `Link`s to `/red`, `/red/orange` and `/red/yellow` to the `Red` component. Test all your links. Navigation is so much easier now!
### Phase 3: NavLinks
It would be nice if our links gave us some indication of which route you were at. Fortunately, React Router has a special component for that very purpose: `NavLink`. NavLinks get an extra CSS class when their `to` prop matches the current URL. By default this class is called `active`.
Go ahead and switch all your `Link`s to `NavLink`s. If you open the app you won't see any change yet. That's because you haven't added any special styling to the `active` class. Go ahead and open the `index.css` file. Create an `.active` class and add the line `font-weight: 700`. Now your active links will be bold. Isn't that nice!
The only problem is that now the `Blue only` link is active even when the path is `/blue/indigo`. That doesn't make a lot of sense. Let's add the `exact` flag to that link so it will only be active when its `to` exactly matches the current path. Now it should look like:
<NavLink exact to="/blue">
Blue only
</NavLink>
Do the same for the `Red only` link. Everything should be working now.
### Phase 4 — Changing NavLink's Active Class
You've already set up `NavLink` to bold the link text using the `.active` class in `src/index.css`. But what if you wanted this class to be something else? For instance, what if you want your main color links (Red, Green, Blue, Violet) to be styled differently when active than your sub-route links (Red Only, Add Orange, Add Yellow, etc.).
You can set the class that React Router sets to an active `NavLink` by adding the `activeClassName` prop.
For instance, when we are at a route matching the below `NavLink`'s `to` prop, the component will have a class of `.parent-active` applied:
<NavLink to="/blue" activeClassName="parent-active" >
Blue
</NavLink>
This allows much more flexibility to style an active `NavLink`!
Using the example above, add an `activeClassName` prop to each of your `NavLink`s in `src/components/Rainbow.js`. Now, add some CSS styling for that class in your `src/index.css` to distinguish your main and your sub-route links.
Compare your work to the solution and make sure the behavior is the same. Time to celebrate! ✨ 🌈 ✨
You can also learn more about using the React Router at <a href="https://reacttraining.com/react-router/web/guides/quick-start" class="markup--anchor markup--p-anchor">reacttraining.com</a>!
---
### Exploring React Builds Project
In this project, you'll use Create React App to create a simple React application. You'll experiment with some of the features that Create React App provides and deploy a production build of your application to a standalone Express application.
### Phase 0: Setup
Begin by using the <a href="https://github.com/facebook/create-react-app" class="markup--anchor markup--p-anchor">create-react-app</a> package to create a React application:
npx create-react-app exploring-react-builds --template @appacademy/simple
> _Remember that using the_ `create-react-app` _command initializes your project as a Git repository. If you use the_ `ls -a` _to view the hidden files in your project, you'll see the _`.git` _file._
Update the `App` component:
- <span id="9186">Wrap the `<h1>` element with a `<div>` element; and</span>
- <span id="5e97">Change the `<h1>` element content to something like "Exploring React Builds".</span>
<!-- -->
// ./src/App.js
import React from 'react';
function App() {
return (
<div>
<h1>Exploring React Builds</h1>
</div>
);
}
export default App;
### Phase 1: Using CSS modules
You've already seen an example of using the `import` keyword to import a stylesheet into a module so that it'll be included in your application build. That's the technique being used to include the global `index.css` stylesheet:
// ./src/index.js
import React from 'react';
import ReactDOM from 'react-dom';
import './index.css';
import App from './App';
ReactDOM.render(
<React.StrictMode>
<App />
</React.StrictMode>,
document.getElementById('root')
);
You can also leverage <a href="https://github.com/css-modules/css-modules" class="markup--anchor markup--p-anchor">CSS modules</a> in your Create React App projects. CSS Modules scope stylesheet class names so that they are unique to a specific React component. This allows you to create class names without having to worry if they might collide with class names used in another component.
Add a new `css-modules` folder to the `src` folder. Within that folder, add the following files:
- <span id="2912">`HeadingA.js`</span>
- <span id="3aa3">`HeadingA.module.css`</span>
- <span id="2ea3">`HeadingB.js`</span>
- <span id="ca2b">`HeadingB.module.css`</span>
Then update the contents of each file to the following:
// ./src/css-modules/HeadingA.js
import React from 'react';
import styles from './HeadingA.module.css';
function HeadingA() {
return (
<h1 className={styles.heading}>Heading A</h1>
);
}
export default HeadingA;
/* ./src/css-modules/HeadingA.module.css */
.heading {
color: green;
}
// ./src/css-modules/HeadingB.js
import React from 'react';
import styles from './HeadingB.module.css';
function HeadingB() {
return (
<h1 className={styles.heading}>Heading B</h1>
);
}
export default HeadingB;
/* ./src/css-modules/HeadingB.module.css */
.heading {
color: red;
}
Notice how the `.heading` CSS class name is being used within each component to set the color of the `<h1>` element. For the `HeadingA` component, the color is `green`, and for the `HeadingB` component, the color is `red`. Using the file naming convention `[name].module.css` let's Create React App know that we want these stylesheets to be processed as CSS Modules. Using CSS Modules allows the `.heading` class name to be reused across components without any issue.
To see this feature in action, update your `App` component to render both of your new components:
import React from 'react';
import HeadingA from './css-modules/HeadingA';
import HeadingB from './css-modules/HeadingB';
function App() {
return (
<div>
<h1>Exploring React Builds</h1>
<HeadingA />
<HeadingB />
</div>
);
}
export default App;
Then run your application (`npm start`) to see "Heading A" and "Heading B" displayed respectively in green and red. If you use the browser's developer tools to inspect "Heading A", you'll see that the `.heading` class name has been modified so that it's unique to the `HeadingA` component:
CSS Modules is an example of how a front-end build process can be used to modify code to enable a feature that's not natively supported by browsers.
### Phase 2: Using an image in a component
Create React App configures webpack with support for loading images (as well as CSS, fonts, and other file types). What this means, for you as the developer, is that you can add an image file to your project, import it directly into a module, and render it in a React component.
Download any image of off the Web or <a href="https://appacademy-open-assets.s3-us-west-1.amazonaws.com/Modular-Curriculum/content/react-redux/topics/react-builds/assets/react-builds-cat.png" class="markup--anchor markup--p-anchor">click here</a> to download the below image.
<figure>
<img src="https://cdn-images-1.medium.com/max/800/0*233dNJ6vfgAmEVCD" class="graf-image" />
</figure>Then within the `src` folder add a new folder named `image`. Within that folder add a new component file named `Image.js`. Also add your downloaded image file to the `image` folder (so it's a sibling to the `Image.js` file).
Update the contents of the `Image.js` file to this:
// ./src/image/Image.js
import React from 'react';
import cat from './react-builds-cat.png';
console.log(cat); // /static/media/react-builds-cat.45f7f4d2.png
function Image() {
// Import result is the URL of your image.
return <img src={cat} alt="images/images/Cat" />;
}
export default Image;
You can import an image into a component using the `import` keyword. This tells webpack to include the image in the build. Notice that when you import an image into a module, you'll get a path to the image's location within the build. You can use this path to set the `src` attribute on an `<img>` element.
> _Be sure to update the image_ `import` _statement to the correct file name if you're using your own image!_
Now update the `App` component to import and render the `Image` component:
// ./src/App.js
import React from 'react';
import HeadingA from './css-modules/HeadingA';
import HeadingB from './css-modules/HeadingB';
import Image from './image/Image';
function App() {
return (
<div>
<h1>Exploring React Builds</h1>
<HeadingA />
<HeadingB />
<Image />
</div>
);
}
export default App;
If you run your application (`npm start`) you'll see your image displayed on the page! You can also open your browser's developer tools and view the "Sources" for the current page. If you can expand the `localhost:3000` > `static` > `media` node on the left, you can see the image file that webpack copied to your build.
### Images in stylesheets
You can also reference images in your CSS files too. Add a CSS file named `Image.css` to the `./src/image` folder and update its contents to this:
/* ./src/image/Image.css */
.cat {
background-image: url(./react-builds-cat.png);
width: 400px;
height: 400px;
}
Then update the `Image` component to this:
// ./src/image/Image.js
import React from 'react';
import './Image.css';
import cat from './react-builds-cat.png';
console.log(cat); // /static/media/react-builds-cat.45f7f4d2.png
function Image() {
return (
<div>
{/* Import result is the URL of your image. */}
<img src={cat} alt="Cat" />
<div className='cat'>
</div>
</div>
);
}
export default Image;
Now you'll see the image displayed twice on the page!
### Phase 3: Updating the supported browsers (and its affect on code transpilation)
Earlier you learned about the `browerslist` setting in the `package.json` file and now adjusting these targets affect how your code will be transpiled:
{
"browserslist": {
"production": [
">0.2%",
"not dead",
"not op_mini all"
],
"development": [
"last 1 chrome version",
"last 1 firefox version",
"last 1 safari version"
]
}
}
The `production` list specifies the browsers to target when creating a production build and the `development` list specifics the browsers to target when running the application using `npm start`. Currently, you're targeting relatively recent versions of the major browsers when creating a development build. Targeting older browser versions results in your code being transpiled to an older version of JavaScript.
To experiment with this configuration option, let's add a class component to the project. Add a new folder named `class-component` to the `src` folder. Within that folder, add a file named `ClassComponent.js` containing the following code:
```js
//x
// ./src/class-component/ClassComponent.js
import React from 'react';
class ClassComponent extends React.Component {
render() {
return <h1>Class Component</h1>;
}
}
export default ClassComponent;
Don't forget to update your App component to render the new component:
Now run your application using npm start. Open your browser's developer tools and view the "Sources" for the current page. Expand the localhost:3000 > static > js node on the left and select the main.chunk.js file. Press CMD+F on macOS or CTRL+F on Windows to search the file for "Class Component". Here's what the transpiled code looks like for the ClassComponent class:
Have you wondered yet why you need to use the developer tools to view the bundles generated by Create React App? Remember that when you runnpm start, Create React App builds your application usingwebpack-dev-server. To keep things as performant as possible, the bundles generated bywebpack-dev-serverare stored in memory instead of writing them to the file system.
The JSX in the component's render method has been converted to JavaScript but the ClassComponent ES2015 class is left alone. This makes sense though as JSX isn't natively supported by any browser while ES2015 classes have been natively supported by browsers for awhile now.
But what if you need to target a version of a browser that doesn't support ES2015 classes? You can use the "Can I use…" website to see when browsers started supporting ES2105 (or ES6) classes. Starting with version 49, Chrome natively supported classes. But imagine that you need to support Chrome going back to version 30, a version of Chrome that doesn't support classes.
Change the browserslist.development property in the package.json file to this:
The query chrome >= 30 specifies that you want to target Chrome version 30 or newer.
Thebrowserl.istwebsite can be used to see the browsers supported by your configuredbrowserslist.
Stop your application if it's currently running. Delete the ./node_modules/.cache folder and run npm start again. Then view the main.chunk.js bundle again in the developer tools:
Now your ES2015 class component is being converted to a constructor function! Here's the transpiled code for reference:
Luckily it's very rare that you'll need to read the code in your generated bundles. webpack, by default, is configured to generate sourcemaps. Sourcemaps are a mapping of the code in a generated file, like a bundle file, to the original source code. This gives you access to your original source code in the browser's developer tools:
You can even set a breakpoint in your source within the developer tools to stop execution on a specific line of code!
Phase 4: Adding environment variables
Earlier you learned that Create React App supports defining environment variables in an .env file. This gives you a convenient way to avoid hard coding values that vary across environments.
Let's experiment with this feature so that you can see how the Create React App build process embeds environment variables into your HTML, CSS, and JavaScript bundles.
Add an .env file to the root of your Create React App project. Define an environment variable named REACT_APP_TITLE:
REACT_APP_TITLE=Exploring React Builds
Remember that environment variables need to be prefixed with REACT_APP_ for Create React App to process them. After defining your environment variable, you can refer to it within JSX using an expression and process.env:
Run your application again using npm start. Open your browser's developer tools and view the "Sources" for the current page. Expand the localhost:3000 node on the left and select (index). Notice that the text %REACT_APP_TITLE% within the <title> element has been converted to the text literal Exploring React Builds:
If you expand the localhost:3000 > static > js node on the left and select the main.chunk.js file, you can see how the App component's JSX has been converted to JavaScript:
Here's a closer look at the relevant React.createElement method call:
Again, notice how the environment variable has been replaced with a text literal. This has important security implications for you to consider. Because environment variables are embedded into your HTML, CSS, and JavaScript bundles during the build process, it's very important to not store any secrets, like API keys, in your environment variables. Remember, anyone can view your bundled code in the browser by inspecting your files!
Phase 5: Deploying a production build
In the last phase of this project, let's add routing to the React application, create a production build, and deploy the build to an Express application!
Adding routing
To add React Router to the application, start by installing the react-router-dom npm package:
Be sure to run and test your application to ensure that the defined routes work as expected:
/ - Should display the HeadingA and HeadingB components;
/image - Should display the Image component; and
/class-component - Should display the ClassComponent component.
Creating a production build
To create a production build, run the command npm run build from the root of your project. The output in the terminal should look something like this:
> [email protected] build [absolute path to your project]
> react-scripts build
Creating an optimized production build...
Compiled successfully.
File sizes after gzip:
47.83 KB build/static/js/2.722c16c4.chunk.js
773 B build/static/js/runtime-main.b7d1e5ee.js
745 B build/static/js/main.12299197.chunk.js
197 B build/static/css/main.e9a0d1f8.chunk.css
The project was built assuming it is hosted at /.
You can control this with the homepage field in your package.json.
The build folder is ready to be deployed.
You may serve it with a static server:
npm install -g serve
serve -s build
Find out more about deployment here:
bit.ly/CRA-deploy
Ignore the comments about using serve to deploy your application (i.e. npm install -g serve and serve -s build). In the next step, you'll create a simple Express application to server your React application.
Serving a React application using Express
Create a new folder for your Express application outside of the Create React App project folder.
For example, from the root of your project, usecd ..to go up a level and then create a new folder namedexpress-serverby running the commandmkdir express-server. This makes theexpress-serverfolder a sibling to your Create React App project folder.
Browse into the express-server folder and initialize it to use npm (i.e. npm init -y). Then install Express by running the command npm install express@^4.0.0.
App a file named app.js with the following contents:
Attempt to match incoming requests to static files located in the public folder; and
If a matching static file isn't found, then the ./public/index.html file will be served for all other requests.
Now add a folder named public to the root of your Express project. Copy the files from the build folder in your Create React App project to the public folder in the Express application project. Then run your application using the command node app.js.
Open a browser and browse to the URL http://localhost:9000/. You should see your React application served from your Express application! Be sure to click the navigation links to verify that all of your configured routes work as expected.
Also, because you configured Express to serve the ./public/index.html file for any request that doesn't match a static file, you can "deep link" to any of your React application's routes:
Of course, if you get a DOM node for the component via refs, you can do anything you want with the DOM nodes of other components, but it will likely mess up React.
docs
Wrapping/Mirroring
Wrapping/Mirroring a HTML Element
Usecase: you want to make a <Button> that takes all the normal props of <button> and does extra stuff.
// usagefunctionApp(){// Type '"foo"' is not assignable to type '"button" | "submit" | "reset" | undefined'.(2322)// return <Button type="foo"> sldkj </Button>// no errorreturn<Buttontype="button"> text </Button>;}// implementationexportinterfaceButtonPropsextendsReact.ComponentPropsWithoutRef<'button'>{specialProp?: string;}exportfunctionButton(props: ButtonProps){const{ specialProp, ...rest}=props;// do something with specialPropreturn<button{...rest}/>;}
Forwarding Refs: As the React docs themselves note, most usecases will not need to obtain a ref to the inner element. But for people making reusable component libraries, you will need to forwardRef the underlying element, and then you can use ComponentPropsWithRef to grab props for your wrapper component. Check our docs on forwarding Refs for more.
In future, the need to forwardRef may go away in React 17+, but for now we still have to deal with this. 🙃
Why not ComponentProps or IntrinsicElements or [Element]HTMLAttributes or HTMLProps or HTMLAttributes?
ComponentProps
You CAN use ComponentProps in place of ComponentPropsWithRef, but you may prefer to be explicit about whether or not the component's refs are forwarded, which is what we have chosen to demonstrate. The tradeoff is slightly more intimidating terminology.
Maybe JSX.IntrinsicElements or React.[Element]HTMLAttributes
There are at least 2 other equivalent ways to do this, but they are more verbose:
// Method 1: JSX.IntrinsicElementstypebtnType=JSX.IntrinsicElements["button"];// cannot inline or will errorexportinterfaceButtonPropsextendsbtnType{}// etc// Method 2: React.[Element]HTMLAttributesexportinterfaceButtonPropsextendsReact.ButtonHTMLAttributes<HTMLButtonElement>
Looking at the source for ComponentProps shows that this is a clever wrapper for JSX.IntrinsicElements, whereas the second method relies on specialized interfaces with unfamiliar naming/capitalization.
Note: There are over 50 of these specialized interfaces available - look for HTMLAttributes in our @types/react commentary.
Ultimately, we picked the ComponentProps method as it involves the least TS specific jargon and has the most ease of use. But you'll be fine with either of these methods if you prefer.
Definitely not React.HTMLProps or React.HTMLAttributes
This is what happens when you use React.HTMLProps:
exportinterfaceButtonPropsextendsReact.HTMLProps<HTMLButtonElement>{specialProp: string;}exportfunctionButton(props: ButtonProps){const{ specialProp, ...rest}=props;// ERROR: Type 'string' is not assignable to type '"button" | "submit" | "reset" | undefined'.return<button{...rest}/>;}
This is what happens when you use React.HTMLAttributes:
exportinterfaceButtonPropsextendsReact.HTMLAttributes<HTMLButtonElement>{/* etc */}// usagefunctionApp(){// Property 'type' does not exist on type 'IntrinsicAttributes & ButtonProps'return<Buttontype="submit"> text </Button>;}
Wrapping/Mirroring a Component
TODO: this section needs work to make it simplified.
Usecase: same as above, but for a React Component you don't have access to the underlying props
constBox=(props: React.CSSProperties)=><divstyle={props}/>;constCard=({ title, children, ...props}: {title: string}&$ElementProps<typeofBox>// new utility, see below)=>(<Box{...props}>{title}: {children}</Box>);
Strategy: extract a component's props by inferring them
🆕 You should also consider whether to explicitly forward refs:
// base button, with ref forwardingtypeProps={children: React.ReactNode;type: 'submit'|'button'};exporttypeRef=HTMLButtonElement;exportconstFancyButton=React.forwardRef<Ref,Props>((props,ref)=>(<buttonref={ref}className="MyCustomButtonClass"type={props.type}>{props.children}</button>));// second layer button, no need for forwardRef (TODO: doublecheck this)exportinterfaceDoubleWrappedPropsextendsReact.ComponentPropsWithRef<typeofFancyButton>{specialProp?: string;}exportfunctionDoubleWrappedButton(props: DoubleWrappedProps){const{ specialProp, ref, ...rest}=props;return<buttonref={ref}{...rest}/>;}// usagefunctionApp(){constbtnRef=React.useRef<HTMLButtonElement>(null!);return(<DoubleWrappedButtontype="button"ref={btnRef}>{' '}
text{' '}</DoubleWrappedButton>);}
Just as you can make generic functions and classes in TypeScript, you can also make generic components to take advantage of the type system for reusable type safety. Both Props and State can take advantage of the same generic types, although it probably makes more sense for Props than for State. You can then use the generic type to annotate types of any variables defined inside your function / class scope.
interfaceProps<T>{items: T[];renderItem: (item: T)=>React.ReactNode;}functionList<T>(props: Props<T>){const{ items, renderItem }=props;const[state,setState]=React.useState<T[]>([]);// You can use type T in List function scope.return(<div>{items.map(renderItem)}<buttononClick={()=>setState(items)}>Clone</button>{JSON.stringify(state,null,2)}</div>);}
You can then use the generic components and get nice type safety through type inference:
ReactDOM.render(<Listitems={['a','b']}// type of 'string' inferredrenderItem={(item)=>(<likey={item}>{/* Error: Property 'toPrecision' does not exist on type 'string'. */}{item.toPrecision(3)}</li>)}/>,document.body);
As of TS 2.9, you can also supply the type parameter in your JSX to opt out of type inference:
ReactDOM.render(<List<number>items={['a','b']}// Error: Type 'string' is not assignable to type 'number'.renderItem={(item)=><likey={item}>{item.toPrecision(3)}</li>}/>,document.body);
You can also use Generics using fat arrow function style:
interfaceProps<T>{items: T[];renderItem: (item: T)=>React.ReactNode;}// Note the <T extends unknown> before the function definition.// You can't use just `<T>` as it will confuse the TSX parser whether it's a JSX tag or a Generic Declaration.// You can also use <T,> https://github.com/microsoft/TypeScript/issues/15713#issuecomment-499474386constList=<Textendsunknown>(props: Props<T>)=>{const{ items, renderItem }=props;const[state,setState]=React.useState<T[]>([]);// You can use type T in List function scope.return(<div>{items.map(renderItem)}<buttononClick={()=>setState(items)}>Clone</button>{JSON.stringify(state,null,2)}</div>);};
interfaceProps<T>{items: T[];renderItem: (item: T)=>React.ReactNode;}interfaceState<T>{items: T[];}classList<T>extendsReact.PureComponent<Props<T>,State<T>>{// You can use type T inside List class.state: Readonly<State<T>>={items: []};render(){const{ items, renderItem }=this.props;// You can use type T inside List class.constclone: T[]=items.slice(0);return(<div>{items.map(renderItem)}<buttononClick={()=>this.setState({items: clone})}>Clone</button>{JSON.stringify(this.state,null,2)}</div>);}}
Though you can't use Generic Type Parameters for Static Members:
classList<T>extendsReact.PureComponent<Props<T>,State<T>>{// Static members cannot reference class type parameters.ts(2302)staticgetDerivedStateFromProps(props: Props<T>,state: State<T>){return{items: props.items};}}
To fix this you need to convert your static function to a type inferred function:
children is usually not defined as a part of the props type. Unless children are explicitly defined as a part of the props type, an attempt to use props.children in JSX or in the function body will fail:
interfaceWrapperProps<T>{item: T;renderItem: (item: T)=>React.ReactNode;}/* Property 'children' does not exist on type 'WrapperProps<T>'. */constWrapper=<Textends{}>(props: WrapperProps<T>)=>{return(<div>{props.renderItem(props.item)}{props.children}</div>);};/*Type '{ children: string; item: string; renderItem: (item: string) => string; }' is not assignable to type 'IntrinsicAttributes & WrapperProps<string>'. Property 'children' does not exist on type 'IntrinsicAttributes & WrapperProps<string>'.*/constwrapper=(<Wrapperitem="test"renderItem={(item)=>item}>{test}</Wrapper>);
To work around that, either add children to the WrapperProps definition (possibly narrowing down its type, as needed):
interfaceWrapperProps<T>{item: T;renderItem: (item: T)=>React.ReactNode;children: string;// The component will only accept a single string child}constWrapper=<Textends{}>(props: WrapperProps<T>)=>{return(<div>{props.renderItem(props.item)}{props.children}</div>);};
or wrap the type of the props in React.PropsWithChildren (this is what React.FC<> does):
Some API designs require some restriction on children passed to a parent component. It is common to want to enforce these in types, but you should be aware of limitations to this ability.
What You CAN Do
You can type the structure of your children: just one child, or a tuple of children.
Don't forget that you can also use `prop-types` if TS fails you.
Parent.propTypes={children: PropTypes.shape({props: PropTypes.shape({// could share `propTypes` to the childvalue: PropTypes.string.isRequired})}).isRequired};
What You CANNOT Do
The thing you cannot do is specify which components the children are, e.g. If you want to express the fact that "React Router <Routes> can only have <Route> as children, nothing else is allowed" in TypeScript.
This is because when you write a JSX expression (const foo = <MyComponent foo='foo' />), the resultant type is blackboxed into a generic JSX.Element type. (thanks @ferdaber)
Type Narrowing based on Props
What you want:
// UsagefunctionApp(){return(<>{/* 😎 All good */}<Buttontarget="_blank"href="https://www.google.com">
Test
</Button>{/* 😭 Error, `disabled` doesnt exist on anchor element */}<Buttondisabledhref="x">
Test
</Button></>);}
Components, and JSX in general, are analogous to functions. When a component can render differently based on their props, it's similar to how a function can be overloaded to have multiple call signatures. In the same way, you can overload a function component's call signature to list all of its different "versions".
A very common use case for this is to render something as either a button or an anchor, based on if it receives a href attribute.
typeButtonProps=JSX.IntrinsicElements['button'];typeAnchorProps=JSX.IntrinsicElements['a'];// optionally use a custom type guardfunctionisPropsForAnchorElement(props: ButtonProps|AnchorProps): props is AnchorProps{return'href'inprops;}functionClickable(props: ButtonProps|AnchorProps){if(isPropsForAnchorElement(props)){return<a{...props}/>;}else{return<button{...props}/>;}}
They don't even need to be completely different props, as long as they have at least one difference in properties:
Here is an example solution, see the further discussion for other solutions. thanks to @jpavon
interfaceLinkProps{}typeAnchorProps=React.AnchorHTMLAttributes<HTMLAnchorElement>;typeRouterLinkProps=Omit<NavLinkProps,'href'>;constLink=<Textends{}>(props: LinkProps&TextendsRouterLinkProps ? RouterLinkProps : AnchorProps)=>{if((propsasRouterLinkProps).to){return<NavLink{...(propsasRouterLinkProps)}/>;}else{return<a{...(propsasAnchorProps)}/>;}};<Link<RouterLinkProps>to="/">My link</Link>;// ok<Link<AnchorProps>href="/">My link</Link>;// ok<Link<RouterLinkProps>to="/"href="/">
My link
</Link>;// error
Approach: Composition
If you want to conditionally render a component, sometimes is better to use React's composition model to have simpler components and better to understand typings:
typeAnchorProps=React.AnchorHTMLAttributes<HTMLAnchorElement>;typeRouterLinkProps=Omit<AnchorProps,'href'>;interfaceButton{as: React.ComponentClass|'a';}constButton: React.FunctionComponent<Button>=(props)=>{const{as: Component, children, ...rest}=props;return(<ComponentclassName="button"{...rest}>{children}</Component>);};constAnchorButton: React.FunctionComponent<AnchorProps>=(props)=><Buttonas="a"{...props}/>;constLinkButton: React.FunctionComponent<RouterLinkProps>=(props)=><Buttonas={NavLink}{...props}/>;<LinkButtonto="/login">Login</LinkButton>;<AnchorButtonhref="/login">Login</AnchorButton>;<AnchorButtonhref="/login"to="/test">
Login
</AnchorButton>;// Error: Property 'to' does not exist on type...
Take care: TypeScript does not narrow the type of a Discriminated Union on the basis of typeof checks. The type guard has to be on the value of a key and not it's type.
The above example does not work as we are not checking the value of event.value but only it's type. Read more about it microsoft/TypeScript#30506 (comment)
Discriminated Unions in TypeScript can also work with hook dependencies in React. The type matched is automatically updated when the corresponding union member based on which a hook depends, changes. Expand more to see an example usecase.
typeSingleElement={isArray: true;value: string[];};typeMultiElement={isArray: false;value: string;};typeProps=SingleElement|MultiElement;functionSequence(p: Props){returnReact.useMemo(()=>(<div>
value(s):
{p.isArray&&p.value.join(',')}{!p.isArray&&p.value}</div>),[p.isArray,p.value]// TypeScript automatically matches the corresponding value type based on dependency change);}functionApp(){return(<div><SequenceisArray={false}value={'foo'}/><SequenceisArray={true}value={['foo','bar','baz']}/></div>);}
Say you want a Text component that gets truncated if truncate prop is passed but expands to show the full text when expanded prop is passed (e.g. when the user clicks the text).
You want to allow expanded to be passed only if truncate is also passed, because there is no use for expanded if the text is not truncated.
Usage example:
constApp: React.FC=()=>(<>{/* these all typecheck */}<Text>not truncated</Text><Texttruncate>truncated</Text><Texttruncateexpanded>
truncate-able but expanded
</Text>{/* TS error: Property 'truncate' is missing in type '{ children: string; expanded: true; }' but required in type '{ truncate: true; expanded?: boolean | undefined; }'. */}<Textexpanded>truncate-able but expanded</Text></>);
Sometimes when intersecting types, we want to define our own version of a prop. For example, I want my component to have a label, but the type I am intersecting with also has a label prop. Here's how to extract that out:
exportinterfaceProps{label: React.ReactNode;// this will conflict with the InputElement's label}// this comes inbuilt with TS 3.5typeOmit<T,KextendskeyofT>=Pick<T,Exclude<keyofT,K>>;// usageexportconstCheckbox=(props: Props&Omit<React.HTMLProps<HTMLInputElement>,'label'>)=>{const{ label }=props;return(<divclassName="Checkbox"><labelclassName="Checkbox-label"><inputtype="checkbox"{...props}/></label><span>{label}</span></div>);};
When your component defines multiple props, chances of those conflicts increase. However you can explicitly state that all your fields should be removed from the underlying component using the keyof operator:
exportinterfaceProps{label: React.ReactNode;// conflicts with the InputElement's labelonChange: (text: string)=>void;// conflicts with InputElement's onChange}exportconstTextbox=(props: Props&Omit<React.HTMLProps<HTMLInputElement>,keyofProps>)=>{// implement Textbox component ...};
As you can see from the Omit example above, you can write significant logic in your types as well. type-zoo is a nice toolkit of operators you may wish to check out (includes Omit), as well as utility-types (especially for those migrating from Flow).
Props: Extracting Prop Types of a Component
Sometimes you want the prop types of a component, but it isn't exported.
A simple solution is to use React.ComponentProps:
// a Modal component defined elsewhereconstdefaultProps: React.ComponentProps<typeofModal>={title: 'Hello World',visible: true,onClick: jest.fn()};
Advice: Where possible, you should try to use Hooks instead of Render Props. We include this merely for completeness.
Sometimes you will want to write a function that can take a React element or a string or something else as a prop. The best Type to use for such a situation is React.ReactNode which fits anywhere a normal, well, React Node would fit:
You can provide good information when bad things happen.
classInvalidDateFormatErrorextendsRangeError{}classDateIsInFutureErrorextendsRangeError{}/** * // optional docblock * @throws {InvalidDateFormatError} The user entered date incorrectly * @throws {DateIsInFutureError} The user entered date in future * */functionparse(date: string){if(!isValid(date))thrownewInvalidDateFormatError('not a valid date format');if(isInFuture(date))thrownewDateIsInFutureError('date is in the future');// ...}try{// call parse(date) somewhere}catch(e){if(einstanceofInvalidDateFormatError){console.error('invalid date format',e);}elseif(einstanceofDateIsInFutureError){console.warn('date is in future',e);}else{throwe;}}
Simply throwing an exception is fine, however it would be nice to make TypeScript remind the consumer of your code to handle your exception. We can do that just by returning instead of throwing:
functionparse(date: string): Date|InvalidDateFormatError|DateIsInFutureError{if(!isValid(date))returnnewInvalidDateFormatError('not a valid date format');if(isInFuture(date))returnnewDateIsInFutureError('date is in the future');// ...}// now consumer *has* to handle the errorsletresult=parse('mydate');if(resultinstanceofInvalidDateFormatError){console.error('invalid date format',result.message);}elseif(resultinstanceofDateIsInFutureError){console.warn('date is in future',result.message);}else{/// use result safely}// alternately you can just handle all errorsif(resultinstanceofError){console.error('error',result);}else{/// use result safely}
You can also describe exceptions with special-purpose data types (don't say monads...) like the Try, Option (or Maybe), and Either data types:
interfaceOption<T>{flatMap<U>(f: (value: T)=>None): None;flatMap<U>(f: (value: T)=>Option<U>): FormikOption<U>;getOrElse(value: T): T;}classSome<T>implementsOption<T>{constructor(privatevalue: T){}flatMap<U>(f: (value: T)=>None): None;flatMap<U>(f: (value: T)=>Some<U>): Some<U>;flatMap<U>(f: (value: T)=>Option<U>): Option<U>{returnf(this.value);}getOrElse(): T{returnthis.value;}}classNoneimplementsOption<never>{flatMap<U>(): None{returnthis;}getOrElse<U>(value: U): U{returnvalue;}}// now you can use it like:letresult=Option(6)// Some<number>.flatMap((n)=>Option(n*3))// Some<number>.flatMap((n=newNone()))// None.getOrElse(7);// or:letresult=ask()// Option<string>.flatMap(parse)// Option<Date>.flatMap((d)=>newSome(d.toISOString()))// Option<string>.getOrElse('error parsing string');
All of the code examples below will be included a second time at the bottom of this article as an embedded gist.
title
description
robots
extra
type
React Intro
Introduction to React for Complete Beginners All of the code examples below will be included a second time at the bottom of this article as an embedded gist, so that it is properly syntax highlighted. React uses a syntax extension of JavaScript called JSX that allows you to write HTML directly within JavaScript.
stackbit_page_meta
docs
Introduction to React for Complete Beginners
All of the code examples below will be included a second time at the bottom of this article as an embedded gist, so that it is properly syntax highlighted.
React uses a syntax extension of JavaScript called JSX that allows you to write HTML directly within JavaScript.
React
React uses a syntax extension of JavaScript called JSX that allows you to write HTML directly within JavaScript
because JSX is a syntactic extension of JavaScript, you can actually write JavaScript directly within JSX
include the code you want to be treated as JavaScript within curly braces: { 'this is treated as JavaScript code' }
JSX code must be compiled into JavaScript
under the hood the challenges are calling ReactDOM.render (JSX, document.getElementById('root'))
One important thing to know about nested JSX is that it must return a single element.
For instance, several JSX elements written as siblings with no parent wrapper element will not transpile.
From the React Docs:
What is React?
React is a declarative, efficient, and flexible JavaScript library for building user interfaces. It lets you compose complex UIs from small and isolated pieces of code called "components".
React has a few different kinds of components, but we'll start with React.Component subclasses:
class ShoppingList extends React.Component {
render() {
return (
<div className="shopping-list">
<h1>Shopping List for {this.props.name}</h1>
<ul>
<li>Instagram</li>
<li>WhatsApp</li>
<li>Oculus</li>
</ul>
</div>
);
}
}
// Example usage: <ShoppingList name="Mark" />
More About React
React.js is a JavaScript library that can be used to build user interfaces. With React, users can create reusable components, and these components display data as it changes over time. React Native also exists to help you create native mobile apps using React (the more common approach for users). In other words, React is a JavaScript tool that makes it easy to reason about, construct, and maintain stateless and stateful user interfaces. It provides the means to declaratively define and divide a UI into UI components (a.k.a., React components) using HTML-like nodes called React nodes. React nodes eventually get transformed into a format for UI rendering (e.g., HTML/DOM, canvas, svg, etc.).
I could ramble on trying to express in words what React is, but I think it best to just show you. What follows is a whirlwind tour of React and React components from thirty thousand feet. Don't try and figure out all the details yet as I describe React in this section. The entire book is meant to unwrap the details showcased in the following overview. Still asking, what is react? Just follow along grabbing a hold of the big concepts for now.
Using React to create UI components similar to a <select>
Below is an HTML <select> element that encapsulates child HTML <option> elements. Hopefully the creation and functionality of an HTML <select> is already familiar.
When a browser parses the above tree of elements it will produce a UI containing a textual list of items that can be selected. Click on the "Result" tab in the above JSFiddle, to see what the browser produces.
The browser, the DOM, and the shadow DOM are working together behind the scenes to turn the <select> HTML into a UI component. Note that the <select> component allows the user to make a selection thus storing the state of that selection (i.e., click on "Volvo", and you have selected it instead of "Mercedes").
Using React you can create a custom <select> by using React nodes to make a React component that eventually will result in HTML elements in an HTML DOM.
Let's create our own <select>-like UI component using React.
Defining a React component
Below I am creating a React component by invoking the React.createClass function in order to create a MySelect React component.
As you can see, the MySelect component is made up of some styles and an empty React <div> node element.
//constMySelect=React.createClass({//define MySelect componentrender: function(){constmySelectStyle={border: '1px solid #999',display: 'inline-block',padding: '5px'};// using {} to reference a JS variable inside of JSXreturn<divstyle={mySelectStyle}></div>;//react div element, via JSX}});
That <div> is an HTML-like tag, yes in JavaScript, called JSX. JSX is an optional custom JavaScript syntax used by React to express React nodes that can map to real HTML elements, custom elements, and text nodes. React nodes, defined using JSX should not be considered a one to one match to HTML elements. There are differences and some gotchas.
JSX syntax must be transformed from JSX to real JavaScript in order to be parsed by ES5 JS engines. The above code, if not transformed would of course cause a JavaScript error.
The official tool used to transform JSX to actual JavaScript code is called Babel.
After Babel (or something similar) transforms the JSX <div> in the above code into real JavaScript, it will look like this:
For now, just keep in mind that when you write HTML-like tags in React code, eventually it must be transformed into real JavaScript, along with any ES6 syntax.
The <MySelect> component at this point consist of an empty React <div> node element. That's a rather trivial component, so let's change it.
I'm going to define another component called <MyOption> and then use the <MyOption> component within the <MySelect> component (a.k.a., composition).
Examine the updated JavaScript code below which defines both the <MySelect> and <MyOption> React components.
//constMySelect=React.createClass({render: function(){constmySelectStyle={border: '1px solid #999',display: 'inline-block',padding: '5px'};return(//react div element, via JSX, containing <MyOption> component<divstyle={mySelectStyle}><MyOptionvalue="Volvo"></MyOption><MyOptionvalue="Saab"></MyOption><MyOptionvalue="Mercedes"></MyOption><MyOptionvalue="Audi"></MyOption></div>);}});constMyOption=React.createClass({//define MyOption componentrender: function(){return<div>{this.props.value}</div>;//react div element, via JSX}});
You should note how the <MyOption> component is used inside of the <MySelect> component and that both are created using JSX.
Passing Component Options Using React attributes/props
Notice that the <MyOption> component is made up of one <div> containing the expression {this.props.value}. The {} brackets indicate to JSX that a JavaScript expression is being used. In other words, inside of {} you can write JavaScript.
The {} brackets are used to gain access (i.e., this.props.value) to the properties or attributes passed by the <MyOption> component. In other words, when the <MyOption> component is rendered the value option, passed using an HTML-like attribute (i.e., value="Volvo"), will be placed into the <div>. These HTML looking attributes are considered React attributes/props. React uses them to pass stateless/immutable options into components. In this case we are simply passing the value prop to the <MyOption> component. Not unlike how an argument is passed to a JavaScript function. And in fact that is exactly what is going on behind the JSX.
Rendering a component to the Virtual DOM, then HTML DOM
At this point our JavaScript only defines two React Components. We have yet to actually render these components to the Virtual DOM and thus to the HTML DOM.
Before we do that I'd like to mention that up to this point all we have done is define two React components using JavaScript. In theory, the JavaScript we have so far is just the definition of a UI component. It doesn't strictly have to go into a DOM, or even a Virtual DOM. This same definition, in theory, could also be used to render this component to a native mobile platform or an HTML canvas. But we're not going to do that, even though we could. Just be aware that React is a pattern for organizing a UI that can transcend the DOM, front-end applications, and even the web platform.
Let's now render the <MySelect> component to the virtual DOM which in turn will render it to the actual DOM inside of an HTML page.
In the JavaScript below notice I added a call to the ReactDOM.render() function on the last line. Here I am passing the ReactDOM.render() function the component we want to render (i.e., <MySelect>) and a reference to the HTML element already in the HTML DOM (i.e., `
`) where I want to render my React `` component.
Click on the "Result" tab and you will see our custom React <MySelect> component rendered to the HTML DOM.
Note that all I did was tell React where to start rendering components and which component to start with. React will then render any children components (i.e., <MyOption>) contained within the starting component (i.e., <MySelect>).
Hold up, you might be thinking. We haven't actually created a <select> at all. All we have done is create a static/stateless list of text strings. We'll fix that next.
Before I move on I want to point out that no implicit DOM interactions were written to get the <MySelect> component into the real DOM. In other words, no jQuery code was invoked during the creation of this component. The dealings with the actual DOM have all been abstracted by the React virtual DOM. In fact, when using React what you are doing is describing a virtual DOM that React takes and uses to create a real DOM for you.
Using React state
In order for our <MySelect> component to mimic a native <select> element we are going to have to add state. After all what good is a custom <select> element if it can't keep the state of the selection.
State typically gets involved when a component contains snapshots of information. In regards to our custom <MyOption> component, its state is the currently selected text or the fact that no text is selected at all. Note that state will typically involve user events (i.e., mouse, keyboard, clipboard, etc.) or network events (i.e., AJAX) and its value is used to determine when the UI needs to be re-rendered (i.e., when value changes re-render).
State is typically found on the top most component which makes up a UI component. Using the React getInitialState() function we can set the default state of our component to false (i.e., nothing selected) by returning a state object when getInitialState is invoked (i.e., return {selected: false};). The getInitialStatelifecycle method gets invoked once before the component is mounted. The return value will be used as the initial value of this.state.
I've updated the code below accordingly to add state to the component. As I am making updates to the code, make sure you read the JavaScript comments which call attention to the changes in the code.
With the default state set, next we'll add a callback function called select that gets called when a user clicks on an option. Inside of this function we get the text of the option that was selected (via the event parameter) and use that to determine how to setState on the current component. Notice that I am using event details passed to the select callback. This pattern should look familiar if you've had any experience with jQuery.
In order for our <MyOption> components to gain access to the select function we'll have to pass a reference to it, via props, from the <MySelect> component to the <MyOption> component. To do this we add select={this.select} to the <MyOption> components.
With that in place we can add onClick={this.props.select} to the <MyOption> components. Hopefully it's obvious that all we have done is wired up a click event that will call the select function. React takes care of wiring up the real click handler in the real DOM for you.
//constMySelect=React.createClass({getInitialState: function(){return{selected: false};},select:function(event){if(event.target.textContent===this.state.selected){this.setState({selected: false});}else{this.setState({selected: event.target.textContent});}},render: function(){constmySelectStyle={border: '1px solid #999',display: 'inline-block',padding: '5px'};return(//pass reference, using props, to select callback to <MyOption><divstyle={mySelectStyle}><MyOptionselect={this.select}value="Volvo"></MyOption><MyOptionselect={this.select}value="Saab"></MyOption><MyOptionselect={this.select}value="Mercedes"></MyOption><MyOptionselect={this.select}value="Audi"></MyOption></div>);}});constMyOption=React.createClass({render: function(){//add event handler that will invoke select callbackreturn<divonClick={this.props.select}>{this.props.value}</div>;}});ReactDOM.render(<MySelect/>,document.getElementById('app'));
By doing all this we can now set the state by clicking on one of the options. In other words, when you click on an option the select function will now run and set the state of the MySelect component. However, the user of the component has no idea this is being done because all we have done is update our code so that state is managed by the component. At this point we have no feedback visually that anything is selected. Let's fix that.
The next thing we will need to do is pass the current state down to the <MyOption> component so that it can respond visually to the state of the component.
Using props, again, we will pass the selected state from the <MySelect> component down to the <MyOption> component by placing the property state={this.state.selected} on all of the <MyOption> components. Now that we know the state (i.e., this.props.state) and the current value (i.e., this.props.value) of the option we can verify if the state matches the value in a given <MyOption> component . If it does, we then know that this option should be selected. We do this by writing a simple if statement which adds a styled selected state (i.e., selectedStyle) to the JSX <div> if the state matches the value of the current option. Otherwise, we return a React element with unSelectedStyle styles.
Make sure you click on the "Result" tab above and use the custom React select component to verify the new functioning.
While our React UI select component is not as pretty or feature complete as you might hope, I think you can see still where all this is going. React is a tool that can help you reason about, construct, and maintain stateless and stateful UI components, in a structure tree (i.e., a tree of components).
Before moving on to the role of the virtual DOM I do want to stress that you don't have to use JSX and Babel. You can always bypass these tools and just write straight JavaScript. Below, I'm showing the final state of the code after the JSX has been transformed by Babel. If you choose not to use JSX, then you'll have to write the following code yourself instead of the code I've written throughout this section.
I'm going to end this whirlwind tour where most people typically start talking about React. I'll finish off this React overview by talking about the merits of the React virtual DOM.
Hopefully you notice the only interaction with the real DOM we had during the creation of our custom select UI is when we told the ReactDOM.render() function where to render our UI component in the HTML page (i.e., render it to `
`). This might just be the only interaction you ever have with the real DOM when building out a React application from a tree of React components. And herein lies much of the value of React. By using React, you really don't ever have to think about the DOM like you once did when you were writing jQuery code. React replaces jQuery, as a complete DOM abstraction, by removing most, if not all, implicit DOM interactions from your code. Of course, that's not the only benefit, or even the best benefit.
Because the DOM has been completely abstracted by the Virtual DOM this allows for a heavy handed performance pattern of updating the real DOM when state is changed. The Virtual DOM keeps track of UI changes based on state and props. It then compares that to the real DOM, and then makes only the minimal changes required to update the UI. In other words, the real DOM is only ever patched with the minimal changes needed when state or props change.
Seeing these performant updates in real time will often clarify any confusion about the performant DOM diffing. Look at the animated image below showcasing the usage (i.e., changing state) of the UI component we created in this chapter.
Notice that as the UI component changes state only the minimally needed changes to the real DOM are occurring. We know that React is doing it's job because the only parts of the real DOM that are actually being updated are the parts with a green outline/background. The entire UI component is not being updated on each state change, only the parts that require a change.
Let me be clear, this isn't a revolutionary concept. You could accomplish the same thing with some carefully crafted and performant minded jQuery code. However, by using React you'll rarely, if ever, have to think about it. The Virtual DOM is doing all the performance work for you. In a sense, this is the best type of jQuery/DOM abstraction possible. One where you don't even have to worry about, or code for, the DOM. It all just happens behinds the scene without you ever implicitly having to interact with the DOM itself.
Now, it might be tempting to leave this overview thinking the value of React is contained in the fact that it almost eliminates the need for something like jQuery. And while the Virtual DOM is certainly a relief when compared to implicit jQuery code, the value of React does not rest alone on the Virtual DOM. The Virtual DOM is just the icing on the cake. Simply stated, the value of React rests upon the fact it provides a simple and maintainable pattern for creating a tree of UI components. Imagine how simple programming a UI could be by defining the entire interface of your application using reusable React components alone.
We'll get to the funny XML-like tags soon. We use components to tell React what we want to see on the screen. When our data changes, React will efficiently update and re-render our components.
Here, ShoppingList is a React component class, or React component type. A component takes in parameters, called props (short for "properties"), and returns a hierarchy of views to display via the render method.
The render method returns a description of what you want to see on the screen. React takes the description and displays the result. In particular, render returns a React element, which is a lightweight description of what to render. Most React developers use a special syntax called "JSX" which makes these structures easier to write. The <div /> syntax is transformed at build time to React.createElement('div'). The example above is equivalent to:
return React.createElement('div', {className: 'shopping-list'},
React.createElement('h1', /* ... h1 children ... */),
React.createElement('ul', /* ... ul children ... */)
);
---
### Valid JSX:
<div>
<p>Paragraph One</p>
<p>Paragraph Two</p>
<p>Paragraph Three</p>
</div>
---
### Invalid JSX:
<p>Paragraph One</p>
<p>Paragraph Two</p>
<p>Paragraph Three</p>
#### To put comments inside JSX, you use the syntax {/\* \*/} to wrap around the comment text.
To put comments inside JSX, you use the syntax {/\* \*/} to wrap around the comment text.
The code editor has a JSX element similar to what you created in the last challenge. Add a comment somewhere within the provided div element, without modifying the existing h1 or p elements.
```js
//
const JSX = (
<div>
{/* This is a comment */}
<h1>This is a block of JSX</h1>
<p>Here's a subtitle</p>
</div>
);
With React, we can render this JSX directly to the HTML DOM using React's rendering API known as ReactDOM.
ReactDOM offers a simple method to render React elements to the DOM which looks like this:
ReactDOM.render(componentToRender, targetNode)
the first argument is the React element or component that you want to render,
and the second argument is the DOM node that you want to render the component to.
ReactDOM.render() must be called after the JSX element declarations, just like how you must declare variables before using them.
key difference in JSX is that you can no longer use the word class to define HTML classes.
— -> This is because class is a reserved word in JavaScript. Instead, JSX uses className
the naming convention for all HTML attributes and event references in JSX become camelCase
a click event in JSX is onClick, instead of onclick. Likewise, onchange becomes onChange. While this is a subtle difference, it is an important one to keep in mind moving forward.
Apply a class of myDiv to the div provided in the JSX code.
The constant JSX should return a div element.
The div should have a class of myDiv.
const JSX = (
<div>
<h1>Add a class to this div</h1>
</div>
);
Ans:
//constJSX=(<divclassName="myDiv"><h1>Add a class to this div</h1></div>);
### React: LearnAboutSelf-ClosingJSXTags-AnotherimportantwayinwhichJSXdiffersfromHTMLisintheideaoftheself-closingtag.>_InHTML,almostalltagshavebothanopeningandclosing tag:_`<div></div>;`_theclosingtagalwayshasaforwardslashbeforethetagnamethatyouareclosing._>_therearespecialinstancesinHTMLcalled"self-closing tags",ortagsthatdon't require both an opening and closing tag before another tag can start._
>_Forexampletheline-breaktagcanbewrittenas_`<br>`_oras_`<br />,`_butshouldneverbewrittenas_`<br></br>`_,sinceitdoesn't contain any content._
>_InJSX,therulesarealittledifferent.AnyJSXelementcanbewrittenwithaself-closingtag,andeveryelementmustbeclosed.>Theline-breaktag,forexample,mustalwaysbewrittenas_`<br />`_inordertobevalidJSXthatcanbetranspiled.>A_`<div>`_,ontheotherhand,canbewrittenas_`<div />`_or_`<div></div>`_.>Thedifferenceisthatinthefirstsyntaxversionthereisnowaytoincludeanythinginthe_`<div />`_._
### FixtheerrorsinthecodeeditorsothatitisvalidJSXandsuccessfullytranspiles.Makesureyoudon't change any of the content — you only need to close tags where they are needed.
```js// const JSX = ( <div> <h2>Welcome to React!</h2> <br > <p>Be sure to close all tags!</p> <hr > </div> );### Ans:```js//constJSX=(<div><h2>Welcome to React!</h2><br/><p>Be sure to close all tags!</p><hr/></div>);
React: Create a Stateless Functional Component
There are two ways to create a React component. The first way is to use a JavaScript function.
Defining a component in this way creates a stateless functional component.
think of a stateless component as one that can receive data and render it, but does not manage or track changes to that data.
To create a component with a function, you simply write a JavaScript function that returns either JSX or null
React requires your function name to begin with a capital letter.
Here's an example of a stateless functional component that assigns an HTML class in JSX:
// After being transpiled, the <div> will have a CSS class of 'customClass'
const DemoComponent = function() {
return (
<div className='customClass' />
);
};
Because a JSX component represents HTML, you could put several components together to create a more complex HTML page.
The code editor has a function called MyComponent. Complete this function so it returns a single div element which contains some string of text.
Note: The text is considered a child of the div element, so you will not be able to use a self-closing tag.
const MyComponent = function() {
// Change code below this line
// Change code above this line
}
ANS:
const MyComponent = function() {
// Change code below this line
return (
<div> Some Text </div >
);
// Change code above this line
};
React: Create a React Component
The other way to define a React component is with the ES6 class syntax. In the following example, Kitten extends React.Component:
This creates an ES6 class Kitten which extends the React.Component class.
So the Kitten class now has access to many useful React features, such as local state and lifecycle hooks.
Also notice the Kitten class has a constructor defined within it that calls super()
It uses super() to call the constructor of the parent class, in this case React.Component
The constructor is a special method used during the initialization of objects that are created with the class keyword. It is best practice to call a component's constructor with super, and pass props to both.
This makes sure the component is initialized properly. For now, know that it is standard for this code to be included.
MyComponent is defined in the code editor using class syntax. Finish writing the render method so it returns a div element that contains an h1 with the text Hello React!.
class MyComponent extends React.Component {
constructor(props) {
super(props);
}
render() {
// Change code below this line
// Change code above this line
}
};
ANS:
class MyComponent extends React.Component {
constructor(props) {
super(props);
}
render() {
// Change code below this line
return (
<div>
<h1>Hello React!</h1>
</div>
);
// Change code above this line
}
};
See More
React: Create a Component with Composition
Imagine you are building an App and have created three components, a Navbar, Dashboard, and Footer.
To compose these components together, you could create an App parent component which renders each of these three components as children. To render a component as a child in a React component, you include the component name written as a custom HTML tag in the JSX.
For example, in the render method you could write:
When React encounters a custom HTML tag that references another component (a component name wrapped in < /> like in this example), it renders the markup for that component in the location of the tag. This should illustrate the parent/child relationship between the App component and the Navbar, Dashboard, and Footer.
Challenge:
In the code editor, there is a simple functional component called ChildComponent and a class component called ParentComponent. Compose the two together by rendering the ChildComponent within the ParentComponent. Make sure to close the ChildComponent tag with a forward slash.
Note:ChildComponent is defined with an ES6 arrow function because this is a very common practice when using React.
However, know that this is just a function.
const ChildComponent = () => {
return (
<div>
<p>I am the child</p>
</div>
);
};
class ParentComponent extends React.Component {
constructor(props) {
super(props);
}
render() {
return (
<div>
<h1>I am the parent</h1>
{ /* Change code below this line */ }
{ /* Change code above this line */ }
</div>
);
}
};
⌛The React component should return a single div element.
⌛The component should return two nested elements.
⌛The component should return the ChildComponent as its second child.
Ans:
Answers
const ChildComponent = () => {
return (
<div>
<p>I am the child</p>
</div>
);
};
class ParentComponent extends React.Component {
constructor(props) {
super(props);
}
render() {
return (
<div>
<h1>I am the parent</h1>
{ /* Change code below this line */ }
{ /* Change code above this line */ }
</div>
);
}
};
</details>
### More Examples:
<a href="https://github.com/bgoonz" class="markup--anchor markup--mixtapeEmbed-anchor" title="https://github.com/bgoonz">
<strong>bgoonz - Overview</strong>
<br />
<em>Web Developer, Electrical Engineer https://bryanguner.medium.com/ https://portfolio42.netlify.app/…</em>github.com</a>
<a href="https://github.com/bgoonz" class="js-mixtapeImage mixtapeImage u-ignoreBlock">
</a>
_More content at_ <a href="http://plainenglish.io/" class="markup--anchor markup--p-anchor">
<em>plainenglish.io</em>
</a>
By <a href="https://medium.com/@bryanguner" class="p-author h-card">Bryan Guner</a> on [May 19, 2021](https://medium.com/p/8021738aa1ad).
<a href="https://medium.com/@bryanguner/introduction-to-react-for-complete-beginners-8021738aa1ad" class="p-canonical">Canonical link</a>
May 23, 2021.
# Snippets:
<p>Renders an accordion menu with multiple collapsible content elements.</p>
<ul>
<li>Define an <code>AccordionItem</code> component, that renders a <code><button></code> which is used to update the component and notify its parent via the <code>handleClick</code> callback.</li>
<li>Use the <code>isCollapsed</code> prop in <code>AccordionItem</code> to determine its appearance and set an appropriate <code>className</code>.</li>
<li>Define an <code>Accordion</code> component that uses the <code>useState()</code> hook to initialize the value of the <code>bindIndex</code> state variable to <code>defaultIndex</code>.</li>
<li>Filter <code>children</code> to remove unnecessary nodes except for <code>AccordionItem</code> by identifying the function's name.</li>
<li>Use <code>Array.prototype.map()</code> on the collected nodes to render the individual collapsible elements.</li>
<li>Define <code>changeItem</code>, which will be executed when clicking an <code>AccordionItem</code>'s <code><button></code>.</li>
<li>
<code>changeItem</code> executes the passed callback, <code>onItemClick</code>, and updates <code>bindIndex</code> based on the clicked element.</li>
</ul>
<div class="sourceCode" id="cb1">
<pre class="sourceCode css">
<code class="sourceCode css">
<a class="sourceLine" id="cb1-1" title="1">
<span class="fu">.accordion-item.collapsed</span> {</a>
<a class="sourceLine" id="cb1-2" title="2"> <span class="kw">display</span>: <span class="dv">none</span>
<span class="op">;</span>
</a>
<a class="sourceLine" id="cb1-3" title="3">}</a>
<a class="sourceLine" id="cb1-4" title="4">
</a>
<a class="sourceLine" id="cb1-5" title="5">
<span class="fu">.accordion-item.expanded</span> {</a>
<a class="sourceLine" id="cb1-6" title="6"> <span class="kw">display</span>: <span class="dv">block</span>
<span class="op">;</span>
</a>
<a class="sourceLine" id="cb1-7" title="7">}</a>
<a class="sourceLine" id="cb1-8" title="8">
</a>
<a class="sourceLine" id="cb1-9" title="9">
<span class="fu">.accordion-button</span> {</a>
<a class="sourceLine" id="cb1-10" title="10"> <span class="kw">display</span>: <span class="dv">block</span>
<span class="op">;</span>
</a>
<a class="sourceLine" id="cb1-11" title="11"> <span class="kw">width</span>: <span class="dv">100</span>
<span class="dt">%</span>
<span class="op">;</span>
</a>
<a class="sourceLine" id="cb1-12" title="12">}</a>
</div>
```js
//
const AccordionItem = ({ label, isCollapsed, handleClick, children }) => {
return (
<>
<button className="accordion-button" onClick={handleClick}>
{label}
</button>
<div
className={`accordion-item ${isCollapsed ? "collapsed" : "expanded"}`}
aria-expanded={isCollapsed}
>
{children}
</div>
</>
);
};
const Accordion = ({ defaultIndex, onItemClick, children }) => {
const [bindIndex, setBindIndex] = React.useState(defaultIndex);
const changeItem = (itemIndex) => {
if (typeof onItemClick === "function") onItemClick(itemIndex);
if (itemIndex !== bindIndex) setBindIndex(itemIndex);
};
const items = children.filter((item) => item.type.name === "AccordionItem");
return (
<>
{items.map(({ props }) => (
<AccordionItem
isCollapsed={bindIndex !== props.index}
label={props.label}
handleClick={() => changeItem(props.index)}
children={props.children}
/>
))}
</>
);
};
<hr />
```js
//
ReactDOM.render(
<Accordion defaultIndex="1" onItemClick={console.log}>
<AccordionItem label="A" index="1">
Lorem ipsum
</AccordionItem>
<AccordionItem label="B" index="2">
Dolor sit amet
</AccordionItem>
</Accordion>,
document.getElementById("root")
);
Renders an alert component with type prop.
Use the useState() hook to create the isShown and isLeaving state variables and set both to false initially.
Define timeoutId to keep the timer instance for clearing on component unmount.
Use the useEffect() hook to update the value of isShown to true and clear the interval by using timeoutId when the component is unmounted.
Define a closeAlert function to set the component as removed from the DOM by displaying a fading out animation and set isShown to false via setTimeout().
Renders a countdown timer that prints a message when it reaches zero.
Use the useState() hook to create a state variable to hold the time value, initialize it from the props and destructure it into its components.
Use the useState() hook to create the paused and over state variables, used to prevent the timer from ticking if it's paused or the time has run out.
Create a method tick, that updates the time values based on the current value (i.e. decreasing the time by one second).
Create a method reset, that resets all state variables to their initial states.
Use the the useEffect() hook to call the tick method every second via the use of setInterval() and use clearInterval() to clean up when the component is unmounted.
Use String.prototype.padStart() to pad each part of the time array to two characters to create the visual representation of the timer.
Renders a table with rows dynamically created from an array of primitives.
Render a <table> element with two columns (ID and Value).
Use Array.prototype.map() to render every item in data as a <tr> element with an appropriate key.
//constDataTable=({ data })=>{return(<table><thead><tr><th>ID</th><th>Value</th></tr></thead><tbody>{data.map((val,i)=>(<trkey={`${i}_${val}`}><td>{i}</td><td>{val}</td></tr>))}</tbody></table>);};
Renders a file drag and drop component for a single file.
Create a ref, called dropRef and bind it to the component's wrapper.
Use the useState() hook to create the drag and filename variables, initialized to false and '' respectively.
The variables dragCounter and drag are used to determine if a file is being dragged, while filename is used to store the dropped file's name.
Create the handleDrag, handleDragIn, handleDragOut and handleDrop methods to handle drag and drop functionality.
handleDrag prevents the browser from opening the dragged file, handleDragIn and handleDragOut handle the dragged file entering and exiting the component, while handleDrop handles the file being dropped and passes it to onDrop.
Use the useEffect() hook to handle each of the drag and drop events using the previously created methods.
Use the useState() hook to create a state variable, containing content and wordCount, using the value prop and 0 as the initial values respectively.
Use the useCallback() hooks to create a memoized function, setFormattedContent, that uses String.prototype.split() to turn the input into an array of words.
Check if the result of applying Array.prototype.filter() combined with Boolean has a length longer than limit and, if so, trim the input, otherwise return the raw input, updating state accordingly in both cases.
Use the useEffect() hook to call the setFormattedContent method on the value of the content state variable during the initial render.
Bind the onChange event of the <textarea> to call setFormattedContent with the value of event.target.value.
Renders a table with rows dynamically created from an array of objects and a list of property names.
Use Object.keys(), Array.prototype.filter(), Array.prototype.includes() and Array.prototype.reduce() to produce a filteredData array, containing all objects with the keys specified in propertyNames.
Render a <table> element with a set of columns equal to the amount of values in propertyNames.
Use Array.prototype.map() to render each value in the propertyNames array as a <th> element.
Use Array.prototype.map() to render each object in the filteredData array as a <tr> element, containing a <td> for each key in the object.
This component does not work with nested objects and will break if there are nested objects inside any of the properties specified in propertyNames
Renders a checkbox list that uses a callback function to pass its selected value/values to the parent component.
Use the useState() hook to create the data state variable and use the options prop to initialize its value.
Create a toggle function that uses the spread operator (...) and Array.prototype.splice() to update the data state variable and call the onChange callback with any checked options.
Use Array.prototype.map() to map the data state variable to individual <input type="checkbox"> elements, each one wrapped in a <label>, binding the onClick handler to the toggle function.
Renders a button that animates a ripple effect when clicked.
Use the useState() hook to create the coords and isRippling state variables for the pointer's coordinates and the animation state of the button respectively.
Use a useEffect() hook to change the value of isRippling every time the coords state variable changes, starting the animation.
Use setTimeout() in the previous hook to clear the animation after it's done playing.
Use a useEffect() hook to reset coords whenever the isRippling state variable is false.
Handle the onClick event by updating the coords state variable and calling the passed callback.
Renders an uncontrolled range input element that uses a callback function to pass its value to the parent component.
Set the type of the <input> element to "range" to create a slider.
Use the defaultValue passed down from the parent as the uncontrolled input field's initial value.
Use the onChange event to fire the onValueChange callback and send the new value to the parent.
//constSlider=({
min =0,
max =100,
defaultValue,
onValueChange,
...rest})=>{return(<inputtype="range"min={min}max={max}defaultValue={defaultValue}onChange={({target: { value }})=>onValueChange(value)}{...rest}/>);};
Define a component, called Star that will render each individual star with the appropriate appearance, based on the parent component's state.
In the StarRating component, use the useState() hook to define the rating and selection state variables with the appropriate initial values.
Create a method, hoverOver, that updates selected according to the provided event, using the .data-star-id attribute of the event's target or resets it to 0 if called with a null argument.
Use Array.from() to create an array of 5 elements and Array.prototype.map() to create individual <Star> components.
Handle the onMouseOver and onMouseLeave events of the wrapping element using hoverOver and the onClick event using setRating.
Define a Tabs component that uses the useState() hook to initialize the value of the bindIndex state variable to defaultIndex.
Define a TabItem component and filter children passed to the Tabs component to remove unnecessary nodes except for TabItem by identifying the function's name.
Define changeTab, which will be executed when clicking a <button> from the menu.
changeTab executes the passed callback, onTabClick, and updates bindIndex based on the clicked element.
Use Array.prototype.map() on the collected nodes to render the menu and view of the tabs, using the value of binIndex to determine the active tab and apply the correct className.
Define a TagInput component and use the useState() hook to initialize an array from tags.
Use Array.prototype.map() on the collected nodes to render the list of tags.
Define the addTagData method, which will be executed when pressing the Enter key.
The addTagData method calls setTagData to add the new tag using the spread (...) operator to prepend the existing tags and add the new tag at the end of the tagData array.
Define the removeTagData method, which will be executed on clicking the delete icon in the tag.
Use Array.prototype.filter() in the removeTagData method to remove the tag using its index to filter it out from the tagData array.


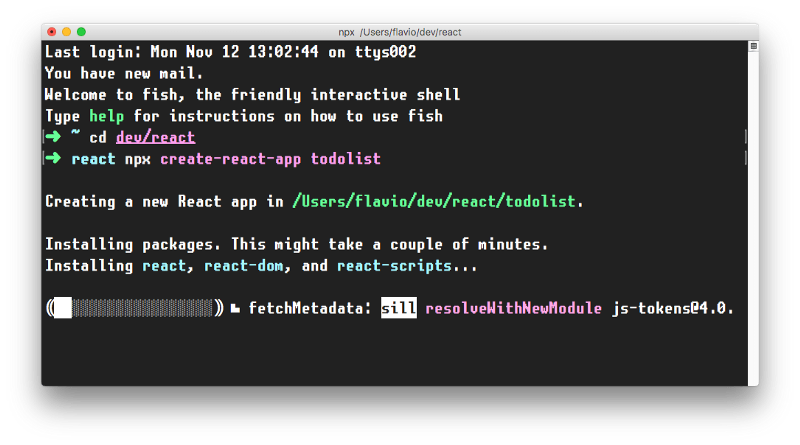
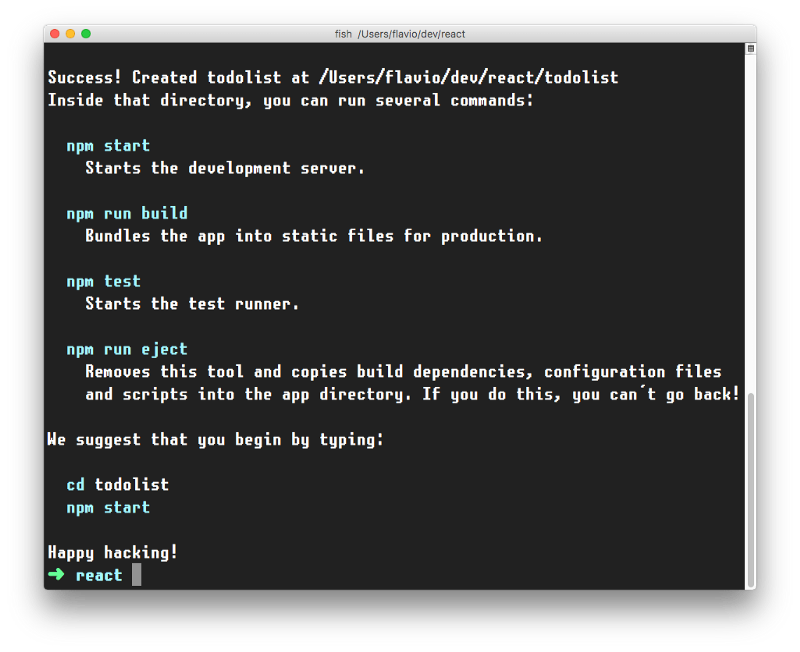

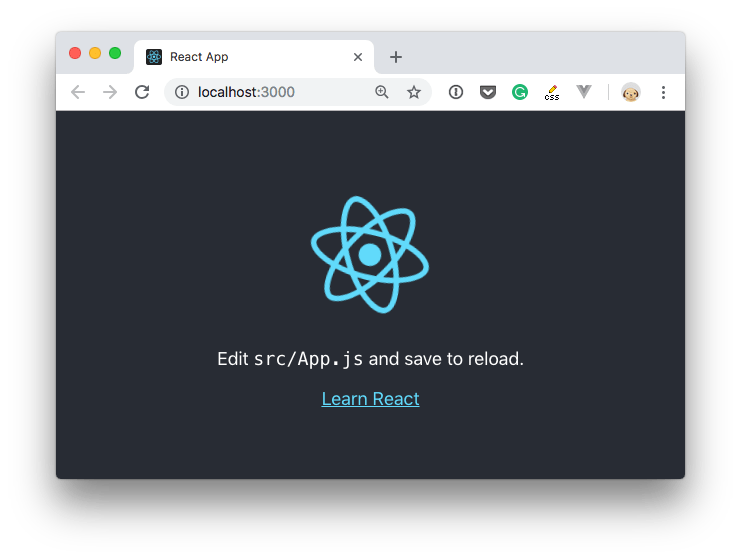
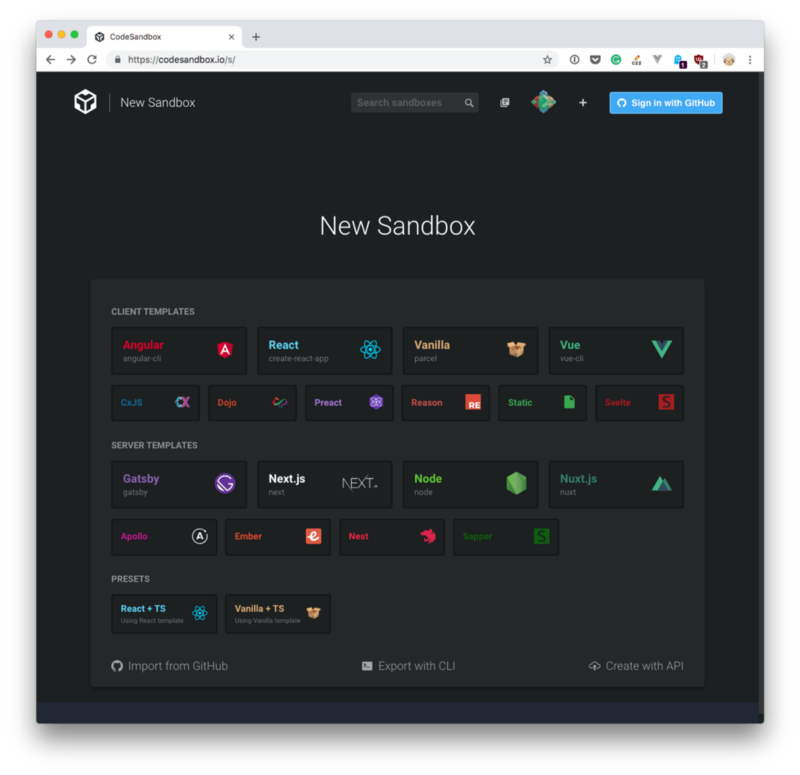
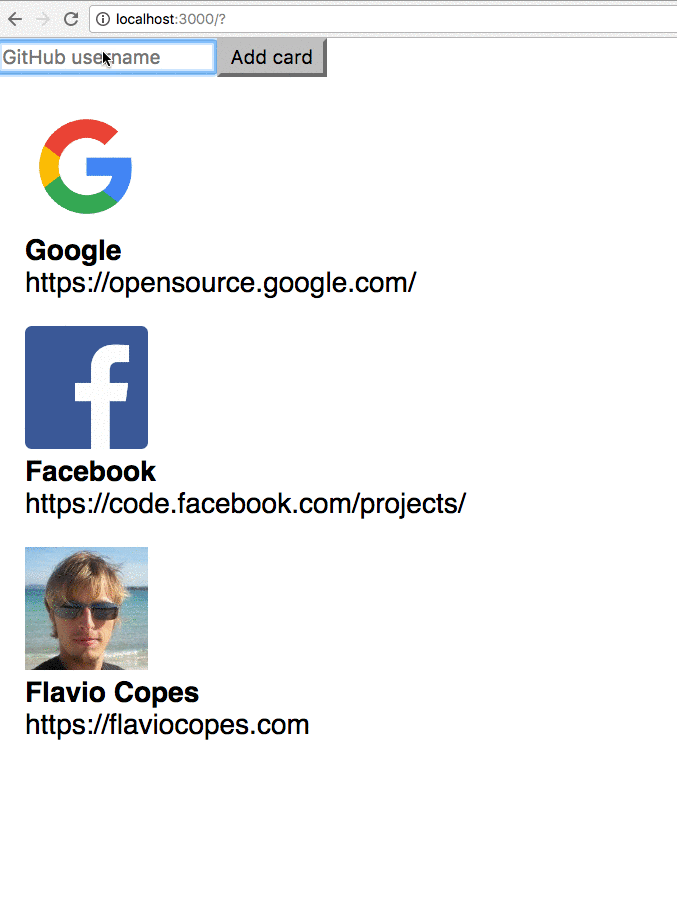
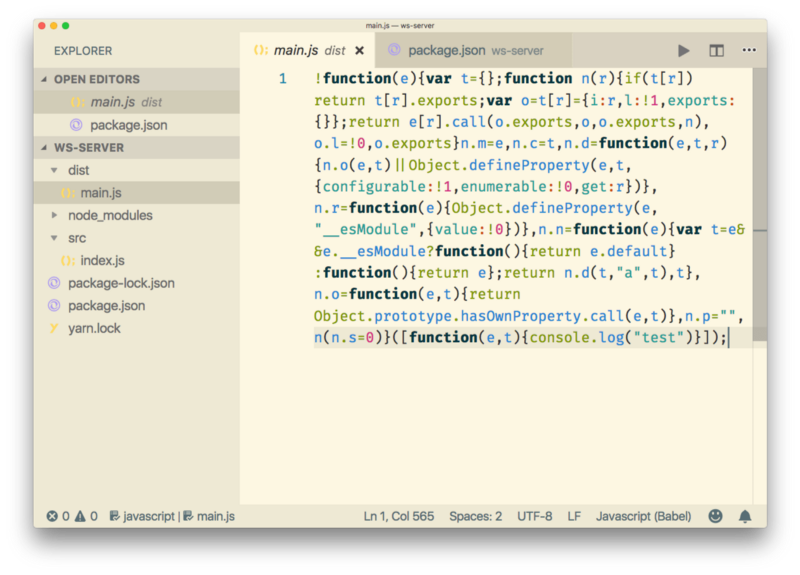
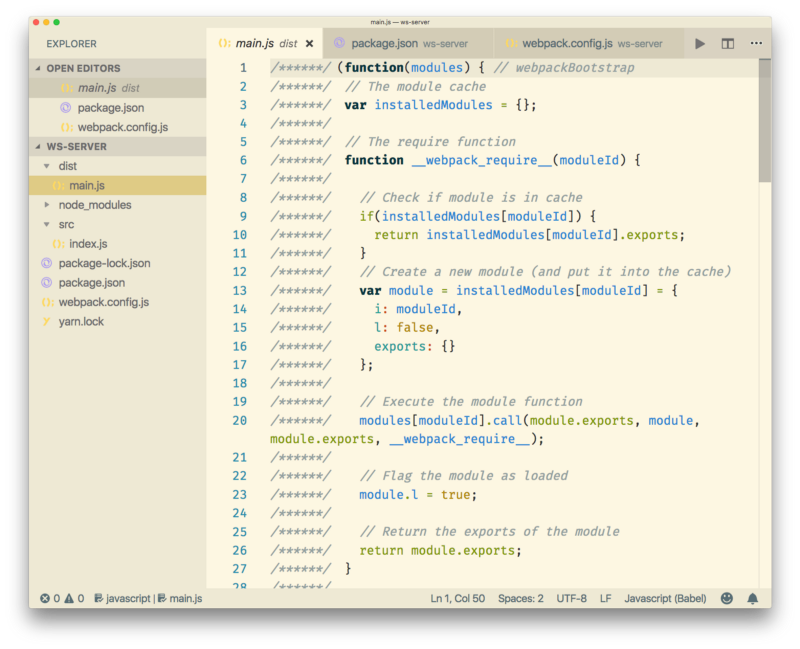
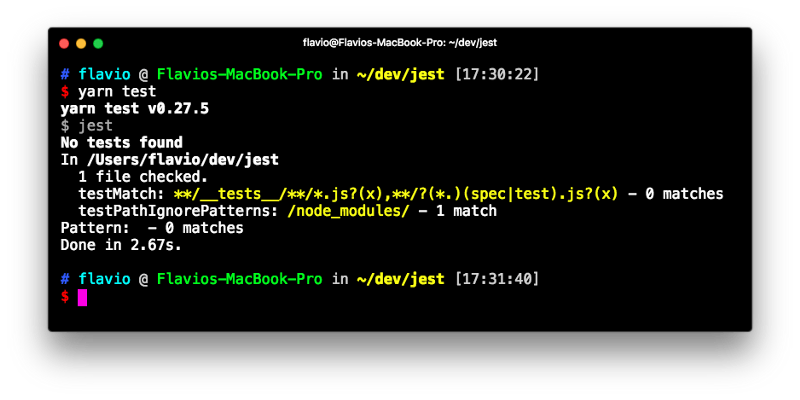
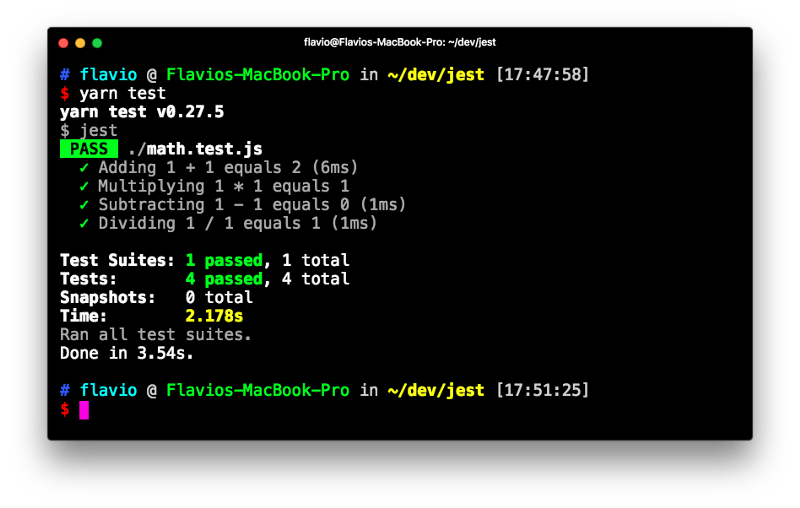
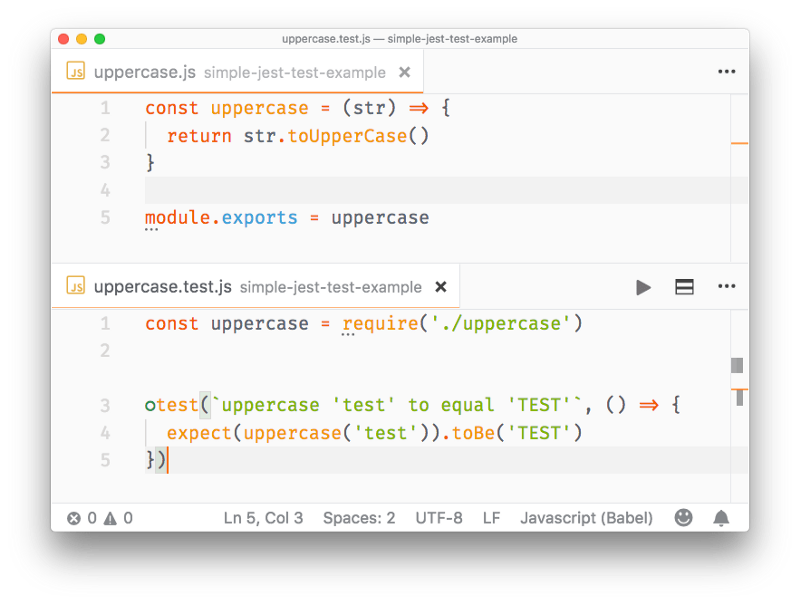
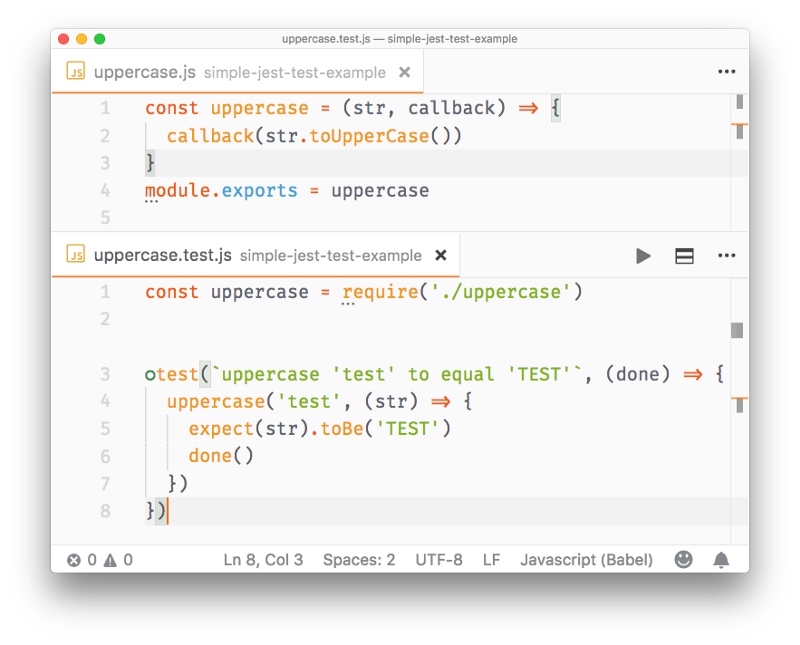
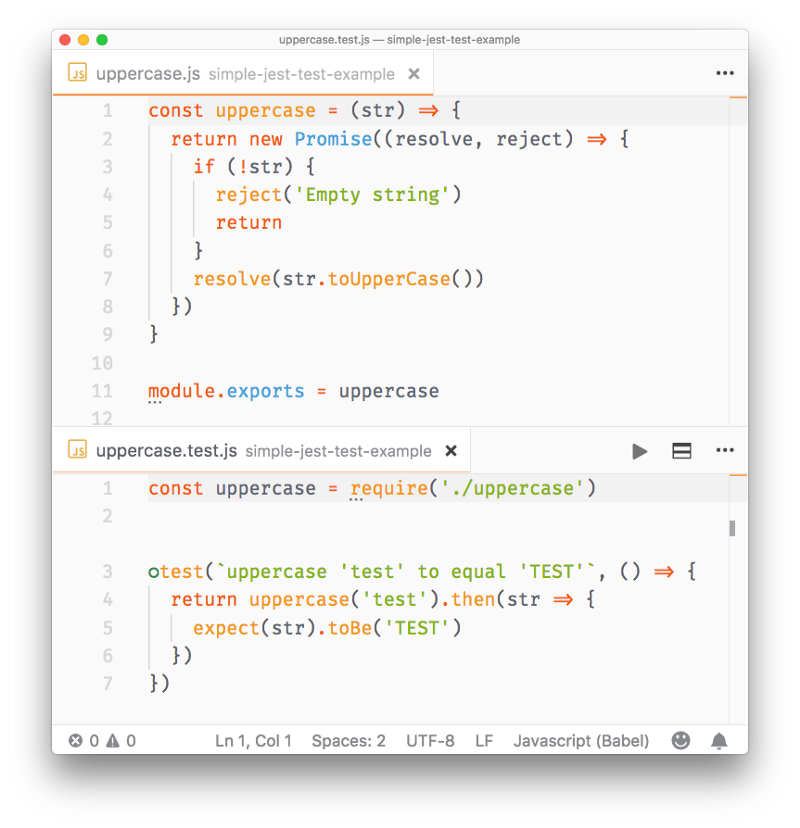
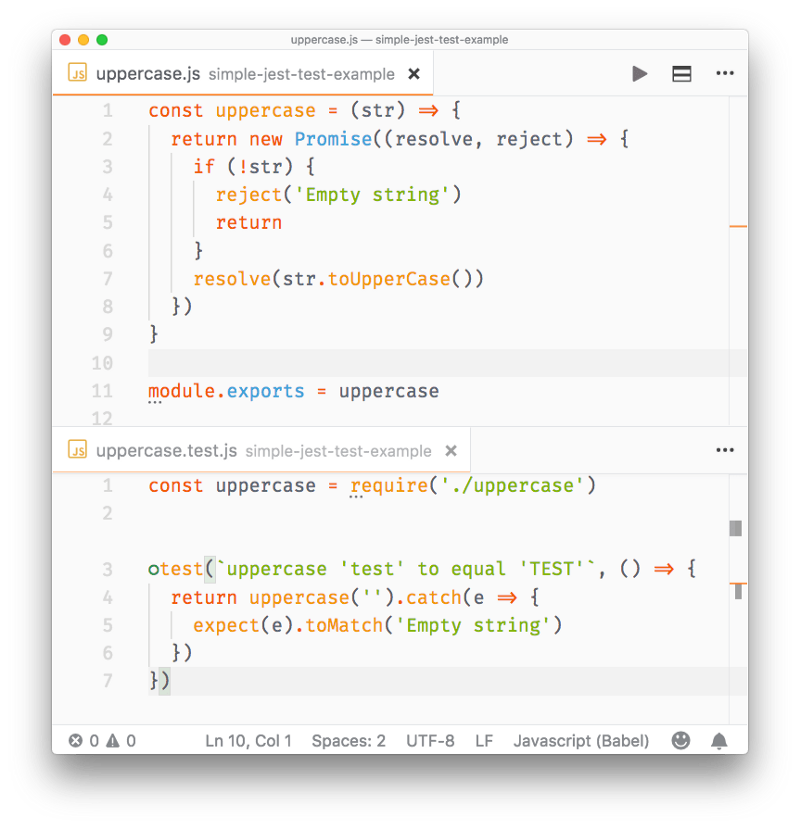
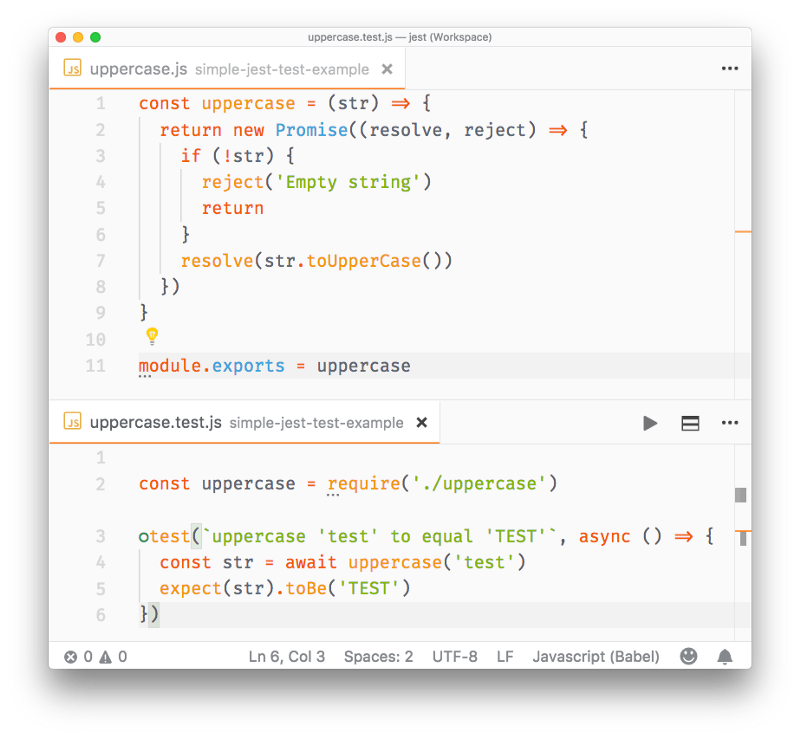
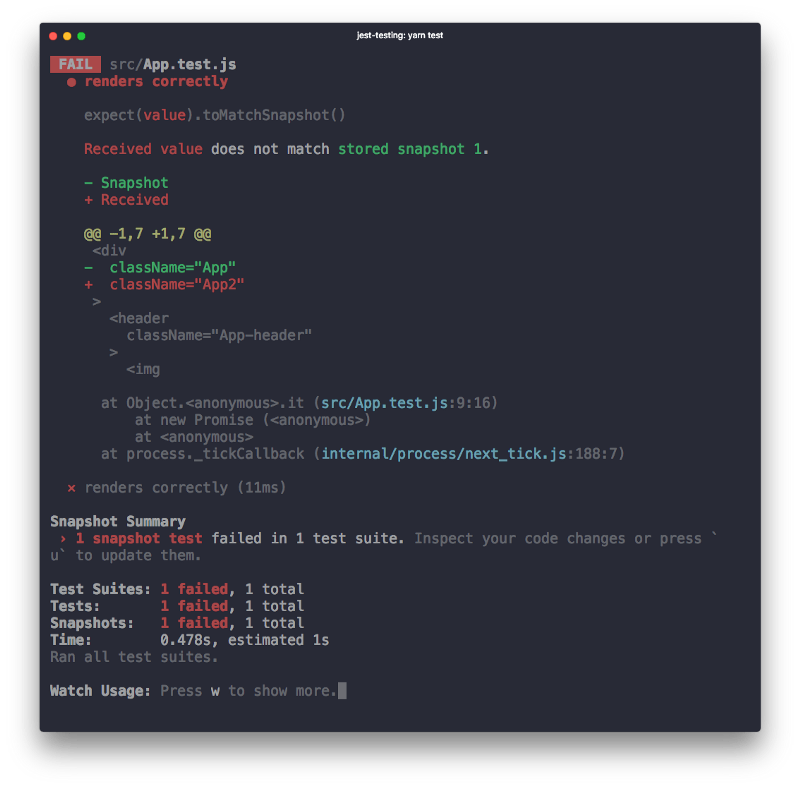
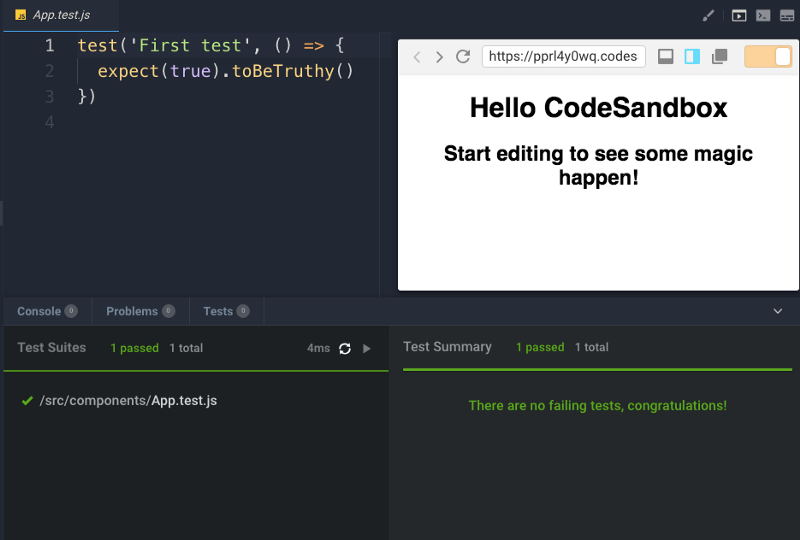
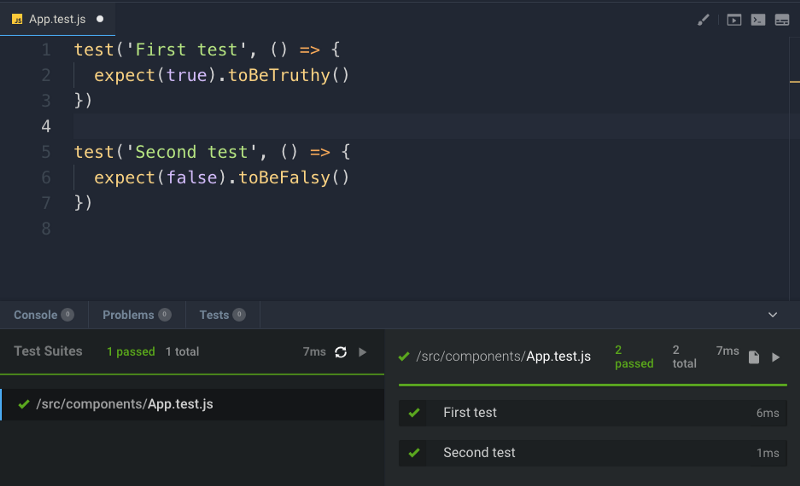
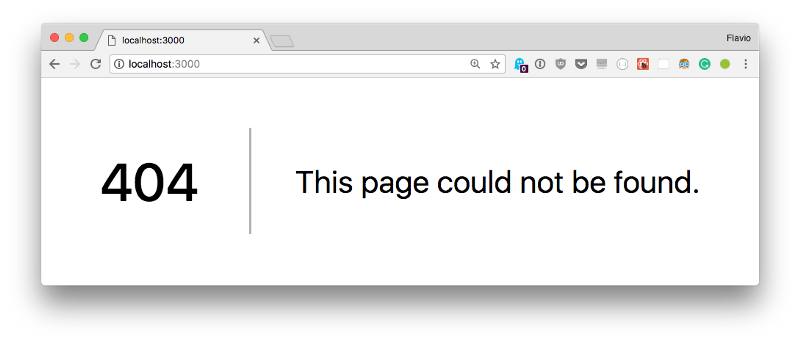
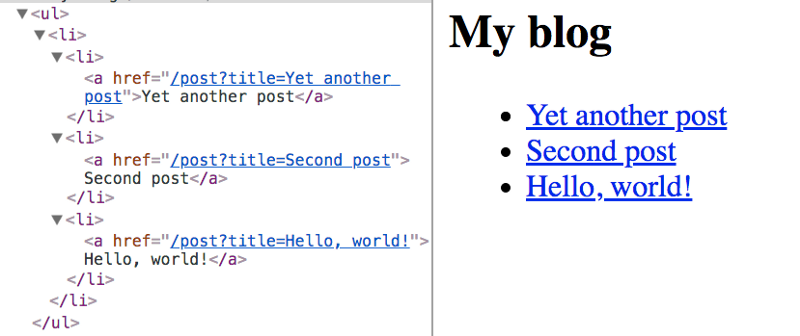

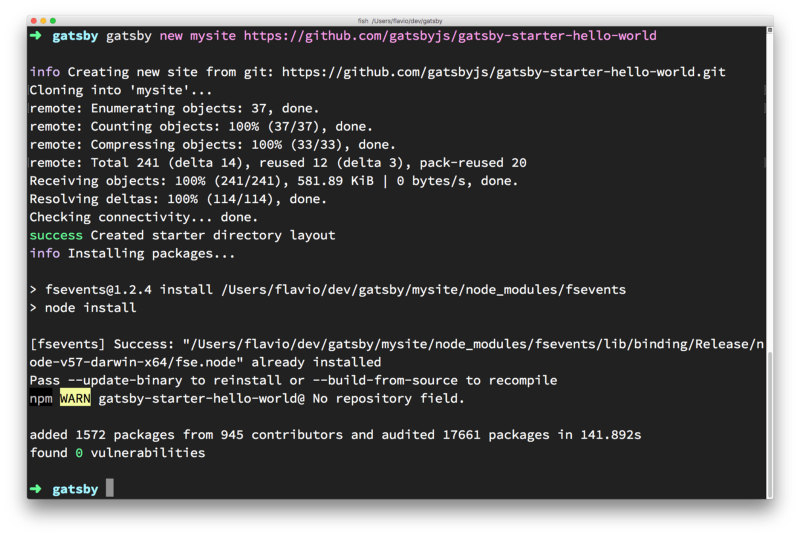
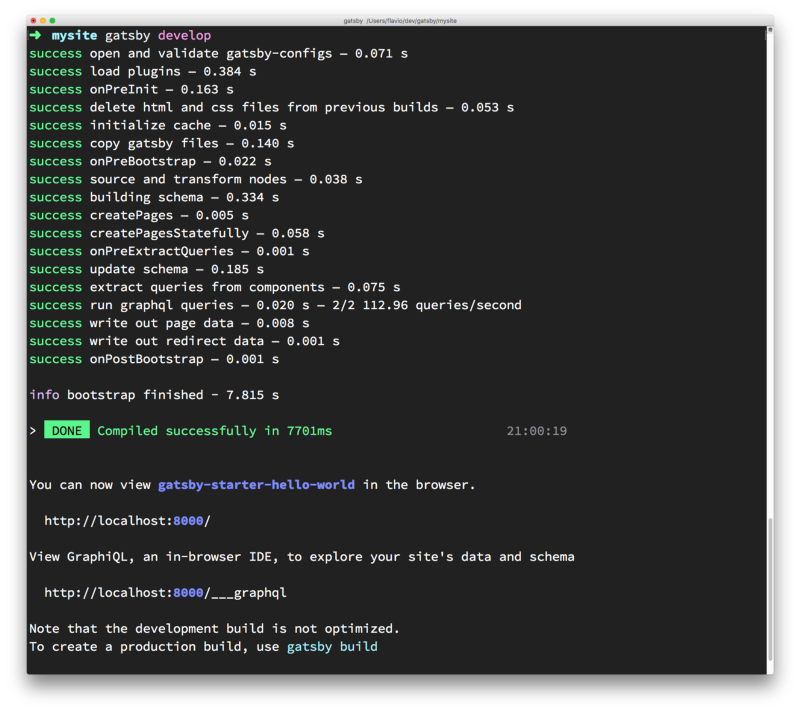

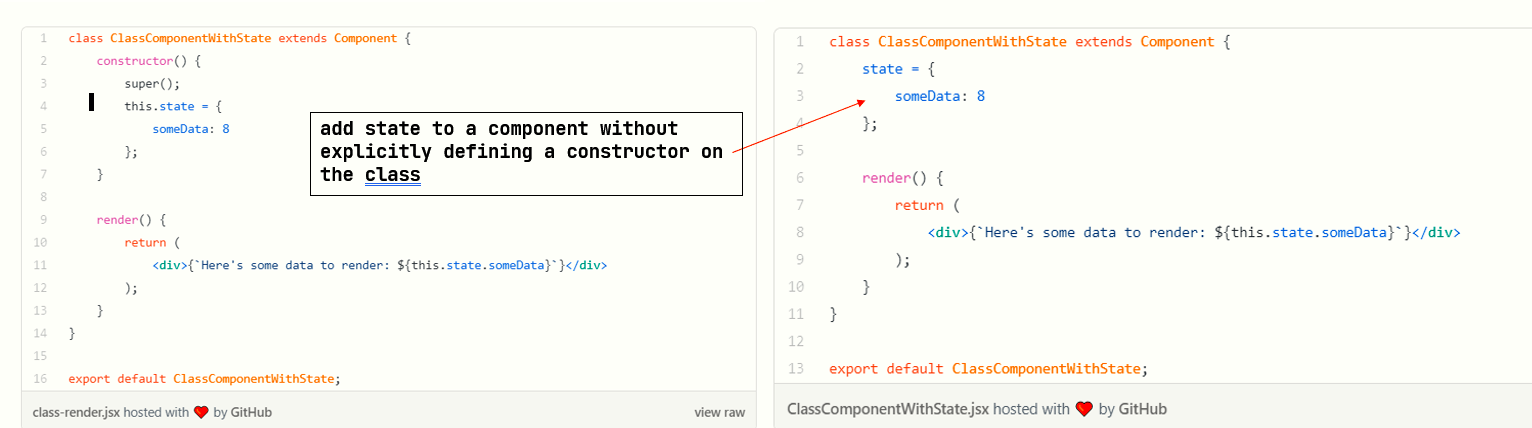

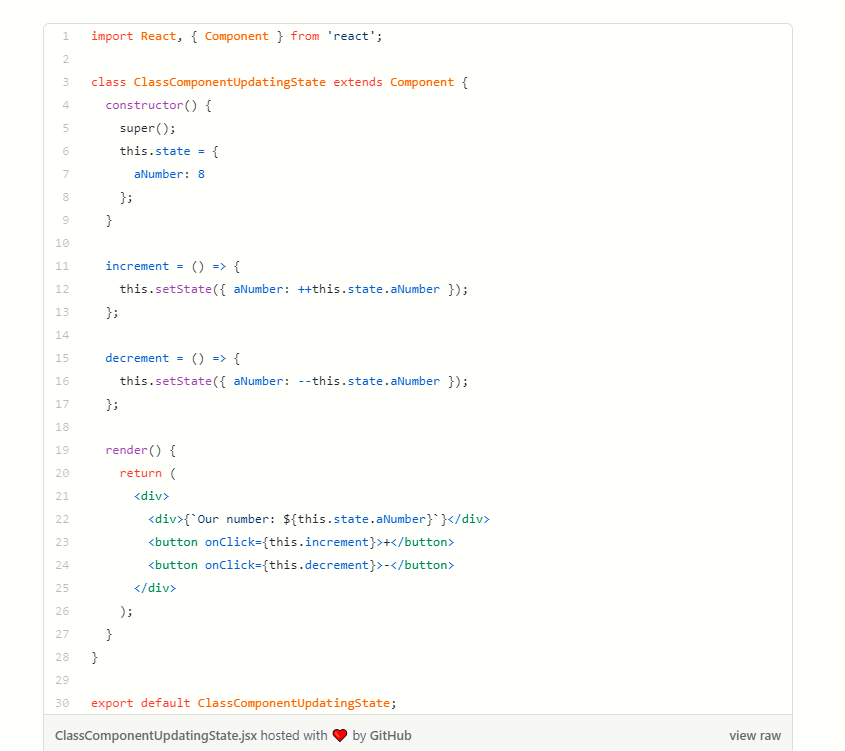
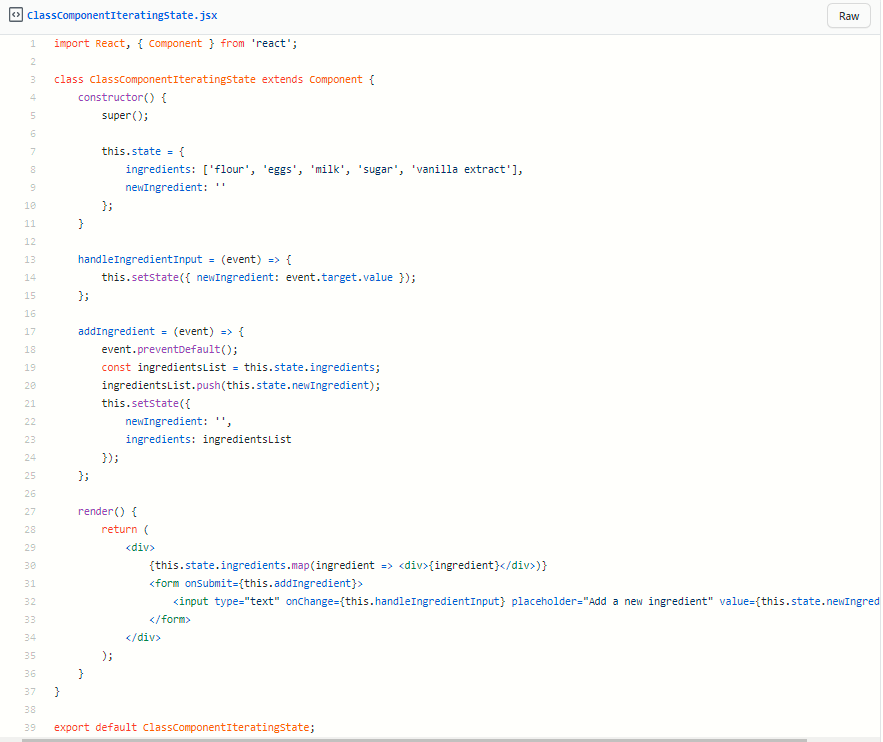

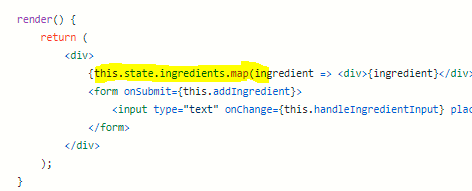


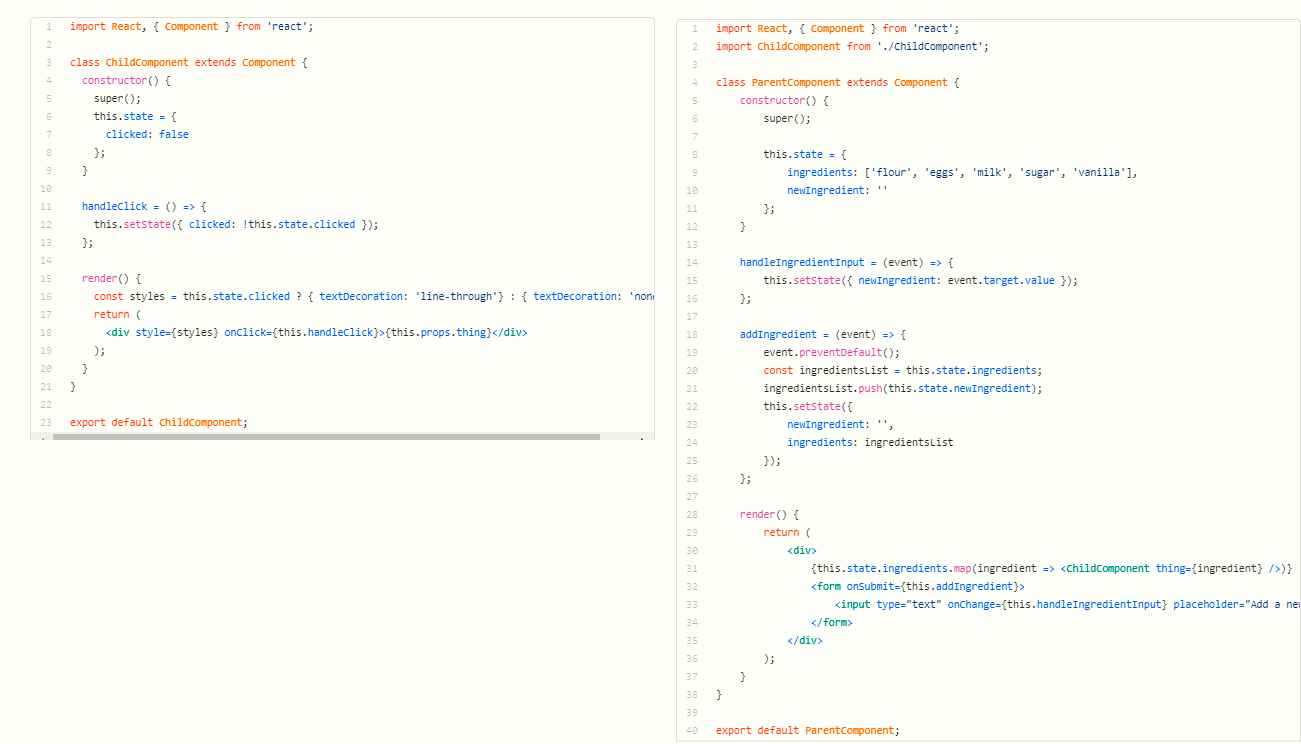


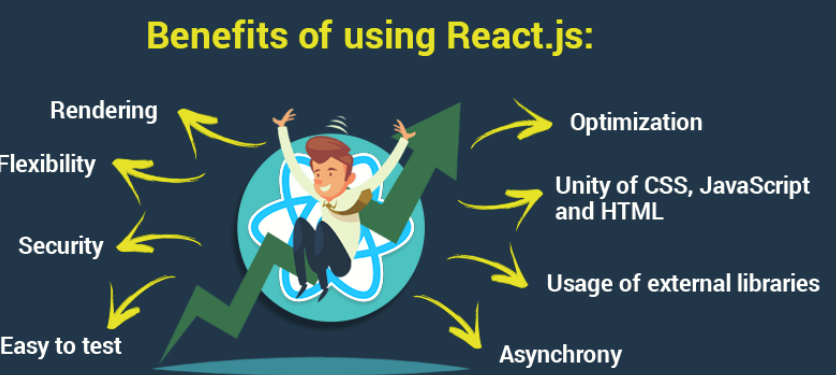

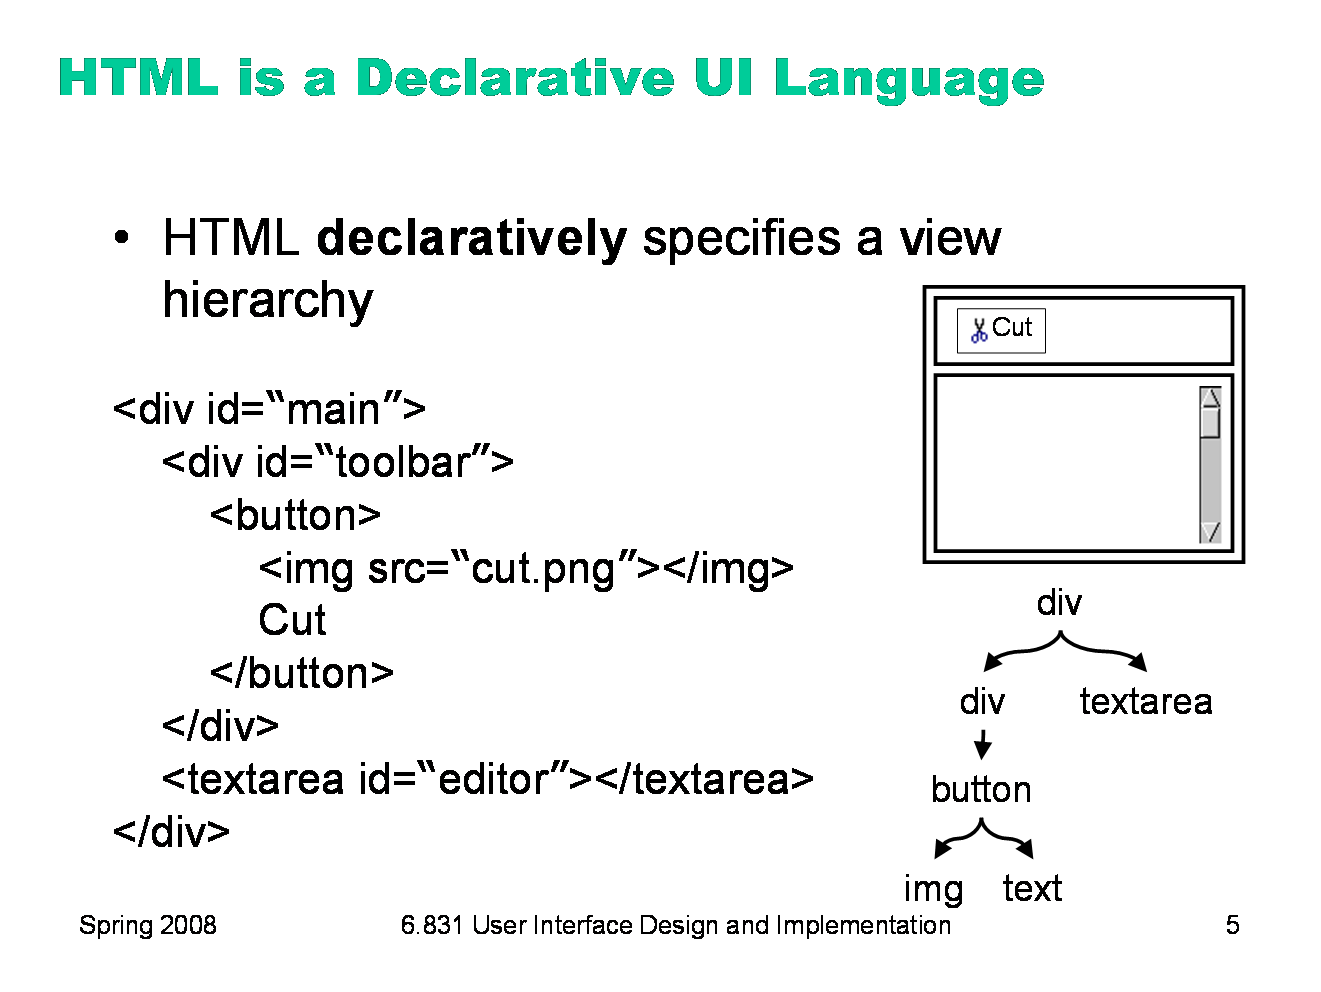

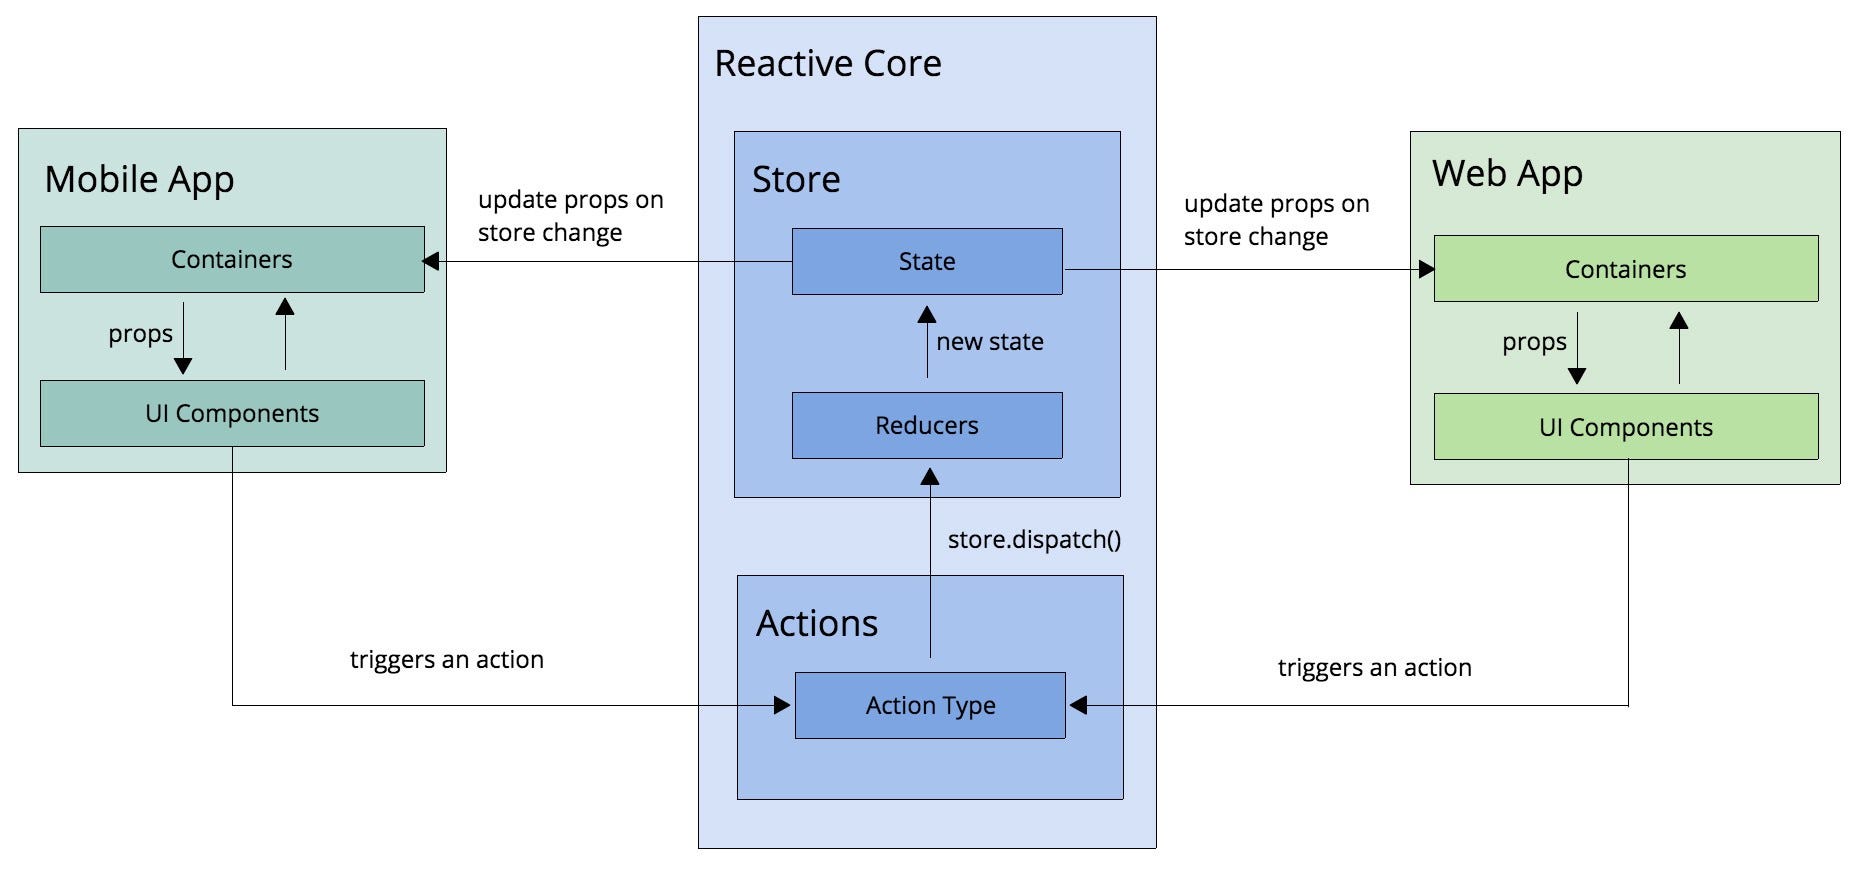

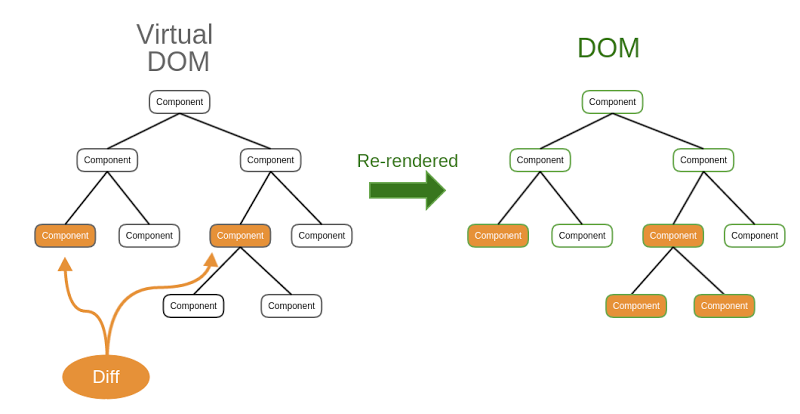


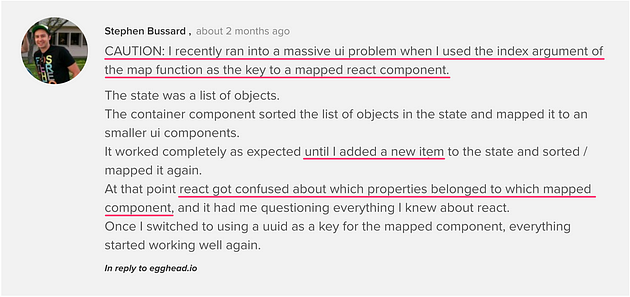
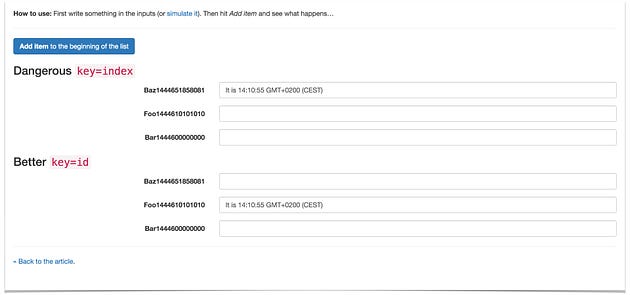

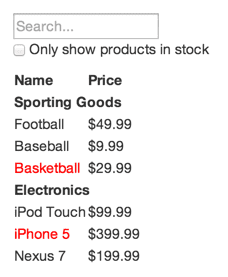


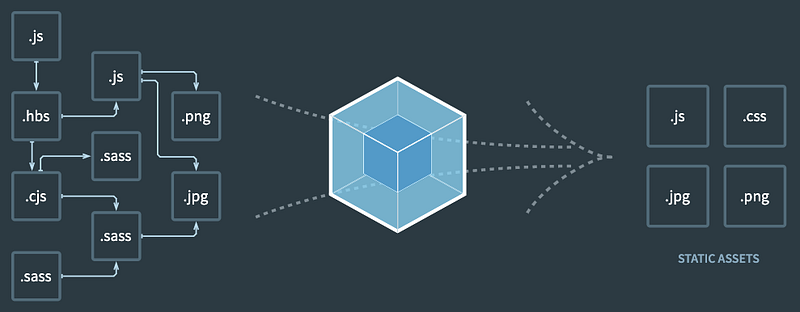
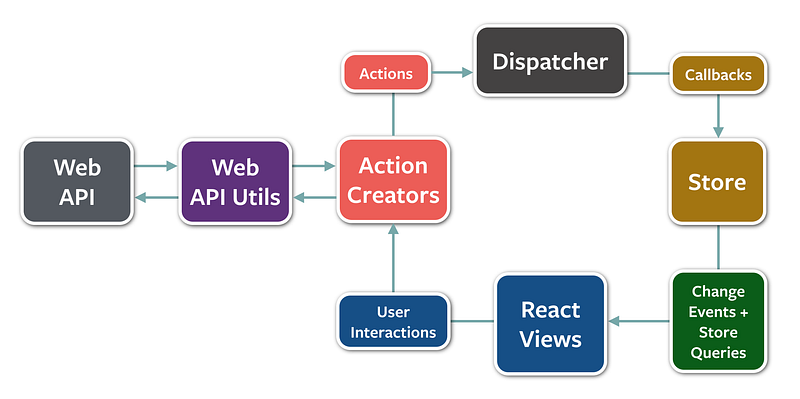

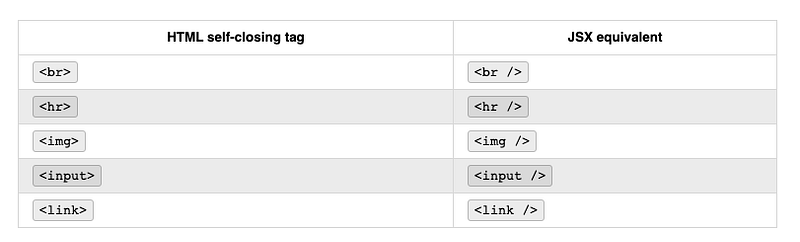

