Works, as of 14/04/2024, on macOS 14.4.1 and lower (prob higher but idk)
This was made for Apple Sillicon Macs.
You need another Mac for this.
If you don't have one and have recovery locked, it's not possible.
If you don't have recovery locked, I'd recommend you reset your mac (there is plenty of tutorials online) from Recovery mode, then go to the next section (Bypassing setup)
Steps
Follow Apple steps. That's all I can say. But instead of reviving your Mac, restore/reset it.
I'd recommend using Apple Configurator 2.
https://support.apple.com/en-us/108900
During the restore process (should take some time), I'd recommend you download the multiple scripts down there and put them in a macOS readable USB key, at root (so in first folder, you know the main folder).
In this part, we'll bypass Setup.app (it checks for MDM, and we don't want that do we ?)
You'll need to boot up in recovery mode. To do so, make sure you are on the hello screen, and press your Touch-ID button for 10s.
Your Mac should go black (it's turned off!)
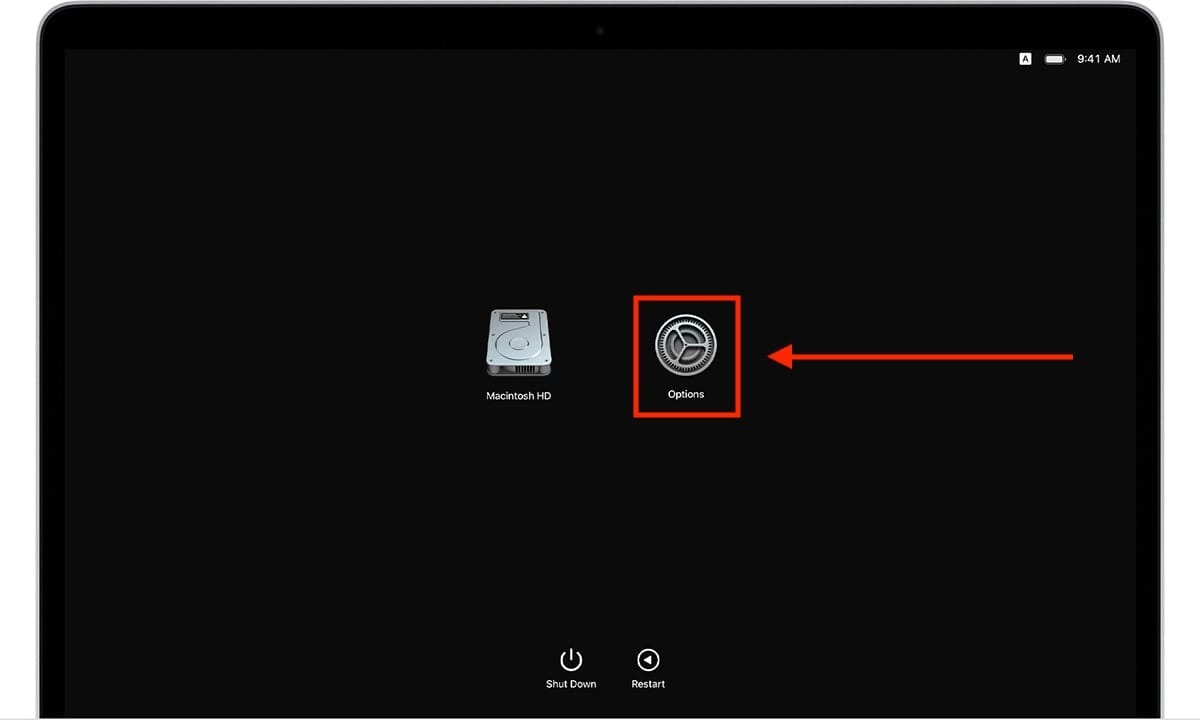
Now, you need to turn it back on, but instead of pressing once, you press and hold the button until you see "Loading recovery options..." or something similar.
Once you see this beautiful screen, go here:
Once you boot into this, follow steps if necessary, then plug your USB key prepared before. Also, make sure your keyboard is the correct one (top right, you can select it).
Now, you need to access the Terminal.
You can do so by looking at the bar at the top and going to Utilities>Terminal.
Once there, you'll need to naviguate to your USB key.
cd /Volumes/ should bring you right to the mounted volumes (where your usb key sits, holy moly).
Right here, you can do a ls to see if your usb key is there. If so, cd <yourUsbKeyName>.
Make sure you don't write the <>.
Right there, if you didn't renamed the scripts I told you, you should be able to run those commands :
chmod +x inRecoveryScriptFirst.sh && ./inRecoveryScriptFirst.sh
This will ask you for a "New Password". Put any password you want, but make sure you remember it !!!!
Once it tells you it's done, Reboot your Mac by going to > Reboot (or Restart, whatever it's called).
You should now see the magnificient macOS Sonoma Hello screen. Click on Next, and configure your Mac until you arrive to the WiFi selection screen.
Here, hold on tight, you aren't going to connect to the internet (yet!)
You need to press the following keys;
⌘ command + ⌥ option + ⌃ control + T
This should bring you our friend the terminal (again!)
For now, you won't type any commands in it, but we'll use it as a way to access system settings.
Click on the , then System Settings.
Here, go down to Users & Groups section, click on Add User
Here, macOS will ask you to login with an admin account.
Replace the first field by root, then fill second field by the password you sent back in Recovery mode (in the script).
You should now be able to fill info (like if you were creating a normal user on Mac). MAKE SURE IT'S AN ADMIN ACCOUNT!!!
After creating the account, turn off the MacBook by pressing 10seconds (again) on the TouchID button.
Then, when it's off, access recovery options like we did before (by pressing the button until it shows you loading...)
Little reminder on how to access the terminal then your usb key from here:
Once you boot into this, follow steps if necessary, then plug your USB key prepared before. Also, make sure your keyboard is the correct one (top right, you can select it).
Now, you need to access the Terminal.
You can do so by looking at the bar at the top and going to Utilities>Terminal.
Once there, you'll need to naviguate to your USB key.
cd /Volumes/should bring you right to the mounted volumes (where your usb key sits, holy moly). Right here, you can do alsto see if your usb key is there. If so,cd <yourUsbKeyName>. Make sure you don't write the <>.
Once in your USB key, do the following;
chmod +x inRecoveryScriptSecond.sh && ./inRecoveryScriptSecond.sh
You can now reboot your Mac again once it told you to do so.
> Reboot (or Restart, whatever it's called)
Now, once the Mac is rebooted, connect (type the password) to the user you created before.
Follow the instructions like if you would be configuring a normal Mac (you can connect your iCloud, etc...)
When you are done and are on your desktop, we need to run one more thing and you should be good to go !
- Open a Terminal (⌘command+Space then type Terminal then enter)
-
cd /Volumes/should bring you right to the mounted volumes (where your usb key sits, holy moly).
Right here, you can do a
lsto see if your usb key is there. If so,cd <yourUsbKeyName>. Make sure you don't write the <>.
- Run the following :
chmod +x PostSetup.sh && ./PostSetup.sh
This should ask two times for your user password (not root but your user password) and you should be good to go !
Bonus:
You might want to download LuLu by https://objective-see.org/products/lulu.html and block add Block rules for the following:
/usr/libexec/teslad and /usr/libexec/mdmclient
IF YOU ARE COMING FROM MY OTHER TUTORIAL IN FRENCH, DONT DO THAT.


Well, I’ll be the first to test, not in beta 1 but once it gets more stable !
btw, why do you need a video tutorial ? Those easily get deprecated and can be misleading in my opinion