- Adafruit PiOLED - 128x32 Monochrome OLED for Raspberry Pi (or similar)
- Python3, a general purpose, high-level programming language:
sudo apt-get install python3 - gpiozero, a library for interfacing Python3 with the RPi's GPIO (General Purpose Input Output):
sudo apt-get install python3-gpiozero - Pypi (or pip for short), the Python Package Index:
sudo apt-get install python3-pip - Git, a free and open source version control system for use with services like GitHub:
sudo apt-get install git - Pillow, a "friendly" fork of the Python Imaging Library (often referred to as PIL),
pip3 install Pillow - i2ctools, enables the RPi to interface with the I2C bus,
sudo apt-get install i2c-tools - SMBus, enables Python3 to interface with I2C devices,
sudo apt-get install python3-smbus
- Run the configuration utility to enable
I2C:sudo raspi-config - Scroll to
Interfacing Optionsand hit ENTER - Scroll to
I2Cand hit ENTER - Select
Yesand hit ENTER - Hit ENTER to return to the configuration utility main screen. Using the right arrow key select
Finishand hit ENTER - Shutdown the RPi:
sudo shutdown now - Attach the OLED Display, power the RPi back up, log in
- Once back on the RPi run the following to confirm that the OLED Display is recognized:
sudo i2cdetect -y 1
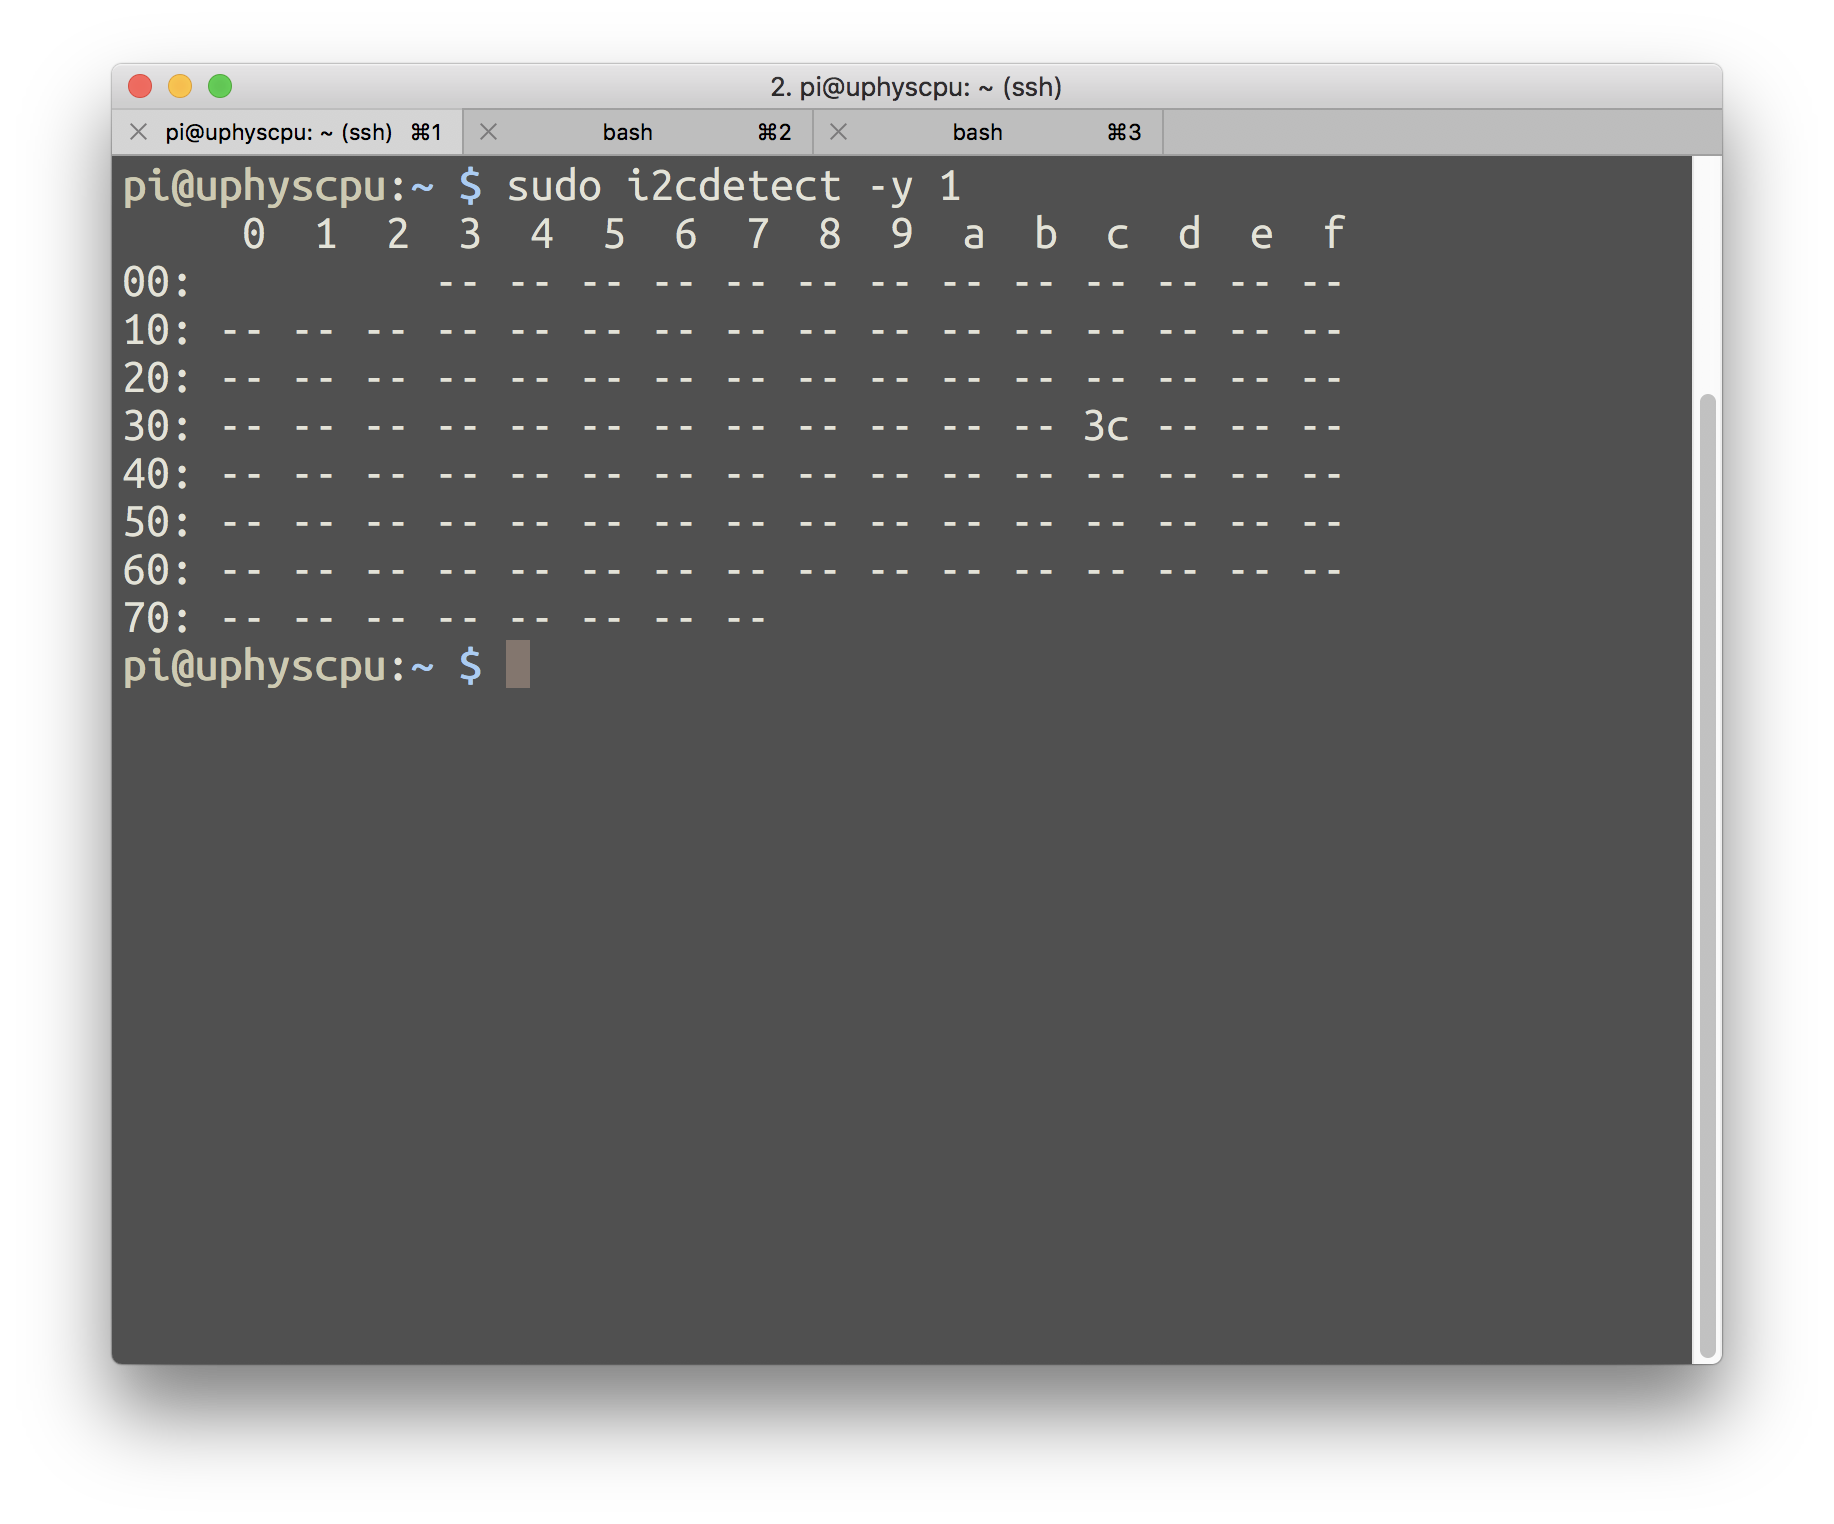
If something like the above shows up the display has been recognized by the RPi.
- Clone the Adafruit Python SSD1306 Python library to the RPi:
git clone https://github.com/adafruit/Adafruit_Python_SSD1306 - Change directories into the library folder:
cd Adafruit_Python_SSD1306/ - Install the library for Python3:
sudo python3 setup.py install - Change directories in the examples folder:
cd examples/ - Make
stats.pyexecutable:sudo chmod +x stats.py - Run
stats.py:python3 stats.py
If you see the IP Address, CPU Load, Memory Usage, and Disk Usage on the OLED Display then everything was setup properly!
If nothing shows up on the OLED Display, and there are errors regarding missing libraries in the Terminal, you may need to install the following missing dependencies: sudo apt-get install libopenjp2-7-dev libtiff5
After installing one should be able to run stats.py without issue: python3 stats.py
stats.py is a cool example but my primary interest in the Adafruit Python SSD1306 library is to display a dynamically assigned IP Address on boot, which is a work around for hostname.local not reliably working on large, institutional wifi networks (like the one at ArtCenter [sigh]).
Below is one example of how to do this. Though there is probably a better way to implement this, it works fine for my purposes.
#!/usr/bin/env python3

# display IP Address on OLED Display
# by Casey Anderson
# Based on stats.py by Tony DiCola & James DeVito

import time
import subprocess

import Adafruit_SSD1306

from PIL import Image
from PIL import ImageDraw
from PIL import ImageFont

RST = None # on the PiOLED this pin isnt used

# 128x32 display with hardware I2C:
disp = Adafruit_SSD1306.SSD1306_128_32(rst=RST)

# Initialize library.
disp.begin()

# Clear display.
disp.clear()
disp.display()

# Create blank image for drawing.
# Make sure to create image with mode '1' for 1-bit color.
width = disp.width
height = disp.height
image = Image.new('1', (width, height))

# Get drawing object to draw on image.
draw = ImageDraw.Draw(image)

# Draw a black filled box to clear the image.
draw.rectangle((0,0,width,height), outline=0, fill=0)

# Draw some shapes.
# First define some constants to allow easy resizing of shapes.
padding = -2
top = padding
bottom = height-padding
# Move left to right keeping track of the current x position for drawing shapes.
x = 0

# font has to be in same directory!
# font size, IP number has some impact on what is and isnt readable...look into this
font = ImageFont.truetype('/home/pi/VCR_OSD_MONO_1.ttf', 12) # from here http://www.dafont.com/bitmap.php

try:
    while True:

        # Draw a black filled box to clear the image.
        draw.rectangle((0,0,width,height), outline=0, fill=0)

        IP = subprocess.Popen(['hostname', '-I'],stdout=subprocess.PIPE)

        # Write the IP
        ip_output = IP.communicate()[0].decode('utf-8')

        draw.text((x, top), "IP: " + ip_output,  font=font, fill=255)

        # Display image.
        disp.image(image)
        disp.display()
        time.sleep(.1)

except KeyboardInterrupt:
        print()
        print('goodbye!!')
        disp.clear()
        disp.display()
IP.kill()- Make oled_display_ip.py executable:
sudo chmod +x oled_display_ip,py - Open
/etc/rc.localwithnano:sudo nano /etc/rc.local - Add the following line above
exit 0:su -c "python3 /home/pi/oled_display_ip.py" pi & - Save and exit the file
- Reboot:
sudo reboot now