Using Planet imagery in an Esri Story Map These are the accounts/tools you need to get started: Documentation and tutorials
Sign in to ArcGIS Online and click on Make a Map
Eplore the layout and tools in the ArcGIS webmap viewer
Select an area of interest. In this example, I'm zooming in to Yosemite National Park.
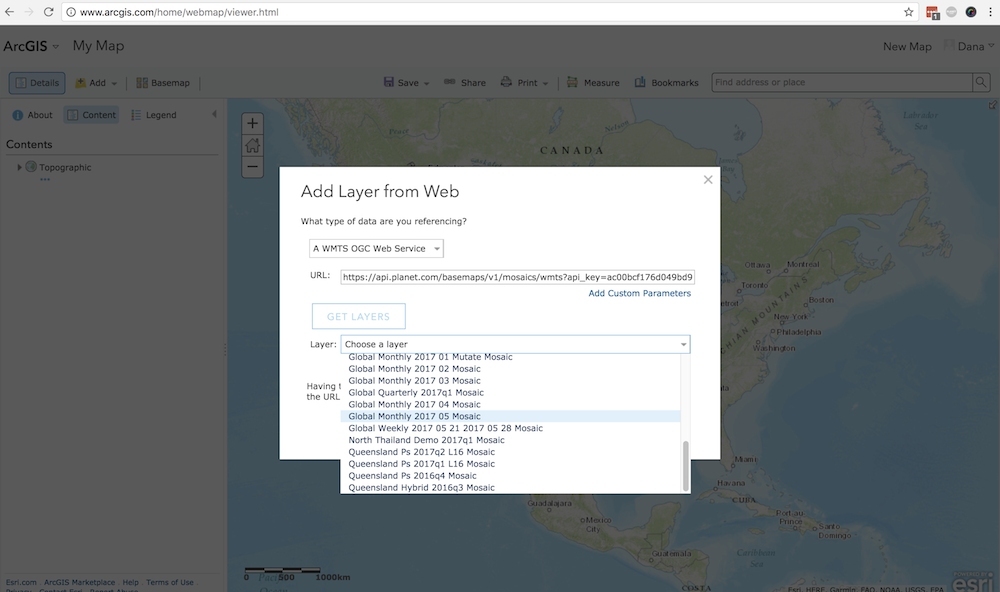
Under the Add dropdown menu, choose Add a layer from the web
In this example, I'm going to use Planet's WMTS Web Service.
Use the following request structure (with your Planet API key) to view the mosaics available to you from the Planet catalog.
https://api.planet.com/basemaps/v1/mosaics/wmts?api_key={your_api_key}
Click on Get Layers and choose a mosaic from the dropdown list. In this example, I'm going to use the Global Monthly 2017 08 Mosaic
Click Add Layer. In the map viewer, you'll see Planet's August 2017 mosaic zoomed in to Yosemite, our chosen area of interest.
Create a map in ArcGIS Online with a Planet imagery as your basemap
go here to start making your map: https://opencalifornia.maps.arcgis.com/home/webmap/viewer.html you might have to login again
at the top left of the map, click Add --> Add layer from web
see screenshot below to see how to connect to the Planet WMTS Basemap Service and access the catalog of mosaics
this is the URL for the service: https://api.planet.com/basemaps/v1/mosaics/wmts?api_key={your_api_key} you'll need your own Planet API key (see above)
select the most recent monthly mosaic available to you- May or June 2017 depends on your account permissions
make sure you check the Basemap box to add layer as basemap
Voila! California!
Add aditional (vector) data layers to map - points of interest? Zoom to extent that you want view in your map -- San Diego, for example -- and save the map