Today we're going to set up Azure Load Balancer service with CockroachDB. I had a customer setting up CockroachDB on IaaS and one of the choices we had to make was use HAProxy or use Azure Load Balancer. Our docs have a note on it but the details are left for the reader. Today, I attempt to fill in the blanks.
The purpose of this tutorial is to provide step by step instructions in getting an Azure Load Balancer up quickly. Our docs do a great job at covering the CockroachDB portion but the granular steps to get ALB up are missing. Since this is my first foray into managed load balancers, I dediced to do the hard work.
- Provision a cluster in Azure
- Provision a load balancer
- Test connectivity
- Clean up
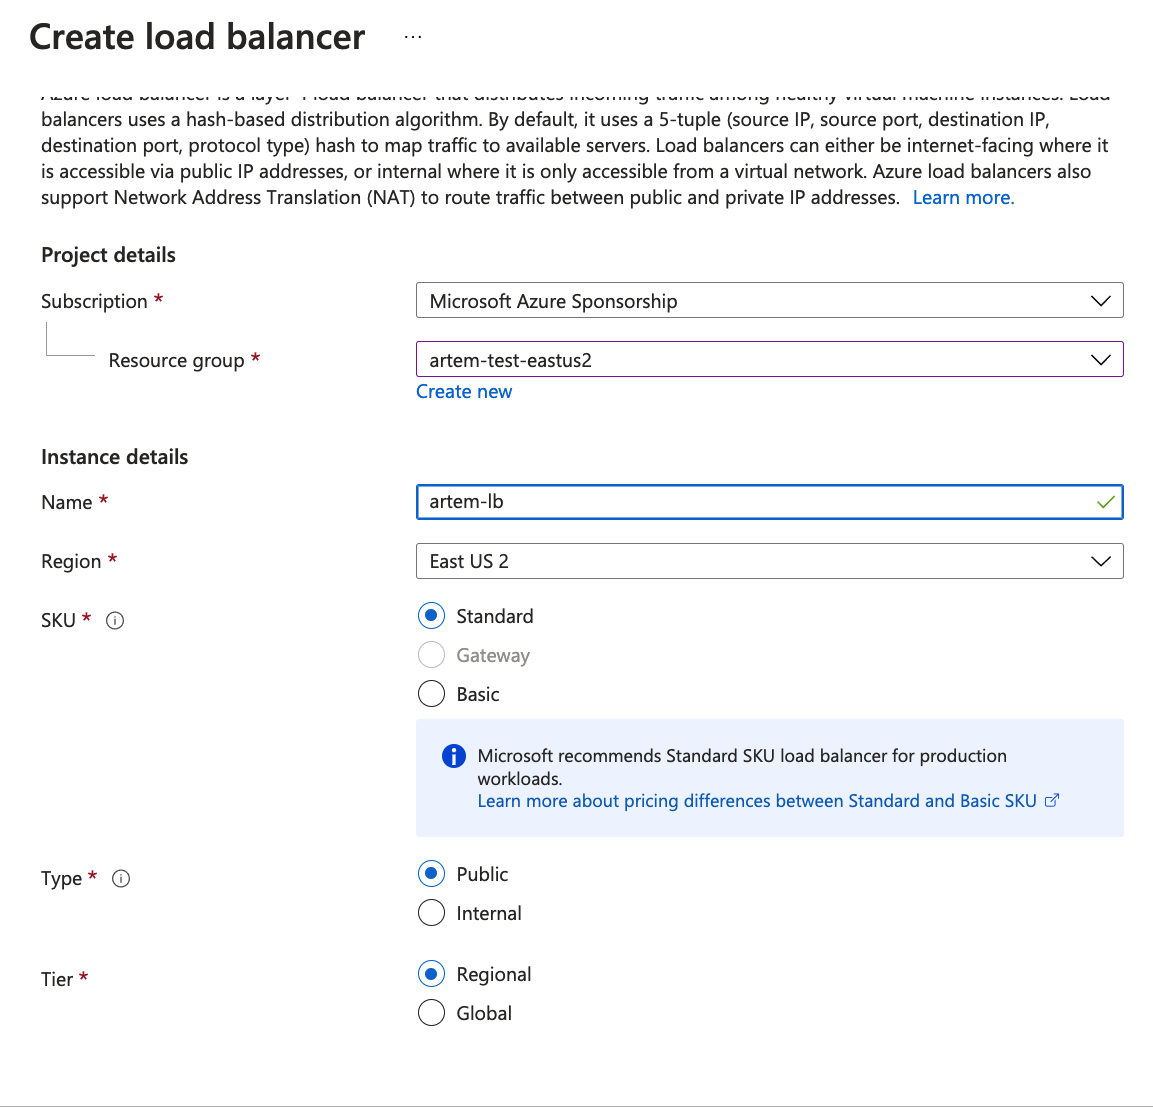
This article assumes you've set up a Resource Group and a Virtual Network associated with it in your Azure subscription. Following this document will walk you through setting up a CockroachDB cluster. When you have these prerequisites in place, we can continue with setting up a load balancer.

Click Create
Fill out the Frontend IP modal
- Add a frontend IP configuration
- Fill out the Public IP address
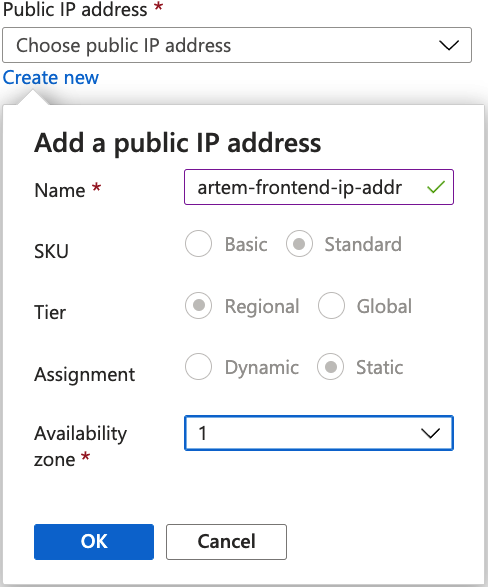
Add frontend IP address

Click Add

Add a backend pool
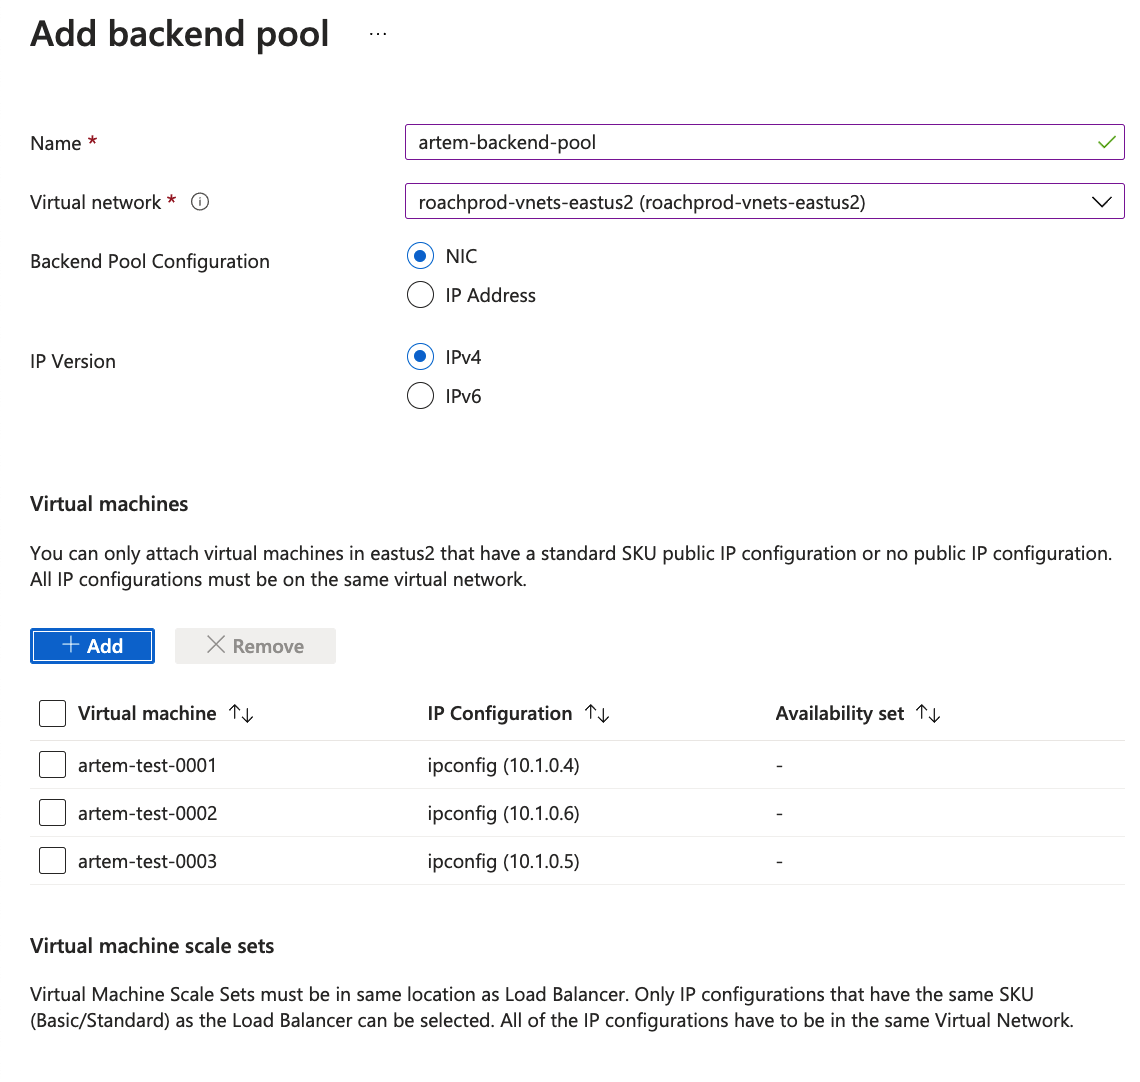
Click Add

-
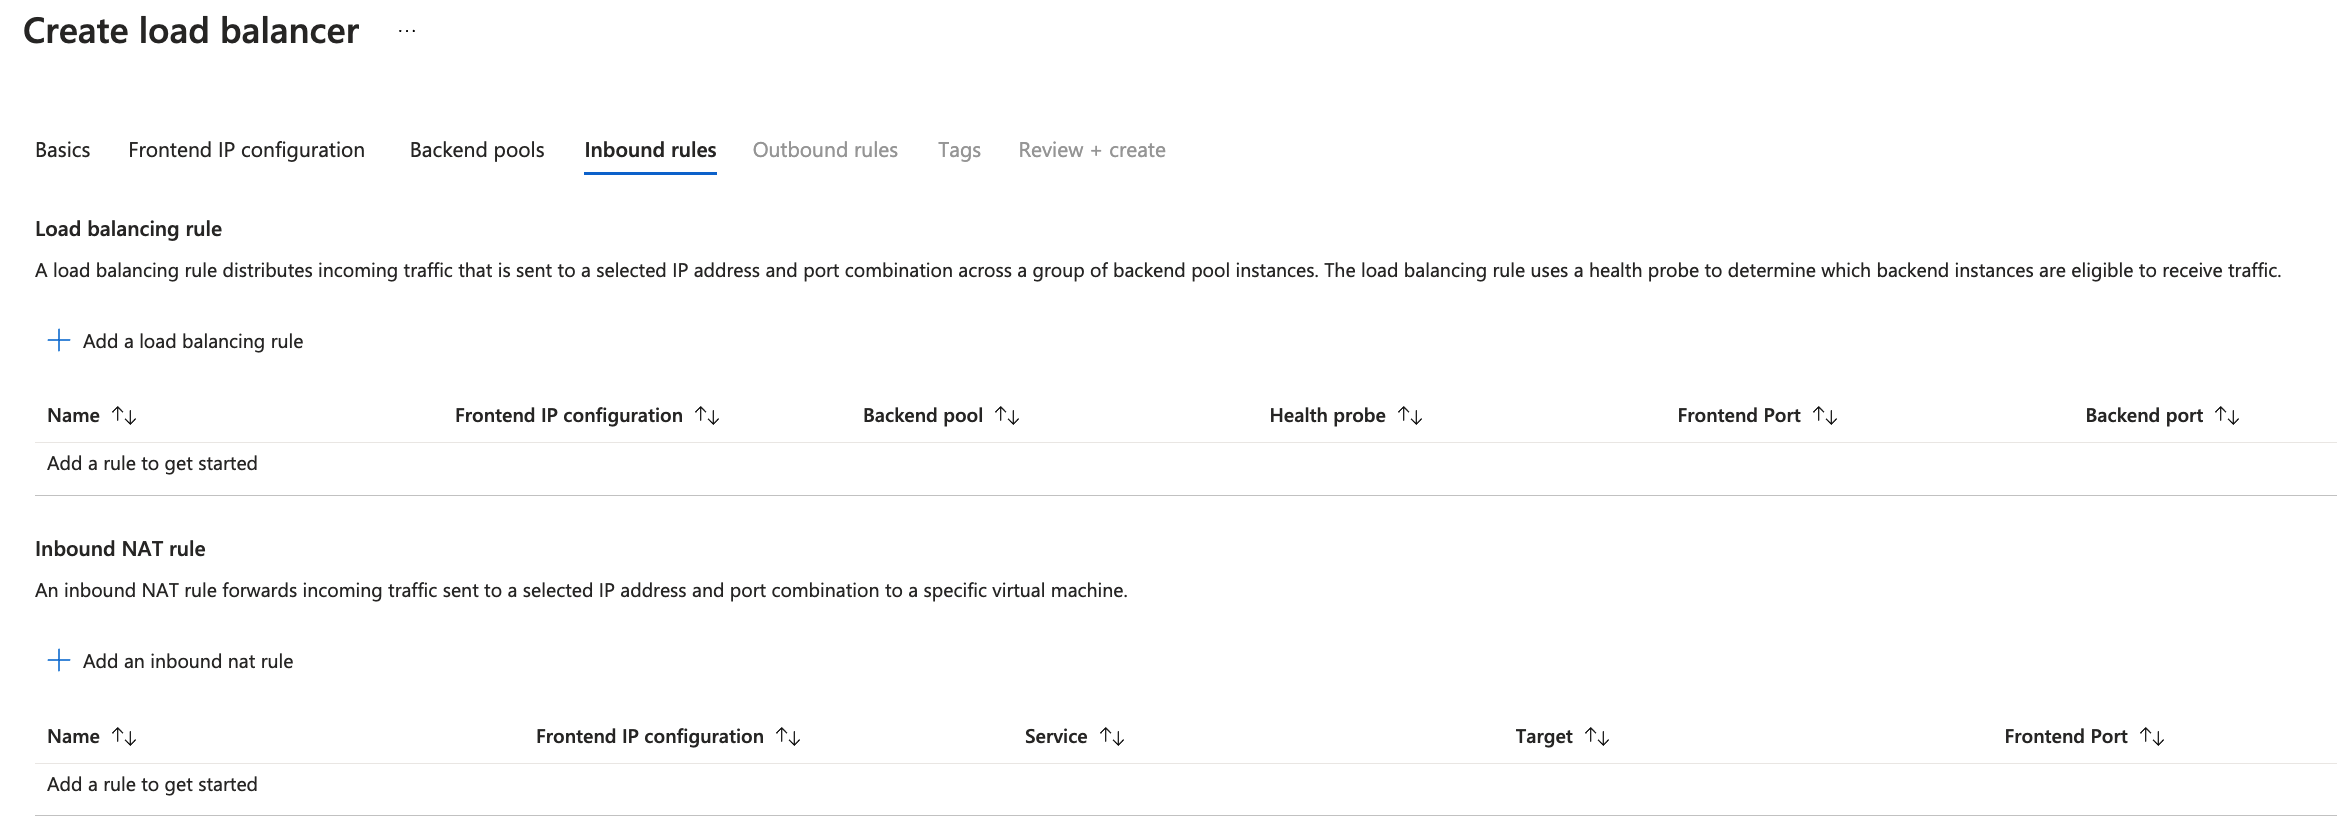
Add a load balancing rule
-
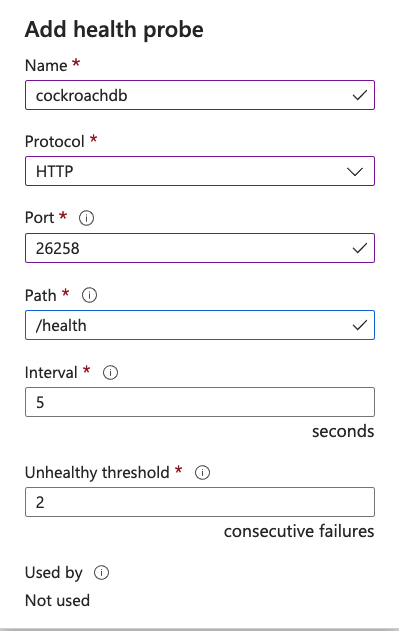
Add a health probe
Be careful with choosing the right port for the health probe. My cluster exposes the health endpoint at port 26258 but I mistakenly assumed it was 8080, which is default for CockroachDB. This can trip you up. Typically the health endoint is exposed at the following url
Load balancing rule

Click Add

Click Next to skip Outbound Rules
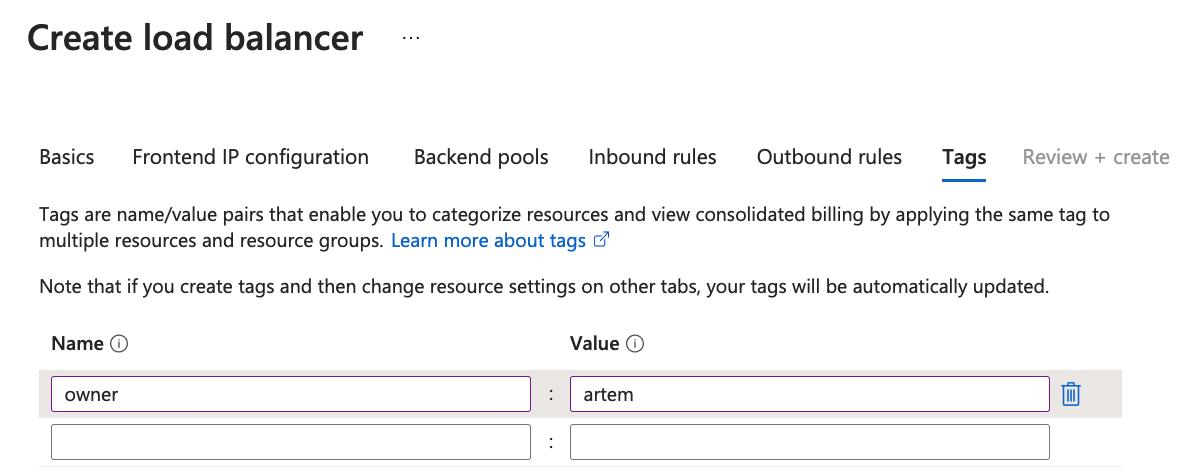
This step is optional depending on your organization. I prefer to tag my cloud resources.

Optionally, download the template for automation

You have a choice to deploy from this same template in this screen or hit the breadcrumb menu up top to go back to the previous screen and deploy the load balancer that way. Both steps will have the same result.

Hit Deploy


Click Create
Once it completes, find the Load Balancer in the console and copy the public IP

Now that we're finished deploying a load balancer, we can test the connectivity to the cluster via LB. Copy the public IP to the clipboard.
Connect to the cluster from your client machine
cockroach sql --insecure --host=<Your LB public IP>In case of secure clusters, you will need to pass --certs-dir flag pointing to the cluster certs you used to set up the cluster. You also need to make sure to include the load balancer public IP when you create node certs. Otherwise you will get the following error
cockroach sql --certs-dir=certs --host=20.97.200.152#
ERROR: x509: certificate is valid for 10.1.0.4, 10.1.0.5, 10.1.0.6, 20.186.27.148, 20.186.26.192, 20.186.27.127, not 20.97.200.152
Failed running "sql"where 20.97.200.152 is the public IP of the LB.
Assuming everything is configured correctly, you should see similar output in your terminal:
cockroach sql --insecure --host=20.97.200.152#
# Welcome to the CockroachDB SQL shell.
# All statements must be terminated by a semicolon.
# To exit, type: \q.
#
# Server version: CockroachDB CCL v21.2.5 (x86_64-unknown-linux-gnu, built 2022/02/07 21:01:07, go1.16.6) (same version as client)
#Now in the console we can issue commands to see which node we're connected to:
root@20.97.200.152:26257/defaultdb> select crdb_internal.node_id();
  crdb_internal.node_id
-------------------------
                      1
Let's exit out and connect again. Based on your set up you may have identical or different results. It may coincidentally point you to the same node, in which case exit out and try again.
root@20.97.200.152:26257/defaultdb> select crdb_internal.node_id();
  crdb_internal.node_id
-------------------------
                      3
This time we connected to node 3 instead. Having a managed load balancer has its advantages over managing a service like HAProxy manually. For once, you can configure zonal redundancy for the frontend IP and manage the service natively instead of Linux process, i.e. haproxy -f haproxy.cfg &.
That's it for today, hope you found this tutorial useful.