This tutorial is meant to demonstrate how CockroachDB Change Data Capture can be integrated with a rich third party ecosystem of products to build sophisticated data pipelines.
The problem this tutorial is trying to solve is lack of native Fivetran connector for CockroachDB. My customer has built their analytics pipeline based on Fivetran. Given there is no native integration, their next best guess was to set up a Postgres connector:

CockroachDB is PostgreSQL wire compatible but it is not correct to assume it is 1:1.
Let's attempt to configure the connector

Eventually you will hit a snag with error java.lang.NumberFormatException: For input string: "CCL".
The problem stems from the way Fivetran parses the output of SELECT VERSION() query. In CockroachDB, the output is CockroachDB CCL v21.2.5 (x86_64-unknown-linux-gnu, built 2022/02/07 21:01:07, go1.16.6) and in PostgreSQL it is PostgreSQL 14.2 on x86_64-apple-darwin21.3.0, compiled by Apple clang version 13.0.0 (clang-1300.0.29.30), 64-bit or some version of that. There is an open thread with Fivetran support requesting a CockroachDB connector. In the meantime, I have a problem to solve and intuitively, I suggested to leverage CockroachDB Change Data Capture. We quickly looked at the available Fivetran connectors and lo and behold, both Kafka and S3 connectors are available. I had a potential solution. My goal was to configure CockroachDB CDC outputing to Kafka, then Fivetran would pick up the topics and deliver to Snowflake. Let's see how it all went down.
All of the products discussed in this tutorial are available as SaaS. I'm going to attempt to use all free tier or trial services. One note, CockroachDB CDC is not available in free tier today. You have to use a dedicated instance, I'm using CockroachDB Dedicated. Enterprise CDC in free tier is something we're considering. Stay tuned.
Disclaimer: I am only familiar with the tools discussed on the surface. I don't claim expert knowledge of any products. This tutorial is intended to demonstrate the art of possible. For best practices, refer to the product documentation.
- Create and configure a Confluent Cloud Kafka cluster
- Create and configure a Cockroach Cloud Dedicated cluster
- Create and configure a Snowflake instance
- Create and configure a Fivetran connector for Confluent Kafka
- Create and configure a Fivetran destination for Snowflake
- Verify
Create an account with Confluent Cloud, then create a cluster.
Create cluster: Basic
Region/zones: Google Cloud Region: us-east4 Availability: Single zone

Continue
Cluster name: cluster_0 Launch cluster
curl -sL --http1.1 https://cnfl.io/cli | sh -s -- latest
export PATH=$(pwd)/bin:$PATH
Login with Confluent CLI
confluent login --saveList the available environments and set the active environment context
confluent environment list
confluent environment use <envid>
List the current Kafka clusters and set the active cluster context
confluent kafka cluster list
confluent kafka cluster use <clusterid>
Create an API key and secret and store to seamlessly interact with the environment via CLI
confluent api-key create --resource <clusterid>
confluent api-key store --resource <clusterid> --force
Get a Kafka Endpoint, we will need it when we set up CockroachDB CDC
confluent kafka cluster describe <clusterid>I am going to use the built-in TPC-C workload for this tutorial and will proactively create a few topics in Kafka based on the CockroachDB table names. Alternatively, CockroachDB CDC can create the topics. Kafka cluster must have auto.create.topics.enable setting set to true for this to work.
I will create a single changefeed tracking multiple tables, the tables I will use are customer, district and history.
confluent kafka topic create customer --partitions 6
confluent kafka topic create district --partitions 6
confluent kafka topic create history --partitions 6
After creating the topics, we can start a Kafka consumer to verify data flows correctly.
confluent api-key use <API KEY> --resource <clusterid>
confluent kafka topic consume district
We just need to verify with a single consumer, if you're curious, you can open a few other terminal windows and consume those topics as well
confluent kafka topic consume customer
confluent kafka topic consume history
We're done with the Confluent Cloud part, let's switch to CockroachDBD for the changefeed configuration.
Given a Dedicated cluster, we need to connect to the cluster and enable changefeeds
SET CLUSTER SETTING kv.rangefeed.enabled = true;At this point, we can start writing data and have CDC push it to Kafka. I am going to use the TPC-C workload that comes built in with the Cockroach binary.
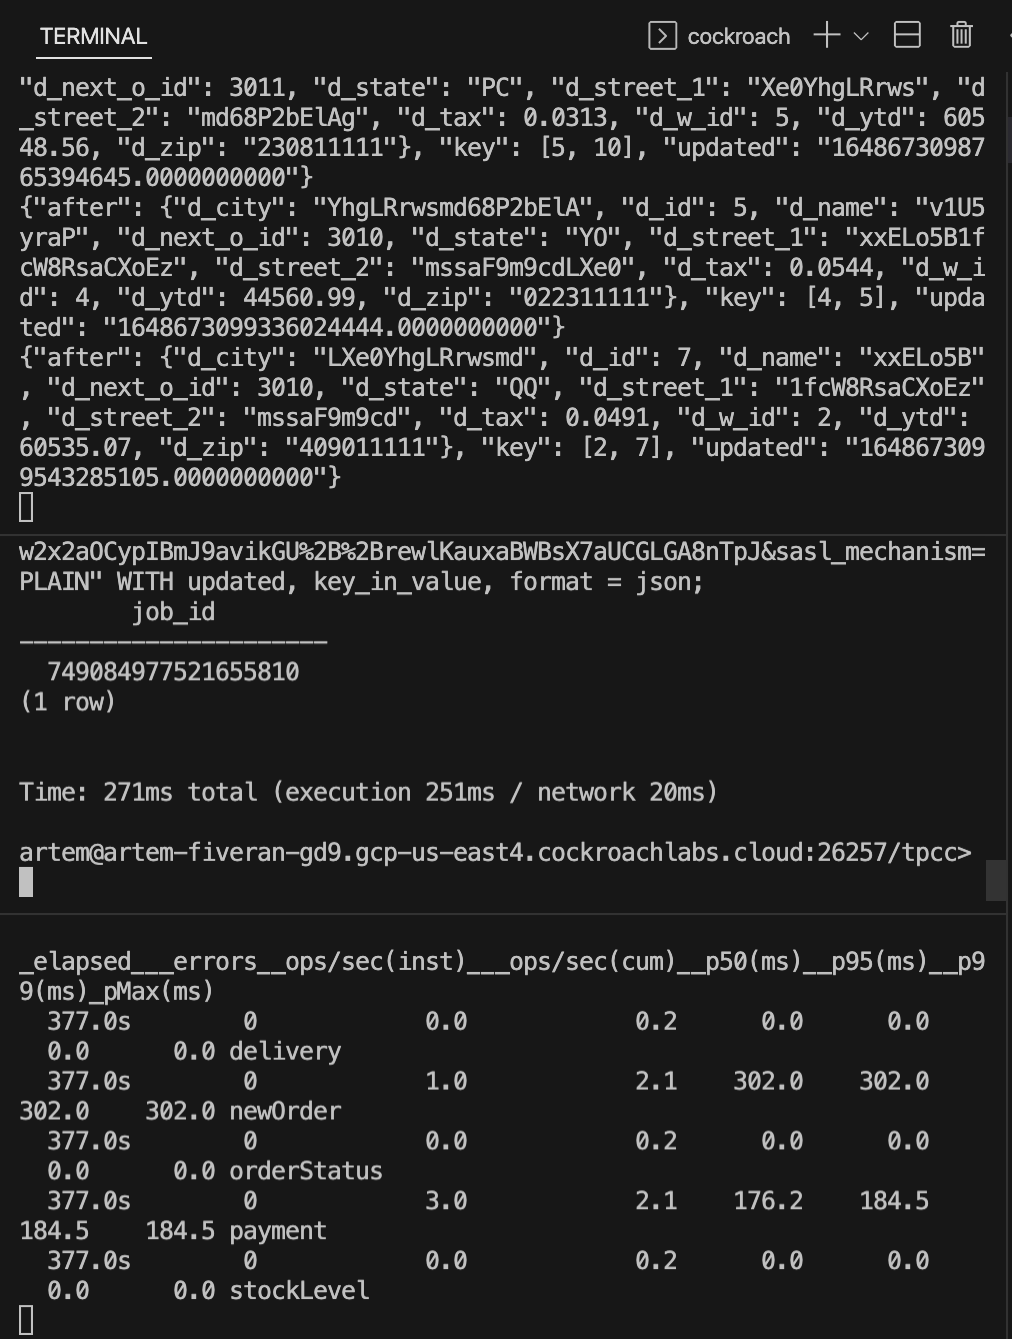
cockroach workload fixtures import tpcc --warehouses=10 'postgresql://user@cluster.cockroachlabs.cloud:26257/tpcc?sslmode=verify-full&sslrootcert=/path/certs/cluster-ca.crt'cockroach workload run tpcc --warehouses=10 --ramp=3m --duration=1h 'postgresql://user@cluster.cockroachlabs.cloud:26257/tpcc?sslmode=verify-full&sslrootcert=/path/certs/cluster-ca.crt'At this point we have a Kafka consumer terminal waiting for incoming messages on the district topic. I have a tpcc workload terminal window open generating workload on CockroachDB. I also have another CockroachDB SQL client window open to set up a changefeed.
I'm using the following SQL syntax to create a changefeed on the three tables
use tpcc;
CREATE CHANGEFEED FOR TABLE customer, district, history INTO "kafka://confluentcluster.confluent.cloud:9092?tls_enabled=true&sasl_enabled=true&sasl_user=<APIKEY>&sasl_password=<url-encoded secret>&sasl_mechanism=PLAIN" WITH updated, key_in_value, format = json;
where sasl_password is the url-encoded secret from Confluent Cloud. I used the following service https://www.urlencoder.org/ to url-encode the secret.
At this point we have a working changefeed and your Confluent consumer should start showing signs of life
Here are my terminal windows, from top to bottom: Kafka consumer, CockroachDB SQL client with the job ID of the changefeed and an active TPC-C workload window generating load on the bottom.
We can now set up Snowflake for our destination warehouse
Create a Snowflake account, navigate to databases and create a destination database.

I called mine fivetran.
We're in the final stretch, we can now switch to Fivetran and connect the dots.
Create an account with Fivetran.
- Add Connector Confluent Cloud
- Destination schema confluent_cloud
- Consumer Group cockroachdb
- Servers yourcluster.confluent.cloud:9092
- Message Type json
- Sync Type Packed
- Security Protocol SASL
- API Key your original Confluent Cloud API key
- API Secret your original Confluent Cloud secret
- Save & Test
- Select your data
- Start initial Sync


- Add Destination
- Snowflake
- Host youraccount.snowflakecomputing.com
- Port 443
- User your Snowflake user
- Database tpcc
- Auth PASSWORD

After Fivetran is done syncing, you can navigate to Snowflake and view your data under Databases / Fivetran / confluent_cloud / Tables / District / Data Preview


Hope you found this useful!