You must be running Windows 10 to perform this procedure. If you are using a different operating system, check When should I set up a local environment to find out what setup instructions you should follow.
Note: It is no longer necessary to enable developer mode for Windows Subsystem Linux to work.
-
Windows Subsystem Linux (WSL) is not automatically enabled on windows. So, to start off, we need to enable it!
a. Go to your Windows Search bar and type in
turn windows features on or offb. Click on the result that matches your query. It will be in your Control Panel. You should see something like this:

c. Scroll down until you see "Windows Subsystem for Linux" - ensure its box is checked!

- Restart your computer
- Check your Windows 10 version by going to
System Informationand checking your Version. If your build is earlier than 16215, skip step 4 and proceed to step 5.
- Open up Microsoft Store. Search for "Ubuntu"
- Choose "Ubuntu" (not 16.04 LTS or 18.04 LTS)


-
If you run into errors or if you have an early version of Windows 10, see further information here
-
Open up the Ubuntu app. Follow the prompts, which will include making a username and password. Don't forget your password!

Note: if you get an error at this step, see FAQ below.
-
Once everything is set up, we can start setting up our system! Start off by running the following to download our dependencies:
sudo apt-get updatesudo apt-get install git-core curl zlib1g-dev build-essential libssl-dev libreadline-dev libyaml-dev libsqlite3-dev sqlite3 libxml2-dev libxslt1-dev libcurl4-openssl-dev software-properties-common libffi-dev libpq-dev libgdbm-dev libncurses5-dev automake libtool bison gnupg postgresql postgresql-contrib -
Install RVM by running (in order):
sudo apt-add-repository -y ppa:rael-gc/rvm sudo apt-get update sudo apt-get install rvm -
Next, to set up a ruby version most compatible with Learn.co labs, we want to download ruby 2.6.1 and set it as our default:
rvm install 2.6.1 rvm use 2.6.1 --default -
Let's install the bundler gem:
```
gem install bundler
```
-
And set up git:
git config --global color.ui trueFor the next few commands, make sure to input your specific information:
git config --global user.name "your_name"git config --global user.email "[email protected]"You can either communicate with your remote repositories via HTTPS or SSH. If you want to use SSH (which means you will not have to authenticate with your GitHub username and password before each push) - follow these instructions.
-
Now we can get set up with the learn-co gem. This will allow you to use commands like
learn,learn submit, andlearn open.gem install learn-co- In your browser, navigate to learn.co/your_github_username
- At the bottom of the page, you should see text that says
OAuth Token:followed by a token. Copy the token, and then go back to your WSL terminal - Type:
learn whoami - Paste in your token
You should now be fully authenticated with learn.
-
Now let's get Node Version Manager, NodeJS, and Rails installed so we can make a bunch of stuff!
- First, install NVM:
curl -o- https://raw.githubusercontent.com/nvm-sh/nvm/v0.35.1/install.sh | bash - Then, reload bash profile into current session:
source ~/.bashrc - Next, install NodeJS:
nvm install node - Now, Ruby on Rails:
gem install rails
- First, install NVM:
You can use any editor you want, but I am going to be walking through setting up VSCode.
-
Download VSCode here. Choose the Windows download, not the Linux download. Any required Linux downloads will be done via the Ubuntu terminal, and everything else should be downloaded for your Windows OS.
-
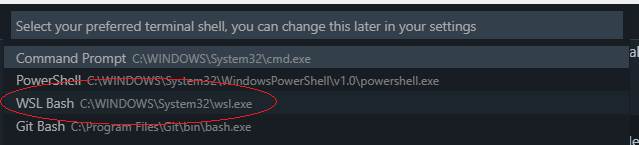
To configure your Ubuntu terminal to be available in VSCode:
- open up VSCode
- open the Command Palette via
F1orCtrl+Shift+p - begin typing the following:
Terminal: Select Default Shelluntil you see it. Select that option.
- Once you select it, a few options will pop up. You want to select WSL
-
Now, you can use your Ubuntu terminal in VSCode. Select "New Terminal" in the "Terminal" drop-down, or type
Ctrl+Shift+` in order to use it! -
Additional User Settings (OPTIONAL):
- You can add a few things to your User Settings to customize and improve your programming experience. Most importantly, we can make VSCode treat .erb files like .html files, allowing us to use all the same shortcuts and get the same syntax highlighting.
- To open up user settings, again open up the Command Palette using
F1orCtr+Shift+pand typePreferences: Open Settings (JSON) - You will see a screen like this:
- to have your erb files treated like html, add the following to your user settings (circled above):
"emmet.includeLanguages": { "erb": "html" } - some optional personal preferences that I like:
"window.zoomLevel": -1, "editor.acceptSuggestionOnEnter": "off", "editor.fontSize": 11, "editor.fontFamily": "Hack, Consolas, 'Courier New', monospace", - Note that for the Hack font to be usable, you have to downlload it. You can check it out here.
-
Update your .learn-config
- Travel to your Linux home directory by typing
cd, you can change your .learn-config by typing:
nano .learn-config- and customizing where you want the
learn opencommand to save labs, and setting your editor to VSCode. Here's what it should look like:
--- :learn_directory: "/mnt/c/users/<your username>/dev/flatiron/labs" :editor: code-
You save a file you have modified in
nanoby following the directions at the bottom of the screen: clickCtrl+Xand thenyand thenEnterto save your changes. -
If you feel uncomfortable with these commands, check out the basic Linux commands link below in the resources.
- Travel to your Linux home directory by typing


Your terminal is actually accessing an Ubuntu Virtual Machine which is running inside of your Windows OS. If you ever cd in your terminal, you will be sent to the 'user home' of your Linux VM. That is also the default location you will be in when you open your Ubuntu app. You actually want to do all of your business inside of your normal Windows file space, not your Linux VM file space. So, you will need to know how to navigate in your terminal from your Ubuntu file system to your Windows file system. This is pretty simple if you understand how the system is set up, so let's go over that quickly.
To allow you to access the functionality of a Linux machine, Windows stores the Ubuntu OS and file system inside of its own file system. You should NEVER access your Ubuntu files via your Windows machine. What you SHOULD do is save everything you are working on in your normal Windows filespace, and access that via your Ubuntu terminal. So, how do you do that? Well, from the Ubuntu's point of view, it is just a normal Linux machine, but Microsoft has made a pathway between the Linux VM and your Windows OS via the /mnt directory in your Ubuntu's root.
Here is a quick visual of what the first few levels of any Linux filesystem look like:

As you can see, the mnt directory is made for other filesystems, so that is where Microsoft connected your Linux to your Windows machine:

So, you can get there from your starting point by typing:
cd /mnt/c/users/your_windows_username
or
cd ../../mnt/c/users/your_windows_username
Remember, put all of your stuff in your windows directories! That way, you have access to it via your Linux Terminal or your Windows OS, and your VSCode editor can open to the correct location when you use
code .
(if you are in your Linux file system, VSCode will open, but not to the right spot).
Start out by making a backup for your .bashrc
mv .bashrc .bashrc.bak
We will want a tool for converting Windows ending to Unix endings for our new .bashrc
sudo apt-get install dos2unix
download the new .bashrc
curl -R "https://raw.githubusercontent.com/Enoch2k2/flatiron-wsl-bashrc/master/.bashrc" >> $HOME/.bashrc
We'll use our converter to convert our bashrc to use the right unix endings:
dos2unix .bashrc
You'll notice that we set up our .learn-config file earlier with a path destination of /mnt/c/users/<your_windows_username>/dev/flatiron/labs. The .bashrc file we just downloaded gives us a really nice way to access that folder quickly by just typing in labs when we pull up our WSL terminal (or anytime you want to access that folder - it doesn't matter what directory you are currently in when you type it). In order for this to work, we need to make sure that these directories exist. To do this, begin by navigating to your windows home directory:
cd /mnt/c/users/your_windows_username
Now, let's make the appropriate files. Run these one at a time, and do it without copying and pasting. Remember the basic bash commands: cd changes directories to whatever folder you type in and mkdir creates a new directory which will be a subdirectory of the current directory location of your terminal.
mkdir dev
cd dev
mkdir flatiron
cd flatiron
mkdir labs
Now you have the directories you need, and you should have seen yourself navigating down your new file tree as you made each new directory and then cd'd into it.
Now, learn open should work seamlessly by adding your most current lab to the labs directory we just made.
Also, you should be able to run the command
labs
at any time in your terminal and you will be taken to your labs directory. Give it a try!
In the Javascript section of the Flatiron curriculum, some tests require phantomjs. If you run across an error related to phantomjs, do the following:
sudo apt-get update
sudo apt-get install build-essential chrpath libssl-dev libxft-dev -y
sudo apt-get install libfreetype6 libfreetype6-dev -y
sudo apt-get install libfontconfig1 libfontconfig1-dev -y
cd ~
export PHANTOM_JS="phantomjs-2.1.1-linux-x86_64"
wget https://github.com/Medium/phantomjs/releases/download/v2.1.1/$PHANTOM_JS.tar.bz2
sudo tar xvjf $PHANTOM_JS.tar.bz2
sudo mv $PHANTOM_JS /usr/local/share
sudo ln -sf /usr/local/share/$PHANTOM_JS/bin/phantomjs /usr/local/bin
phantomjs --versionSetting up PostgreSQL allows simple production-level database integration into a Rails project. This allows easy hosting on Heroku with only a little setup.
-
First, we want to Download PostgreSQL for Windows - download the Interactive Installer.
-
Once everything is downloaded and installed, you can verify proper operation by typing in your terminal
psql -p 5432 -h localhost -U postgresonce connection is verified, you can quit by typing
\q -
There are a few ways to do the next few steps but the easiest way is to use pgAdmin. Open up pgAdmin, which is a Graphical User Interface for PostgreSQL.

- This should open up pgAdmin in your browser. Start a server by right-clicking "PostgreSQL" and selecting "Connect Server"


- Enter the password you defined during the download
- Your PostgreSQL server is running, and can now be integrated into your projects.
- You also want to set up a new user/role and password that you want to use with your rails app. Ensure you give your user/role all available permissions during setup.
- During setup, ensure to fill out
Namein theGeneraltab,Passwordin theDefinitiontab, and enable all permissions in thePrivilegestab.
- During setup, ensure to fill out


EXAMPLE: CONNECTING YOUR POSTGRESQL SERVER TO YOUR RAILS APP
-
Make sure your server is connected and roles are configured as described above.
-
Make sure you are in a suitable directory (in your Windows file system space) and create a Rails app configured to use PostgreSQL:
rails new my-first-app --database=postgresql -
Now, let's configure our
database.ymlfile to allow our app to connect to our database. Add the following to yourconfig/database.ymlfile under BOTHdevelopment:andtest:You will need to add a user and password which will correspond to the roles we created in pgAdmin.host: localhost user: your-postgres-username password: your-postgres-usernames-password -
We can now test our database and rails interoperability by first setting up some architecture in our app:
rails g scaffold Post title:string body:text -
now create and migrate a database:
rake db:create rake db:migrate -
If these fail, ensure you have added your database.yml configurations under both the development AND test sections
-
Now, start a server:
rails s -
If you navigate to
localhost:3000you should see that we are on Rails!
-
Let's test our database by going to 'localhost:3000/posts'
-
Now just follow the crud links and try to make a post! We should be seeing our database working great with our rails app!


- Hopefully, everything is working for you! Now you're ready to develop using WSL!
If you get the error: Windows Subsystem for Linux has no installed distributions. Distributions can be installed by visiting the Windows Store: https://aka.ms/wslstore Press any key to continue...
- Search for 'Services' in your Windows search bar, open it up

- Scroll down to the
Lsection, and findLxssManager. If it is running, right click andRestartit. If it is not running, right click it andStartit.

You can check out the github issue here
Microsoft Documentation: Windows Subsystem for Linux
Setting up a SSH Key with GitHub
Basic Linux Commands