How to install Arch Linux on an VPS (kvm).
This guide assumes the following:
- x86_64, KVM-based VPS
- VPS has one ROM drive (virtio)
- VPS has more around 8 GB RAM
| PARTITION | DEVICE | TYPE |
|---|---|---|
| Boot | /dev/vdX1 | BIOS Boot (4) |
| Root | /dev/vdX2 | Linux Filesystem (ext4) |
Note Remember to replace /dev/vdX with the actual drive, e.g /dev/vda
Assume anything reffered to as *low ram vps* in the guide to be a VPS with <8gb ram. Ignore bootstrap partition if your VPS can fit an arch bootstrap image on tmpfs, which makes it a lot simpler.
| PARTITION | DEVICE | TYPE |
|---|---|---|
| Bootstrap (only low ram vps) | /dev/vdX2 | Linux Filesystem (ext4) |
Please follow these instructions carefully. If want to blindly copy-paste commands please refer to https://wiki.archlinux.org/title/general_recommendations.
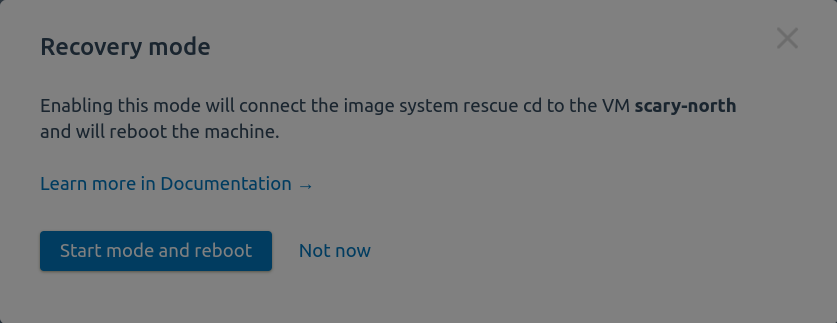
If VPS using vmmanager from https://docs.ispsystem.com/v6/virtual-machines/recovery-mode Go to VPS Panel: Virtual machines →⋮Menu → Recovery mode

Select Recovery mode.
Check availability of ssh connection to VPS
ssh [email protected] <--- VPS ip addressNote: If you get a hostkey mismatch, remove
~/.ssh/known_hosts. This happens because the recovery os uses a temporary ssh fingerprint.
Note: Need to disable iptables for ssh to connect
systemctl stop iptables.service ip6tables.servicehttps://gitlab.com/systemrescue/systemrescue-sources/-/issues/190
Alternetivly, VNC can be used for installation proccess.

Note: https://en.wikipedia.org/wiki/Classless_Inter-Domain_Routing#IPv4_CIDR_blocks
If mask is 255.255.255.255, thus cidr will be /32
ip address add <VPS IP>/<cidr> broadcast + dev <ens#>
ip route add <Gateway IP>/<cidr> dev <ens#>
ip route add default via <Gateway IP>
now it's time to test if internet is up
ping 1.1.1.1
ping google.com-
FYI: iso date
To change the date to last iso date look for lastest one at https://mirror.rackspace.com/archlinux/iso/latest/.
in terminal execute
[root@VPS] cd /tmp
[root@VPS] wget https://geo.mirror.pkgbuild.com/iso/latest/archlinux-bootstrap-x86_64.tar.zstNote:
For this you need to have an option to install qemu-img
Make some extra room for the image:mkdir /tmp/mnt mount -t tmpfs tmpfs /tmp/mnt cd /tmp/mntDownload Archlinux cloud image:wget https://geo.mirror.pkgbuild.com/images/latest/Arch-Linux-x86_64-cloudimg.qcow2
Burn image to vdX:qemu-img convert -f qcow2 -O raw Arch-Linux-x86_64-cloudimg-20210315.17387.qcow2 /dev/sdb
For additional info Install Arch Linux On OVH VPS
list available drives:
fdisk -l
Choose correct ROM drive to wipe fs by executing:
wipefs -a /dev/vdX
- Create a GPT partition table:
[root@VPS] parted /dev/vdX mklabel gpt- Create partitions on /dev/vdX
[root@VPS] parted /dev/vdX-
FYI: bios_grub partition
With GPT partition table also need to create abios_grubpartition of 1MiB since the default firmware for KVM virtual machine is seaBIOS which is a free and open source BIOS implementation. Later the Grub 2 boot loader will be installed insidebios_grubpartition.
Make ensure thatbios_grubpartition starts at least 31 KiB (63 sectors) from the start of the disk because the first 63 sectors is reserved for MBR boot code. However, it will give us performance benefit if we align partitions so the bios_grub partition might start at 1MiB from the start of the disk.
For additional info refer to BIOS/MBR examples on Arch Wiki
-
Create bios_grub partition with this command:
mkpart primary 1MiB 2MiB -
Set it as a bios_grub partition
set 1 bios_grub on -
Create the second partition.
mkpart primary 2MiB 100%
100% means it will use all the following space of the disk. This tutorial use a single root partition. If you need advanced setup, you can adjust it.
-
FYI: reasons to use ext4
it doesn't make sense to use other partition types than ext4 here really, because of RAID on servers and most features of the other filesystems wont be useful in a virtualized environment
[root@VPS] mkfs.ext4 /dev/vdX2-
/ToDo
mkfs.ext4 /dev/vdX2
This will be tricky, as the bootstrap image loaded on the drive before extraction.
For this, create your main partition, which will span the entire drive, minus 6 gigabyes.
To make this easier, just say `-6G` when fdisk asks you for the last sector
Now need to make another partition, which will span the 6 gigabytes left free for bootstrap image. There is an option to reclaim the space later.
Check Bonus: Low ram VPS: Reclaim space.
- Making bootstrap folder
[root@VPS] mkdir /tmp/bootstrap
[root@VPS] mount -t tmpfs tmpfs /tmp/bootstrap- extracting bootstrap image & removing leftovers
[root@VPS] cd /tmp/bootstrap
[root@VPS] tar xzf /tmp/archlinux-bootstrap-*-x86_64.tar.zst --numeric-owner
[root@VPS] mv root.x86_64/* .
[root@VPS] rmdir root.x86_64[root@VPS] mount /dev/vdX2 /tmp/bootstrap/mnt# uncomment a mirror, e.g the rackspace one
sed -i 's|#Server = https://mirror.rackspace.com|Server = https://mirror.rackspace.com|g' etc/pacman.d/mirrorlist -
Optional: enable pacman parrarel downloading
sed -i 's/#ParallelDownloads/ParallelDownloads/g' etc/pacman.conf
[root@VPS] /tmp/bootstrap/bin/arch-chroot /tmp/bootstrap[root@VPS] pacman-key --init
[root@VPS] pacman-key --populate archlinuxNote this can take a while because of entropy generation.
[root@VPS] pacstrap /mnt base linux linux-firmware sudo openssh grub os-prober micro xfsprogs pacman-contrib bash-completion-
Optional: alternative kernel to install
you can use another kernel: linux-lts may be optimal for servers
[root@VPS] genfstab -U mnt >> mnt/etc/fstabNow exit your bootstrap chroot:
[root@VPS] exit[root@VPS] /tmp/bootstrap/bin/arch-chroot /tmp/bootstrap/mnt/default config is fine, but you can make it better.
# change GRUB_TIMEOUT= to a lower value for faster boot
[root@VPS] sed -i 's/GRUB_TIMEOUT=.*/GRUB_TIMEOUT=2/g' /etc/default/grub
# remove everything from GRUB_CMDLINE_LINUX_DEFAULT=, hiding logs is useless and makes debugging harder
[root@VPS] sed -i 's/GRUB_CMDLINE_LINUX_DEFAULT.*/GRUB_CMDLINE_LINUX_DEFAULT=""/g' /etc/default/grub# install bootloader
# Since we are using BIOS firmware, so the target should be i386-pc
[root@VPS] grub-install --target=i386-pc /dev/vdX
# create bootloader entries
[root@VPS] grub-mkconfig -o /boot/grub/grub.cfgPost-config steps to make after initial installation is complete
- Configure and launch
systemd-networkd
# starting service
[root@VPS] systemctl enable systemd-networkd.service
# adjust to your needs
# if ip is public, so need to add Destination= with gateway ip and subnet prefix
cat << EOF > /etc/systemd/network/20-wired.network
[Match]
Name=en*
[Network]
Address=xxx.xxx.xxx.xxx/32
Gateway=10.0.0.1
DNS=1.1.1.1
[Route]
Destination=10.0.0.1/32
EOF
The preinstalled systemd-resolved provides resolver services for DNS, DNSSEC, DNS over TLS, mDNS and LLMNR.
- Configure DNS in
/etc/systemd/resolved.conf
[Resolve]
DNS = 1.1.1.1
FallbackDNS = 9.9.9.9- Start resolved with
DNS stub file mode
# creating stub file
[root@VPS] ln -sf /run/systemd/resolve/stub-resolv.conf /etc/resolv.conf
# starting service
[root@VPS] systemctl enable systemd-resolved.service
[root@VPS] echo "en_US.UTF-8 UTF-8" >> /etc/locale.gen
[root@VPS] echo "LANG=en_US.UTF-8" >> /etc/locale.conf
[root@VPS] locale-genFor VPS public ip Timezone can be check at ipinfo.io
[root@VPS] ln -sf /usr/share/zoneinfo/<REGION>/<CITY> /etc/localtimeThis will take a while depending on VPS network speed, as it should test and choose the fastest mirror.
[root@VPS] cp /etc/pacman.d/mirrorlist /etc/pacman.d/mirrorlist.backup
[root@VPS] awk '/^## Country Name$/{f=1; next}f==0{next}/^$/{exit}{print substr($0, 1);}' /etc/pacman.d/mirrorlist
[root@VPS] sed -i 's/^#Server/Server/' /etc/pacman.d/mirrorlist[root@VPS] echo "Hostname" > /etc/hostname[root@VPS] mkinitcpio -P[root@VPS] passwd# create user
[root@VPS] useradd -m <username>
# give user a password
[root@VPS] passwd <username>
# configure sudo using drop-in files in https://wiki.archlinux.org/title/sudo#Configure_sudo_using_drop-in_files_in_/etc/sudoers.d
# it is strongly advised to use `visudo`
[root@VPS] nano /etc/sudoers.d/<username>
# add desired sudo magic
<username> ALL=(ALL:ALL) ALL
# optionally permit passwordless execution (for example, networkctl)
<username> ALL=(ALL:ALL) NOPASSWD: /usr/bin/networkctlForce public key authentication instead of password https://wiki.archlinux.org/title/OpenSSH#Force_public_key_authentication
# login into <username>
[root@VPS] sudo -u <username> bash
# create keys
[<username>@VPS] ssh-keygen
# copy public key id_rsa.pub from host to VPS into file ~/.ssh/authorized_keys
# chown authorized_keys
[<username>@VPS] chown <username>:<username> ~/.ssh/authorized_keys
# return to root
[<username>@VPS] exit
# restart sshd service
[root@VPS] systemctl restart sshd- Disable root login
- Disable password authentication
# (?) Port SSHD_PORT
PermitRootLogin no
PasswordAuthentication no
ClientAliveInterval 30
ClientAliveCountMax 60
LogLevel VERBOSE
AuthorizedKeysFile .ssh/authorized_keys[root@VPS] systemctl enable sshd[root@VPS] systemctl start qemu-guest-agent
# https://docs.ispsystem.com/v6/virtual-machines/how-to-check-and-restore-qemu-guest-agent
[root@VPS] systemctl enable --now qemu-guest-agent.service[root@VPS] exit
[root@VPS] umount /tmp/bootstrap/mnt
[root@VPS] umount /tmp/bootstrap
[root@VPS] exitNow go to control panel and reboot the VPS. It should boot right into Arch.
If you can't ssh to it, connect using KVM in the control panel and debug the issue.
-
Remember the bootstrap partition we made?
Yeah, we don't need that anymore.fdisk /dev/vdXThen type d and choose partition number 2. This will remove useless partition.
Now, the tricky part: also remove partition 10. Type d, followed by 10. BUT, when it asks you, DO NOT erase the ext4 header, otherwise you will have to redo the process.
Now make another partition with id 10 and fill entire drive with it. Write the changes with w and reboot. It should automatically fsck the filesystem and fix up stuff. Now the filesystem is reclaimed.
credits: