- Navigate to the
/bootdirectory of the Fedora installation of the host to grab some kernel and initramfs images.
The following is an example output for the above command.cd /boot && ls -ltotal 239596 -rw-r--r--. 1 root root 234567 Jul 21 02:13 config-5.13.4-200.fc34.x86_64 -rw-r--r--. 1 root root 234567 Jul 25 22:05 config-5.13.5-200.fc34.x86_64 -rw-r--r--. 1 root root 234567 Jul 28 21:17 config-5.13.6-200.fc34.x86_64 drwx------. 4 root root 4096 Jan 1 1970 efi -rw-r--r--. 1 root root 155544 Jan 27 2021 elf-memtest86+-5.31 drwxr-xr-x. 2 root root 4096 Apr 23 16:26 extlinux drwx------. 2 root root 4096 Aug 2 13:07 grub2 -rw-------. 1 root root 84860404 Jul 12 00:09 initramfs-0-rescue-8ee701c92f0f486cbb7afe96e5b7ea67.img -rw-------. 1 root root 33023557 Jul 23 18:49 initramfs-5.13.4-200.fc34.x86_64.img -rw-------. 1 root root 33002599 Jul 30 08:37 initramfs-5.13.5-200.fc34.x86_64.img -rw-------. 1 root root 32910001 Aug 2 14:44 initramfs-5.13.6-200.fc34.x86_64.img drwxr-xr-x. 3 root root 4096 Jul 12 00:09 loader drwx------. 2 root root 16384 Jul 12 00:06 lost+found -rw-r--r--. 1 root root 153868 Jan 27 2021 memtest86+-5.31 -rw-------. 1 root root 5778689 Jul 21 02:13 System.map-5.13.4-200.fc34.x86_64 -rw-------. 1 root root 5778727 Jul 25 22:05 System.map-5.13.5-200.fc34.x86_64 -rw-------. 1 root root 5778835 Jul 28 21:17 System.map-5.13.6-200.fc34.x86_64 -rwxr-xr-x. 1 root root 10580240 Jul 12 00:09 vmlinuz-0-rescue-8ee701c92f0f486cbb7afe96e5b7ea67 -rwxr-xr-x. 1 root root 10853744 Jul 21 02:13 vmlinuz-5.13.4-200.fc34.x86_64 -rwxr-xr-x. 1 root root 10851312 Jul 25 22:05 vmlinuz-5.13.5-200.fc34.x86_64 -rwxr-xr-x. 1 root root 10850800 Jul 28 21:17 vmlinuz-5.13.6-200.fc34.x86_64 - With appropriate permissions, copy the kernel images to a reference directory
linxkrnland the initramfs images to a reference directoryinitrmfs.sudo cp /boot/vmlinux-* linxkrnl/sudo cp /boot/initramfs-* initrmfs/ - Take up the ownership of the copied kernel images and kernel images by executing the following command on the reference directories
linxkrnlandinitrmfsrespectively.sudo chown $(whoami):$(whoami) linxkrnl/ --recursivesudo chown $(whoami):$(whoami) initrmfs/ --recursive
The following is an example output for the above command.ls -l linxkrnl/total 42136 -rwxr-xr-x. 1 t0xic0der t0xic0der 10580240 Aug 2 15:35 vmlinuz-0-rescue-8ee701c92f0f486cbb7afe96e5b7ea67 -rwxr-xr-x. 1 t0xic0der t0xic0der 10853744 Aug 2 15:35 vmlinuz-5.13.4-200.fc34.x86_64 -rwxr-xr-x. 1 t0xic0der t0xic0der 10851312 Aug 2 15:35 vmlinuz-5.13.5-200.fc34.x86_64 -rwxr-xr-x. 1 t0xic0der t0xic0der 10850800 Aug 2 15:35 vmlinuz-5.13.6-200.fc34.x86_64
The following is an example output for the above command.ls -l initrmfs/total 179496 -rw-------. 1 t0xic0der t0xic0der 84860404 Aug 2 15:36 initramfs-0-rescue-8ee701c92f0f486cbb7afe96e5b7ea67.img -rw-------. 1 t0xic0der t0xic0der 33023557 Aug 2 15:36 initramfs-5.13.4-200.fc34.x86_64.img -rw-------. 1 t0xic0der t0xic0der 33002599 Aug 2 15:36 initramfs-5.13.5-200.fc34.x86_64.img -rw-------. 1 t0xic0der t0xic0der 32910001 Aug 2 15:36 initramfs-5.13.6-200.fc34.x86_64.img - Reuse the domain with the custom partitioning based on EXT4 that was created by the end of the Setting up Fedora Workstation VM on QEMU using BIOS and start it up by executing the following command.
qemu-system-x86_64 \ -boot menu=on \ -m 2048 \ -cpu max \ -smp 4 \ -drive file=datadrct/fedobios.raw,format=raw \ -accel kvm - In a new terminal session inside the virtualized domain, execute the following command to fetch the parameters passed to the kernel during boot.
The following is an example output for the above command.cat /proc/cmdline
Take a note of the UUID for the root partition and the same can be confirmed by executing the following command in a terminal session inside the virtualized domain.BOOT_IMAGE=(hd0,msdos1)/vmlinuz-5.11.12-300.fc34.x86_64 root=UUID=0fa356e9-9509-4e18-8283-8983254c79d1 ro rhgb quiet
The following is an example output for the above command.cat /etc/fstab# # /etc/fstab # Created by anaconda on Mon Aug 2 09:36:54 2021 # # Accessible filesystems, by reference, are maintained under '/dev/disk/'. # See man pages fstab(5), findfs(8), mount(8) and/or blkid(8) for more info. # # After editing this file, run 'systemctl daemon-reload' to update systemd # units generated from this file. # UUID=0fa356e9-9509-4e18-8283-8983254c79d1 / ext4 defaults 1 1 UUID=2d2863bb-527b-4477-bae5-5955bdb44d7b /boot ext4 defaults 1 2 - Power off the virtualized domain and start it up again by executing the following command with the correct UUID for the root partition.
qemu-system-x86_64 \ -boot menu=on \ -m 2048 \ -cpu max \ -smp 4 \ -drive file=datadrct/fedobios.raw,format=raw \ -accel kvm \ -nographic \ -kernel linxkrnl/<vmlinuz-x.yy.zz-aaa.fcRR.x86_64> \ -initrd initrmfs/<initramfs-x.yy.zz-aaa.fcRR.x86_64.img> \ -append "root=UUID=<xxxxxxxx-xxxx-xxxx-xxxx-xxxxxxxxxxxx> rw console=ttyS0" - A lot of
systemdprompts would show up on the console and the virtualized domain would boot up. The following is an example output for the above command.... [ OK ] Started Network Manager Script Dispatcher Service. [ OK ] Finished Network Manager Wait Online. [ OK ] Reached target Network is Online. [ OK ] Reached target Remote File Systems (Pre). [ OK ] Reached target Remote File Systems. Starting Virtualization daemon... Starting Notify NFS peers of a restart... Starting Permit User Sessions... [ OK ] Started Notify NFS peers of a restart. [ OK ] Finished Permit User Sessions. Starting GNOME Display Manager... Starting Hold until boot process finishes up... [ OK ] Started GNOME Display Manager. Fedora 34 (Workstation Edition) Kernel 5.13.6-200.fc34.x86_64 on an x86_64 (ttyS0) fedorable login: t0xic0der Password: Last login: Tue Aug 3 09:31:12 on tty2 [t0xic0der@fedorable ~]$ - As the kernel image and initramfs image versions that we used here are dissimilar from the version of the firmware installed on the virtualized domain, there can be kernel modules which are broken or incompletely loaded.
ip a
As evidenced by the output of the above command executed inside the console of the virtualized domain, the kernel modules for network are apparently broken and the hostname of the host is taken up by the virtualized domain due to the mismatch of kernel images, initramfs images and installed firmware versions.1: lo: <LOOPBACK,UP,LOWER_UP> mtu 65536 qdisc noqueue state UNKNOWN group default qlen 1000 link/loopback 00:00:00:00:00:00 brd 00:00:00:00:00:00 inet 127.0.0.1/8 scope host lo valid_lft forever preferred_lft forever inet6 ::1/128 scope host valid_lft forever preferred_lft forever - For best compatibility, keep the versions for kernel image, initramfs image and installed firmware inline with each other. Instructions for the same have been provided in the Offloading domain TTY output to console with original kernel/initramfs images documentation.

Last active
February 25, 2023 22:33
-
-
Save gridhead/efa2f9acf8da3e92772dc6c69d439c22 to your computer and use it in GitHub Desktop.
Adventures with QEMU, KVM and Libvirt
- Download the Fedora Workstation ISO file from website and store it in a reference directory
cdromimg.https://getfedora.org - Create a virtual disk image of type
16GBand of formatRAWin a reference directorydatadrctby executing the following command.qemu-img create -f raw datadrct/fedobios.raw 16G - Start a virtual machine for installing Fedora Workstation on the virtual disk image by executing the following command on the host.
qemu-system-x86_64 \
  -boot menu=on \
  -m 2048 \
  -cpu max \
  -smp 4 \
  -cdrom cdromimg/<Fedora-Workstation-Live-x86_64-xx-y.z.iso> \
  -drive file=datadrct/fedobios.raw,format=raw \
  -accel kvm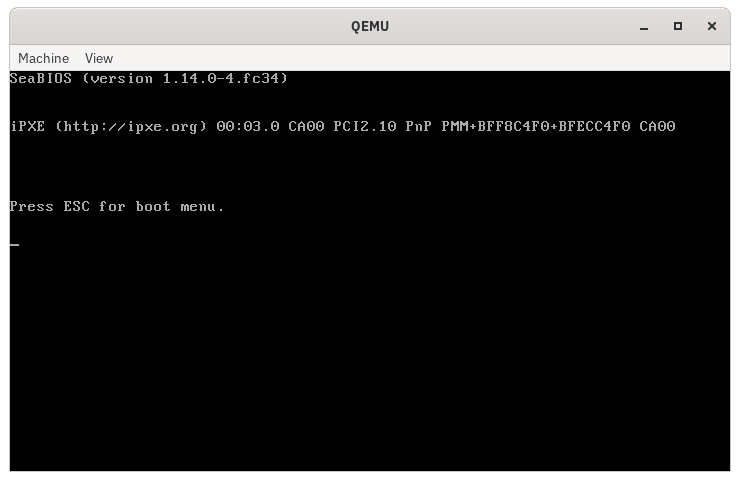

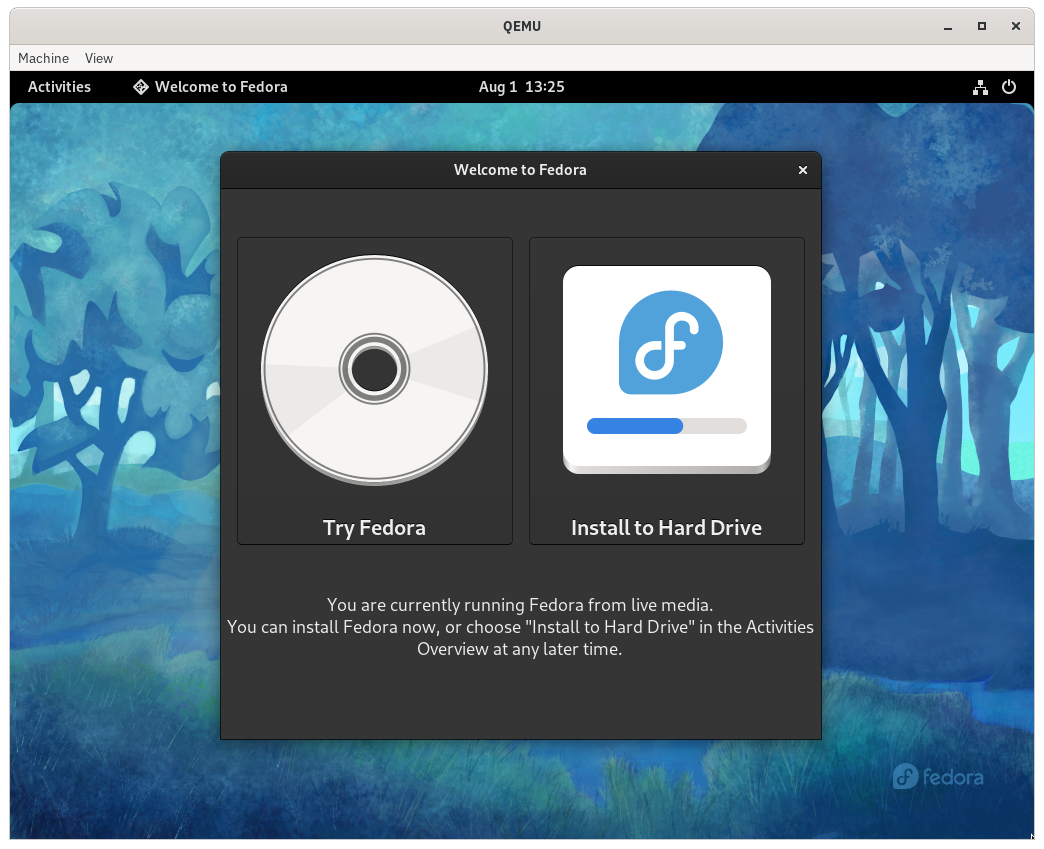
- A greeting window would open up, providing with two options - Either to
Try FedoraorInstall to Hard Drive.
Click on theInstall to Hard Drivebutton to open up the installer application.
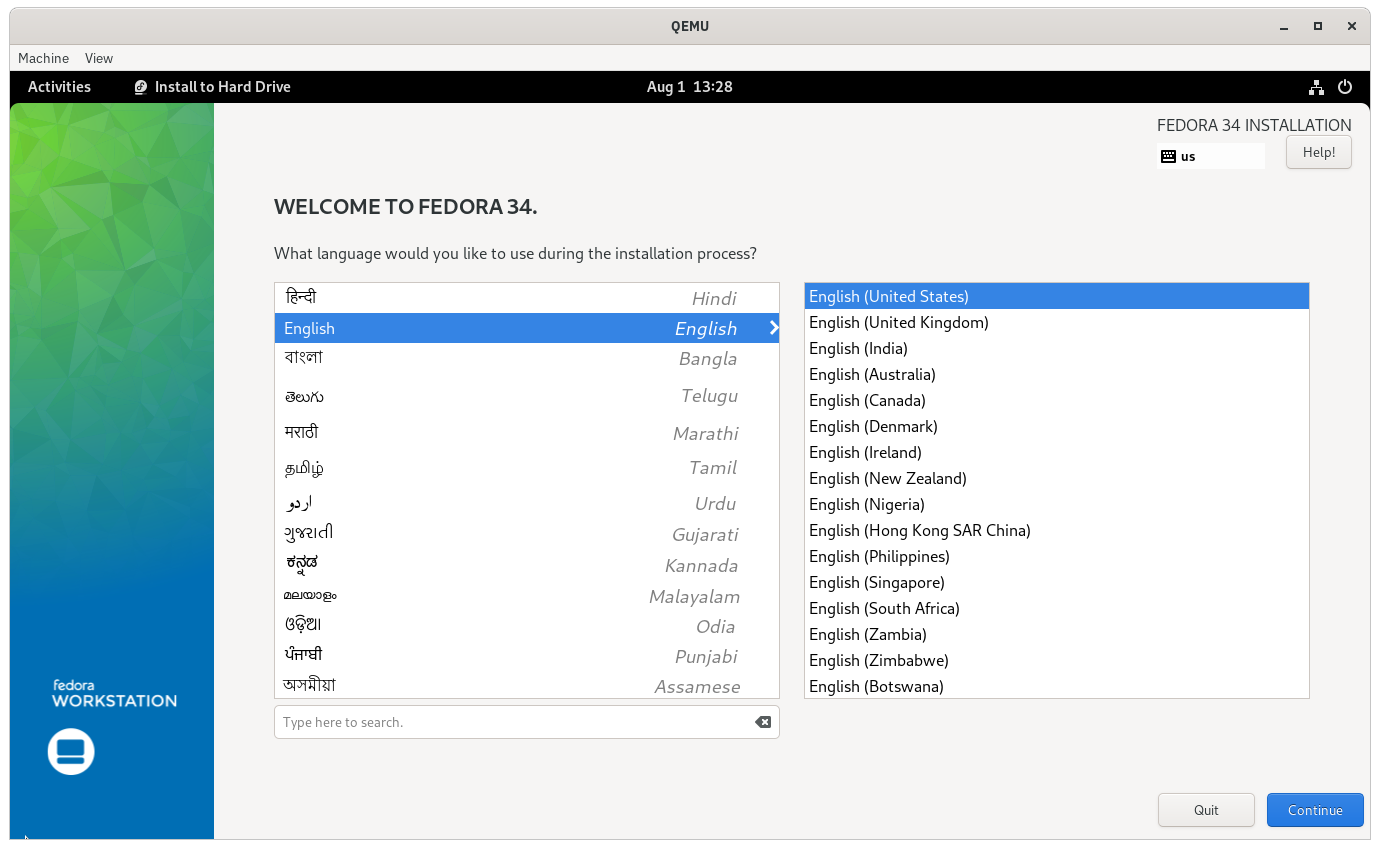
- Pick the language of choice to proceed with the installation on the installer application.
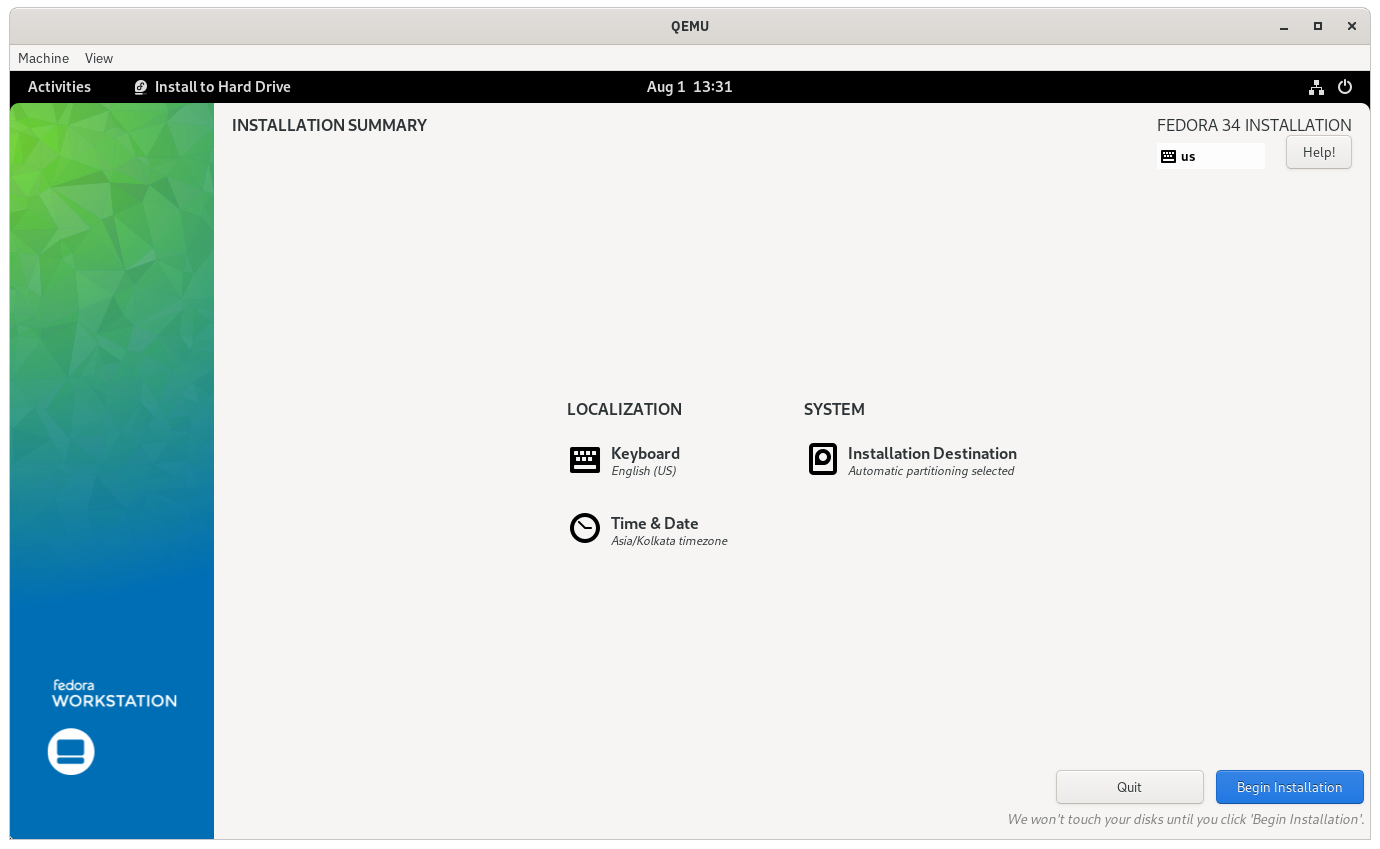
- Configure the installation to liking and then click on
Begin Installationon the installer application to start.
-
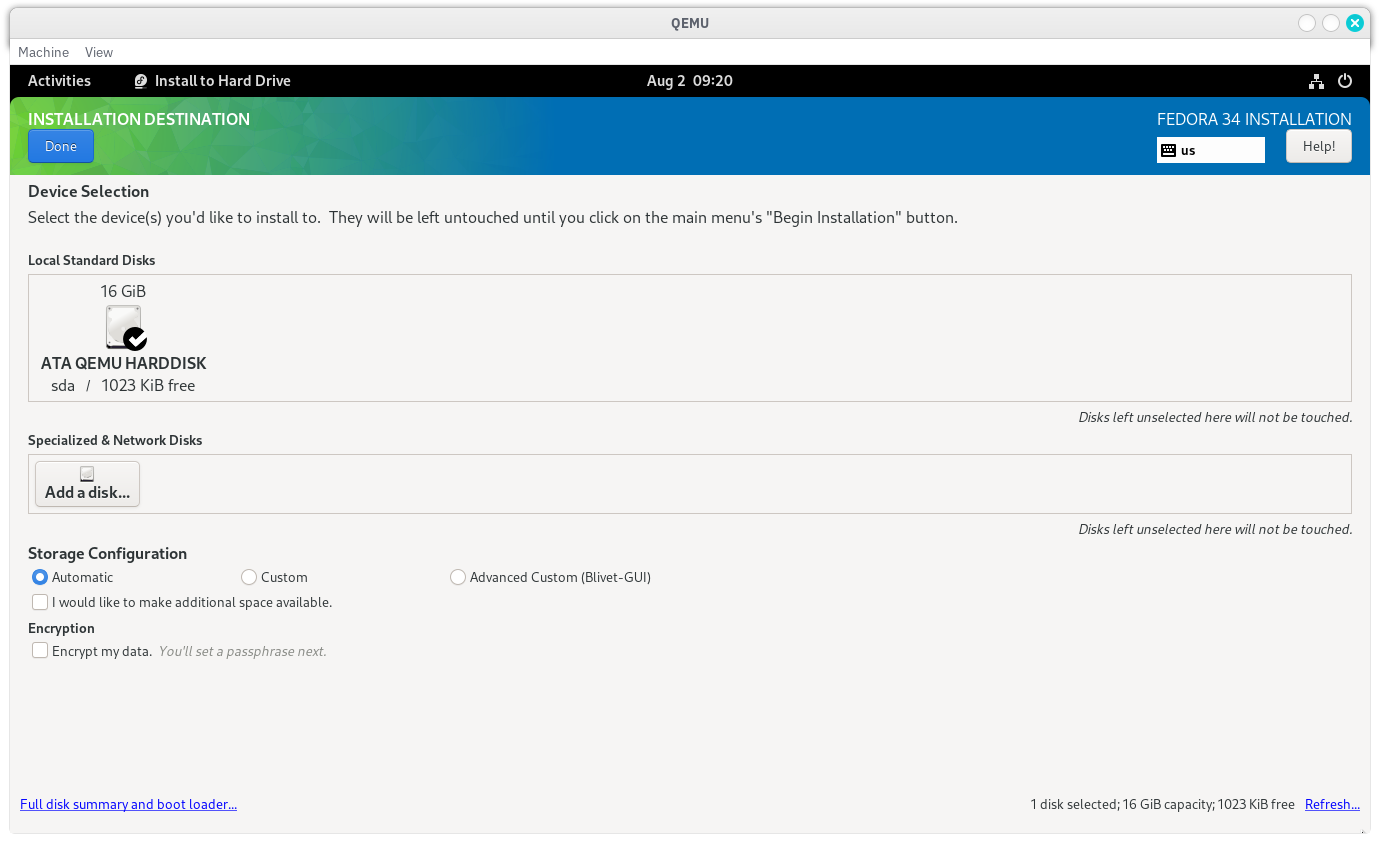
BTRFS partitioning is recommended and the partitioning scheme is configured to consider it as a default. Proceed with the automatic partitioning scheme as illustrated in the following screenshot to apply the recommended partitioning.
-
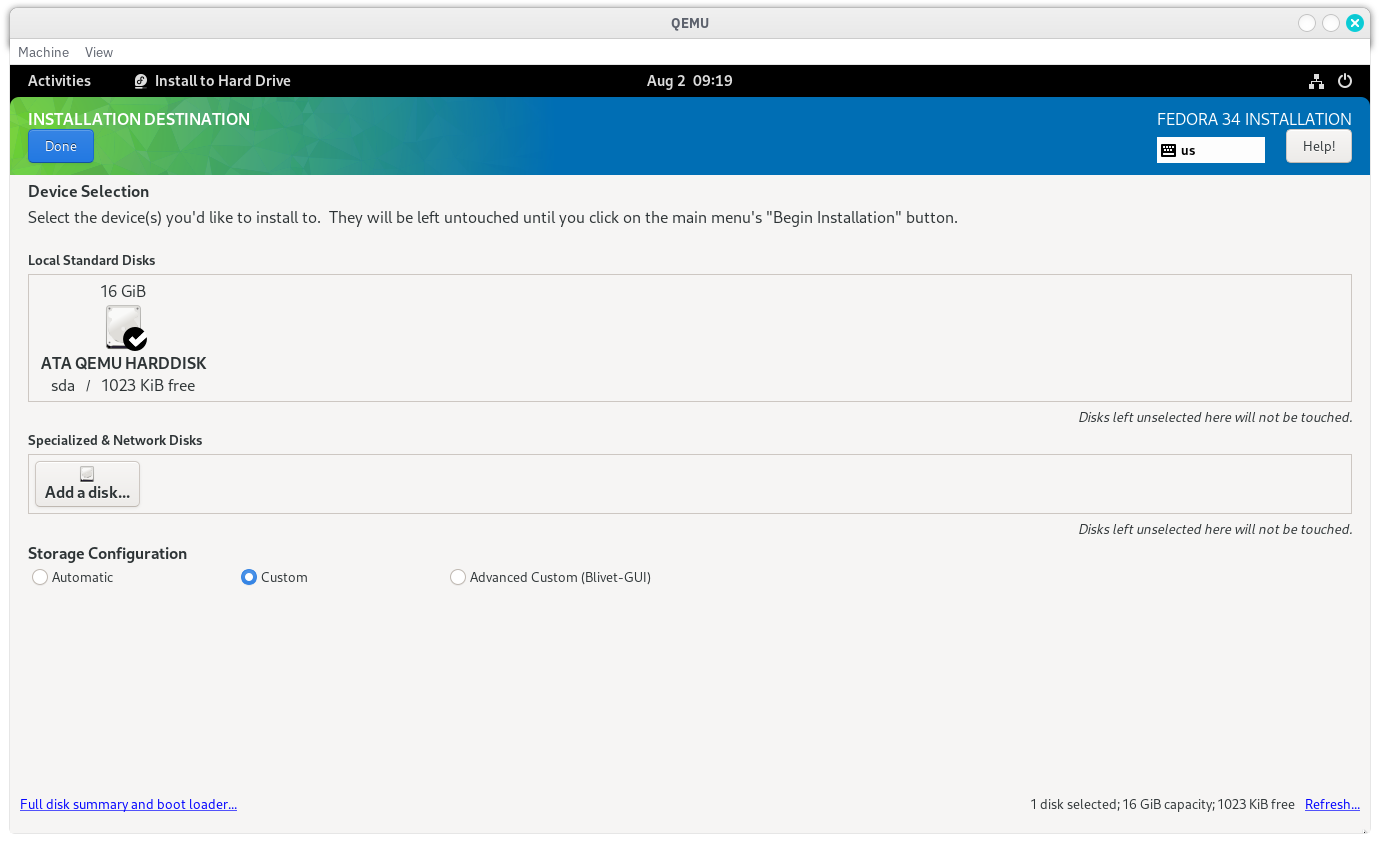
In case of a requirement of a custom partitioning scheme, toggle the
Customradio button underStorage Configurationand click onDonebutton to move to the page where custom partitioning scheme can be selected.
For the sake of simplicity, the partitions are configured in the following manner.Partition Desired Capacity File System Mount Point Device Type Reformat? Encrypt? /dev/sda1 1GiB EXT4 /boot Standard Partition Yes No /dev/sda2 15GiB EXT4 / Standard Partition Yes No 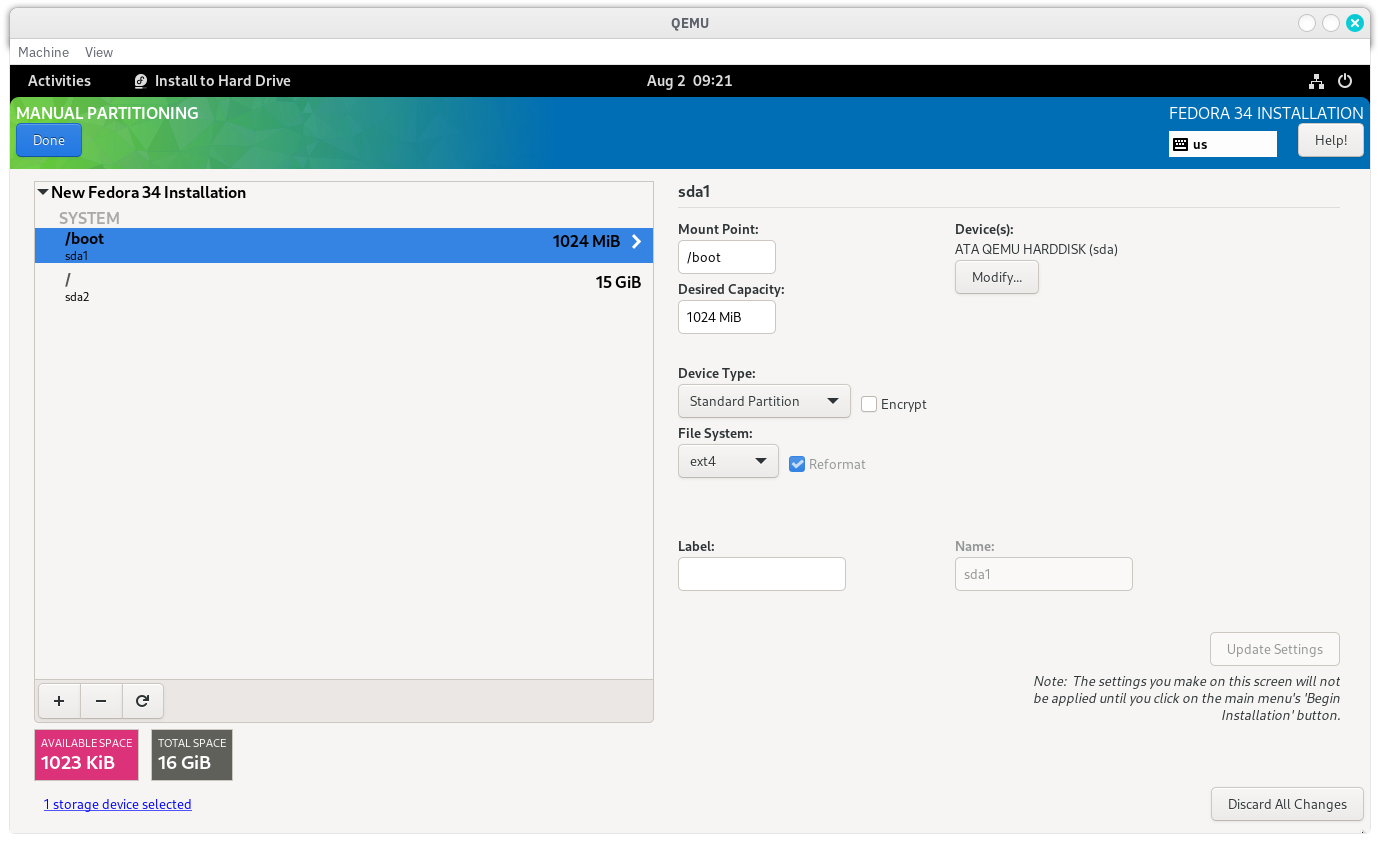
-
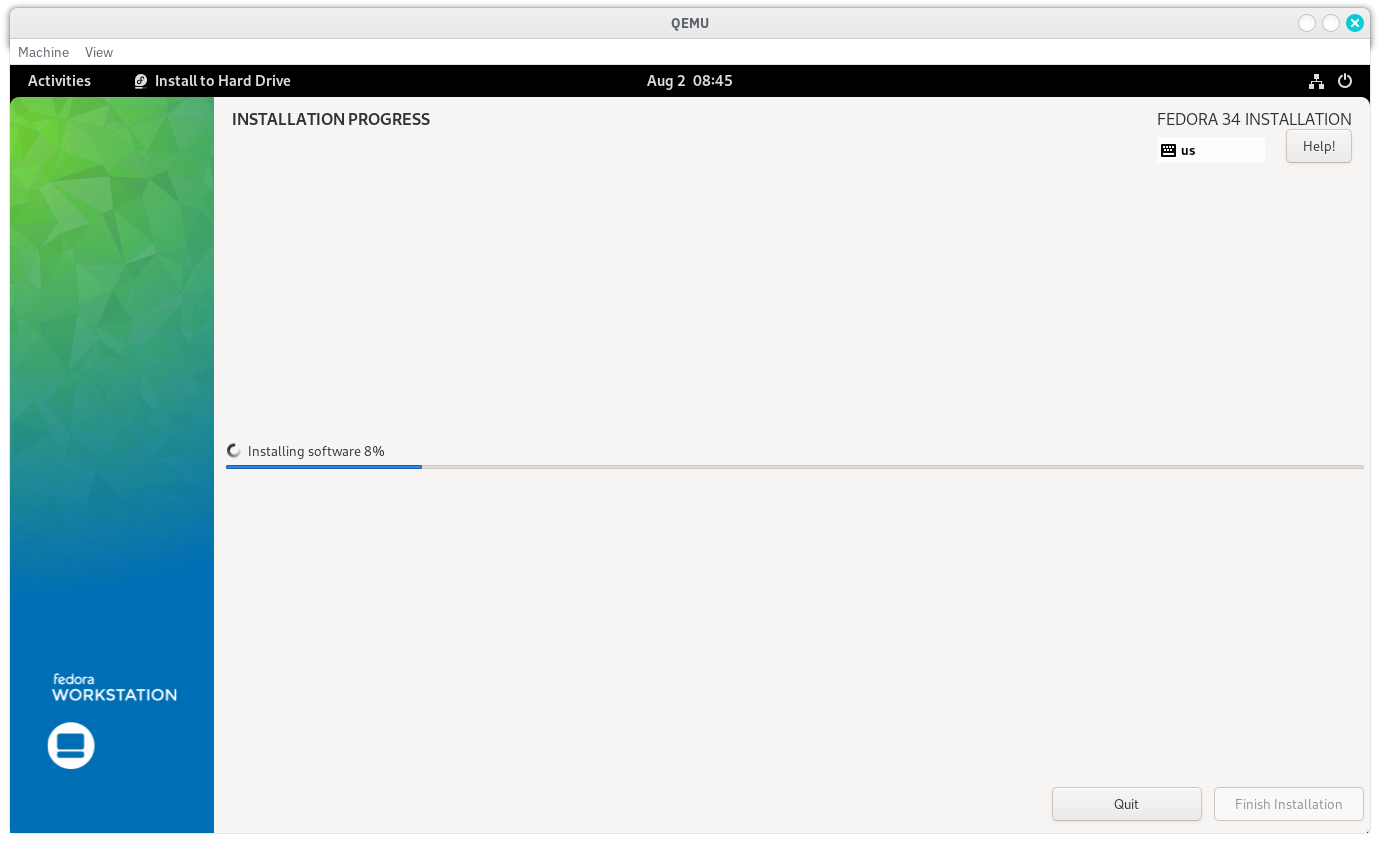
- Let the installation finish, click the
Finish Installationbutton to exit the installer application and then power off the virtualized guest.
- Start a virtual machine where Fedora Workstation was just installed by executing the following command on the host.
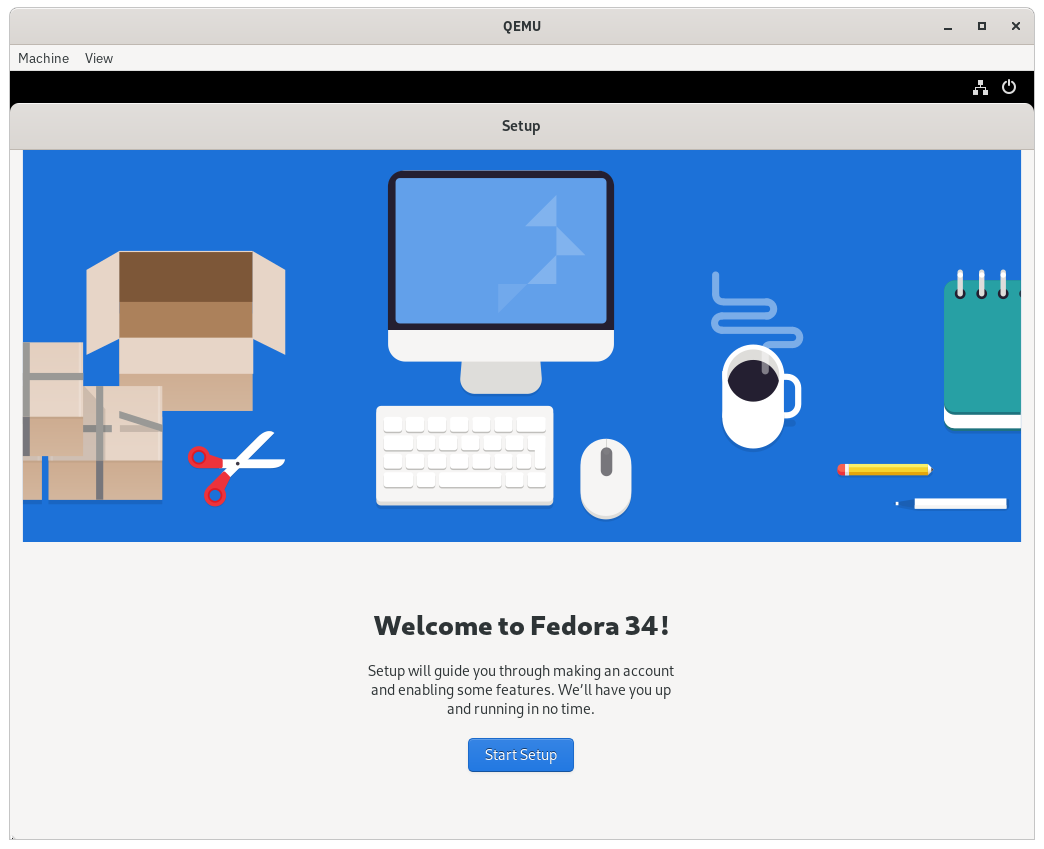
qemu-system-x86_64 \ -boot menu=on \ -m 2048 \ -cpu max \ -smp 4 \ -drive file=datadrct/fedobios.raw,format=raw \ -accel kvm - Set up the Fedora Workstation according to preferences.
- Download the Fedora Workstation ISO file from website and store it in a reference directory
cdromimg.https://getfedora.org - Source OVMF UEFI assets by following the Fetching OVMF UEFI from the correct source guide, if not done already.
- Create a virtual disk image of type
16GBand of formatRAWin a reference directorydatadrctby executing the following command.qemu-img create -f raw datadrct/fedouefi.raw 16G - Start a virtual machine for installing Fedora Workstation on the virtual disk image by executing the following command on the host.
qemu-system-x86_64 \
  -boot menu=on \
  -m 2048 \
  -cpu max \
  -smp 4 \
  -cdrom cdromimg/<Fedora-Workstation-Live-x86_64-xx-y.z.iso> \
  -drive file=datadrct/fedouefi.raw,format=raw \
  -bios /usr/share/edk2/ovmf/OVMF_CODE.fd \
  -accel kvm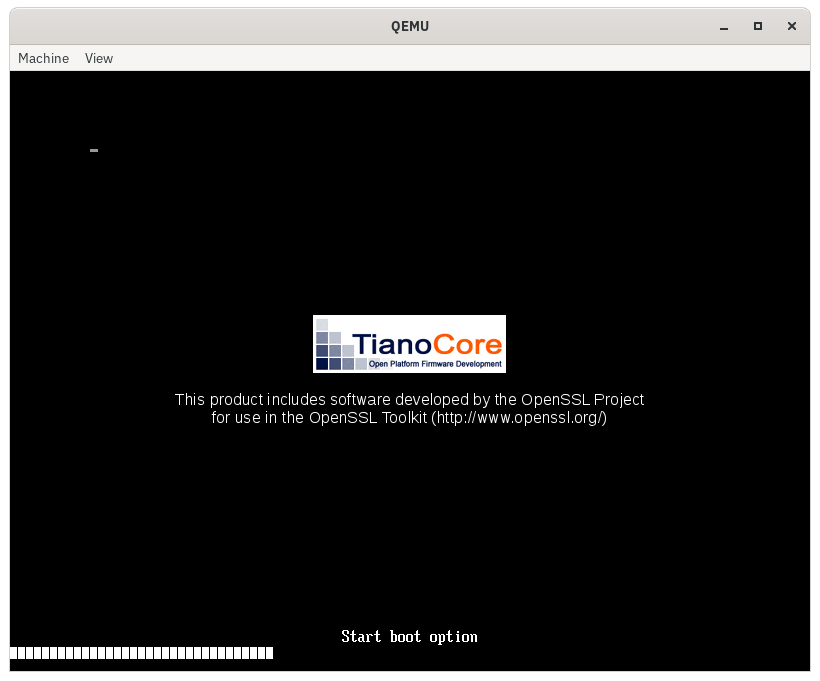
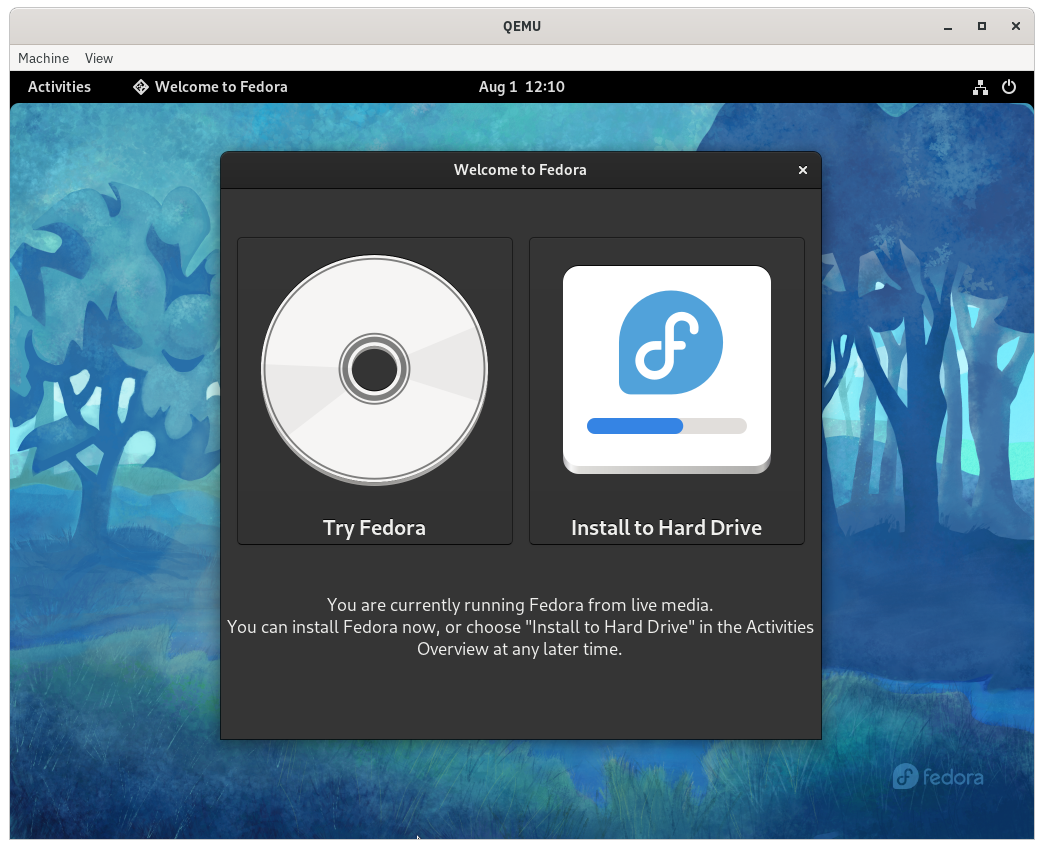
- A greeting window would open up, providing with two options - Either to
Try FedoraorInstall to Hard Drive.
Close the window for now.
- In a new terminal session inside the virtualized guest, execute the following command to confirm UEFI boot.
ls -la /sys/firmware/efi/efivars/
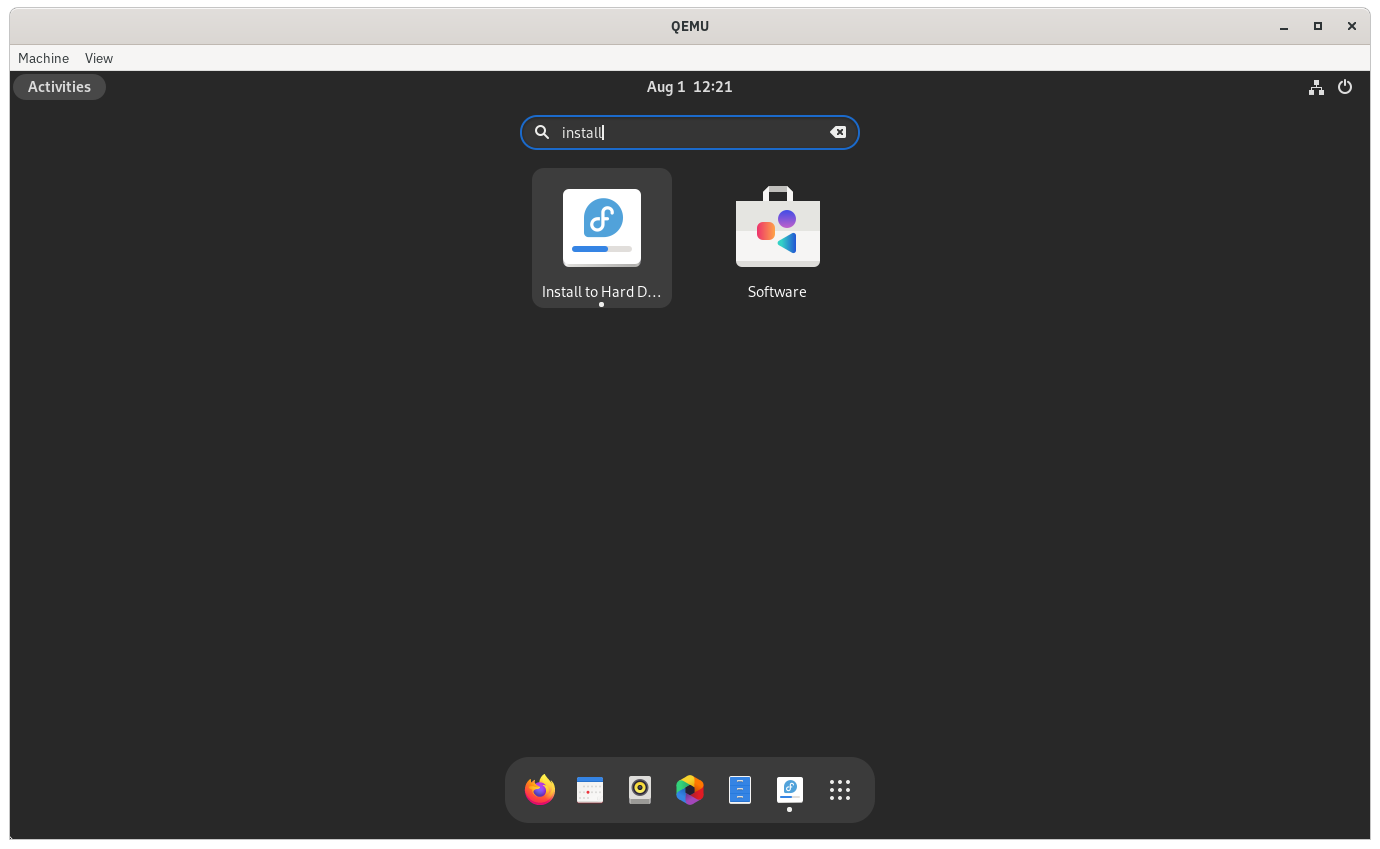
- Open up the installer application by clicking on the
Install to Hard Driveicon from the GNOME drawer inside the virtualized guest.
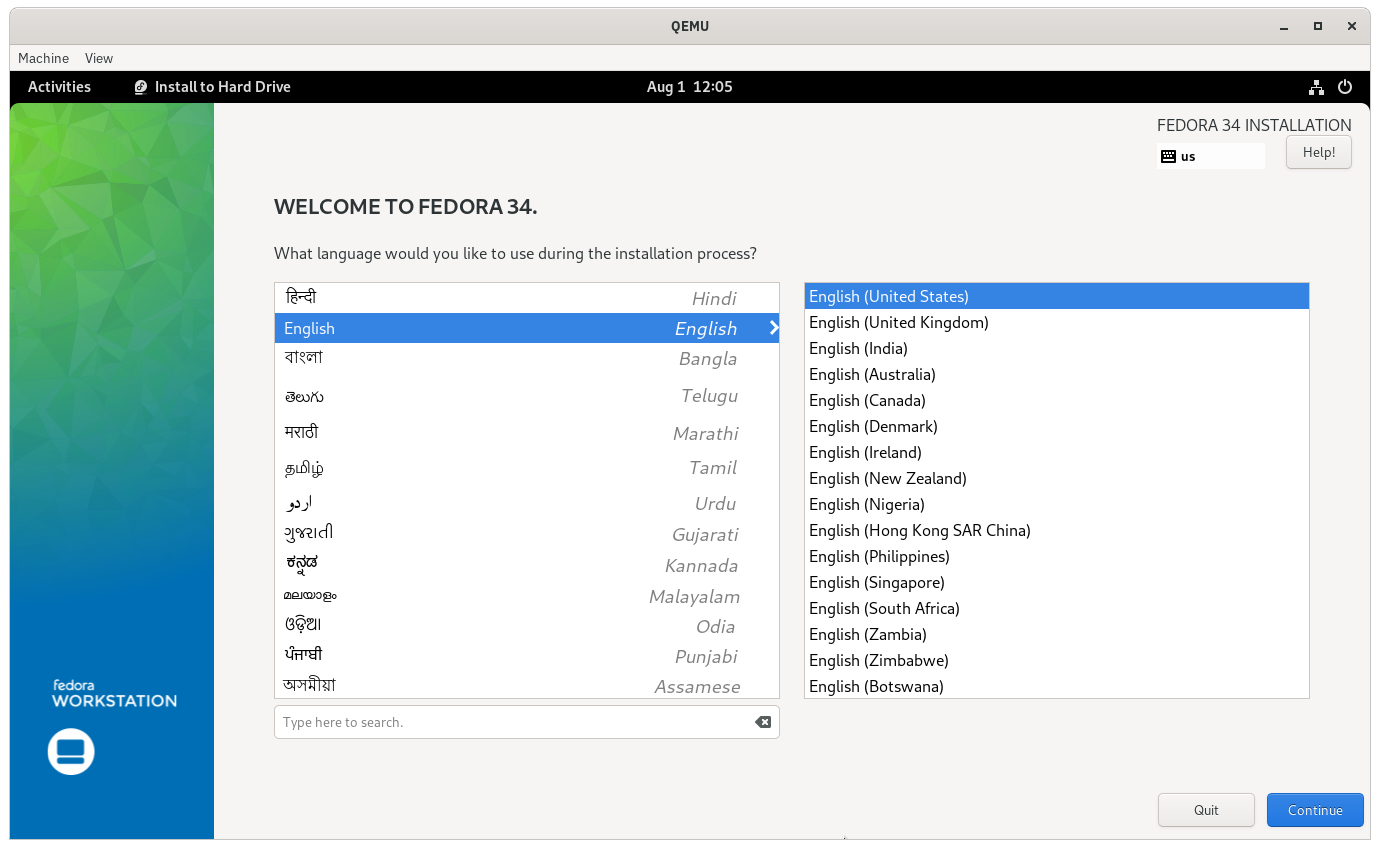
- Pick the language of choice to proceed with the installation on the installer application.
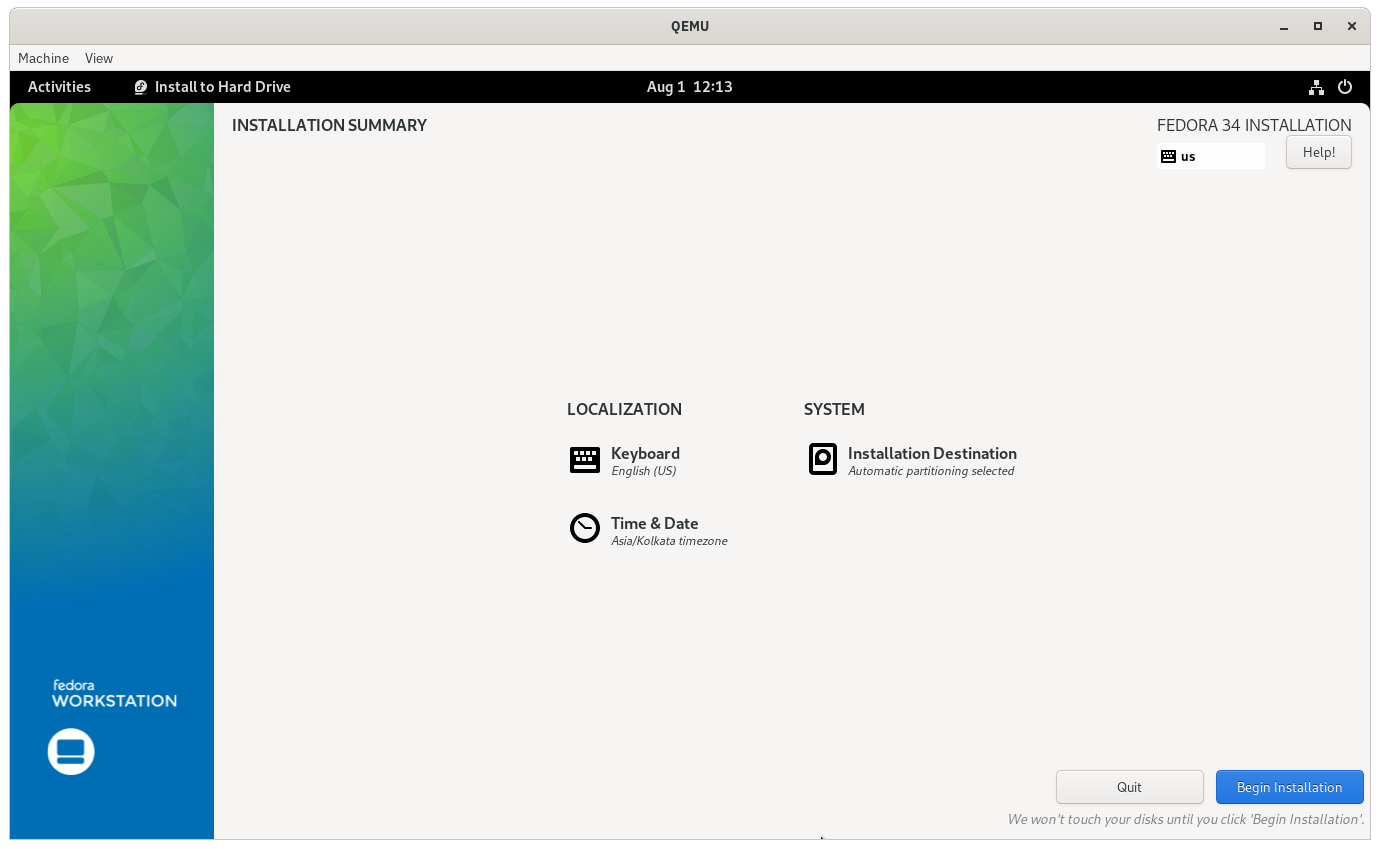
- Configure the installation to liking and then click on
Begin Installationon the installer application to start.
-
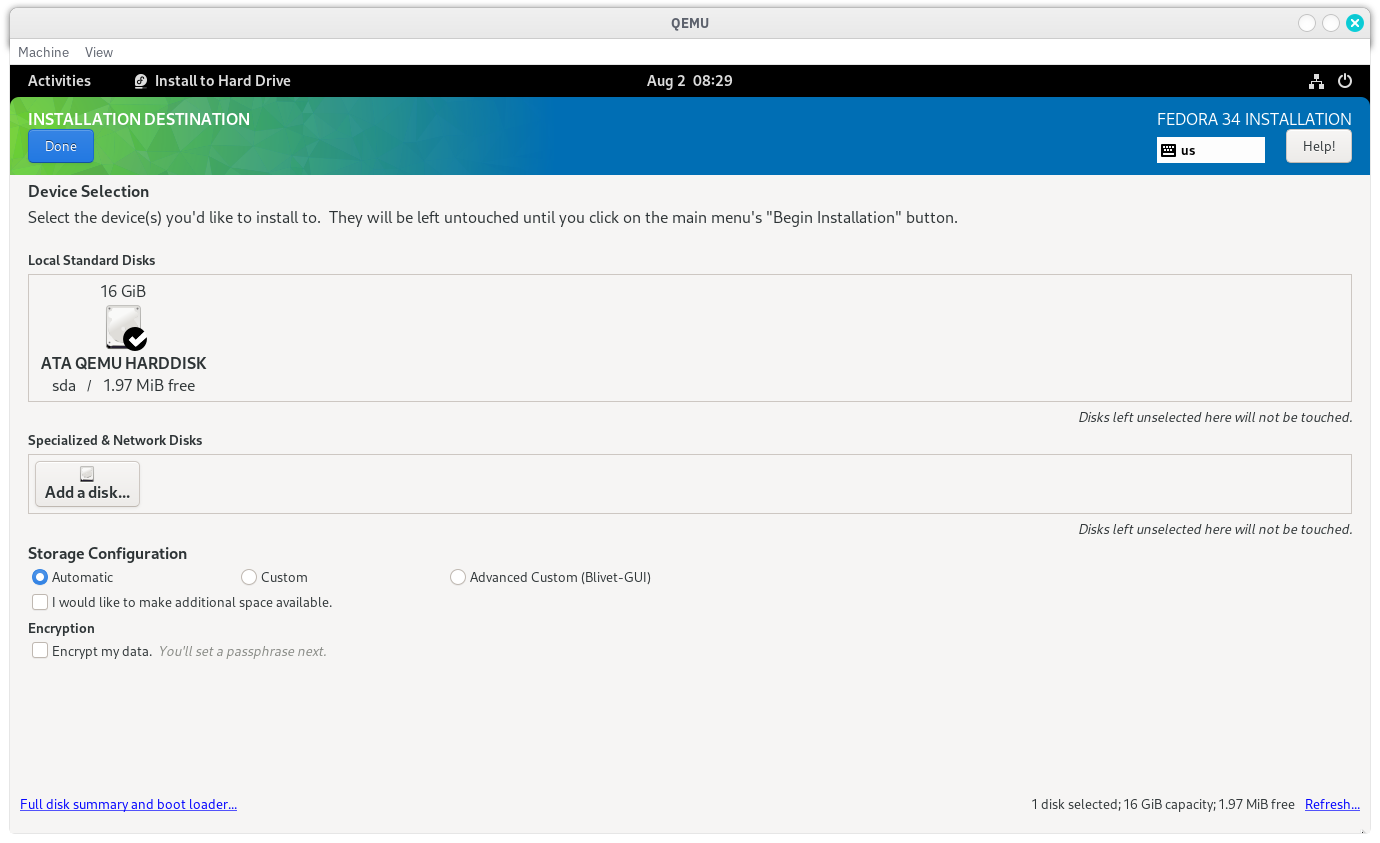
BTRFS partitioning is recommended and the partitioning scheme is configured to be considered as a default. Proceed with the automatic partitioning scheme as illustrated in the following screenshot to apply the recommended partitioning.
-
In case of a requirement of a custom partitioning scheme, toggle the
Customradio button underStorage Configurationand click onDonebutton to move to the page where custom partitioning scheme can be selected.
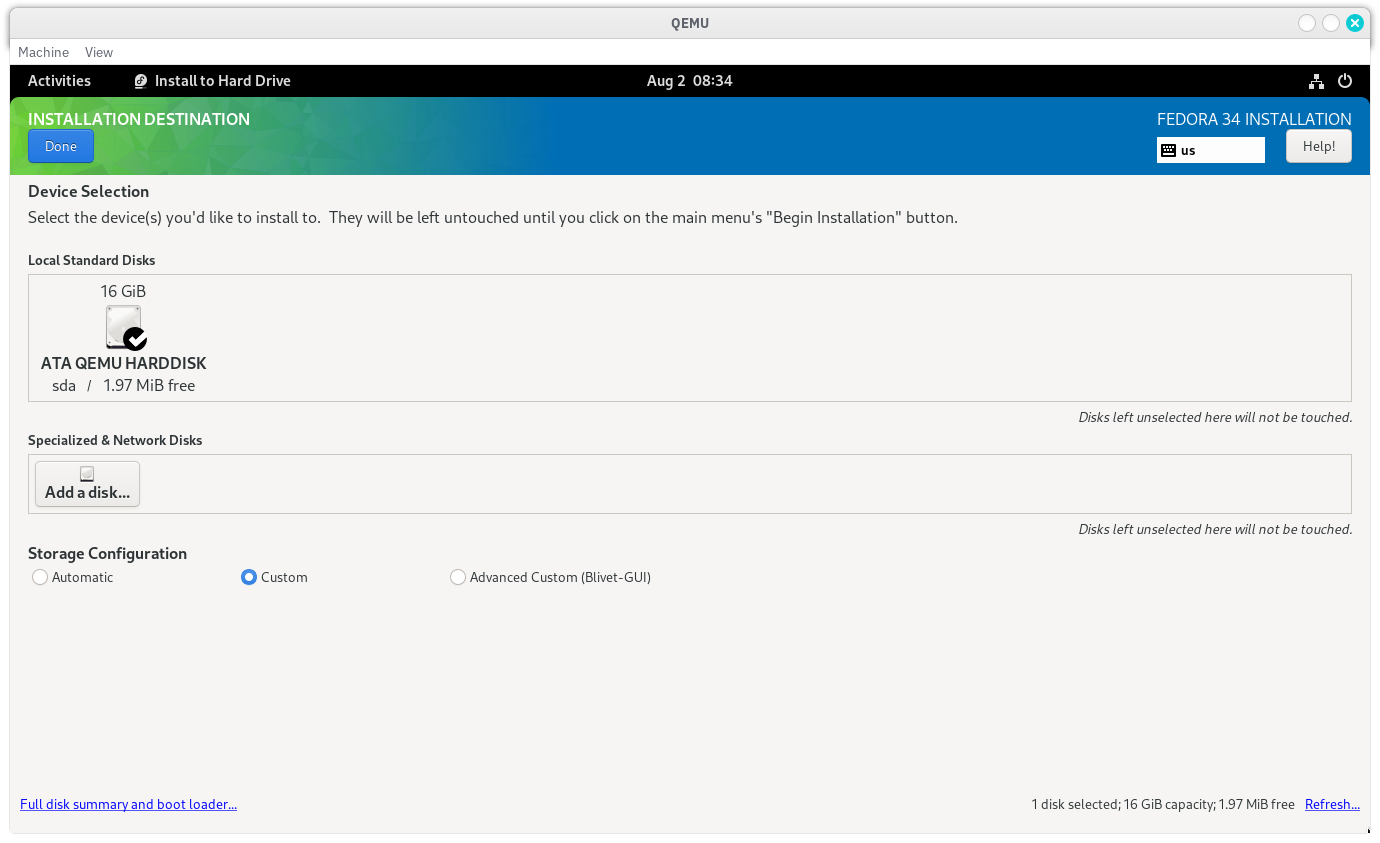
For the sake of simplicity, the partitions are configured in the following manner.Partition Desired Capacity File System Mount Point Device Type Reformat? Encrypt? /dev/sda1 1GiB EFI Standard Partition /boot/efi Standard Partition Yes No /dev/sda2 15GiB EXT4 / Standard Partition Yes No 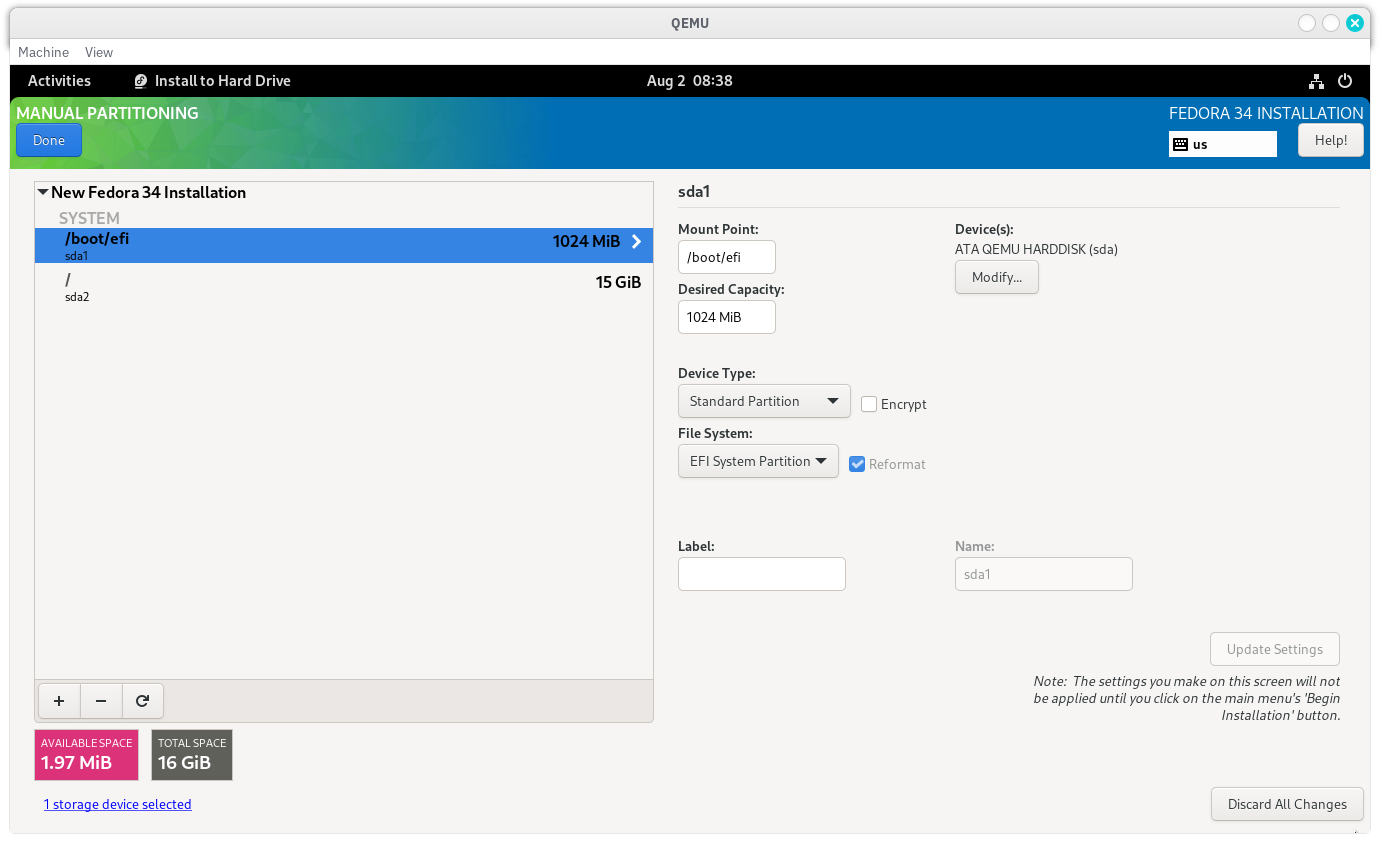
-
- Let the installation finish, click the
Finish Installationbutton to exit the installer application and then power off the virtualized guest.
- Start a virtual machine where Fedora Workstation was just installed by executing the following command on the host.
qemu-system-x86_64 \ -boot menu=on \ -m 2048 \ -cpu max \ -smp 4 \ -drive file=datadrct/fedouefi.raw,format=raw \ -bios /usr/share/edk2/ovmf/OVMF_CODE.fd \ -accel kvm - Set up the Fedora Workstation according to preferences.
- Download the Fedora Workstation ISO file from website and store it in a reference directory
cdromimg.https://getfedora.org - Create a virtual disk image of type
16GBand of formatRAWin a reference directorydatadrctby executing the following command.qemu-img create -f raw datadrct/fedovirt.raw 16G - Invoke virt-install session for installing Fedora Workstation using BIOS on the virtual disk image by executing the following command on the host.
ORvirt-install \ --virt-type kvm \ --name fedoraXX-mstr \ --memory 4096 \ --vcpus 8 \ --cdrom cdromimg/Fedora-Workstation-Live-x86_64-xx-y.z.iso \ --disk datadrct/fedoraXX/fedoraXX-mstr.raw \ --graphics vnc,listen=0.0.0.0,port=5920 \ --network default,mac=00:00:00:00:03:00 \ --noautoconsole \
Invoke virt-install session for installing Fedora Workstation using UEFI on the virtual disk image by executing the following command on the host.
The following is an example output for the above command.virt-install \ --virt-type kvm \ --name fedoraXX-mstr \ --memory 4096 \ --vcpus 8 \ --cdrom cdromimg/Fedora-Workstation-Live-x86_64-xx-y.z.iso \ --disk datadrct/fedoraXX/fedoraXX-mstr.raw \ --graphics vnc,listen=0.0.0.0,port=5920 \ --network default,mac=00:00:00:00:03:00 \ --noautoconsole \ --boot uefiStarting install... Domain is still running. Installation may be in progress. You can reconnect to the console to complete the installation process. - Execute the following command on the host to list currently defined domains. The
--allflag lists all domains - even if they are running or not.
The following is an example output for the above command.virsh list --allId Name State ------------------------------- 1 fedoraXX-mstr running - Visit https://www.realvnc.com/en/connect/download/viewer/ in an internet browser of choice, download and install the VNC viewer application either on the host device or another device in the same network.
- Switch to the VNC Viewer window and type in
0.0.0.0:5920from the host device (or<ip-address-of-host-device>:5920if accessed from another device in the same network) to continue installing. - A greeting window would open up inside the VNC Viewer, providing with two options - Either to
Try FedoraorInstall to Hard Drive.
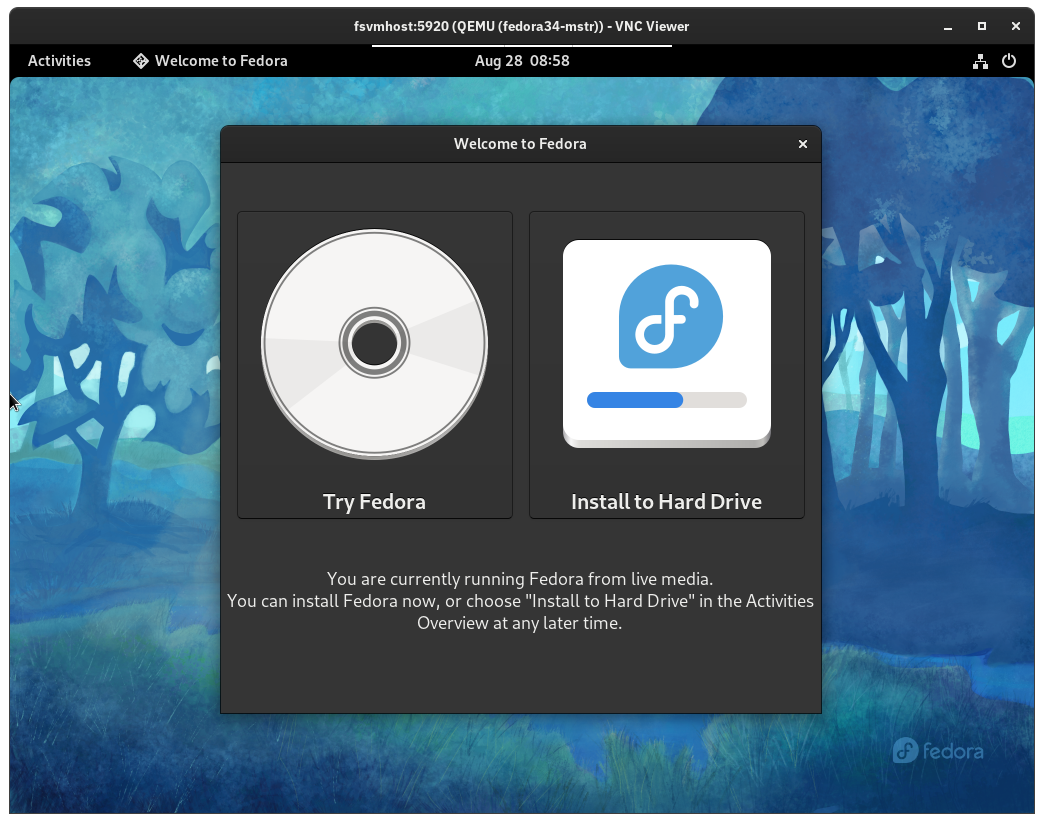
- Now, follow either the instructions Setting up Fedora Workstation VM on QEMU using BIOS guide if BIOS is being used or Setting up Fedora Workstation VM on QEMU using UEFI guide if UEFI is being used to complete the installation.
- Once the installation is completed, power off the domain. It would show up like the following when listed on the host.
The following is an example output for the above command.virsh list --allId Name State ------------------------------- 1 fedoraXX-mstr shut off - It can be started up again by executing the following command on the host.
The following is an example output for the above command.virsh start fedoraXX-mstr
Switch to the VNC Viewer window and type inDomain 'fedoraXX-mstr' started0.0.0.0:5920from the host device (or<ip-address-of-host-device>:5920if accessed from another device in the same network) to continue using the domain. - To power off a domain externally, simply execute the following command from the host.
The following is an example output for the above command.virsh shutdown fedoraXX-mstrDomain 'fedoraXX-mstr' is being shutdown - If the domain has become unresponsive to the shutdown command, it can be forcibly turned off by executing the following command from the host.
The following is an example output for the above command.virsh destroy fedoraXX-mstrDomain 'fedora34-mstr' destroyed - If the domain is no longer required, it can be unlisted by executing the following command from the host.
The following is an example output for the above command.virsh undefine fedoraXX-mstr
Note that this would not remove the virtual disk image, the installation sources and other related elements for the domain and they must be removed manually.Domain 'fedora34-mstr' has been undefined - To edit the configuration of the domain, execute the following command from the host.
This would open up the domain's XML configuration specification in the default text editor of the host. Follow https://libvirt.org/formatdomain.html to learn more about it.virsh edit fedoraXX-mstr
- On the host device, execute either of the following commands to install OVMF, if not already installed.
- Stable builds from Fedora repos
Since June 2016, OVMF is available in the default Fedora repositories as a part of theedk2-ovmfpackage. It would most likely be installed already on a default Fedora installation and the package also includes the firmware for secureboot.sudo dnf install edk2-ovmf -y - Nightly builds from custom repo
The nightly builds of OVMF can be found in a custom repository maintained by Gerd Hoffmann on his personal site where a collection of QEMU/KVM firmware, including EDK2/OVMF can be found. Due to their experimental nature, these builds can be occasionally broken.sudo dnf install dnf-plugins-coresudo dnf config-manager --add-repo http://www.kraxel.org/repos/firmware.reposudo dnf install edk2.git-ovmf-x64
- Stable builds from Fedora repos
- Navigate to the following directory where the OVMF assets are installed.
cd /usr/share/edk2/ovmfEnrollDefaultKeys.efi OVMF_CODE.fd OVMF_CODE.secboot.fd OVMF_VARS.fd OVMF_VARS.secboot.fd Shell.efi UefiShell.iso - Assets from this folder would be continually referred to in the dealings with QEMU.
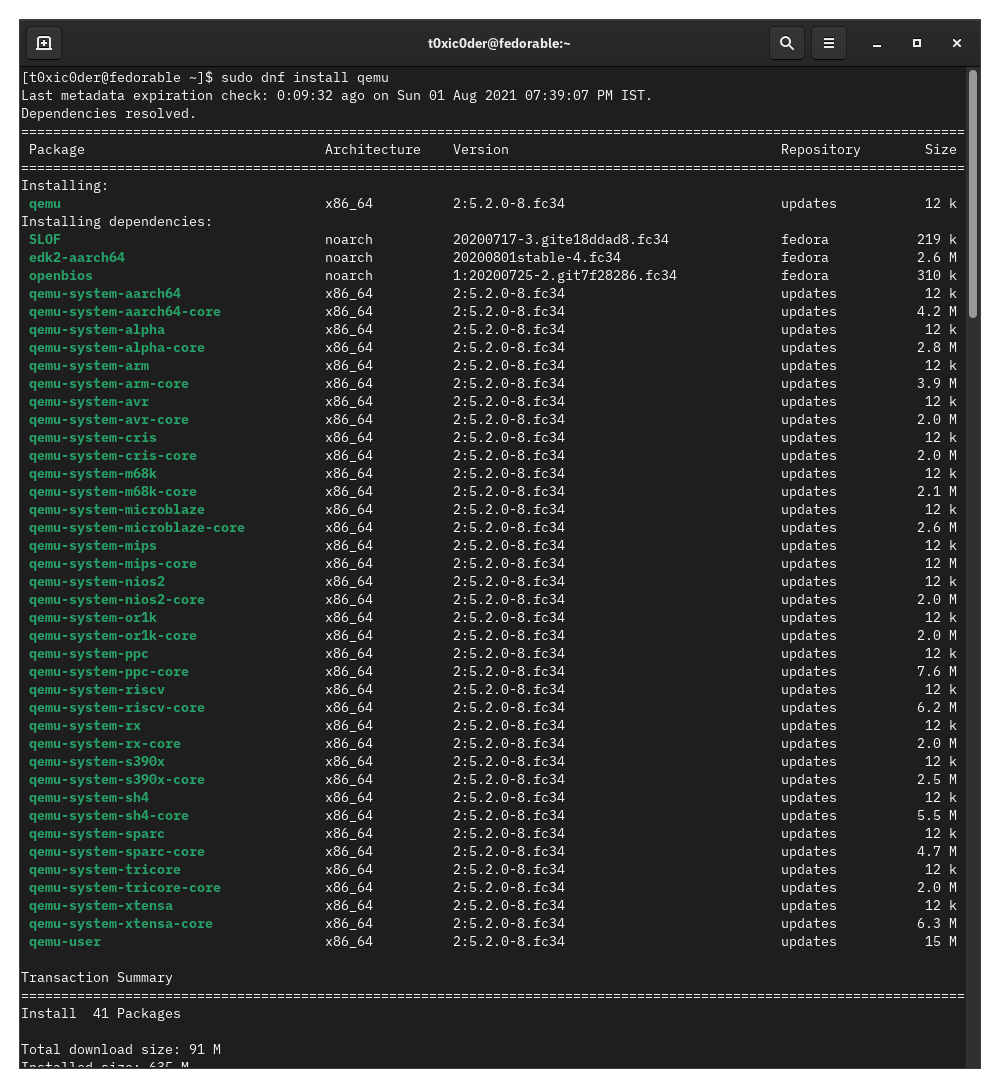
- Execute the following command to install libvirt on the host device, if not already installed.
sudo dnf install libvirt -y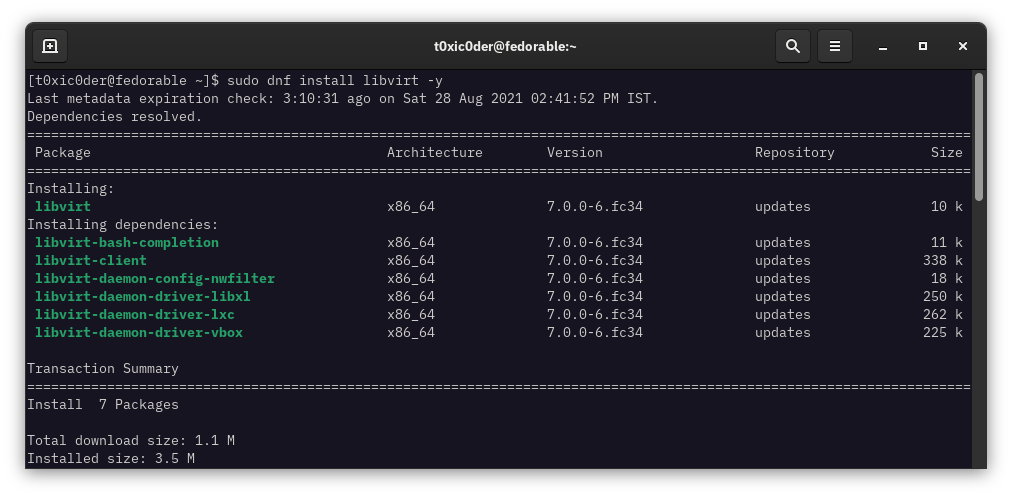
- Execute the following command to install virt-install on the host device, if not already installed.
sudo dnf install virt-install -y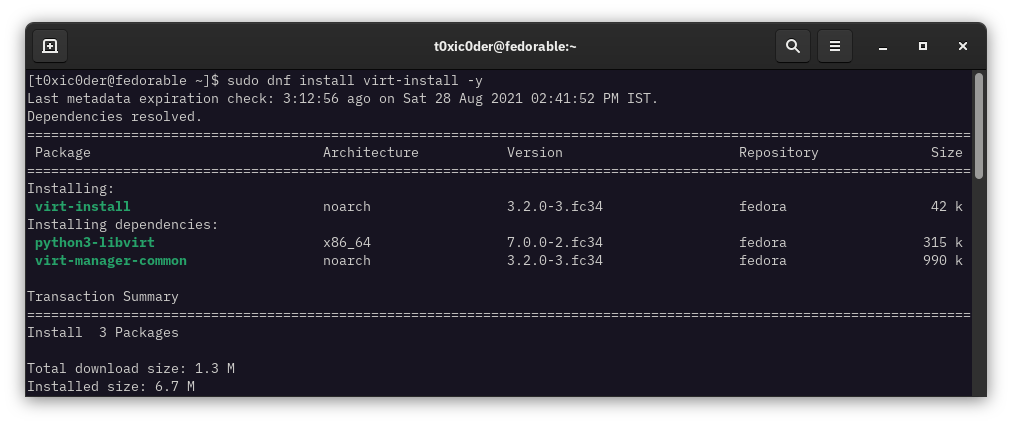
This documentation extends from the Offloading domain TTY output to console with custom kernel/initramfs images documentation, so it is highly recommended to read that document first.
- Reuse the domain with the custom partitioning based on EXT4 that was created by the end of the Setting up Fedora Workstation VM on QEMU using BIOS and start it up by executing the following command.
qemu-system-x86_64 \ -boot menu=on \ -m 2048 \ -cpu max \ -smp 4 \ -net nic \ -net user,hostfwd=tcp::6969-:8080 \ -drive file=datadrct/fedobios.raw,format=raw \ -accel kvm - In a new terminal session of the virtualized domain, execute the following command to fetch details about the currently used kernel image version.
uname -a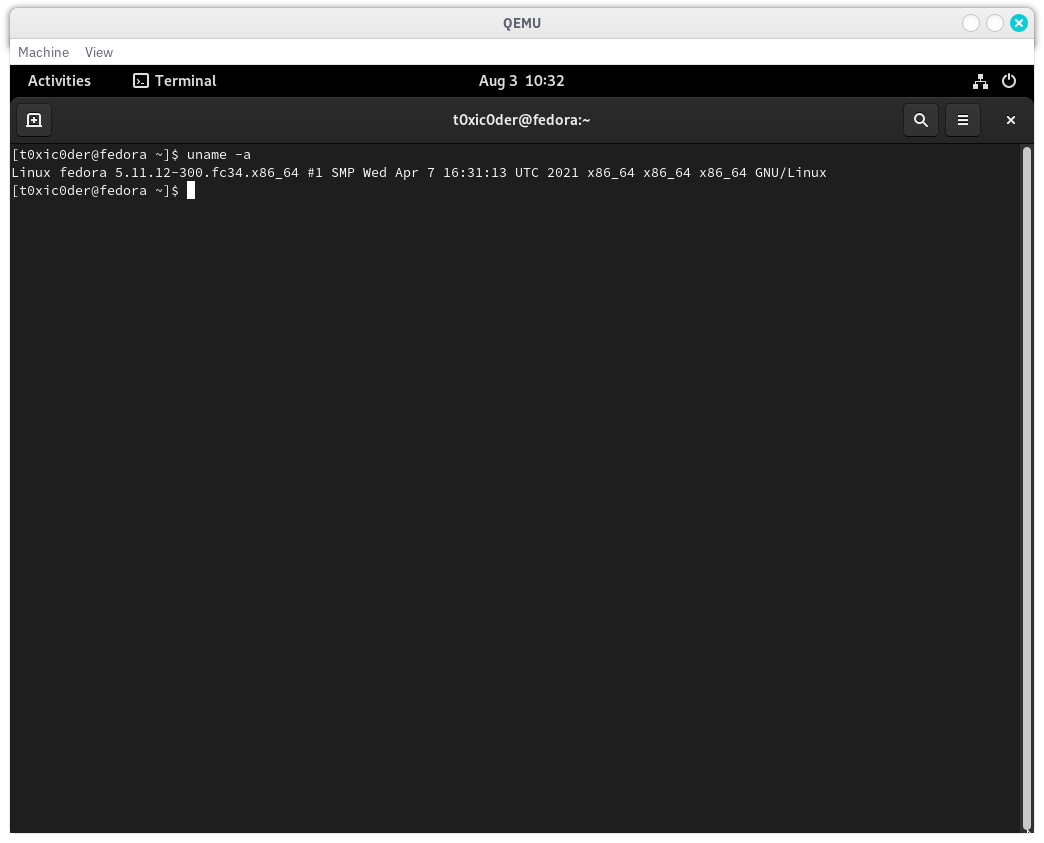
- With appropriate permissions, copy the kernel image and the initramfs image of the aforementioned version to the home directory of the default user in the virtualized domain.
ls -la /boot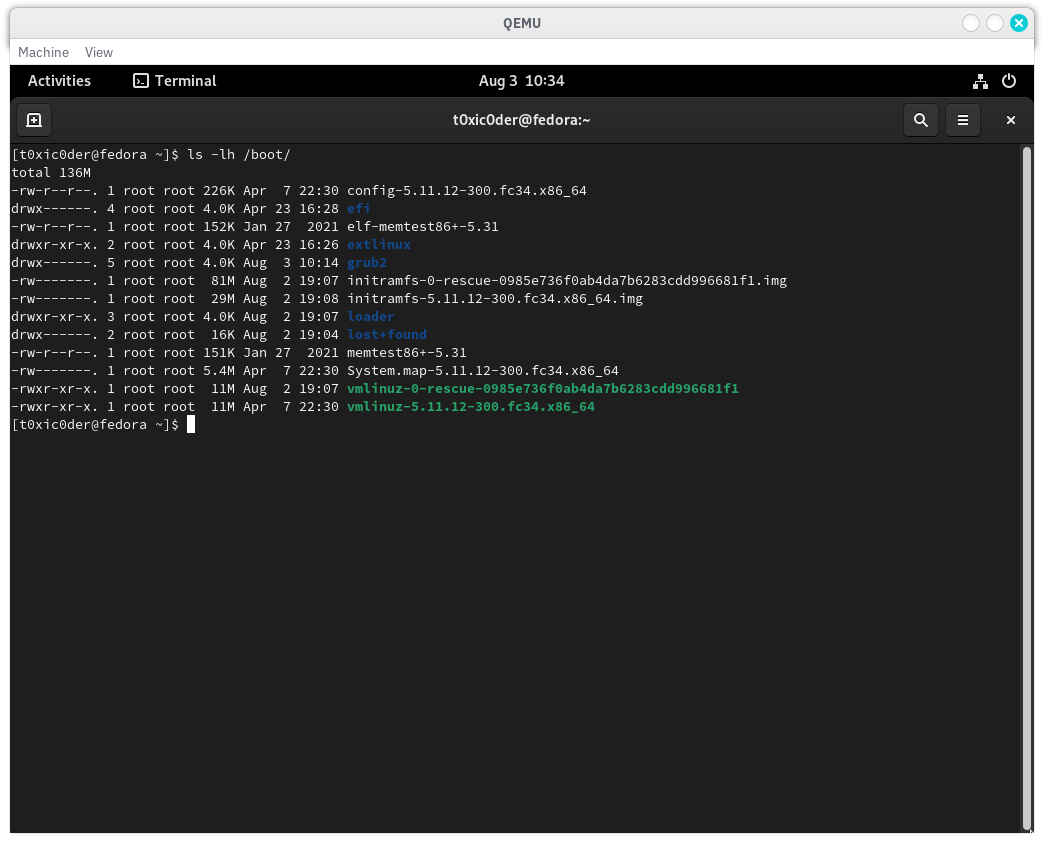
sudo cp /boot/<vmlinux-x.yy.zz-aaa-fcRR.x86_64> .sudo cp /boot/<initramfs-x.yy.zz-aaa-fcRR.x86_64.img> .ls -lh .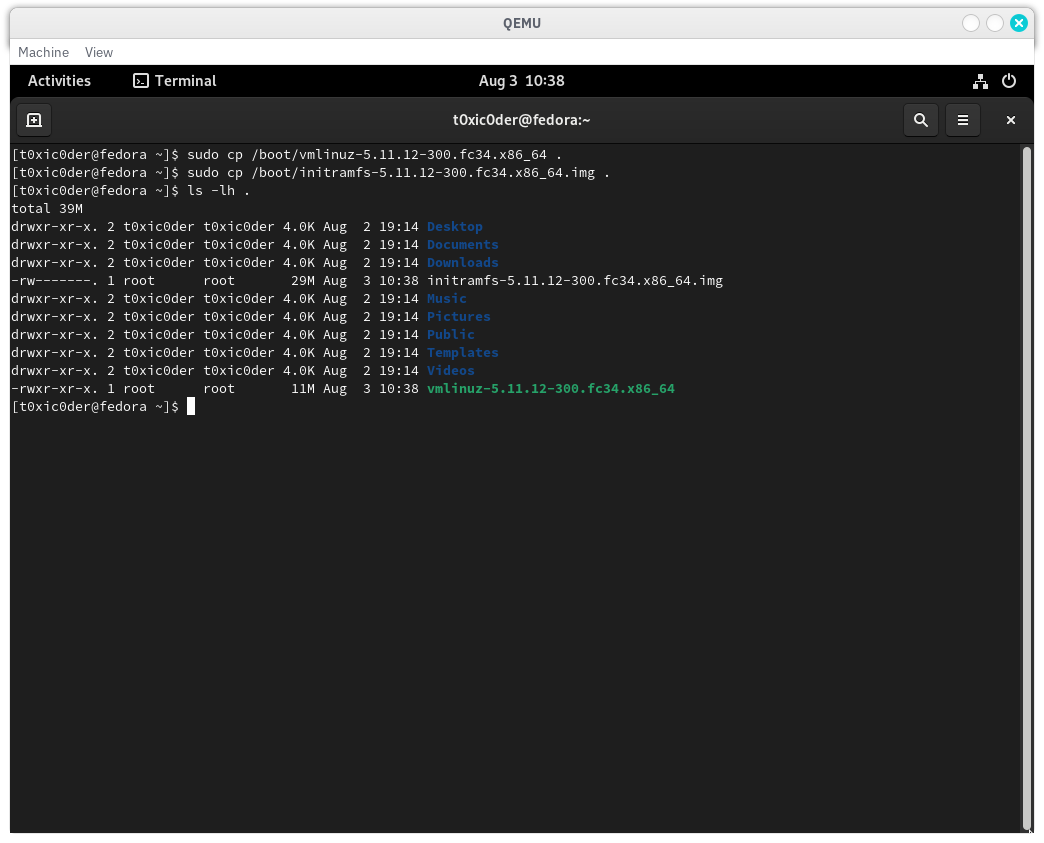
- Take up the ownership of the copied kernel images and kernel images by executing the following command in a terminal session in the virtualized domain.
sudo chown $(whoami):$(whoami) <vmlinux-x.yy.zz-aaa-fcRR.x86_64>sudo chown $(whoami):$(whoami) <initramfs-x.yy.zz-aaa-fcRR.x86_64.img>ls -lh .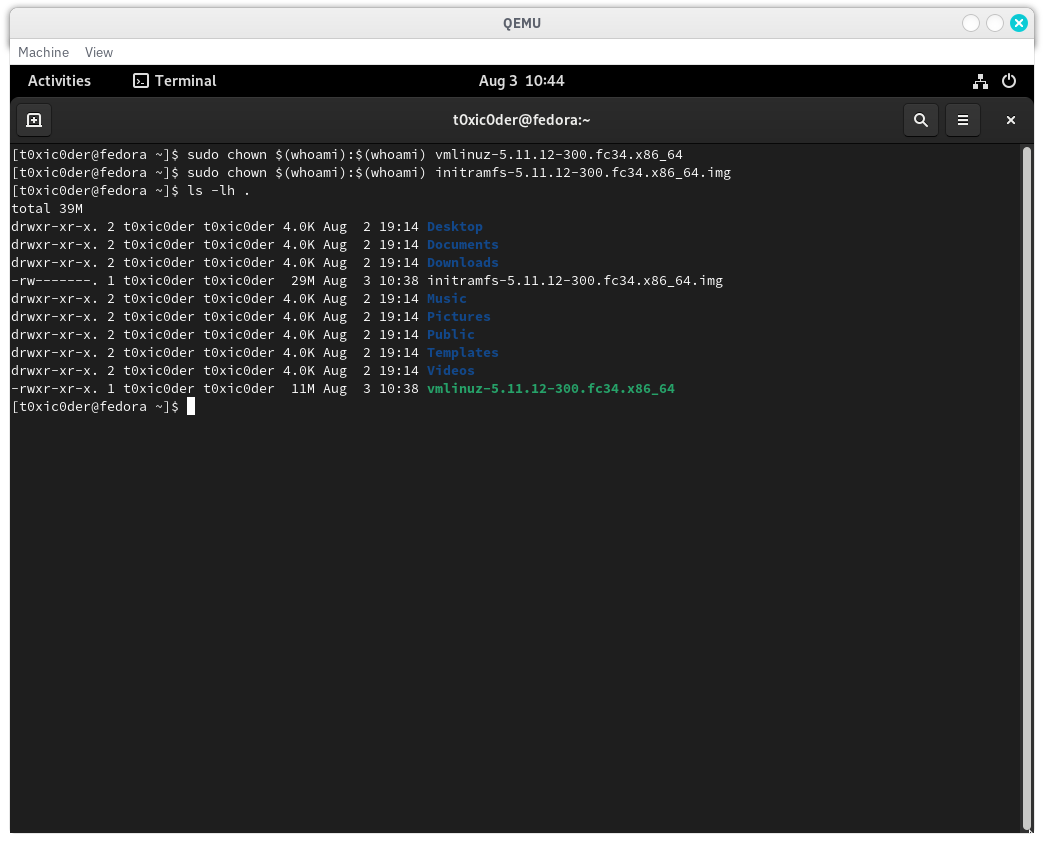
- Start an HTTP server in the same directory by executing the following command in a terminal session in the virtualized domain.
python3 -m http.server 8080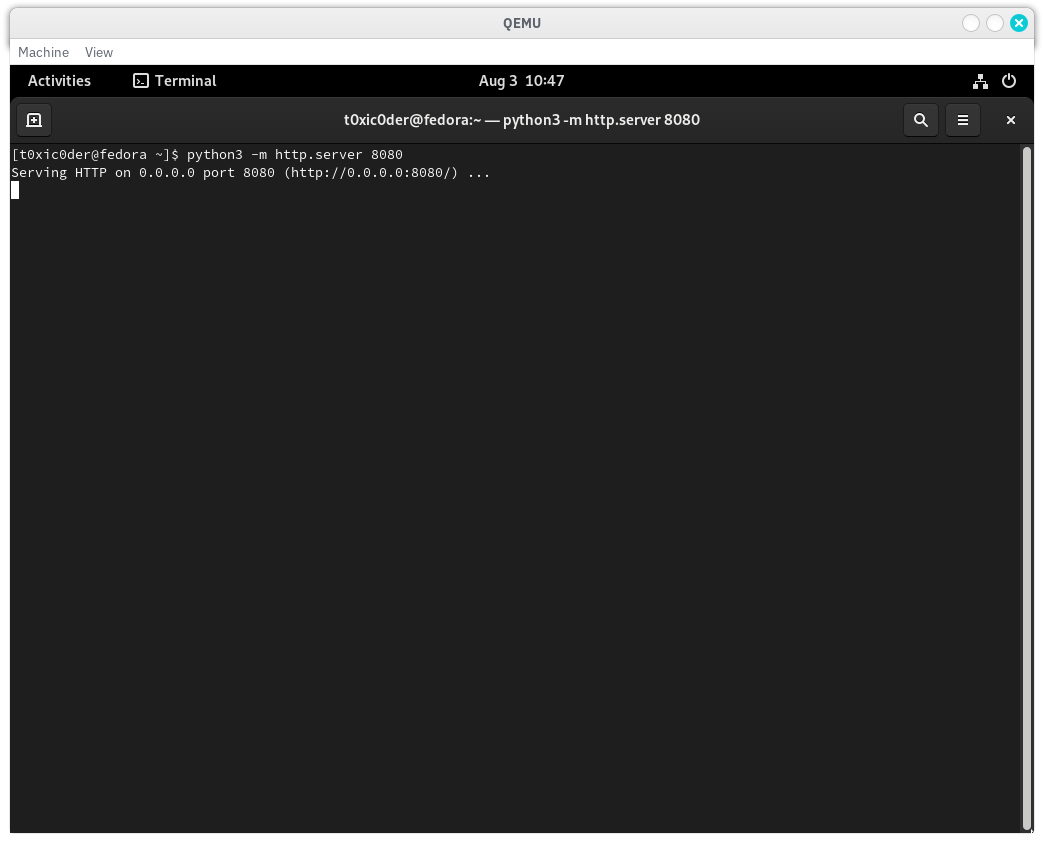
- In a new terminal session of the host, execute the following command to pull the kernel image and initramfs image into reference directories
linxkrnlandinitrmfsrespectively.wget http://localhost:6969/vmlinuz-x.yy.zz-aaa.fcRR.x86_64 -O linxkrnl/vmlinuz-x.yy.zz-aaa.fcRR.x86_64wget http://localhost:6969/initramfs-x.yy.zz-aaa.fcRR.x86_64.img -O initrmfs/initramfs-x.yy.zz-aaa.fcRR.x86_64.img
The following is an example output for the above command.ls -lh linxkrnl/total 52M -rwxr-xr-x. 1 t0xic0der t0xic0der 11M Aug 2 15:35 vmlinuz-0-rescue-8ee701c92f0f486cbb7afe96e5b7ea67 -rw-rw-r--. 1 t0xic0der t0xic0der 11M Aug 3 10:38 vmlinuz-5.11.12-300.fc34.x86_64 -rwxr-xr-x. 1 t0xic0der t0xic0der 11M Aug 2 15:35 vmlinuz-5.13.4-200.fc34.x86_64 -rwxr-xr-x. 1 t0xic0der t0xic0der 11M Aug 2 15:35 vmlinuz-5.13.5-200.fc34.x86_64 -rwxr-xr-x. 1 t0xic0der t0xic0der 11M Aug 2 15:35 vmlinuz-5.13.6-200.fc34.x86_64
The following is an example output for the above command.ls -lh initrmfs/total 204M -rw-------. 1 t0xic0der t0xic0der 81M Aug 2 15:36 initramfs-0-rescue-8ee701c92f0f486cbb7afe96e5b7ea67.img -rw-rw-r--. 1 t0xic0der t0xic0der 29M Aug 3 10:38 initramfs-5.11.12-300.fc34.x86_64.img -rw-------. 1 t0xic0der t0xic0der 32M Aug 2 15:36 initramfs-5.13.4-200.fc34.x86_64.img -rw-------. 1 t0xic0der t0xic0der 32M Aug 2 15:36 initramfs-5.13.5-200.fc34.x86_64.img -rw-------. 1 t0xic0der t0xic0der 32M Aug 2 15:36 initramfs-5.13.6-200.fc34.x86_64.img - Execute the following command to fetch the parameters passed to the kernel during boot in a terminal session in the virtualized domain.
The following is an example output for the above command.cat /proc/cmdline
Take a note of the UUID for the root partition and the same can be confirmed by executing the following command in a terminal session inside the virtualized domain.BOOT_IMAGE=(hd0,msdos1)/vmlinuz-5.11.12-300.fc34.x86_64 root=UUID=0fa356e9-9509-4e18-8283-8983254c79d1 ro rhgb quiet
The following is an example output for the above command.cat /etc/fstab# # /etc/fstab # Created by anaconda on Mon Aug 2 09:36:54 2021 # # Accessible filesystems, by reference, are maintained under '/dev/disk/'. # See man pages fstab(5), findfs(8), mount(8) and/or blkid(8) for more info. # # After editing this file, run 'systemctl daemon-reload' to update systemd # units generated from this file. # UUID=0fa356e9-9509-4e18-8283-8983254c79d1 / ext4 defaults 1 1 UUID=2d2863bb-527b-4477-bae5-5955bdb44d7b /boot ext4 defaults 1 2 - Power off the virtualized domain and start it up again by executing the following command with the correct UUID for the root partition, correct names for kernel image and initramfs image which were recently fetched.
qemu-system-x86_64 \ -boot menu=on \ -m 2048 \ -cpu max \ -smp 4 \ -drive file=datadrct/fedobios.raw,format=raw \ -accel kvm \ -nographic \ -kernel linxkrnl/<vmlinuz-x.yy.zz-aaa.fcRR.x86_64> \ -initrd initrmfs/<initramfs-x.yy.zz-aaa.fcRR.x86_64.img> \ -append "root=UUID=<xxxxxxxx-xxxx-xxxx-xxxx-xxxxxxxxxxxx> rw console=ttyS0" - A lot of
systemdprompts would show up on the console and the virtualized domain would boot up. The following is an example output for the above command.... [ OK ] Started Network Manager Script Dispatcher Service. [ OK ] Finished Network Manager Wait Online. [ OK ] Reached target Network is Online. [ OK ] Reached target Remote File Systems (Pre). [ OK ] Reached target Remote File Systems. Starting Virtualization daemon... Starting Notify NFS peers of a restart... Starting Permit User Sessions... [ OK ] Started Notify NFS peers of a restart. [ OK ] Finished Permit User Sessions. Starting GNOME Display Manager... Starting Hold until boot process finishes up... [ OK ] Started GNOME Display Manager. Fedora 34 (Workstation Edition) Kernel 5.13.6-200.fc34.x86_64 on an x86_64 (ttyS0) fedora login: t0xic0der Password: Last login: Tue Aug 3 10:31:46 on tty2 [t0xic0der@fedora ~]$ - As the kernel image and initramfs image versions that we used here are similar to the version of the firmware installed on the virtualized domain, there can be kernel modules work just fine.
ip a
As evidenced by the output of the above command executed inside the console of the virtualized domain, the kernel modules for network now work just fine and the hostname of the virtualized host has been retained as the kernel images, initramfs images and installed firmware versions correspond with each other.1: lo: <LOOPBACK,UP,LOWER_UP> mtu 65536 qdisc noqueue state UNKNOWN group default qlen 1000 link/loopback 00:00:00:00:00:00 brd 00:00:00:00:00:00 inet 127.0.0.1/8 scope host lo valid_lft forever preferred_lft forever inet6 ::1/128 scope host valid_lft forever preferred_lft forever 2: ens3: <BROADCAST,MULTICAST,UP,LOWER_UP> mtu 1500 qdisc fq_codel state UP group default qlen 1000 link/ether 52:54:00:12:34:56 brd ff:ff:ff:ff:ff:ff altname enp0s3 inet 10.0.2.15/24 brd 10.0.2.255 scope global dynamic noprefixroute ens3 valid_lft 86298sec preferred_lft 86298sec inet6 fec0::26ff:70eb:26b2:5923/64 scope site dynamic noprefixroute valid_lft 86302sec preferred_lft 14302sec inet6 fe80::486a:c7b3:ca0a:43cf/64 scope link noprefixroute valid_lft forever preferred_lft forever
- Download the Fedora Workstation ISO file from website and store it in a reference directory
cdromimg.https://getfedora.org - Start a virtual machine for mapping a virtualized guest port to a host port for the live ISO and there is no need for a virtual disk image here.
qemu-system-x86_64 \ -boot menu=on \ -m 4096 \ -cpu max \ -smp 4 \ -cdrom cdromimg/<Fedora-Workstation-Live-x86_64-xx-y.z.iso> \ -accel kvm \ -net nic \ -net user,hostfwd=tcp::2323-:22 - Wait for the virtual machine to boot up.
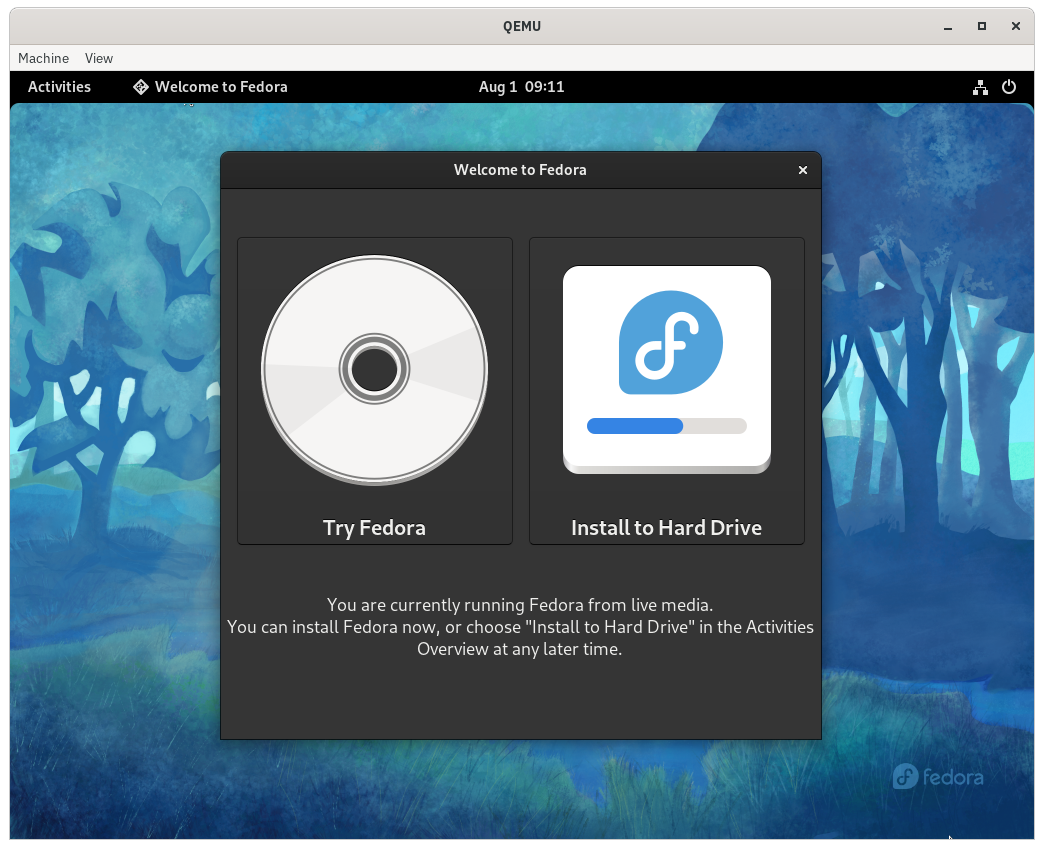
- In a new terminal session on the guest, execute the following command to the enable the
OpenSSHservice.sudo systemctl enable --now sshd.service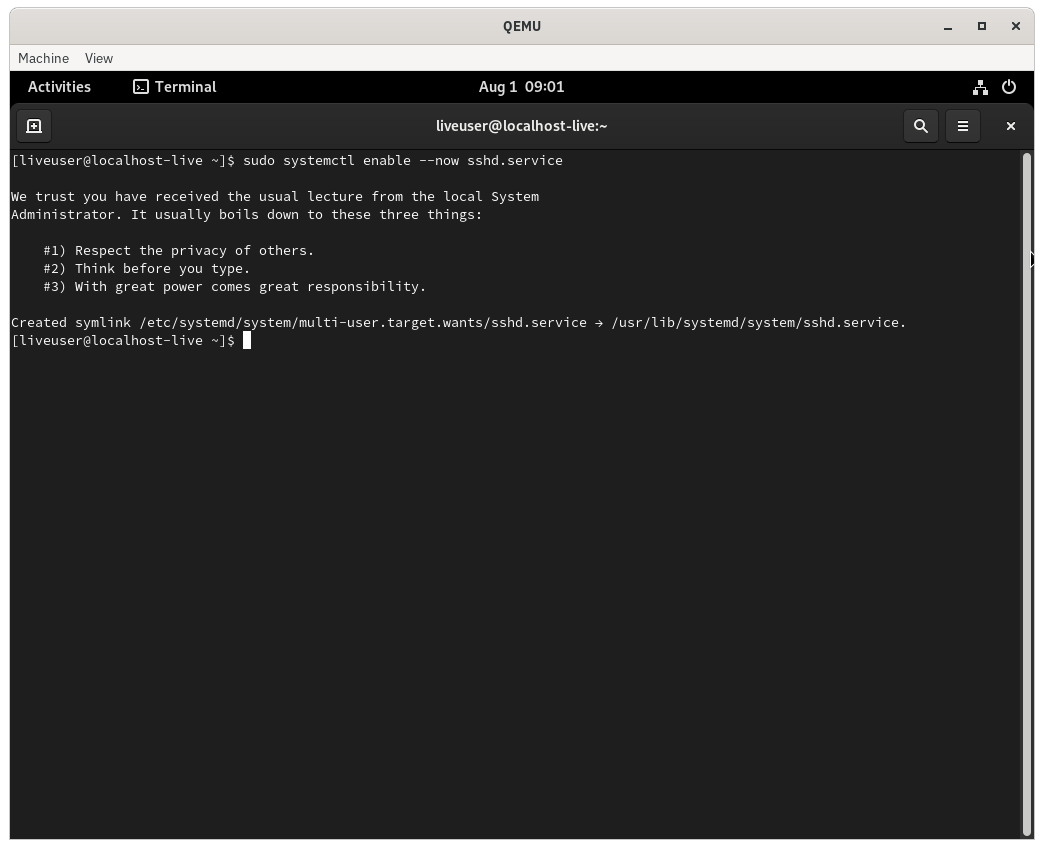
- Now change the password of the current user by executing the following command in the terminal session on the guest.
passwd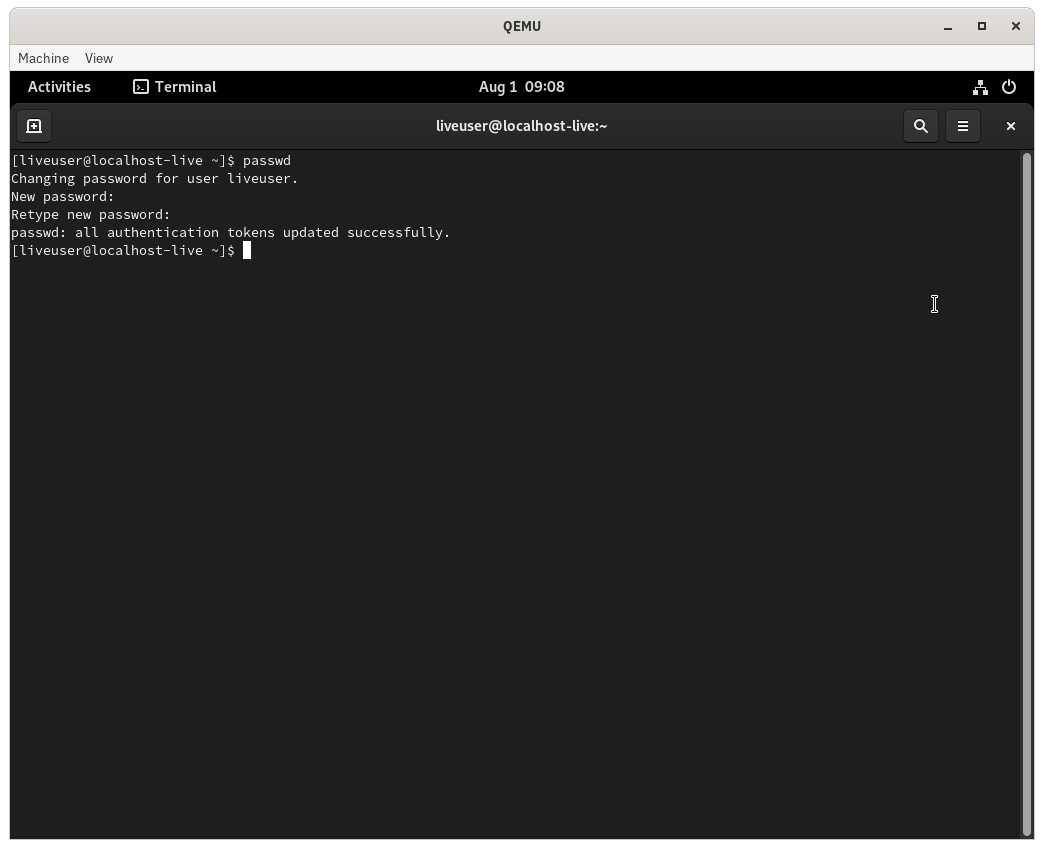
- In a new terminal session on the host, execute the following command to connect to the guest using
SSH.ssh liveuser@localhost -p 2323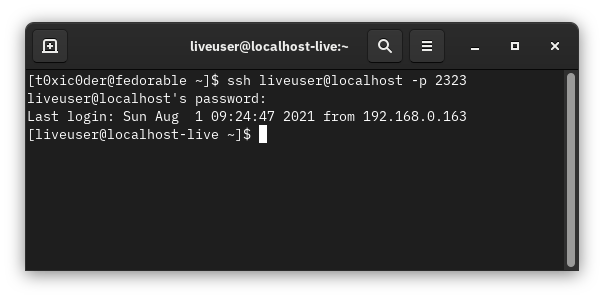
OR
In a new terminal session on a device connected to the same network, execute the following command to connect to the guest usingSSH.ssh liveuser@<ip-address-of-the-host-device> -p 2323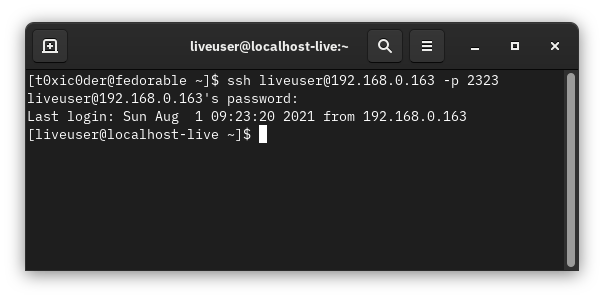
- Execute the following command in to logout of the session.
logout - This was an example of mapping port 22 of the virtualized guest with port 2323 of the host with TCP for the purposes of SSH and this can be reused with slight changes to accommodate other use-cases.
More information can be found here https://www.kraxel.org/blog/2019/09/display-devices-in-qemu/
- Download the Fedora Workstation ISO file from website and store it in a reference directory
cdromimg.https://getfedora.org - Execute the following command to know about the VGA providers available at disposal.
qemu-system-x86_64 -vga helpnone no graphic card std standard VGA (default) cirrus Cirrus VGA vmware VMWare SVGA xenfb Xen paravirtualized framebuffer qxl QXL VGA virtio Virtio VGA - Start a virtual machine for playing around with various VGA providers for the live ISO and there is no need for a virtual disk image here.
qemu-system-x86_64 \ -boot menu=on \ -m 8192 \ -cpu max \ -smp 4 \ -cdrom cdromimg/<Fedora-Workstation-Live-x86_64-xx-y.z.iso> \ -accel kvm - Open up
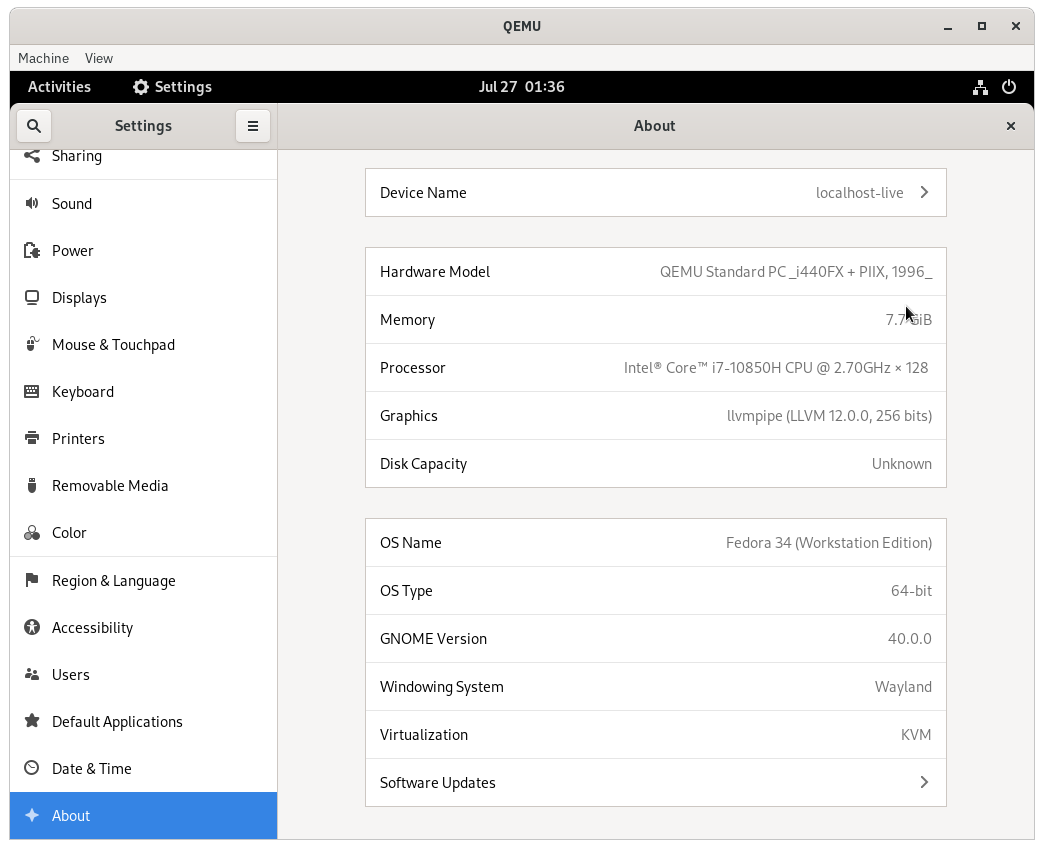
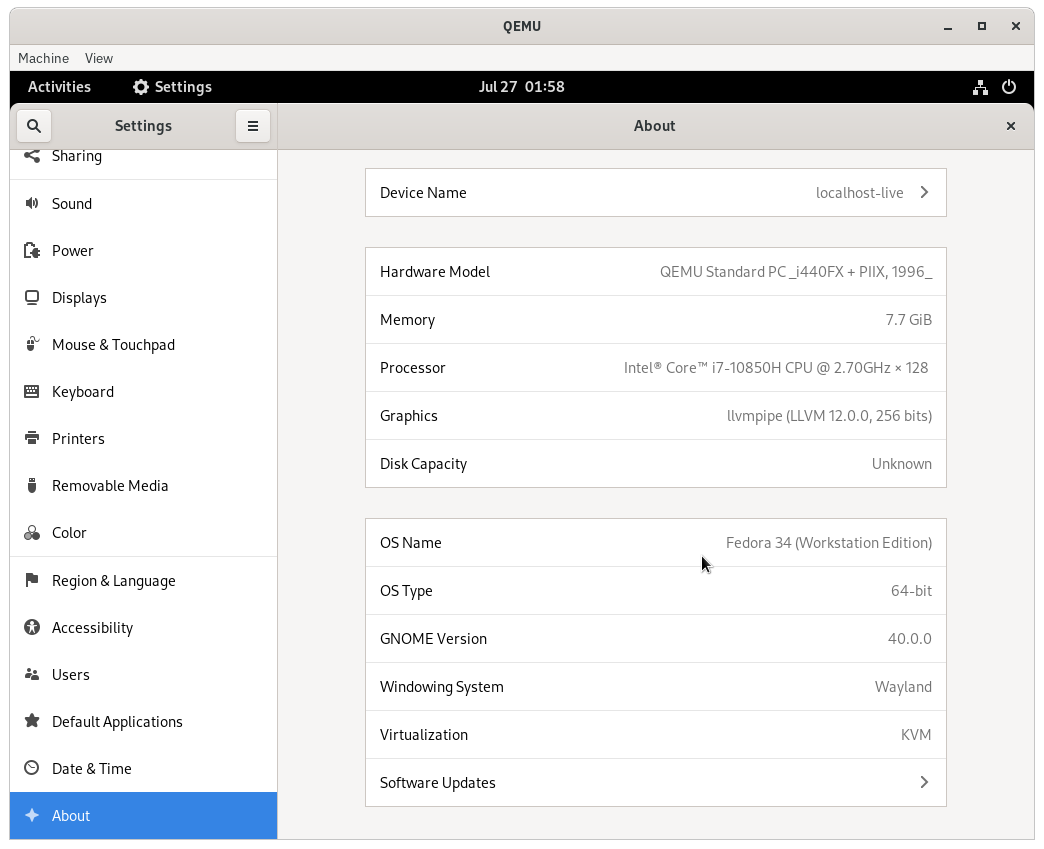
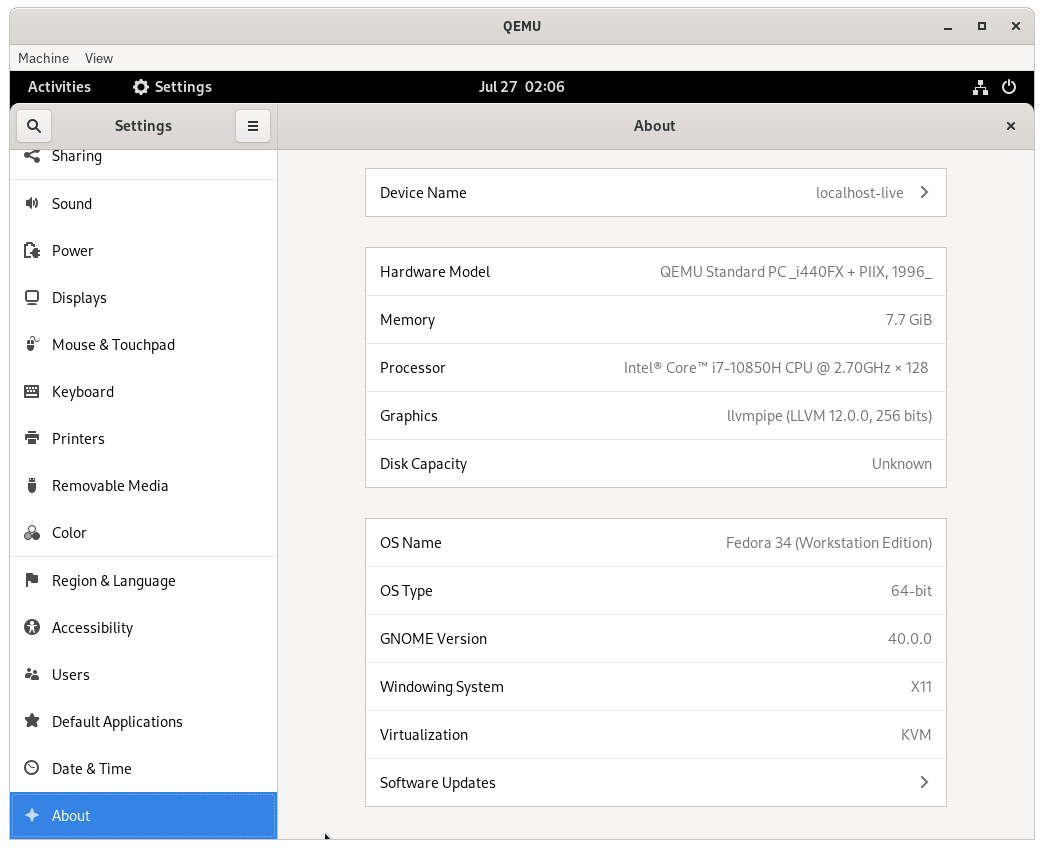
Settingsinside the VM and head over to theAboutsection. Information about theGraphicscan be seen here. - Open up
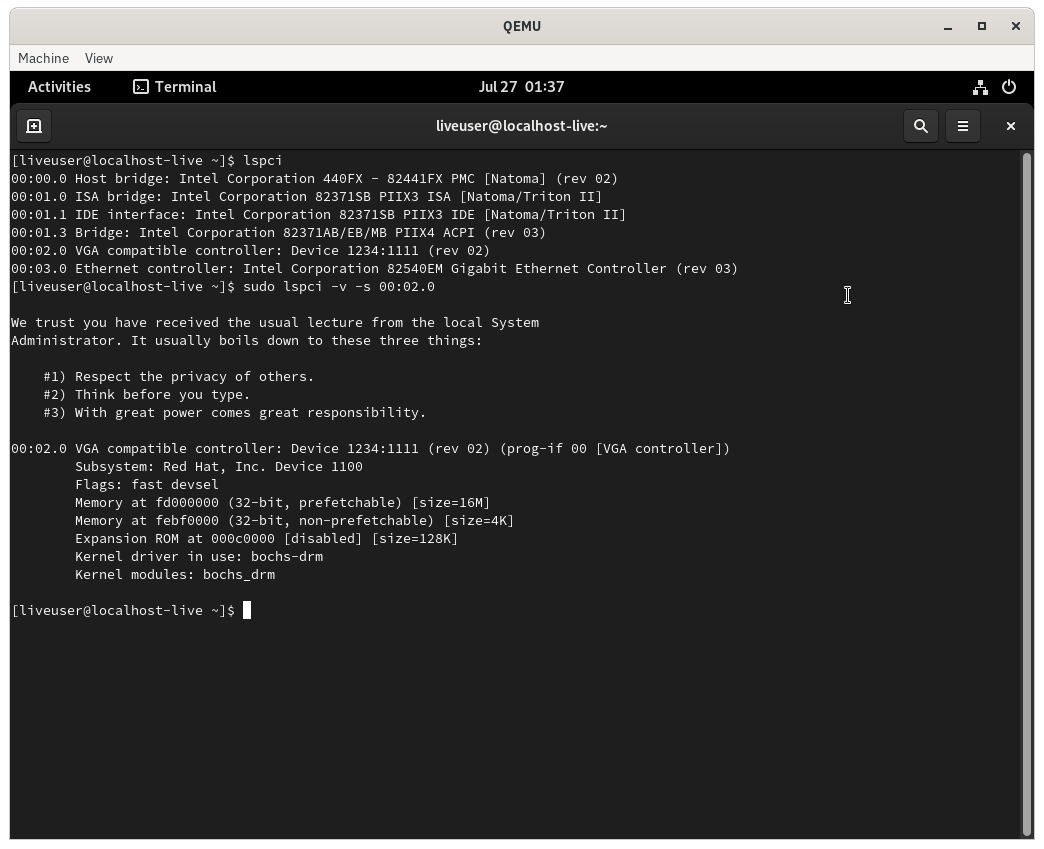
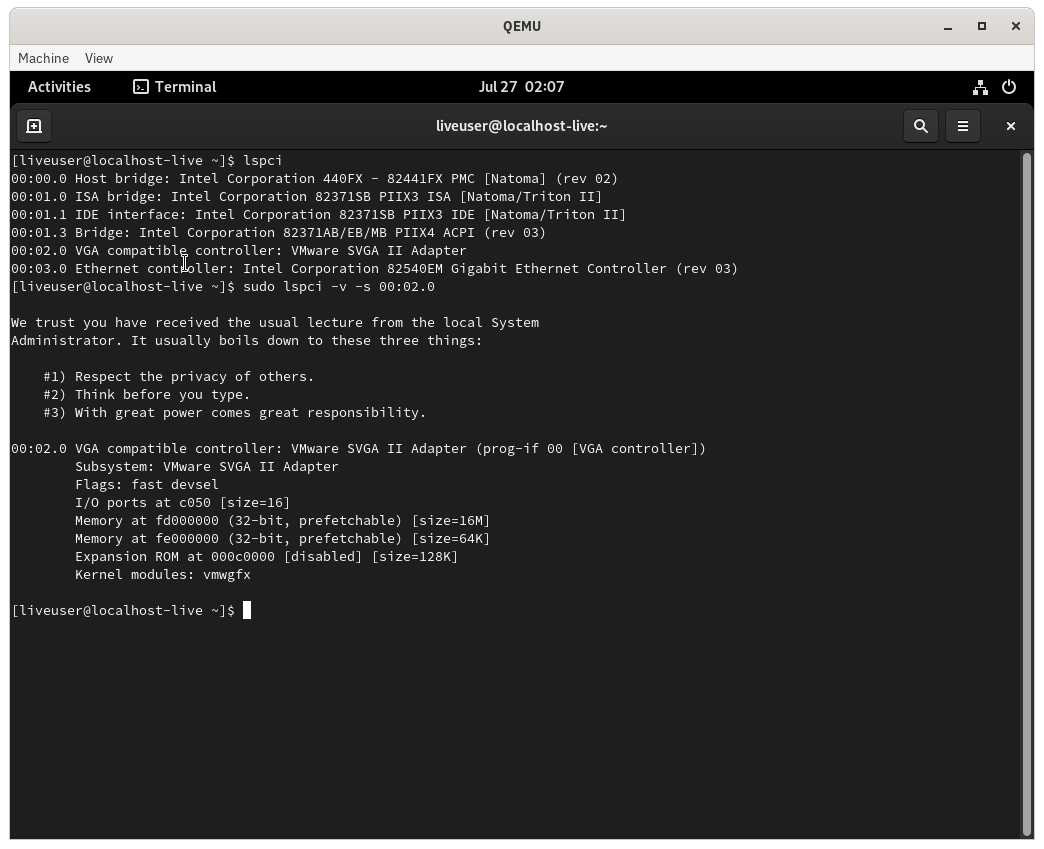
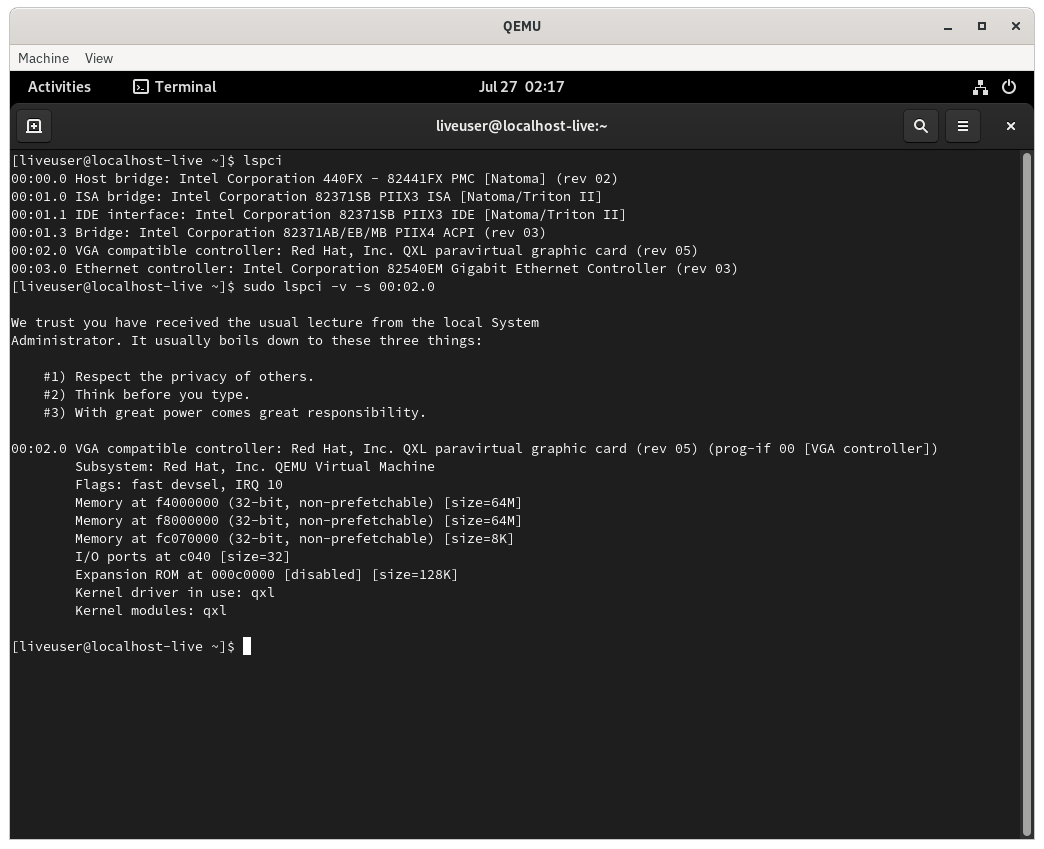
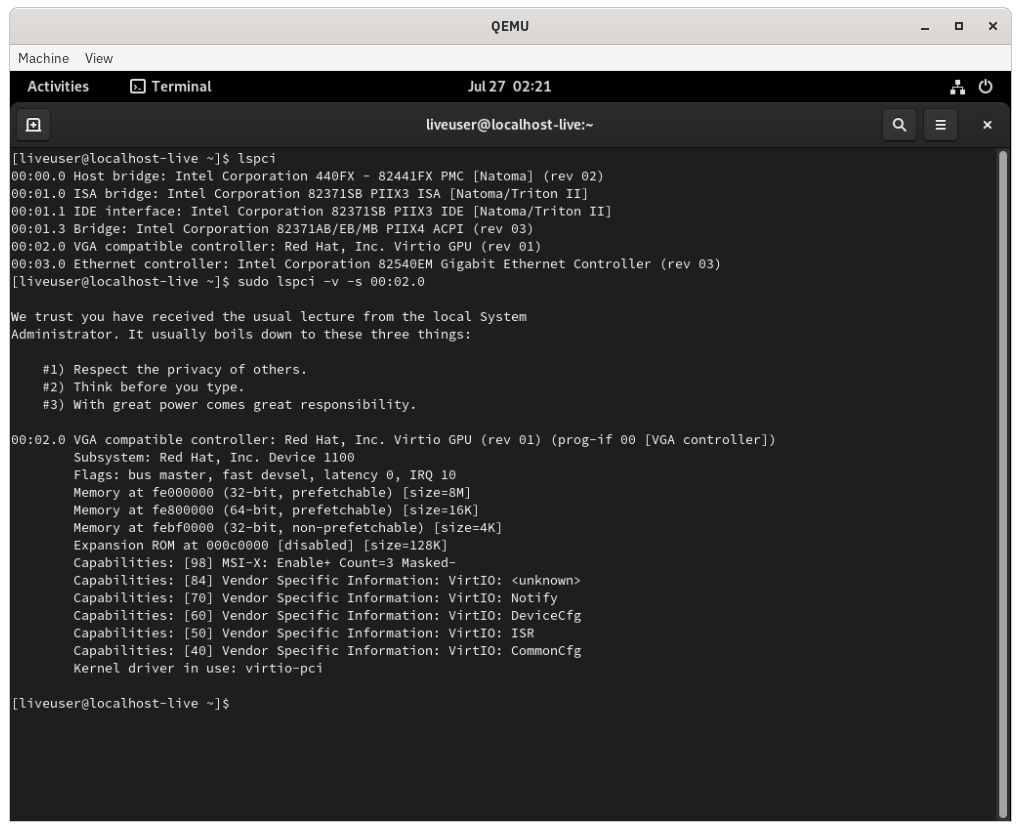
Terminalinside the VM and execute thelspcicommands in regards with the current VGA controller to find more information on it.
We will test out each VGA provider one-by-one and list the information for each now.
- Standard VGA (Default)
qemu-system-x86_64 \ -boot menu=on \ -m 8192 \ -cpu max \ -smp 4 \ -cdrom cdromimg/<Fedora-Workstation-Live-x86_64-xx-y.z.iso> \ -accel kvm -vga stdSettings->About
lspci
- No graphic card
qemu-system-x86_64 \
  -boot menu=on \
  -m 8192 \
  -cpu max \
  -smp 4 \
  -cdrom cdromimg/<Fedora-Workstation-Live-x86_64-xx-y.z.iso> \
  -accel kvm
  -vga none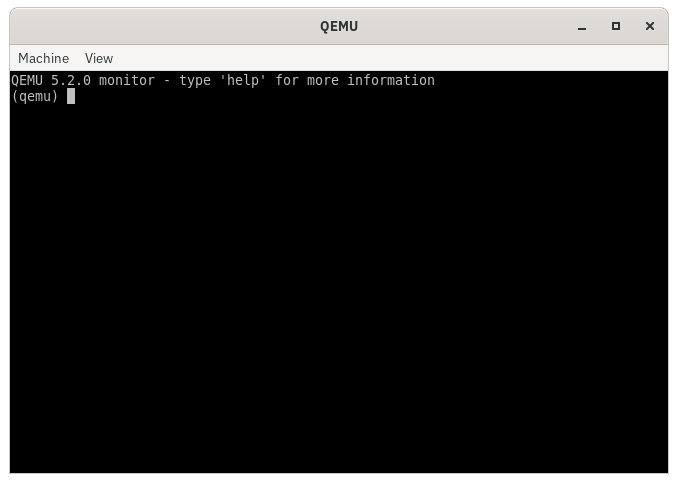
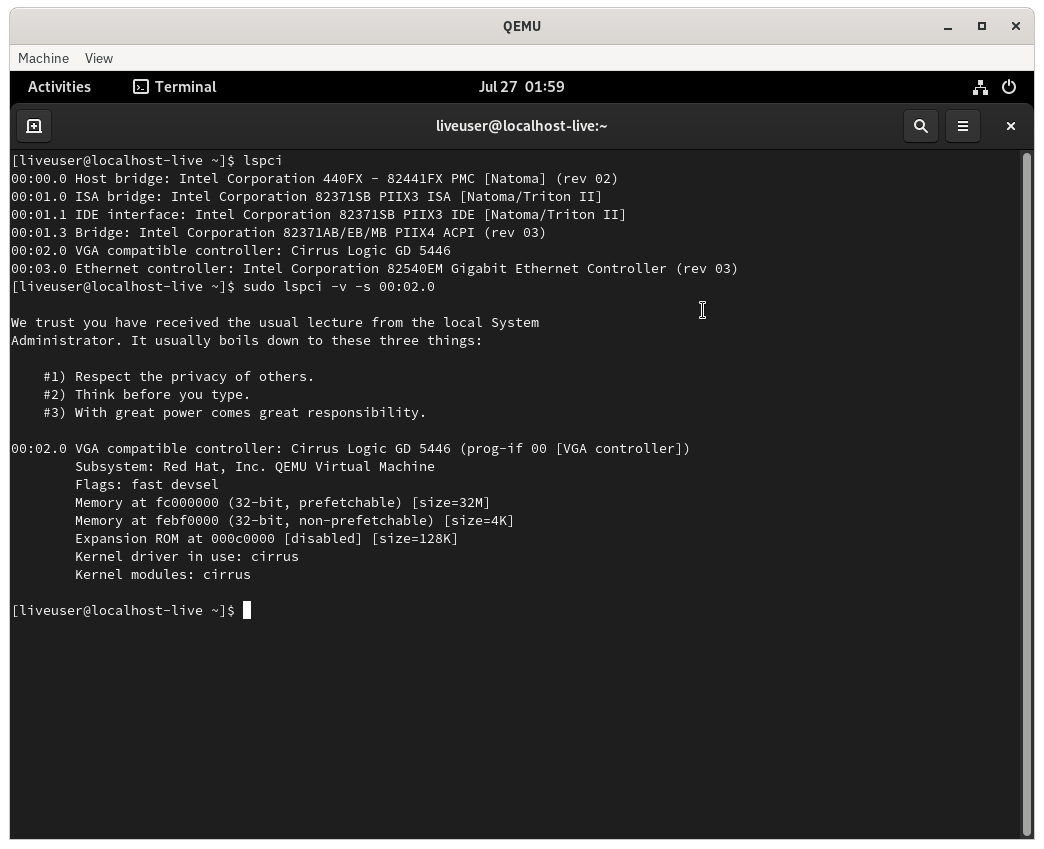
- Cirrus VGA
qemu-system-x86_64 \ -boot menu=on \ -m 8192 \ -cpu max \ -smp 4 \ -cdrom cdromimg/<Fedora-Workstation-Live-x86_64-xx-y.z.iso> \ -accel kvm -vga cirrusSettings->About
lspci
- VMware SVGA
qemu-system-x86_64 \ -boot menu=on \ -m 8192 \ -cpu max \ -smp 4 \ -cdrom cdromimg/<Fedora-Workstation-Live-x86_64-xx-y.z.iso> \ -accel kvm -vga vmwareSettings->About
lspci
- Xen paravirtualized framebuffer
qemu-system-x86_64 \
  -boot menu=on \
  -m 8192 \
  -cpu max \
  -smp 4 \
  -cdrom cdromimg/<Fedora-Workstation-Live-x86_64-xx-y.z.iso> \
  -accel kvm
  -vga xenfb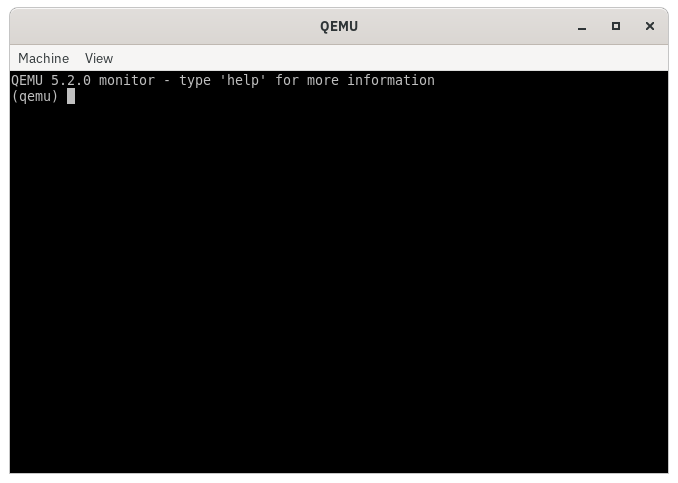
- QXL VGA
qemu-system-x86_64 \ -boot menu=on \ -m 8192 \ -cpu max \ -smp 4 \ -cdrom cdromimg/<Fedora-Workstation-Live-x86_64-xx-y.z.iso> \ -accel kvm -vga qxlSettings->About
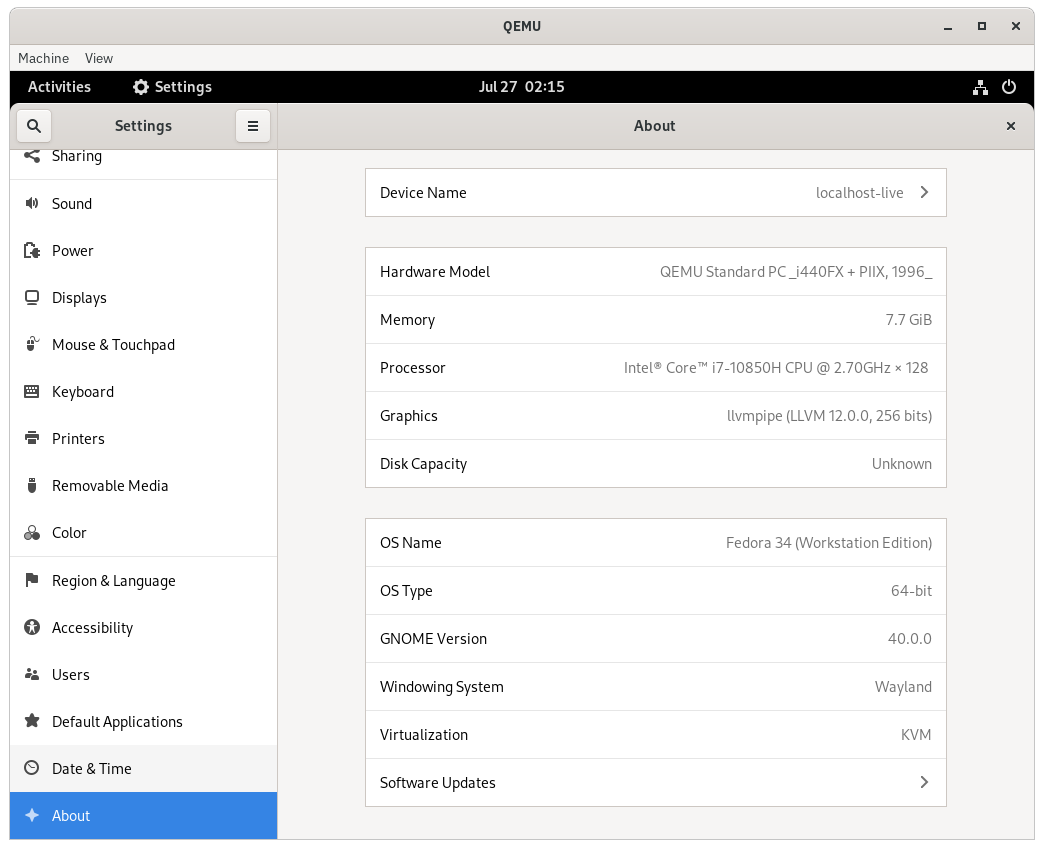
lspci
- VirtIO VGA
qemu-system-x86_64 \ -boot menu=on \ -m 8192 \ -cpu max \ -smp 4 \ -cdrom cdromimg/<Fedora-Workstation-Live-x86_64-xx-y.z.iso> \ -accel kvm -vga virtioSettings->About
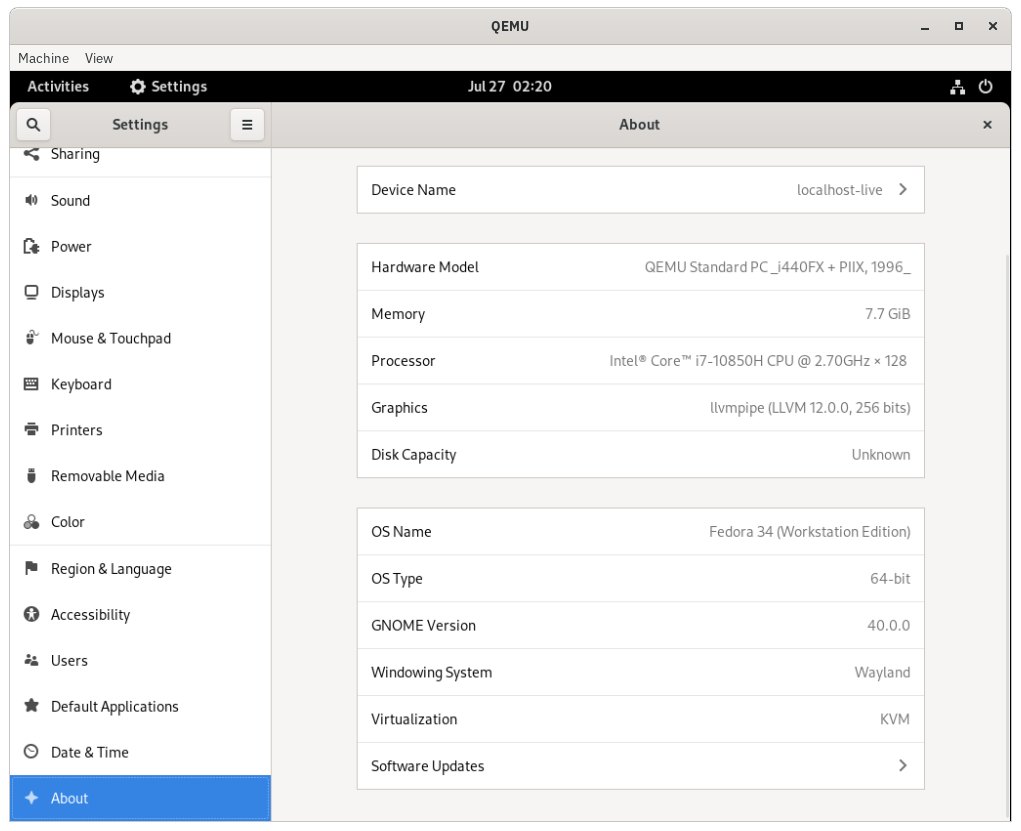
lspci
Sharing certain amount of RAM as video memory in QEMU using the std provider in a GNU/Linux operating system
- Continuing on from the end of the guide about Setting up Arch Linux VM on QEMU using BIOS, start up the same VM by executing the following command.
qemu-system-x86_64 \ -boot menu=on \ -m 2048 \ -cpu max \ -smp 4 \ -drive file=database/archqemu.raw,format=raw \ -accel kvm \ -vga std \ -device VGA,vgamem_mb=512 - Execute the following command inside the console of the VM to view the list of the emulated PCI hardware attached.
lspci00:00.0 Host bridge: Intel Corporation 440FX - 82441FX PMC [Natoma] (rev 02) 00:01.0 ISA bridge: Intel Corporation 82371SB PIIX3 ISA [Natoma/Triton II] 00:01.1 IDE interface: Intel Corporation 82371SB PIIX3 IDE [Natoma/Triton II] 00:01.3 Bridge: Intel Corporation 82371AB/EB/MB PIIX4 ACPI (rev 03) 00:02.0 VGA compatible controller: Device 1234:1111 (rev 02) 00:03.0 Ethernet controller: Intel Corporation 82540EM Gigabit Ethernet Controller (rev 03) - Probe into the output of
00:02.0by executing the following command as it seems to be an emulated VGA controller.lspci -v -s 00:02.000:02.0 VGA compatible controller: Device 1234:1111 (rev 02) (prog-if 00 [VGA controller]) Subsystem: Red Hat, Inc. Device 1100 Flags: fast devsel Memory at fd000000 (32-bit, prefetchable) [size=512M] Memory at febf0000 (32-bit, non-prefetchable) [size=4K] Expansion ROM at 000c0000 [disabled] [size=128K] Kernel driver in use: bochs-drm Kernel modules: bochs_drm - There are many providers like
qxl,virtio,vmwareetc. that can be used in place ofstd.
- Download the Fedora Workstation ISO file from website and store it in a reference directory
cdromimg.https://getfedora.org - Source OVMF UEFI assets by following the Fetching OVMF UEFI from the correct source guide, if not done already.
- Start a virtual machine for playing around with setting viewport resolution for the live ISO and there is no need for a virtual disk image here.
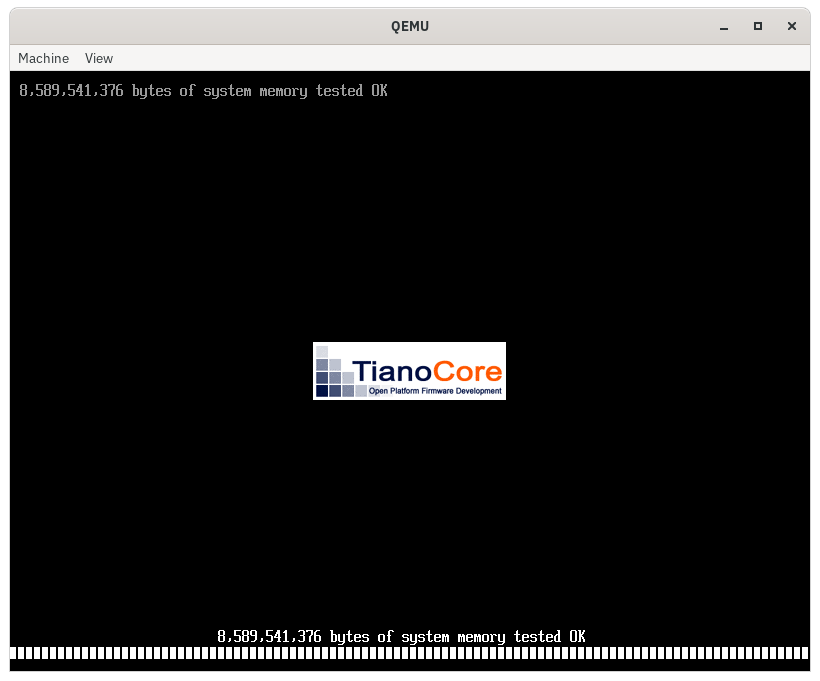
qemu-system-x86_64 \ -boot menu=on \ -m 2048 \ -cpu max \ -smp 4 \ -bios /usr/share/edk2/ovmf/OVMF_CODE.fd \ -cdrom cdromimg/<Fedora-Workstation-Live-x86_64-xx-y.z.iso> \ -accel kvm - Press
ESCkey when the following screen is visible during the startup to navigate into the OVMF UEFI settings.
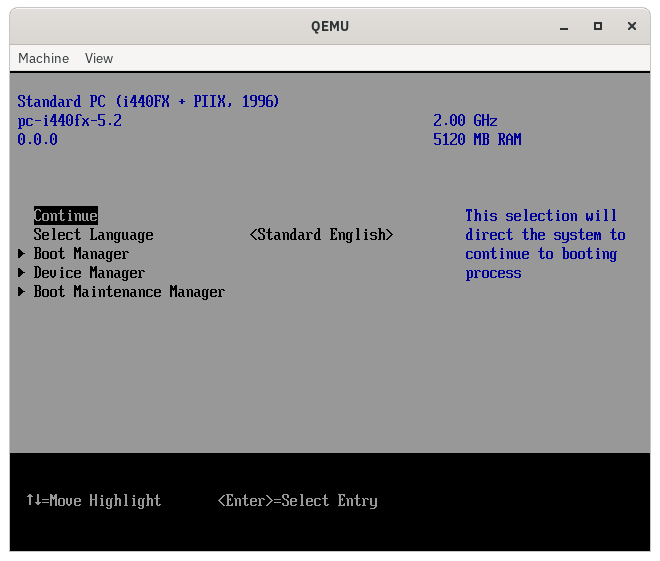
- Once inside the OVMF UEFI settings, just use the arrow keys to point at
Continueand pressENTERto resume booting.
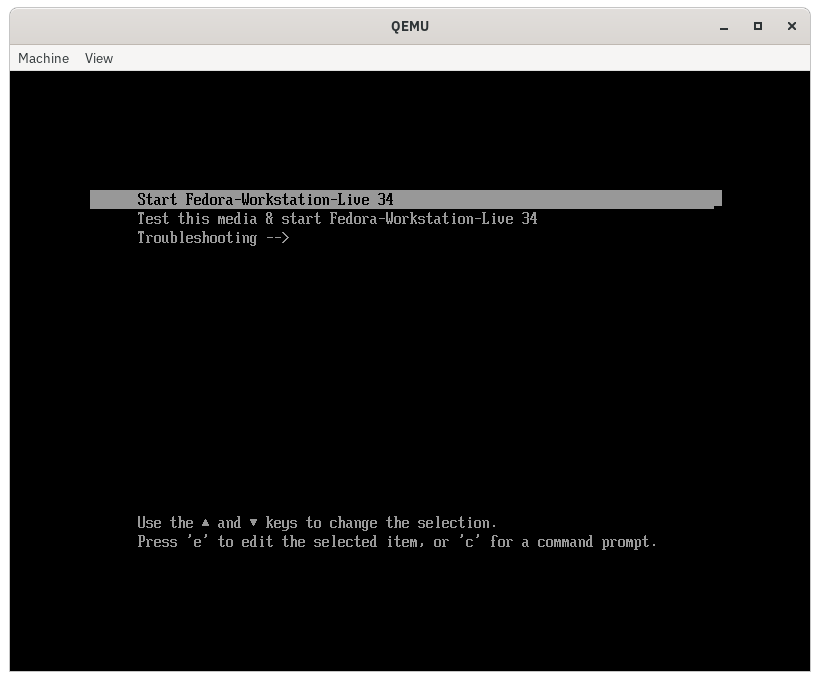
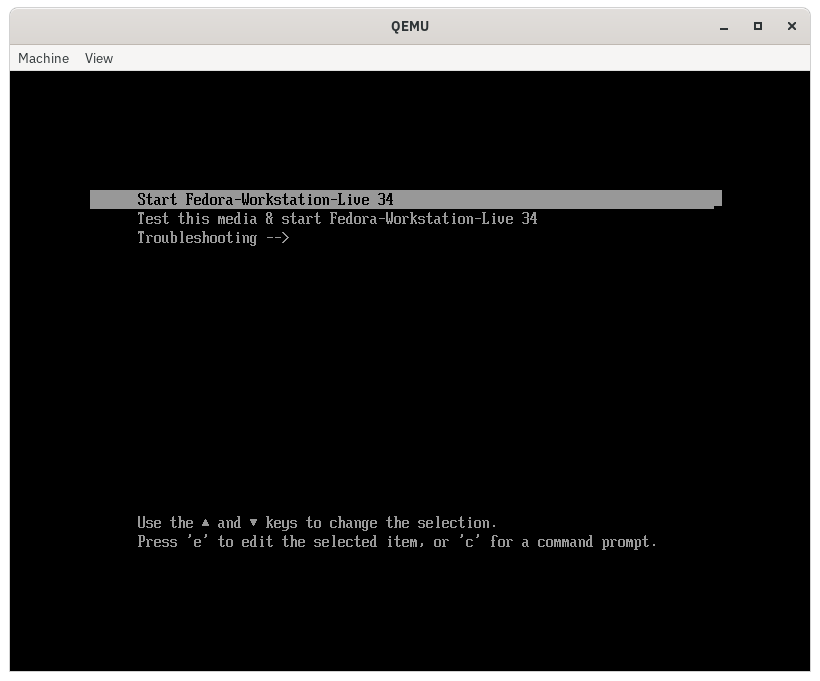
- QEMU would now boot into the live environment of Fedora Workstation so use the arrow keys to point at the first option and press
ENTERto boot up.
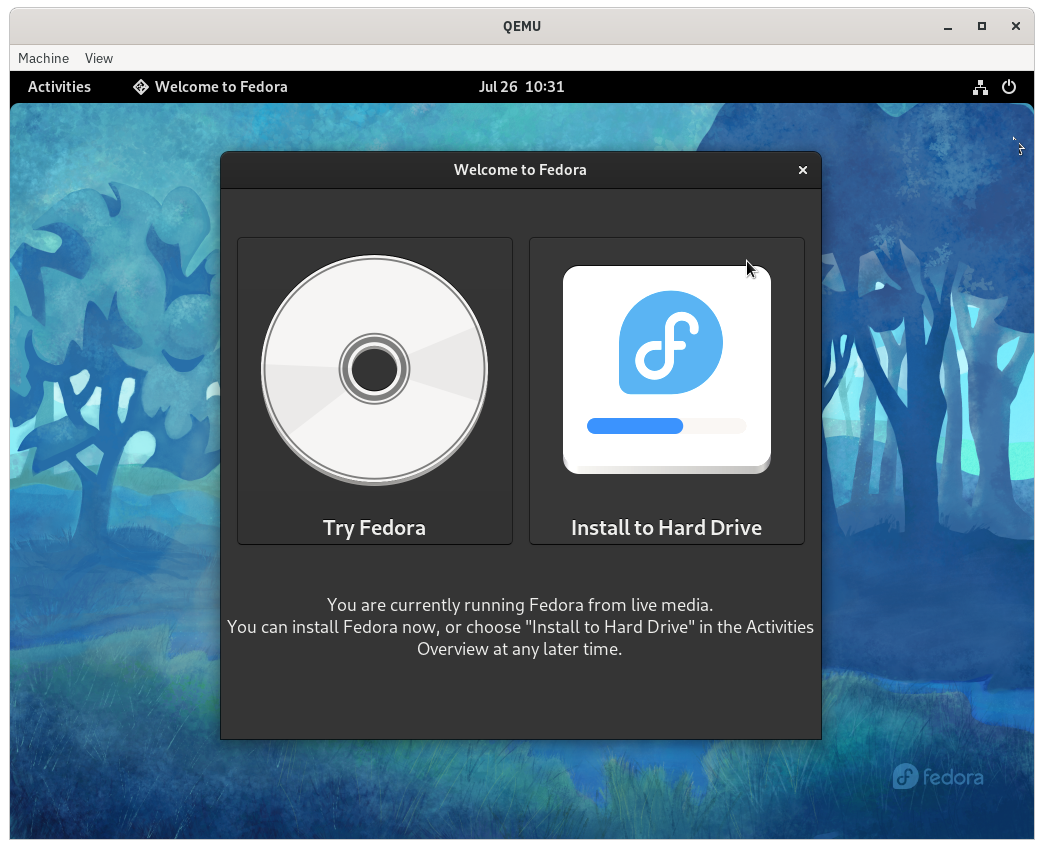
- Once the live environment of Fedora Workstation has booted up, open up a terminal instance.
- Execute the following command to install
xrandron the live environment.sudo dnf install xrandr - Once
xrandris installed on the live environment, execute it to find a list of supported resolutions and refresh rates for the current renderer.xrandr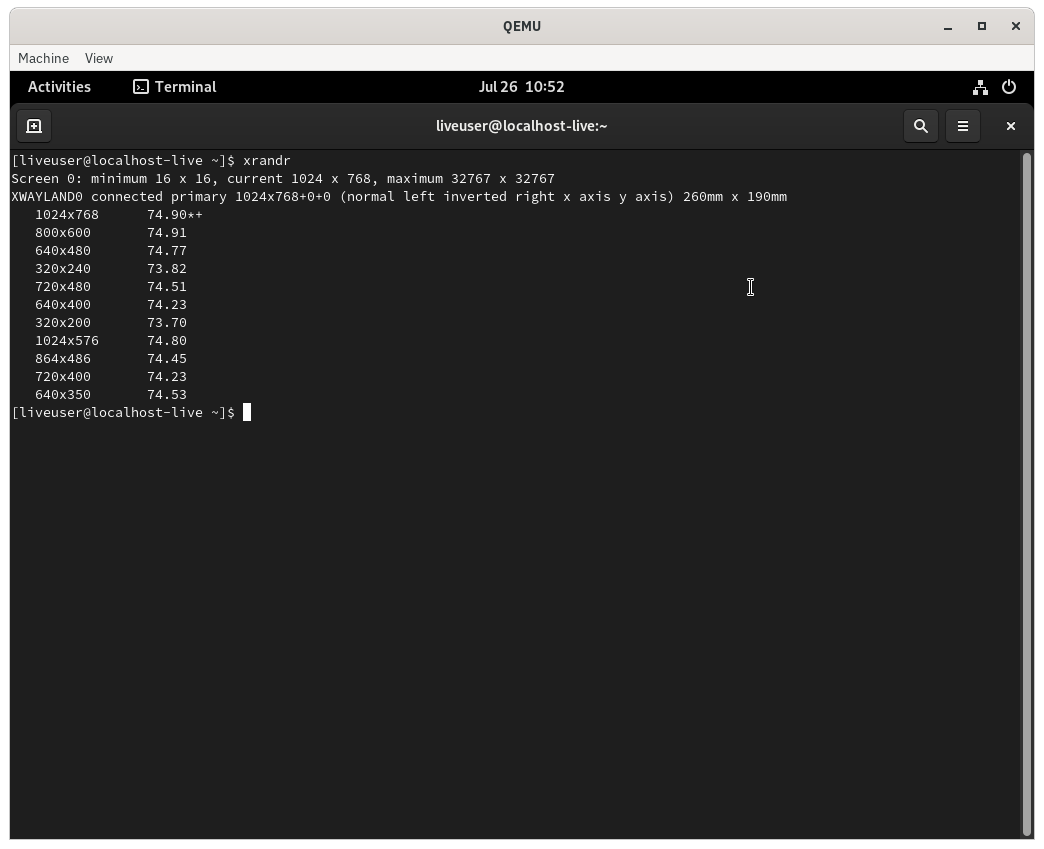
- Restart the live environment and press the
ESCkey during the startup to navigate into the OVMF UEFI settings.
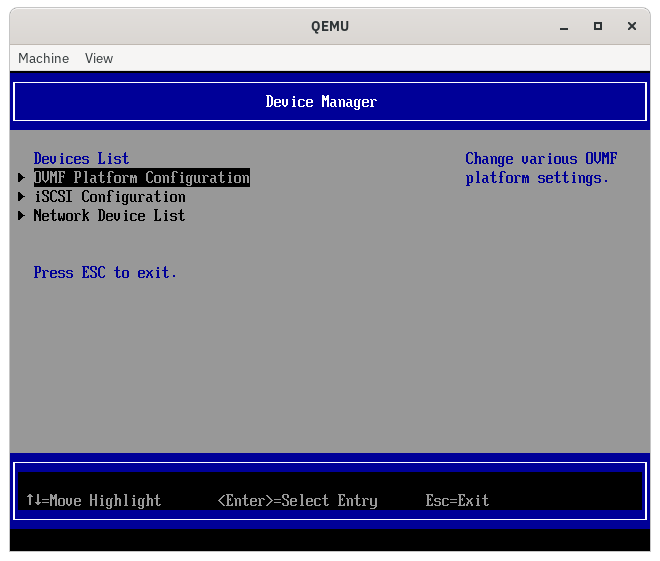
- Use the arrow keys to point at
Device Manager, pressENTERand then select theOVMF Platform Configurationoption.
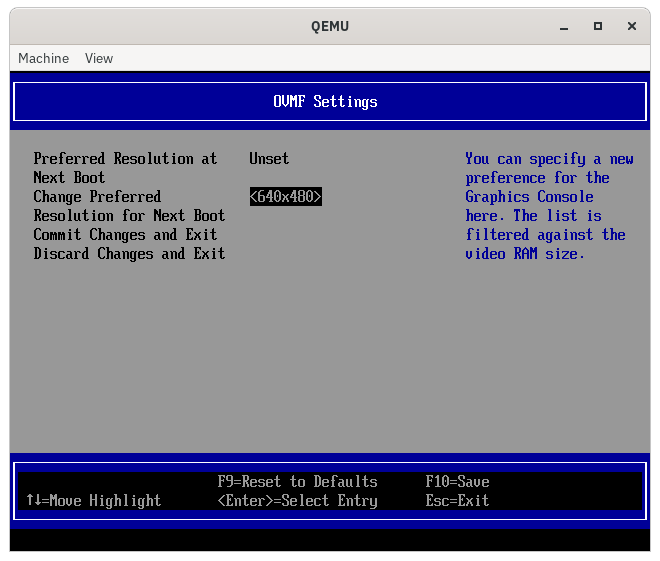
- Observe that the
Preferred Resolution at Next BootisUNSET. Open up the popup forChange Preferred Resolution for Next Bootand select1280x720.
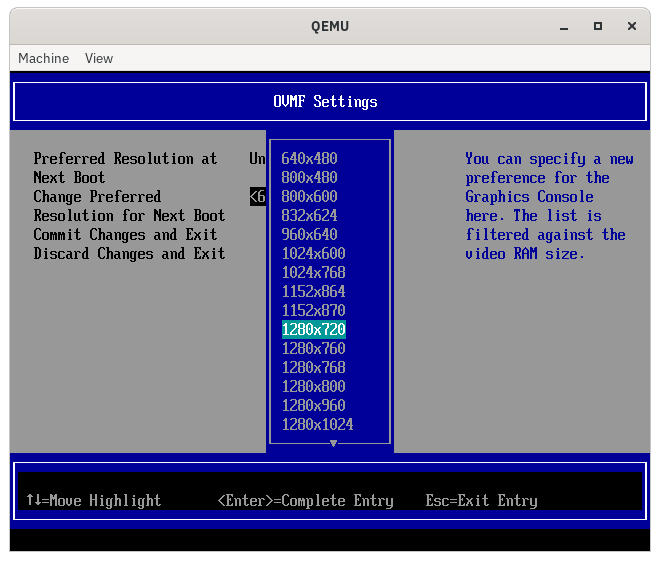
- Press
F10key and then pressYto confirm saving the configuration. PressCtrl+Alt+Delto reboot the VM.
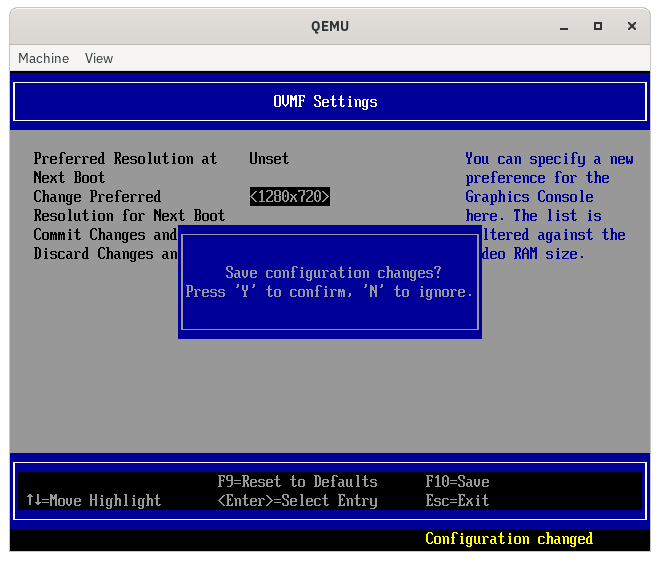
- Once the booting into the live environment, the set resolution would be made available to select from the list of all other resolution.
More information can be found here https://qemu-project.gitlab.io/qemu/system/vnc-security.html
- Download the Fedora Workstation ISO file from website and store it in a reference directory
cdromimg.https://getfedora.org - Start a virtual machine for setting up intrinsic VNC server for the live ISO and there is no need for a virtual disk image here.
qemu-system-x86_64 \
  -boot menu=on \
  -m 2048 \
  -cpu max \
  -smp 4 \
  -cdrom cdromimg/<Fedora-Workstation-Live-x86_64-xx-y.z.iso> \
  -vnc 0.0.0.0:59,password=on \
  -accel kvm
  -monitor stdio
QEMU 5.2.0 monitor - type 'help' for more information (qemu) - Visit https://www.realvnc.com/en/connect/download/viewer/ in an internet browser of choice, download and install the VNC viewer application either on the host device or another device in the same network.
- Head back to the prompt where the VM was started and type in the following command in the
(qemu)console to change the default VNC password.change vnc passwordQEMU 5.2.0 monitor - type 'help' for more information (qemu) change vnc password Password: ******** - Switch to the VNC Viewer window and type in
0.0.0.0:5959from the host device (or<ip-address-of-host-device>:5959if accessed from another device in the same network) -59from the command referring to the offset from5900which is the default VNC port.
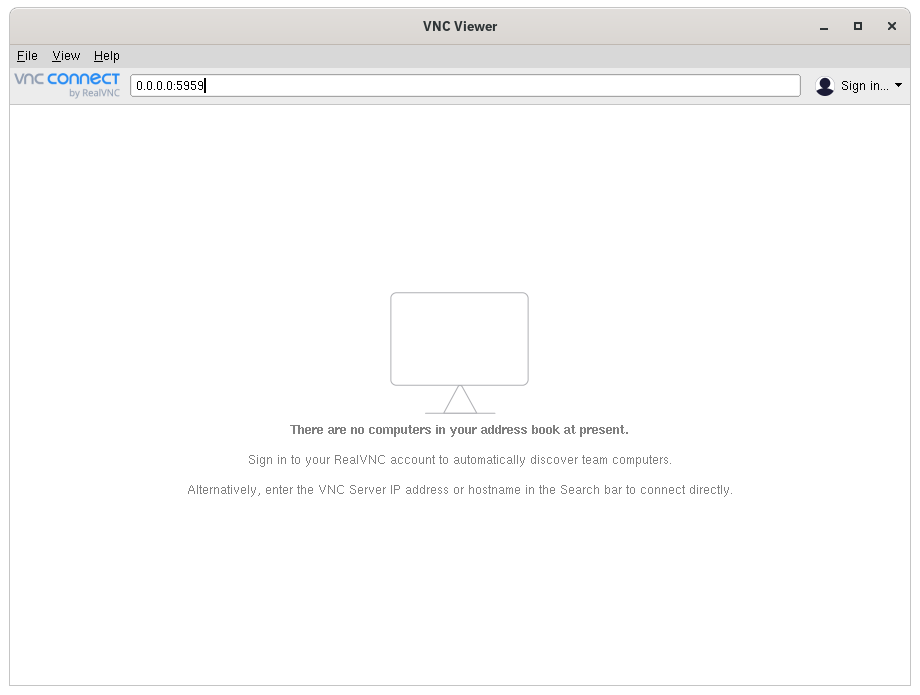
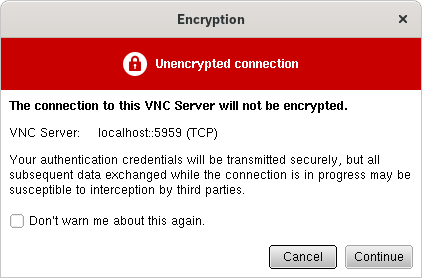
- A window would appear warning about the nature of the connection being unencrypted. This is fine for a closed network so click on the
Continuebutton.
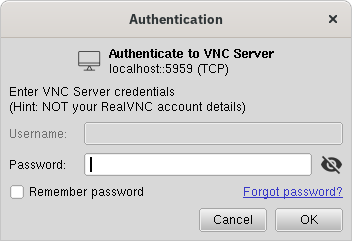
- Another window would appear which would ask for password. Enter the password that was set in the step #5 and then click on the
OKbutton.
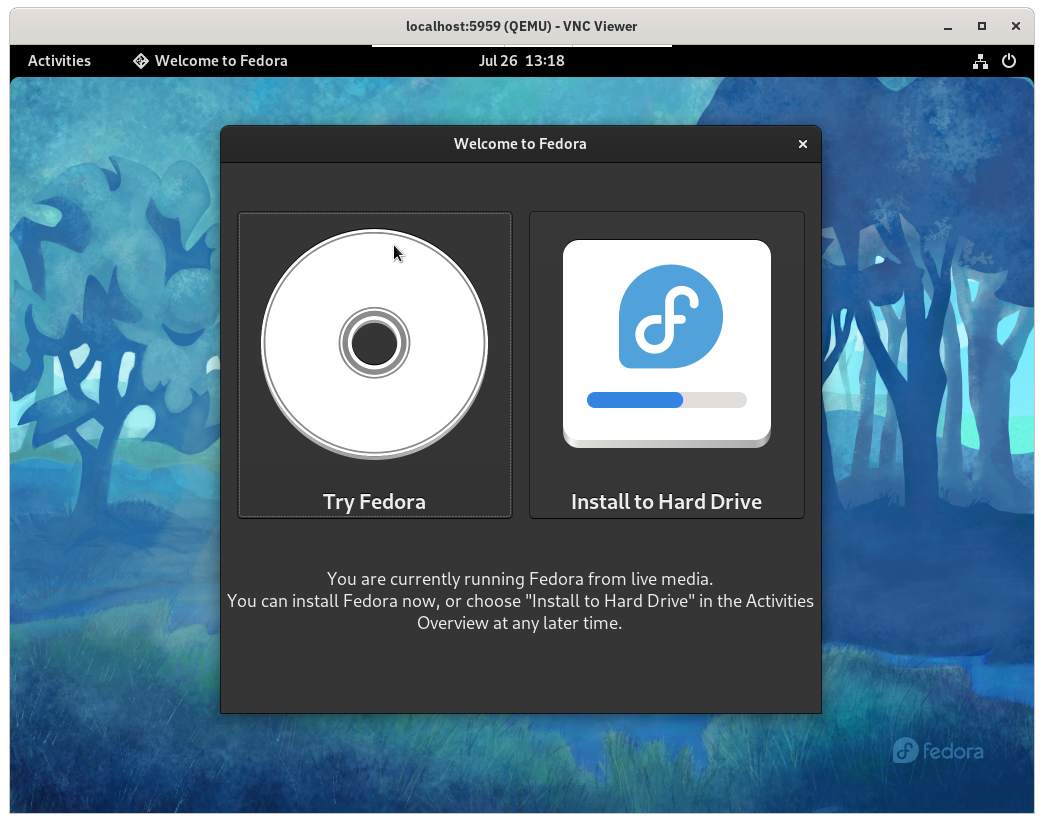
- Finally a window showing the virtual desktop of the live environment would show up and it can be used to interact with the VM.
Here are a list of articles that I found useful - and I suspect that you would too.
- Windows as QEMU guest - https://matteocroce.medium.com/windows-as-qemu-guest-a115a56043b6/
- How to Install VirtIO Drivers on KVM-QEMU Windows Virtual Machines - https://linuxhint.com/install_virtio_drivers_kvm_qemu_windows_vm/
- QEMU official documentation - https://qemu-project.gitlab.io/qemu/
- Using UEFI with QEMU - https://docs.fedoraproject.org/en-US/quick-docs/uefi-with-qemu/
- QEMU documentation on Arch Linux - https://wiki.archlinux.org/title/QEMU/
- SUSE LES15SP3 Virtualization Guide - https://documentation.suse.com/sles/15-SP3/html/SLES-all/book-virtualization.html
Sign up for free
to join this conversation on GitHub.
Already have an account?
Sign in to comment