This list has been updated for Big Sur (and later). Since I don't use these versions, this guide might still need further improvements. For older macOS versions, please see this older revision.
- Open Automator
- Quick Action
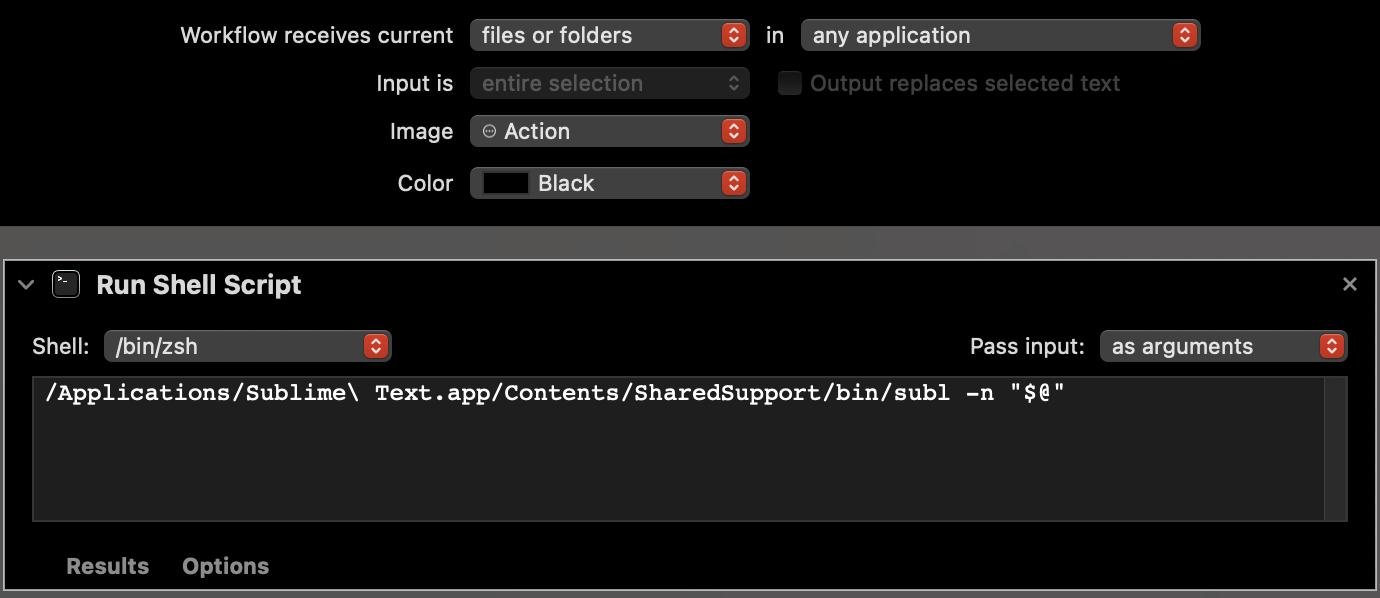
- Set “Service receives selected” to
files or foldersinany application - Add a
Run Shell Scriptaction - Set the script action to
/Applications/Sublime\ Text.app/Contents/SharedSupport/bin/subl -n "$@" - Set “Pass input” to
as arguments - Save as
Open in Sublime Text
Let's repeat the steps above for a second entry, this time to add files or folders to an existing Sublime Text window
- Open Automator
- Create a new Service
- Add a
Run Shell Scriptaction - Set “Workflow receives current” to
files or foldersinany application - Set the script action to
/Applications/Sublime\ Text.app/Contents/SharedSupport/bin/subl -a "$@" - Set “Pass input” to
as arguments - Save as
Add to Sublime Text
You can assign a global shortcut to run the services we just created
- Open “System Preferences”
- Select “Keyboard” then the “Shortcuts” tab
- In the left pane, click on “Services”
- In the right pane, scroll to “Files and Folders”
- Select “Open in Sublime Text” (or “Add to Sublime Text”) and click “add shortcut”
- Select a shortcut
You might want to rename or edit the items we just created
- Activate Finder
- Click on “Finder” in the Apple menu, select “Services” then “Services Preferences”
- In the right pane, scroll to “Files and Folders” and scroll to the item you want to edit
- Right click the item and select “Open in Automator”
- Edit and save
Alternatively, you can edit the workflow (e.g. ~/Library/Services/Open in Sublime Text.workflow) in your preferred text editor


Awesome! Thanks.
Can someone please explain
"$@"in/Applications/Sublime\ Text.app/Contents/SharedSupport/bin/subl -n "$@"I understood that the first part finds the executable for Sublime Text, -n option is for a new window.