This gist is currently a Work In Progress.
These steps were practised and performed on a Debian Bookworm container and Proxmox 8.x Hypervisor (Debian). Instructions may vary for other releases/distros. Please DYOR and observe that YMMV. Comments, ideas and critique very welcome.
Speed run screencast: https://youtu.be/SFWV8blEdZQ
This gist is effectively a tech demo. I hope you enjoy and take away something useful.
The objective with most of the topics is to show ways / introduce tooling to boost productivity and the quality of our daily lives working in tech.
Click here to toggle the TODO section
- Talk about / introduce https://github.com/kyle0r/bash-shortcuts-cheat-sheet, probably fits in the xterm/tmux sections.
- Does xrdp support USB key pass-through/auth?
xrdp-chansrv[430]: [INFO ] Detected remote smartcard 'SCARD'
- Add a TOC
- Investigate if this answer can help to optmise the xterm config duplication
Depends on the jq command. Perform the following from the hypervisor terminal:
sudo apt install jq

# list available storage
sudo pvesh get storage

# pick the relevant storage for CT templates
template_storage=local

# pick relevant storage for the CT rootfs
hypervisor_storage=sas-zfs-nocrypt

# procure CT template
sudo pveam download "$template_storage" debian-12-standard_12.7-1_amd64.tar.zst

# determine the proxmox host - this assumes the first / a singular host setup
h=$(pvesh ls --output-format=json nodes | jq -r '.[0].name')
# determine the next free vmid
next_vmid=$(( $(cat <(sudo pvesh get /nodes/"$h"/lxc --output-format=json | jq -r '.[].vmid') <(sudo pvesh get /nodes/"$h"/qemu --output-format=json | jq -r '.[].vmid') | sort | tail -n1) + 1 ))
echo "The next available vmid on host: $h, is: $next_vmid"

ct_new_hostname=debian-de-demo
pub_key=~kyle/.ssh/tmp.pub

# create the CT
sudo pct create "$next_vmid" "$template_storage":vztmpl/debian-12-standard_12.7-1_amd64.tar.zst \
--ostype debian \
--hostname "$ct_new_hostname" \
--memory 8192 \
--cores 4 \
--storage "$hypervisor_storage" \
--rootfs "$hypervisor_storage":20,mountoptions=noatime \
--net0 name=eth0,type=veth,bridge=vmbr0,ip=dhcp,firewall=0 \
--unprivileged 1 \
--features nesting=1 \
--ssh-public-keys "$pub_key" \
--start 1

# make a note of the dhcp ip
sudo pct exec "$next_vmid" -- hostname -I
Now to run commands on the CT, from the hypervisor terminal:
# note that: sudo pct enter "$next_vmid # does not provide login shell

# enter the CT with root login shell
sudo pct exec "$next_vmid" -- /bin/bash -l

# Sanity check that you entered the CT and are not on the hypervisor
hostname

# Select the locales to generate for the CT and set a system-wide default if desired.
dpkg-reconfigure locales

# OPTIONAL: disable IPv6 to simplify the localnet IP stack
cat <<EOF > /etc/sysctl.d/disable_ipv6.conf
net.ipv6.conf.all.disable_ipv6 = 1
net.ipv6.conf.default.disable_ipv6 = 1
EOF

# update and upgrade the CT packages
apt update && apt full-upgrade -y

# some misc sensible/required packages
apt install -y mawk aptitude molly-guard needrestart bash-completion sudo curl vim

# 💡👇 The following will install lots of deps required for the desktop env
# It will also prompt you to setup the keyboard
apt install -y xrdp mate-desktop-environment xclip

# choose an editor
update-alternatives --config editor

# Fix a bug with xrdp where the service user cannot read the private key causing TLS to be disabled.
# journal: Cannot accept TLS connections because certificate or private key file is not readable
mkdir -p /etc/systemd/system/xrdp-sesman.service.d
cat <<EOF > /etc/systemd/system/xrdp-sesman.service.d/99-ssl-key-fix.conf
[Service]
ExecStartPre=/usr/bin/find /etc/xrdp/key.pem -type l -and -delete
ExecStartPre=/usr/bin/cp /etc/ssl/private/ssl-cert-snakeoil.key /etc/xrdp/key.pem
ExecStartPre=/usr/bin/chown xrdp:root /etc/xrdp/key.pem
EOF

# once complete, reboot the CT for good measure
reboot
Now it is time to set up the demo user.
If you need inspiration for a password, you can try this snippet which will run as the nobody user as a best practice:
cat <<'EOF' | sudo -u nobody bash
test -e /usr/share/dict/words && echo "$(whoami) generated password: $(shuf -n 4 <(awk 'length($0) > 4 && length($0) < 9 && ! /'"'"'/' /usr/share/dict/words) | tr '\n' ' ' | tr '[:upper:]' '[:lower:]')" || echo 'Aborted. Dictionary not found.'
EOF
This generation approach follows the logic of https://xkcd.com/936/. Jeff Preshing published an online generator here.
From the hypervisor terminal:, enter the CT and setup the demo user:
# enter the CT with root login shell
sudo pct exec "$next_vmid" -- /bin/bash -l

# Sanity check that you entered the CT and are not on the hypervisor
hostname

# check you are happy with the keyboard and locale config, adjust as required
localectl status; echo "value of /etc/default/locale: $(</etc/default/locale)"

# create a throwaway user for demo purposes
demouser=op-demo
adduser --disabled-password --gecos '' "$demouser"
# set a password so you can login via xrdp
passwd "$demouser"
# if you'd like to give the demo user sudo rights
usermod --append --groups sudo "$demouser"

# OPTIONAL: you may wish to modify the suoders config to set NOPASSWD for the sudo group
visudo

# OPTIONAL: copy the ssh config to the demo user
cp -a ~root/.ssh $(eval echo ~"$demouser")/.ssh && chown -R "$demouser": "$_"

# enable copy/paste in xterm required for future steps, and a legible font size
cat <<'EOF' | sudo -u "$demouser" sh
cat <<'SH' >> ~/.Xresources
XTerm*selectToClipboard: true
UXTerm*selectToClipboard: true
XTerm*faceName: monospace
UXTerm*faceName: monospace
XTerm*faceSize: 14
UXTerm*faceSize: 14
SH
EOF

# function to remove CR (windows line endings) from the clipboard
cat <<'EOF' | sudo -u "$demouser" sh
cat <<'SH' >> ~/.bash_aliases
clipclean() { xclip -o -selection clipboard | tr -d '\r' | xclip -i -selection clipboard; }
SH
EOF

exit # logout from the CT termminal
Simple steps to test ssh connectivity and optionally setup pub key auth for the demo user
demouser=op-demo

# replace <dhcp_ip> with the one noted during CT creation
dhcp_ip=<dhcp_ip>

# OPTIONAL: set up public key auth - replace <key> accordingly
ssh_key=~/.ssh/<key>; ssh-copy-id -i "$ssh_key" "$demouser"@"$dhcp_ip"

# test ssh connectivity
ssh "$demouser"@"$dhcp_ip" 'date;hostname;tty;w'
Open the run dialogue: WIN+r and run: mstsc /v:<dhcp_ip> /w:1920 /h:1080
TODO cmdkey entry?
I'm not personally familiar with connecting to RDP servers from a Linux desktop env but I understand that Debian 12 Bookworm has at least two packages available aptitude search freerdp rdesktop. It should be fairly self explanatory to then launch those clients and connect to the new CT.
OK, now its time to setup the demo user and install the following prerequisites:
tmuxis a terminal multiplexergitmange source control and clone reposbsdtarcan handle zip extraction from a pipe*jqis a cli tool for parsing and manipulating JSON data.
* bsdtar can handle extracting zip and other formats in a pipeline - check the man bsdtar page. It is part of the libarchive-tools package in Debian.
From the CT terminal:
sudo apt install -y tmux git libarchive-tools jq
For a host that has a desktop env installed you can typically check the current keyboard map via setxkbmap -query and set the map via setxkbmap gb for English GB or no for Norwegian and us for United States and so on.
You can also invoke localectl status to see locale and keymap info.
To persist this change for a specific user, add the setxkbmap to ~/.bashrc or the relevant rc file for the shell you are using.
If you prefer a GUI to manage this aspect, on MATE destop env you can change keyboard settings via
System → Control Center → Hardware → Keyboard → Layouts Tab.
To change the system default on Debian invoke: sudo dpkg-reconfigure keyboard-configuration and follow the menu steps. [docs]
If the kbd package is not installed, for example on a minimally installed host, the kdb package may be required keyboard management to work properly.
I noted when testing different keyboard settings/commands that one needs to keep in mind if one is sitting on a physical tty or a pseudo pty terminal. AFAIK loadkeys and dumpkeys are designed to work on physical TTYs and may have issues with TTYs.
Generating locales and optionally setting the system default locale is easy via sudo dpkg-reconfigure locales. Users will inherit /etc/default/locale if its set. This was already suggested to be performed during the CT setup steps.
💡 Note that this demo CT is not intended to be a multilingual host, so setting the default locale should not be an issue. For multi-user, multi-language hosts, it is usually best practice not to set a default locale.
Adding locales can be automated by manipulating /etc/locale.gen and invoking locale-gen and update-locale but I'm leaving it out of scope for this gist. Ask a GenAI or perform a web search if you are interested in further details. DYOR - YMMV!
Check the current users locale settings by invoking the locale command.
If a user doesn't specify their own locale in their shell profile or rc files, the system default /etc/default/locale will be used. If the system default is not set, there will be a fall back to an unspecified default, typically the C locale.
In case you want to perform this for a specific user (or don't have sudo rights) then use the locale -a to list which locales are available and then set one by invoking LC_ALL=<locale> where <locale> is your preferred locale. For example LC_ALL=en_GB.UTF-8.
Add the relevant LC_ALL to your ~/.bashrc or relevant shell rc file to set the locale for interactive sessions and set it in your ~/.profile to set the locale for any login sessions. For consistency you may wish to set it in both files.
💡 You'll want to logout of any desktop env / exit any terminal sessions to pick up the change.
I noted on a minimal MATE desktop env that created from a debian-12-standard_12.2-1_amd64 template that the language / regional options were missing from the Control Center. There is some ambiguity on if and how one makes those options appear. It would be worth investigating the ibus setup and/or i18n settings on MATE desktop.
To get the best look and feel you'll want a font that supports powerline. What is that? Here is what GPT-4o mini says:
Powerline fonts are a type of font specifically designed for use in terminal applications, particularly for enhancing the appearance of status lines and prompts in command-line interfaces. They are often used in conjunction with terminal emulators and text editors to provide a visually appealing and informative display of information.
AFAIK, Kim Silkebækken introduced the concept of powerlines when he started his vim project. The repo is here: https://github.com/powerline/powerline.
For this demo I've chosen SourceCodePro which is open font created by Adobe.
The following snippet will download and extract the latest OTF version of SourceCodePro to the ~/.fonts dir.
The snippet utilises the GitHub API and jq to determine the latest version and then runs an download | extract pipeline and does not create any temporary cruft.
if download_url=$(curl --connect-timeout 5 -sSL https://api.github.com/repos/adobe-fonts/source-code-pro/releases/latest | jq -r '.assets[] | select(.name | contains("OTF")) | .browser_download_url'); then

  mkdir -p ~/.fonts
  echo -n 'Downloading font. Please wait... '
  if curl --connect-timeout 5 -sSL "$download_url" |bsdtar -xf - --strip-components=1 -C ~/.fonts; then
    echo 'Font installed OK'
    # install new fonts
    echo -n 'Updaing font cache. Please wait... '
    fc-cache -fv 1>/dev/null 2>&1 && echo OK || echo FAILURE
  else
    echo 'FAILURE'
  fi
else
  echo 'Error determining font download_url'
fi
More powerline fonts are available here: https://github.com/powerline/fonts
TODO
I chose to demo xterm because its a straightforward and ubiquitous. I tested with xterm -version 379.
Keep in mind the difference between login and non-login shell sessions
- login: executes the system and current user profile
- non-login: skips the profile
The pre-installed MATE desktop xterm launcher does not not invoke a login shell. Run shopt login_shell to see what I mean.
I suggest to create a launcher which invokes xterm -ls which will launch xterm as a login shell and will execute the system and user profile.
TODO screenshot.
One reason this is important, is that the profile contains the setup for things like the users ~/.local/bin
💡 xterm vs. uxterm for improved unicode support, you may wish to use uxterm rather than xterm.
💡 Cosmetic paste issue It looks like there is a cosmetic paste bug in xterm. If the paste is larger/more than the visible terminal rows, then the terminal doesn't scroll to accommodate the paste, so it looks like the paste has become malformed. From testing, the paste is fine and it is just a cosmetic issue. I was not able to tune this out via xterm config options. If you know how to fix it please leave a comment.
Nord is a beautiful color palette for text editors and terminals (any many other ports). Check out the details on nordtheme.com.
You can download the latest version of the xterm nord theme as follows:
echo -n 'xterm-nord-theme install... '; curl --connect-timeout 5 --create-dirs -sSL https://gist.githubusercontent.com/kyle0r/74cd5a6046747867e521efc01997a53d/raw/xterm-nord-theme -o ~/.config/xterm/themes/nord && echo OK || echo FAILURE
I sourced this file from the nordtheme/xresources git repo and made simple adjustments to make it work on the version of xterm in the CT.
The following snippet will setup some sensible defaults for xterm and merge the changes into the X resource database. The config will:
- Activate the SourceCodePro font
- Activate the Nord theme published above
- Set some sensible defaults
cat <<'EOF' > ~/.Xresources && xrdb -merge ~/.Xresources || echo 'FAILURE'
! font cfg
XTerm*faceName: SourceCodePro-Medium
UXTerm*faceName: SourceCodePro-Medium
XTerm*faceSize: 14
UXTerm*faceSize: 14

! color support
XTerm*termName: xterm-256color
UXTerm*termName: xterm-256color
XTerm*colorMode: true
UXTerm*colorMode: true

! selections in the terminal are automatically copied to the clipboard
XTerm*selectToClipboard: true
UXTerm*selectToClipboard: true

! the Meta key (e.g. Alt key) sends an escape sequence e.g. ALT+B and ALT+F
! For example:
! ALT+B moves the cursor backwards by one word
! ALT+F moves the cursor forwards by one word
! ref: https://github.com/kyle0r/bash-shortcuts-cheat-sheet
XTerm*metaSendsEscape: true
UXTerm*metaSendsEscape: true

! testing suggests pwd is ~
#include ".config/xterm/themes/nord"
EOF
💡 You'll want to logout / exit any terminal sessions to pick up changes.
I'm assuming tmux is installed system wide per the prerequisites section.
Installing tmux on a per user basis inside ~/.local is possible but outside the scope of this gist.
This gist contains a copy of my tmux config which may include some features you'll like including:
- tmux-plugins/tpm - tmux plugin manager
- tmux-plugins/tmux-sensible - sensible settings for tmux
- arcticicestudio/nord-tmux - theme
- Use the mouse to select panes and drag-resize panes
- ALT+PGUP / PGDN to change between windows
- ALT+← / ↑ / → / ↓ to change between panes
- prefix | to split a pane vertically (pipe)
- prefix - to split a pane horizontally (minus/hyphen/dash)
- prefix < move window left
- prefix > move window right
- prefix s toggle pane synchronisation - typing into all panes at the same time
- prefix R reload tmux config
You can download the latest version of the .tmux.conf as follows:
echo -n 'installing ~/.tmux.conf ... '; curl --connect-timeout 5 -sSL https://gist.githubusercontent.com/kyle0r/74cd5a6046747867e521efc01997a53d/raw/.tmux.conf > ~/.tmux.conf && echo OK || echo FAILURE
The tpm project is a simple way to manage tmux plugins.
git clone --depth=1 https://github.com/tmux-plugins/tpm ~/.tmux/plugins/tpm

tmux new-session '~/.tmux/plugins/tpm/scripts/install_plugins.sh; printf "%s" "Press ENTER to continue..."; read -r _;'
Now you can launch tmux :)
Here is an example of how the tmux config looks like from a cygwin mintty:

Launch tmux and invoke the prefix + U kbd shortcut.
xpanes describes itself as "The ultimate terminal divider powered by tmux"

This shell snippet will install the latest version of xpanes into the local bin:
if xpanes_latest_version=$(curl --connect-timeout 5 -sSL https://api.github.com/repos/greymd/tmux-xpanes/releases/latest|grep '"tag_name":'|grep -Eo 'v[0-9\.]+'); then

  echo "xpanes latest version detected as: $xpanes_latest_version"

  echo -n 'Downloading and installing xpanes. Please wait... '
  if curl --create-dirs --connect-timeout 5 -sSL "https://raw.githubusercontent.com/greymd/tmux-xpanes/$xpanes_latest_version/bin/xpanes" -o ~/.local/bin/xpanes; then
    echo OK
    chmod +x ~/.local/bin/xpanes
  else
    echo FAILURE
  fi
else
  echo 'There was a problem determining xpanes_latest_version'
fi
💡 You'll want to logout / exit any terminal sessions to pick up changes.
Just run the snippet again in the future.
TODO
We need a vim plugin manager for this, lets go with vim-plug. Here is a shell snippet to install vim-plug:
if latest_version=$(curl --connect-timeout 5 -sSL https://api.github.com/repos/junegunn/vim-plug/releases/latest|grep '"tag_name":'|cut -d'"' -f4); then

  echo "vim-plug latest version detected as: $latest_version"

  echo -n 'Downloading and installing vim-plug. Please wait... '
  if curl --create-dirs --connect-timeout 5 -sSL "https://raw.githubusercontent.com/junegunn/vim-plug/$latest_version/plug.vim" -o ~/.vim/autoload/plug.vim; then
    echo OK
  else
    echo FAILURE
  fi
else
  echo 'There was a problem determining xpanes_latest_version'
fi
A relevant vim config with some defaults:
cat <<EOF >> ~/.vimrc
" disable bracketed-paste - which prevents pasting commands into vim
" https://en.wikipedia.org/wiki/Bracketed-paste
" https://vimhelp.org/term.txt.html#xterm-bracketed-paste
set t_BE=

syntax on

" enables support for 24-bit RGB color in terminal emulators that support it
set termguicolors

call plug#begin()
" INFO: nord-vim plugin modifies formatoptions and removes t option
" which prevents autowrapping to textwidth on paste
Plug 'arcticicestudio/nord-vim'
call plug#end()

" conditional color scheme loading
if filereadable(expand("~/.vim/plugged/nord-vim/colors/nord.vim"))
  colorscheme nord
endif
EOF
Then run the following, which will install the plugin(s) and then quit vim to finalise the install.
vim -c PlugInstall -c 'echo "Press ENTER to continue..."' -c 'call input("")' -c qa
Now try to edit a file, for example vim ~/.vimrc to see that the nord plugin/colorscheme is active.
vim -c PlugUpdate to update plugins and vim -c PlugUpgrade to upgrade vim-plug itself.
fzf describes itself as "a general-purpose command-line fuzzy finder" and improves the quality of life on the terminal, enhancing things like searching shell history, changing dirs and finding files.
This approach installs fzf on a per user basis rather than system wide.
To install the latest version from GitHub inspired from the official docs here:
git clone --depth=1 https://github.com/junegunn/fzf.git ~/.fzf

# run the installer and follow the prompts
~/.fzf/install
💡 You'll want to logout / exit any terminal sessions to pick up the change.
Check out this screencast by @samoshkin which explores fzf features.
( cd ~/.fzf && git pull && ~/.fzf/install )
TODO
A Firefox fork... To quote LibreWolf's website: "A custom version of Firefox, focused on privacy, security and freedom."
I've taken LibreWolf for a spin and it looks good. After a quick look at the out of the box settings, they were refreshingly privacy focused. It was a nice touch to see that LibreWolf comes bundled with uBlock Origin.
I'm going to trail this as my main desktop browser and drop-in replacement for Firefox. It will be interesting to see if Firefox profiles can be used in / migrated to LibreWolf.
TODO explain the snippet: GPT-4o mini said
In summary, this shell snippet automates the process of downloading the latest LibreWolf browser release for Linux, unpacking it, and setting up a convenient symlink for easy access. It includes error handling to ensure that the user is informed if something goes wrong during the URL retrieval process.
if librewolf_url=$(curl --connect-timeout 5 -sSL "https://gitlab.com/api/v4/projects/librewolf-community%2Fbrowser%2Fbsys6/releases" | jq -r 'sort_by(.tag_name) | last | .assets.links[] | select(.name | test("linux-x86_64.*\\.tar\\.xz$")) | .url'); then

  mkdir -p ~/.local/bin

  echo -n 'unpacking LibreWolf to ~/.local/librewolf. Please wait... '
  # cruftless download and unpack
  curl --connect-timeout 5 -sSL "$librewolf_url" | bsdtar -xf - -C ~/.local && echo OK || echo FAILURE

  # local bin symlink for LibreWolf
  ln -fs ~/.local/librewolf/librewolf ~/.local/bin
else
  echo 'There was an error determining the librewolf_url'
fi
💡 You'll want to logout / exit any terminal sessions to pick up changes.
Taken from https://librewolf.net/installation/debian/
# install external repo support
sudo apt update && sudo apt install extrepo -y

# enable LibreWolf repo
sudo extrepo enable librewolf

# system wide install of LibreWolf
sudo apt update && sudo apt install librewolf -y
Mozilla structures its Firefox release process into multiple platforms, editions, and channels.
For this demo, we are interested in the desktop platform and the various editions and channels.
The following shell snippet will install the latest Firefox edition of your choice, for the current user. AFAIK this approach bypasses the download token that Mozilla implemented in 2020. See the privacy concerns section below.
# ref: https://ftp.mozilla.org/pub/firefox/releases/latest/README.txt

# pick a locale
ff_locale=nb-NO # Norwegian
ff_locale=en-US # US English
ff_locale=en-GB # British English

# pick a platform
ff_os=win64
ff_os=osx
ff_os=linux
ff_os=linux64

# pick an edition
ff_edition=firefox-latest-ssl
ff_edition=firefox-beta-latest-ssl
ff_edition=firefox-devedition-latest-ssl
...
# All-in-one as an example
ff_locale=en-GB;ff_os=linux64;ff_edition=firefox-devedition-latest-ssl

# This works as of 2025-May
# determine the ftp edition path
ff_ftp_edition_path=firefox
[[ $ff_edition =~ devedition ]] && ff_ftp_edition_path=devedition
# use the http location header to determine the latest release
if ff_ftp_release_url=$(echo -n "https://ftp.mozilla.org/pub/$ff_ftp_edition_path/releases/"; curl --connect-timeout 5 --head -sS "https://download.mozilla.org/?product=${ff_edition}&os=${ff_os}&lang=${ff_locale}"| grep ^Location | cut -d'/' -f7- | tr -d '\r'); then

  mkdir -p ~/.local/bin

  echo 'unpacking Firefox to ~/.local/firefox. Please wait...'
  # cruftless download and unpack
  curl --connect-timeout 5 -sSL "$ff_ftp_release_url" | bsdtar -xf - -C ~/.local && echo OK || echo FAILURE

  # local bin symlink for Firefox
  ln -fs ~/.local/firefox/firefox ~/.local/bin
else
  echo 'There was an error determining the ff_ftp_release_url'
fi
Read more about Mozilla's download token which is used by Firefox's telemetry feature: [ref] [ref] [ref]. AFAIK downloads from the Firefox releases repo, originally their ftp, now hosted on a CDN, does NOT contain a download token.
You can browse the different editions/locales via an existing browser: https://www.mozilla.org/firefox/all/ but be warned, downloading from the website directly will include a download token as mentioned above.
TODO [ref]
Firefox no longer supports sideloading/preloading extensions, so I'm not aware of a way to install extensions automatically without distributing either:
- A preconfigured Firefox profile which I would not consider a best practice.
OR - A custom packaged Firefox like LibreWolf
The next best thing is just to click the direct install links from your preferred/throwaway Firefox profile:
-
Quick Tabs Ported by kyle0r - direct install link (1.0.6.2)
☝️ Based on the original Chrome extension by babyman which was originally ported to Firefox by Kevin Jones. -
uBlock Origin by Raymond Hill - direct install link (1.63.2)
I suggest to enable "Block Outsider Intrusion into LAN" under Filter Lists -> Privacy -
Port Authority by Hacks and Hops - direct install link (2.0.0)
Alternative to "Block Outsider Intrusion into LAN" feature of uBlock Origin that can also provide notifications of intrusion attempts.
- Set your language in
about:preferences - Install a dictionary: https://addons.mozilla.org/firefox/language-tools/
I cannot endorse installing Google Chrome on your system, which is effectively mass surveillance software. In addition to the privacy and surveillance issues with Google products, the 2024 drama surrounding the migration of extension manifest v2 to v3 highlights Google's disdain for ad blocking and privacy. It is a real shame Chrome has achieved an effective monopoly. [ref] [ref] [ref].
In the past, many people, especially early Google adopters/advocates were duped by Google's "Don't be evil" corporate code of conduct, myself included, which was officially abandoned in 2018... one can interpolate that evil/unethical things were happening at Google before then. On a related note, one interesting data point would be to map whether Google was working on military contracts before 2018, and how this may have expanded in recent years, especially with the rise of AI [search].
I would urge you to look for privacy-respecting ethically sound alternatives. Browsers based on Firefox that support the WebExtensions API manifest V2, such as uBlock Origin, are a good place to start researching.
You could research the ungoogled-chromium-portablelinux project which provides a portable ungoogled Chromium install. Here is a quick snippet if you'd like to take it for a test drive.
if download_url=$(curl --connect-timeout 5 -sSL https://api.github.com/repos/ungoogled-software/ungoogled-chromium-portablelinux/releases/latest | jq -r '.assets[] | select(.name | test("linux\\.tar\\.xz$")) | .browser_download_url'); then

  mkdir -p ~/.local
  echo -n 'Downloading archive. Please wait... '
  if curl --connect-timeout 5 -sSL "$download_url" |bsdtar -xf - -C ~/.local; then
    echo 'installed OK'
    # create symlink to the latest ungoogled-chromium
    ln -fs "$(find ~/.local -name 'ungoogled-chromium*' | sort -h | tail -n1)"/chrome ~/.local/bin/chromium
  else
    echo FAILURE
  fi
else
  echo 'Error determining font download_url'
fi
After install, you can launch the latest ungoogled-chromium-portablelinux by invoking chromium on the terminal.
You will might see a gnome-keyring prompt. I have no experience with this, so DYOR. Here is the man page for gnome-keyring. I'm assuming it wants to use the keyring to read and write website secrets like usernames and passwords for saved sites, that sort of thing. Similar to the keychain in OS X. You'll probably need to take some steps to initialise the user keyring if you want to take advantage of its features.
Click here to see details on installing Google Chrome
When researching, I found the "Google-Chrome-Portable-maker-for-linux" project here. Which is discussed here. It looks quite interesting. Keep in mind this relates to the Google Chrome browser distribution and is not ungoogled.
Given Chrome's market share, it's understandable if you still have a Chrome use case, for example if you need to install Chrome to migrate away from it... or if Google surveillance don't bother you, or if you require it for projects and won't be using it for personal accounts and real data... I've included a quick start shell snippet below.
🔐 I would strongly recommend to block outbound connections from Chrome by default and to selectively open up access for the specific use cases / hosts that you may have. This will mitigate some of the surveillance issues.
For this you can research projects like OpenSnitch or Firejail.
# download latest Chrome
chrome_dl_filename=google-chrome-stable_current_"$(dpkg --print-architecture)".deb
curl --connect-timeout 5 -sSL https://dl.google.com/linux/direct/$chrome_dl_filename > ~/Downloads/"$chrome_dl_filename"

# dry-run the install to check if you are happy with the install plan
sudo apt install --dry-run --fix-broken ~/Downloads/"$chrome_dl_filename"

# install Chrome system wide
sudo apt install -y --fix-broken ~/Downloads/"$chrome_dl_filename"
Sublime Text as its name suggests is extremely good. Back in ~2008 creator Jon Skinner had some really novel ideas on improving UI/UX and Sublime introduced and made the Command Palette popular which other apps have since implemented their own flavours of. I remember trying the early versions and being blown away by it.
Another prominent name associated to Sublime Text is Will Bond who is the author/hoster of the Sublime Text package repo hosted at https://packagecontrol.io/. Will was one of the primary engineers for the v3 and v4 releases of Sublime Text and has been instrumental figure in the Sublime package/extensibility community.
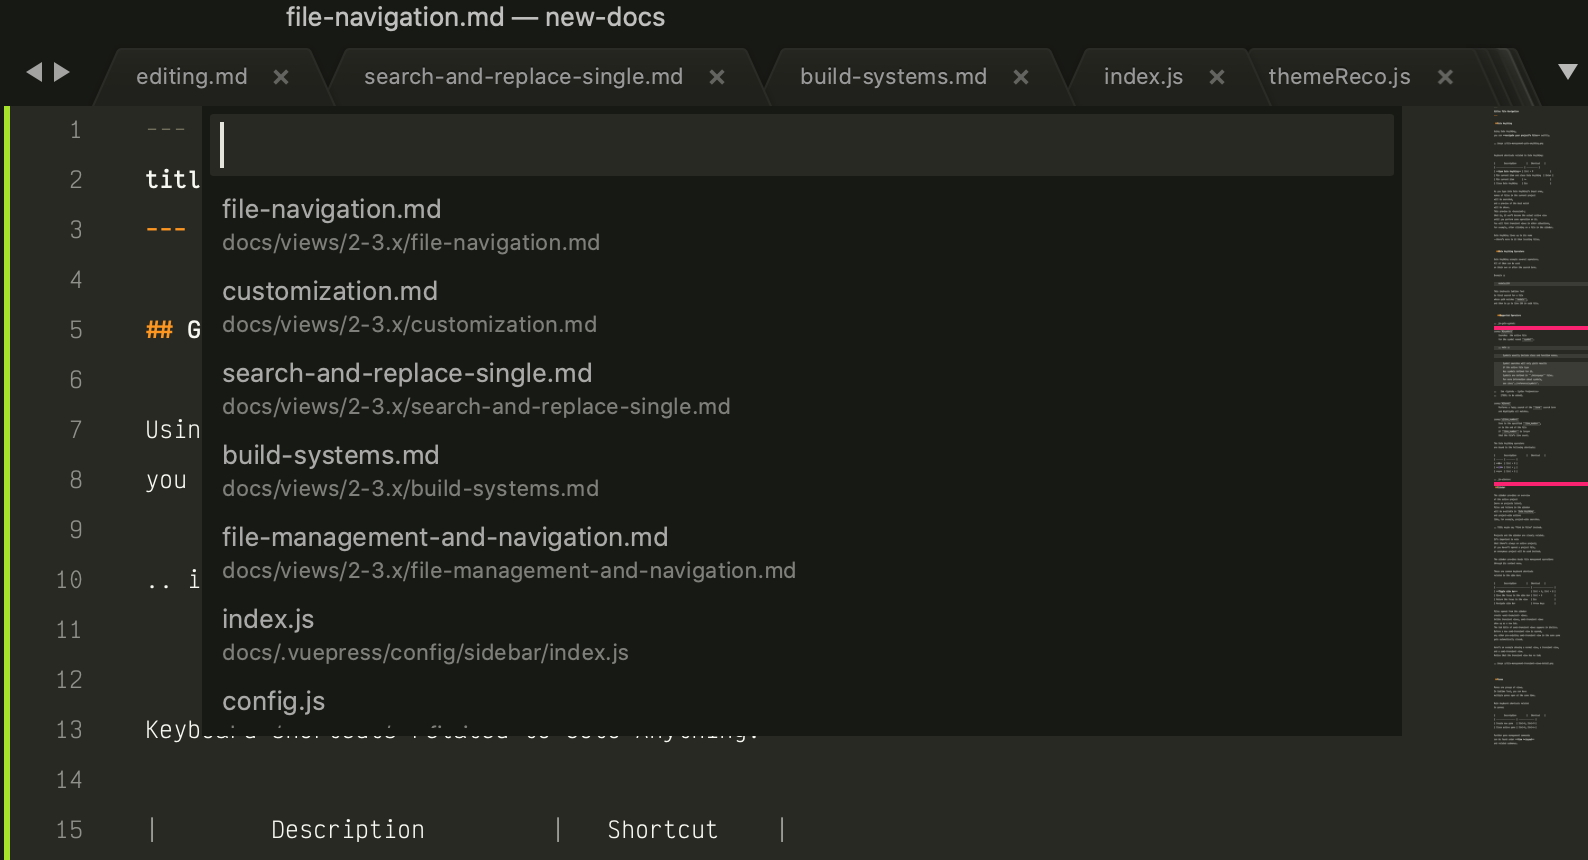
A key UX paradigm of Sublime is palettes, which take keystrokes from the user and fuzzy match against commands and files facilitating mouseless navigation:
-
The Command Palette: ctrl+shift+p on Win/Linux, and cmd+shift+p on OS X.
-
Goto Anything is also implemented in a Palette: ctrl+p on Win/Linux, and cmd+p on OS X.

Sublime is highly customisable through its preferences system and extensible through its package/plugin system. Packages are authored in Python. Sublime has a console and vim emulation... If you've never tried it I highly recommend taking it for a test drive.
Although Sublime has always worked in evaluation mode without restrictions, I can really recommend the software and would encourage you to buy a licence if you can afford it and feel the same way as so many users. Its worth reading the sales FAQ if you are considering buying a license, which as of writing provides 3 years of updates.
A little history on my text editor usage
I was born at the beginning of the 80's... so I've used a few text editors over the years. vim has a special place in my heart and its my goto on the Terminal. On Windows I've used Notepad++ on and off, and heavily used TextMate on OS X for about a decade when I was daily driving Apple hardware.
That being said, I've been using Sublime Text for a long time and procured it for a number of teams in the enterprise. Its very hard to beat - in the last decade its my preferred editor. It works flawlessly on Windows, Linux and OS X.
I've only found one issue with Sublime Text where I needed to fallback to vim which I posted about here. Its related to how Sublime Text handles files with mixed line endings.
An officially endorsed community driven set of Docs exists for Sublime Text: https://docs.sublimetext.io/ which to be honest, makes the official docs look... a bit shit.
As of 2025-April direct downloads are available via https://www.sublimetext.com/download_thanks. Click the "direct download" text/link to expand the options. You can see the downloads are hosted on https://download.sublimetext.com and have sigs and keys available for file verification.
Here is an example shell snippet from the time of writing:
curl --connect-timeout 5 -sSL 'https://download.sublimetext.com/sublime_text_build_4192_x64.tar.xz' |
bsdtar -xf - -C ~/.local && ln -s ~/.local/sublime_text/sublime_text ~/.local/bin/subl
If successful, you should now be able to invoke subl in the terminal.
Tweaked from https://www.sublimetext.com/docs/linux_repositories.html#apt
curl --connect-timeout 5 -sSL https://download.sublimetext.com/sublimehq-pub.gpg | gpg --dearmor | sudo tee /etc/apt/trusted.gpg.d/sublimehq-archive.gpg > /dev/null

echo "deb https://download.sublimetext.com/ apt/stable/" | sudo tee /etc/apt/sources.list.d/sublime-text.list

sudo apt update
sudo aptitude install sublime-text
Head over to https://packagecontrol.io/ and knock yourself out. The repo hosts ~2,500 packages.
Kudos to Will for hosting the repo! ❤️
Open the Command Palette and start to type: Install Package Control, press enter
OR
In the GUI menu bar: Tools → Install Package Control...
OR
Manually:
- Exit Sublime
- Install via
curl
curl --connect-timeout 5 -sSL 'https://packagecontrol.io/Package%20Control.sublime-package' > "~/.config/sublime-text/Installed Packages/Package Control.sublime-package"
- Start Sublime and either inspect the console log or look for Package entries in the Command Palette
Click here to see a selection of packages which I find extremely useful / productive:
by Avtandil Kikabidze aka LONGMAN https://packagecontrol.io/packages/CodeFormatter
Formats (beautifies) source code and supports various languages including PHP, JavaScript, JSON, HTML, Python ...
by bg-k https://packagecontrol.io/packages/AsciiConverter
by ehuss https://packagecontrol.io/packages/Column%20Select

by davidpeckham https://packagecontrol.io/packages/Filter%20Lines
I use this ALOT. Amazing package!

by tylerl https://packagecontrol.io/packages/FilterPipes
A very useful package and similar to :%!<command> in vim filtering/piping the buffer/file through a command and replacing the buffer with the output.

by NeoVintageous https://packagecontrol.io/packages/NeoVintageous
A powerful vim emulator for Sublime Text. Designed to be fast, reliable, and with zero configuration required.
by davidolrik https://packagecontrol.io/packages/Rsync%20SSH
This package lets you keep a remote in sync with rsync, and syncs the current file on save. I don't use it that often but its been a productivity booster in the past.
by xavi- https://packagecontrol.io/packages/SelectUntil
A real productivity booster when handling text data files.
This package allows you to extend one ore more selections until the next instance of a search term, making it super easy to select or edit multiple pieces of text that are similar but not quite the same.
by borislubimov https://packagecontrol.io/packages/Show%20Character%20Code
Very useful package to display detailed character information in the status bar
by jonlabelle https://packagecontrol.io/packages/Trimmer

by btoews https://packagecontrol.io/packages/URLEncode
Encodes and decodes URLs.
by rosshadden https://packagecontrol.io/packages/xpath Versatile and comprehensive XPath 1.0 package for processing HTML and XML with xpath. Extensive demo gifs have been published on the GitHub repo: https://github.com/rosshadden/sublime-xpath. Includes a markup linter/formatter.

If you like VS Code, then here some shell snippets to get you started.
curl --connect-timeout 5 -sSL 'https://code.visualstudio.com/sha/download?build=stable&os=linux-x64' | bsdtar -xf - -C ~/.local && ln -s ~/.local/VSCode-linux-x64/bin/code ~/.local/bin
curl --connect-timeout 5 -sSL 'https://code.visualstudio.com/sha/download?build=stable&os=linux-deb-x64' > ~/Downloads/vscode_amd64.deb


sudo apt update && sudo apt install -y --fix-broken ~/Downloads/vscode_amd64.deb
Of corse there is a Nord plugin for VS Code :)
A similar story to text editors... I've used a number of text/file comparison and merge tools over the years. Beyond Compare is hands down the best I've tried to date and I've purchased a number of licences over the years both personally and in the enterprise, to support its great team and further development.
https://www.scootersoftware.com/kb/linux_install#targz
TODO resolve the following deps:
op-demo@debian-de-demo:~$ ~/Downloads/bcompare-5.0.7.30840/install.sh

install prefix? [/home/op-demo] /home/op-demo/.local
/home/op-demo/Downloads/bcompare-5.0.7.30840/install.sh: line 172: ldconfig: command not found
https://www.scootersoftware.com/kb/linux_install#debian
# procure the .deb
( cd ~/Downloads; curl --connect-timeout 5 -sSLO 'https://www.scootersoftware.com/files/bcompare-5.0.7.30840_amd64.deb' )

# install
sudo apt update && sudo apt install -y --fix-broken ~/Downloads/bcompare-5.0.7.30840_amd64.deb