Create todolist application with React Native using Expo
expo init react-native-expo --template bare-minimum
yarn create expo-app reactnative-with-expo

- Debug
- Layout
- Styles
expo install expo-app-loadingyarn expo-splash-screen -p android -b "#E1E1E1" -i ./assets/images/splash.png -r nativehttps://github.com/expo/expo-cli/tree/main/unlinked-packages/configure-splash-screen
Images.js
// local imgs
const Logo = require("../assets/images/logo.png");
// internet images
const StaticRandom = "https://picsum.photos/seed/picsum/200/300";

export default {
  Logo,
  StaticRandom,
};
// Debug tool
import "expo-dev-client";
import React, { useCallback, useEffect, useState } from "react";
import {
Text,
View,
Image,
StyleSheet,
SafeAreaView,
TouchableWithoutFeedback,
TouchableOpacity,
TouchableNativeFeedback,
TouchableHighlight,
Button,
Alert,
Platform,
StatusBar,
} from "react-native";
import { Asset } from "expo-asset";
import Entypo from "@expo/vector-icons/Entypo";
import * as SplashScreen from "expo-splash-screen";
import * as Font from "expo-font";
import { Images } from "./constants";
// cache app images
const assetImages = [Images.Logo, Images.StaticRandom];
// cache images
function cacheImages(images) {
return images.map((image) => {
if (typeof image === "string") {
return Image.prefetch(image);
} else {
return Asset.fromModule(image).downloadAsync();
}
});
}
export default function App() {
const [appIsReady, setAppIsReady] = useState(false);
function _loadResourcesAsync() {
return Promise.all([...cacheImages(assetImages)]);
}
useEffect(() => {
async function prepare() {
try {
// Keep the splash screen visible while we fetch resources
await SplashScreen.preventAutoHideAsync();
// Pre-load fonts, make any API calls you need to do here
await Font.loadAsync(Entypo.font);
// Artificially delay for two seconds to simulate a slow loading
// experience. Please remove this if you copy and paste the code!
await _loadResourcesAsync();
} catch (e) {
console.warn(e);
} finally {
// Tell the application to render
setAppIsReady(true);
}
}
console.log("first time");
prepare();
}, []);
const onLayoutRootView = useCallback(async () => {
if (appIsReady) {
// This tells the splash screen to hide immediately! If we call this after
// `setAppIsReady`, then we may see a blank screen while the app is
// loading its initial state and rendering its first pixels. So instead,
// we hide the splash screen once we know the root view has already
// performed layout.
await SplashScreen.hideAsync();
}
}, [appIsReady]);
if (!appIsReady) {
return null;
}
console.log("ready 123");
return (
<SafeAreaView style={styles.container} onLayout={onLayoutRootView}>
<TouchableHighlight>
<Text>SplashScreen Demo 23! 👋</Text>
</TouchableHighlight>
<TouchableWithoutFeedback onPress={() => console.log("image tab")}>
<Image source={Images.Logo} />
</TouchableWithoutFeedback>
<TouchableHighlight
onPress={() => {
console.log("image opacity");
}}
>
<Image
source={{ uri: Images.StaticRandom }}
style={styles.staticRandomImage}
/>
</TouchableHighlight>
<TouchableNativeFeedback>
<View
style={{ width: 300, height: 70, backgroundColor: "blue" }}
></View>
</TouchableNativeFeedback>
<Button
title={"Submit" + StatusBar.currentHeight}
style={[{ backgroundColor: "green" }, { color: "white" }]}
onPress={() =>
Alert.alert("title", "press", [
{ text: "Yes", onPress: () => "console.log('yes');" },
{ text: "No", onPress: () => "console.log('no');" },
])
}
/>
</SafeAreaView>
);
}
const styles = StyleSheet.create({
container: {
flex: 1,
paddingTop: Platform.OS === "android" ? StatusBar.currentHeight : 0,
},
staticRandomImage: {
width: 300,
height: 200,
},
});
Views
Native Components
In Android development, you write views in Kotlin or Java; in iOS development, you use Swift or Objective-C. With React Native, you can invoke these views with JavaScript using React components. At runtime, React Native creates the corresponding Android and iOS views for those components.
React Native also lets you build your own Native Components for Android and iOS to suit your app’s unique needs
Native Components Directory
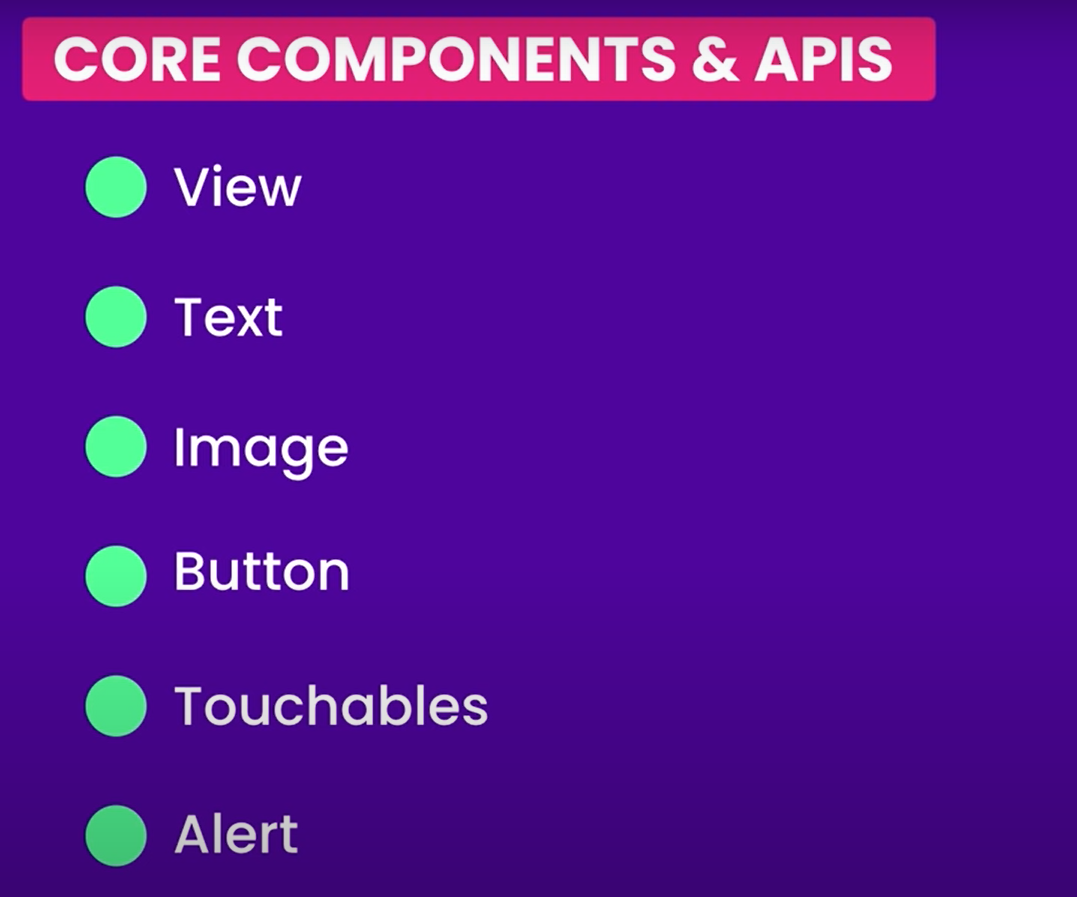
Core Components
Day 1