①「React」でUIを構築してみて、便利さを知る
②フロントで問題となる状態管理を「Redux」でやってみることで、モダンなアーキテクチャを体験する
- npm or yarn のinstall
npm: https://nodejs.org/ja/download/
yarn: https://yarnpkg.com/lang/ja/docs/install/#mac-stable
Reactとは?
👉Facebookが作った、MVCでいうViewをコンポーネントとして構築するためのUIライブラリ

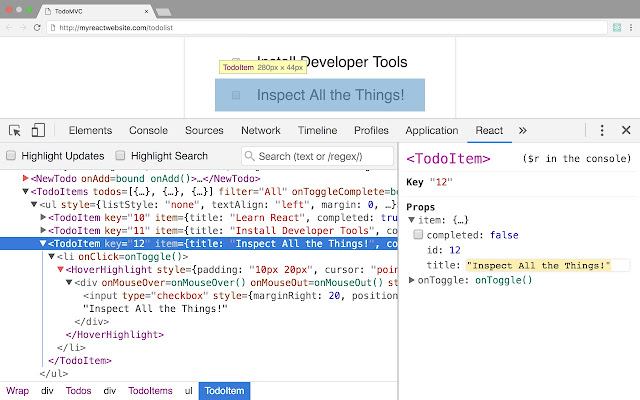
以下のコードがReactでDOM(Document Object Model)を構築するサンプルです。
Header(h1)として“Hello, world”が表示されます。
import React from 'react';
import ReactDOM from 'react-dom';

const element = <h1>Hello, world</h1>;
ReactDOM.render(element, document.getElementById('root'));
ReactのDOMは、要素とその子要素を前の要素と比較し、DOMを必要な状態にするために必要なDOM更新のみを適用します。(差分描画)
コンセプト
- JUST THE UI
React.jsはComponentを作るためだけのライブラリ。 - VIRTUAL DOM
rerenderされる際に、その構造体の前後の状態を比較し、最小限の変更で実際のDOMに反映します。 - DATA FLOW
アプリケーションのデータを管理しているComponentがいて、そのデータを子のComponentに渡していく一方向なデータの流れ。
git clone 👉 https://github.com/10shi10ma/React-Hands-on
$ yarn add react react-dom
$ yarn add -D react-scripts
package.json 👇
...

"scripts": {
"start": "react-scripts start"
},
...
public/index.html 👇
<!doctype html>
<html>
    <head>
        <meta charset="utf-8">
        <title>React Example</title>
    </head>
    <body>
        <div id="root" />
    </body>
</html>
src/index.js 👇
import React from 'react'
import { render } from 'react-dom'

render(
  <h1>Hello, React</h1>,
  document.getElementById('root')
);
ポイント) Reactは、JSXというXMLライクな構文で、DOMを定義できる。
$ yarn startReactはコンポーネントを作成するためのライブラリです。
コンポーネントは、UIを独立した再利用可能な部分に分割し、各部分について個別に考えることができます。

src/index.js 👇
import React from 'react';
import {render} from 'react-dom';

// Headerコンポーネント
const Header = () => (
  <h1>Header</h1>
);

// Bodyコンポーネント
const Body = () => (
  <p>Header</p>
)

// Appコンポーネント
class App extends React.Component {
  constructor(props) {
    super(props)
  }

  render() {
    return (
      <div>
        <Header />
        <Body />
      </div>
    );
  }
}

render(
  <App />,
  document.getElementById('root')
);コンポーネント間でデータのやりとりはpropをI/Fとして外部とやりとりすることが出来ます。
親コンポーネントで<Hello name="foo" />のようにすると、Helloコンポーネントでは、this.props.nameとして参照することが出来ます。
src/index.js 👇
// Headerコンポーネント
const Header = (props) => (
  <h1>{props.headerTitle}</h1>
);

...

// Appコンポーネント

class App extends React.Component {
  constructor(props) {
    super(props)
  }

  render() {
    const headerTitle = 'ヘッダータイトル'
    return (
      <div>
        <Header headerTitle={headerTitle}/>
        <Body />
      </div>
    );
  }
}

...
Componentが内部で持つ情報をstateとして保持できます。
propsと違いコンポーネント外部に非公開であり、コンポーネント自身で制御します。
ユーザーのアクションやAjaxリクエストなどにより、動的に値が変化するような場合はStateを使います。
this.setStateでstateを更新すると、Componentが再描画されて表示が更新されます。子のComponentも再描画されます。
src/Counter.js 👇
import React from 'react';

export default class Counter extends React.Component {
  constructor(props) {
    super(props)
    this.state = {
      count: 0
    }
    this.countUp = this.countUp.bind(this)
  }
  countUp() {
    this.setState({count: this.state.count + 1})
  }
  render() {
    return (
      <div>
        <div>count:{this.state.count}</div>
        <button onClick={this.countUp}>click!</button>
      </div>
    )
  }
}
src/index.js 👇
import React from 'react';
import {render} from 'react-dom';
import Counter from './Counter';

...

// Bodyコンポーネント
const Body = () => (
  <Counter />
)Flux?
👉 Facebookが提唱しているアーキテクチャで、データの流れを分かりやすくるために使われる
アーキテクチャ?MVC?
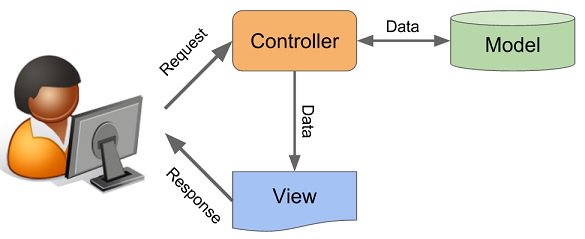
JavaScriptはイベントドリブンなので、データの流れが複雑化しやすい。
MVCは小さなアプリケーションには適していそう。

そこで「Flux」
Redux?
👉 Reduxは、Fluxアーキテクチャの実装ライブラリの1つ。
React単体では、コンポーネント自身が個別に状態を管理するのに対して
Reduxを用いた場合は、コンポーネントとは別の状態管理する専用の場所「ストア」で状態管理する。
そのストアで管理されたstateを変更したい場合は、Actionを発行する必要がある。
- View上のユーザー操作などにより状態変更を方向づけるActionをAction Createrを通じて生成します(状態変更のトリガーは必ずAction)
- Actionが生成され、Reducerへ届く
- Reducerは現在のStateとActionをもとに新たなStateを生成して返す
- Reducerが返したStateはStoreの中に入る
- ViewはStoreを介してStateを取得してレンダリングを行う
src/Counter.js 👇
import React from 'react';

export default class Counter extends React.Component {
  constructor(props) {
    super(props)
    this.state = {
      count: 0
    }
    this.countUp = this.countUp.bind(this)
    this.countDown = this.countDown.bind(this)
  }
  countUp() {
    this.setState({count: this.state.count + 1})
  }

  countDown() {
    this.setState({count: this.state.count - 1})
  }
  render() {
    return (
      <div>
        <div>count:{this.state.count}</div>
        <button onClick={this.countUp}>up!</button>
        <button onClick={this.countDown}>down!</button>
      </div>
    )
  }
}
⏰stateはcountのみ⏰
$ yarn add react-redux reduxpackage.json 👇
  "dependencies": {
    "react": "^16.4.1",
    "react-dom": "^16.4.1",
    "react-redux": "^5.0.7",
    "redux": "^4.0.0"
  },
  "devDependencies": {
    "react-scripts": "^1.1.4"
}src/actions/index.js 👇
// Action & ActionCreator
export const countUp = () => ({type: 'COUNT_UP'});
export const countDown = () => ({type: 'COUNT_DOWN'});
src/reducers/index.js 👇
// Reducer
const reducer = (state={count:0}, action) => {
  const count = state.count;
  switch (action.type) {
    case 'COUNT_UP':
      return {count: count + 1};
    case 'COUNT_DOWN':
      return {count: count - 1};
    default:
      return state;
  }
}

export default reducer;src/index.js 👇
...

import { createStore } from 'redux';
import { Provider } from 'react-redux';
import reducer from './reducers'

...

// store作成
const store = createStore(reducer);

render(
  <Provider store={store}>
    <Counter />
  </Provider>,
  document.getElementById('root')
);src/Counter.js 👇
import React from 'react';
import { connect } from 'react-redux'
import {countUp, countDown} from './actions'

class Counter extends React.Component {
  constructor(props) {
    super(props)
    this.countUp = this.countUp.bind(this)
    this.countDown = this.countDown.bind(this)
  }
  countUp() {
    this.props.countUp();
  }

  countDown() {
    this.props.countDown();
  }
  render() {
    return (
      <div>
        <div>count:{this.props.count}</div>
        <button onClick={this.countUp}>up!</button>
        <button onClick={this.countDown}>down!</button>
      </div>
    )
  }
}

const mapStateToProps = state => ({count: state.count});

export default connect(mapStateToProps, {countUp, countDown})(Counter);👉 https://gist.github.com/10shi10ma/c4e210061eaaff0d8a8e2382a15d2c23