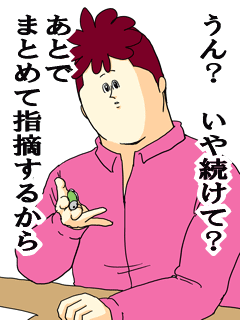
OpenCVの勉強のため、題記のとおり課題設定し、取り組んでみた記録.
以下のステップで地獄のミサワ顔を作る.
- 入力画像から顔を検出し、抽出する.
- 1.で抽出した画像を切り出す.
- 2.で切り出した画像を、顔を中心部に寄せる感じで画像処理で変形する
- 3.の画像変換結果を、入力画像に合成する.
# TODO: files
!ls -1
face_detect_cv_test.ipynb
haarcascade_frontalface_alt.xml
images.jpeg
lena_std.tif
shape_predictor_68_face_landmarks.dat
test.py
初めに、以下を参考に、OpenCVで顔検出してみる. http://qiita.com/donksite/items/f500d301bc192efcec70
顔領域だけ、ピンポイントに取り出すことができなかった.
顔領域だけ、ピンポイントで取り出すために、以下の方法を考えた.
- a.) 肌色を検出し、肌色部分だけ抽出する.
- b.) 顔のパーツ(目、鼻、口、など)を検出し、それらの座標を使って絞り込む
%matplotlib inline
import cv2 # opencv
import matplotlib.pyplot as plt # matplotlibの描画系

fn_img = "lena_std.tif" # レナさんの画像ファイル名
img = cv2.imread(fn_img) # レナさんの画像を読み込む

img_gray = cv2.cvtColor(img, cv2.COLOR_BGR2GRAY) # グレースケール化

# cascade の学習結果は https://github.com/Itseez/opencv/tree/master/data/haarcascades から落とせる
cascade_path = "haarcascade_frontalface_alt.xml"
cascade = cv2.CascadeClassifier(cascade_path) # カスケード分類器を作成
facerect = cascade.detectMultiScale(img_gray, scaleFactor=1.1, minNeighbors=1, minSize=(10,10)) # 顔認識

img_result = cv2.cvtColor(img, cv2.COLOR_BGR2RGB) # 出力結果用にコピー & RGB化
rect_color = (0, 255, 0) # 矩形の色 (B=0, G=255, R=0)
if len(facerect) > 0:
    for rect in facerect:
        # 検出範囲を矩形で囲む
        cv2.rectangle(img_result, tuple(rect[0:2]), tuple(rect[0:2] + rect[2:4]), rect_color, thickness=2)

plt.imshow(img_result)
<matplotlib.image.AxesImage at 0x7f54e64c1b50>
dlibには、顔パーツの検出機能があるようだ.
https://matthewearl.github.io/2015/07/28/switching-eds-with-python/
まずは、顔検出する.
%matplotlib inline
import cv2
import dlib
import numpy as np
import matplotlib.pyplot as plt

fn_img = "lena_std.tif" # input image (BGR)
#fn_img = "images.jpeg"
img = cv2.imread(fn_img)

# Initialize dlib detector and predictor
detector = dlib.get_frontal_face_detector()
predictor = dlib.shape_predictor("shape_predictor_68_face_landmarks.dat")

# Conduct face detection
rects = detector(img, 1)
if len(rects) < 1:
    print "face didn't detected"
else:
    print "face detected: %d" % ( len(rects))
face detected: 1
# image to be output
tmp_img = img.copy()

# facelandmark vector
vec = np.matrix([[p.x, p.y] for p in predictor(img, rects[0]).parts()])

highlights = [ 5, 10, 17, 26, ]

for i in range(0, len(vec)-1):
    center = (vec[i,0], vec[i,1])
    radius = 5
    if i in highlights:
        color = (0, 0,255) # Red
    else:
        color = (0,0,0) # black
    cv2.circle(tmp_img, center, radius, color, thickness=-1 )

plt.imshow(cv2.cvtColor(tmp_img, cv2.COLOR_BGR2RGB))
<matplotlib.image.AxesImage at 0x7f54d0617210>
目、鼻、口を包含する4点をpointsとする.
pointsを包含する正方形の4点を、(x1, y1), (x2, y1), (x1, y2), (x2, y2)を導出する.
    points   = np.array([ [vec[i,0], vec[i,1]] for i in highlights ])
    for v in points:
        print "points: [%d, %d]" % ( v[0], v[1])
points: [237, 374]
points: [312, 376]
points: [243, 251]
points: [354, 252]
    x1 = max(points[:,0])
    x2 = min(points[:,0])
    y1 = max(points[:,1])
    y2 = min(points[:,1])
    print "x1=%d x2=%d y1=%d y2=%d" % (x1, x2, y1, y2 )
x1=354 x2=237 y1=376 y2=251
こんな顔を作りたい.
まず、顔から目、鼻、口のみを切り出す.
切り出した顔を縮小し、元の顔に合成する.
# face mask
mask_image = np.zeros(img.shape, np.uint8)
points = cv2.convexHull(points)
cv2.fillConvexPoly(mask_image, points, color=(255,255,255))

# crop face
face_area = cv2.bitwise_and(img, mask_image)
plt.imshow(cv2.cvtColor(face_area, cv2.COLOR_BGR2RGB))
<matplotlib.image.AxesImage at 0x7f54d0272f50>
# remove face
non_face_area = img.copy()
cv2.fillConvexPoly(non_face_area, points, color=(0,0,0))
plt.imshow(cv2.cvtColor(non_face_area, cv2.COLOR_BGR2RGB))
<matplotlib.image.AxesImage at 0x7f54d01ed750>
# make it small
scale = 0.6 # < 1.0
w_base = x1-x2
h_base = y1-y2
w = np.int((x1-x2) * scale)
h = np.int((y1-y2) * scale)
w_offset = ( w_base - w ) / 2
h_offset = ( h_base - h ) / 2

face_area_misawa = np.zeros(face_area.shape, np.uint8)
face_area_misawa[(y2+h_offset):(y2+h+h_offset), (x2+w_offset):(x2+w+w_offset)] = cv2.resize(face_area[y2:y1, x2:x1], (w,h))

plt.imshow(cv2.cvtColor(face_area_misawa, cv2.COLOR_BGR2RGB))
<matplotlib.image.AxesImage at 0x7f54d0137090>
mixed_image = non_face_area + face_area_misawa
plt.imshow(cv2.cvtColor(mixed_image, cv2.COLOR_BGR2RGB))
<matplotlib.image.AxesImage at 0x7f54d0054f90>
その際に、縮小して元の画像から情報が欠損した部分に、周りの色と同じになるように補間をかける.
画像の欠損部分マスクと元画像の論理和をから、欠損部分を埋める画像を作り(intp_mask), 上記合成画像とさらに論理和をとった. (まろやかさを出すためにGaussianBlurもかけた)
ret, tmp  = cv2.threshold(mixed_image, 1, 255, cv2.THRESH_BINARY)
intp_mask = cv2.split(cv2.bitwise_not(tmp))[0]
blured_img = cv2.GaussianBlur(img, (51, 51), 5, img, 5)
intp_img  = cv2.bitwise_and(blured_img, blured_img, mask=intp_mask)

plt.imshow(cv2.cvtColor(intp_img, cv2.COLOR_BGR2RGB))
<matplotlib.image.AxesImage at 0x7f54c85bb650>
mixed_image2 = intp_img + mixed_image
plt.imshow(cv2.cvtColor(mixed_image2, cv2.COLOR_BGR2RGB))
<matplotlib.image.AxesImage at 0x7f54c8599090>
... まろやかさがたりない?
tmp_img = cv2.GaussianBlur(mixed_image2, (5, 5), 3, img, 3)
plt.imshow(cv2.cvtColor(tmp_img, cv2.COLOR_BGR2RGB))
<matplotlib.image.AxesImage at 0x7f54c8494d10>
- dlibを使った顔画像の検出はうまくできた.
- 顔の特徴点からミサワ変換の範囲指定まではいい感じ
- OpenCVで同様のことはできないのか?
- 顔の特徴点からミサワ変換の範囲指定まではいい感じ
- 画像処理で、縮小前後の画像の合成がうまくいかない.
- OpenGL使ってポリゴンに顔を写像して、特定範囲のみ縮小してみる.


